Loading ...
Loading ...
Loading ...
Attaching the Embroidery Foot
Basic operations B-53
STARTING TO EMBROIDER
B
a
Press (Needle position button) to raise the needle.
b
Press .
• When the message “OK to automatically lower the
presser foot? ” appears on the LCD screen, press
to continue.
→ The screen changes, and all keys and operation
buttons are locked (except ).
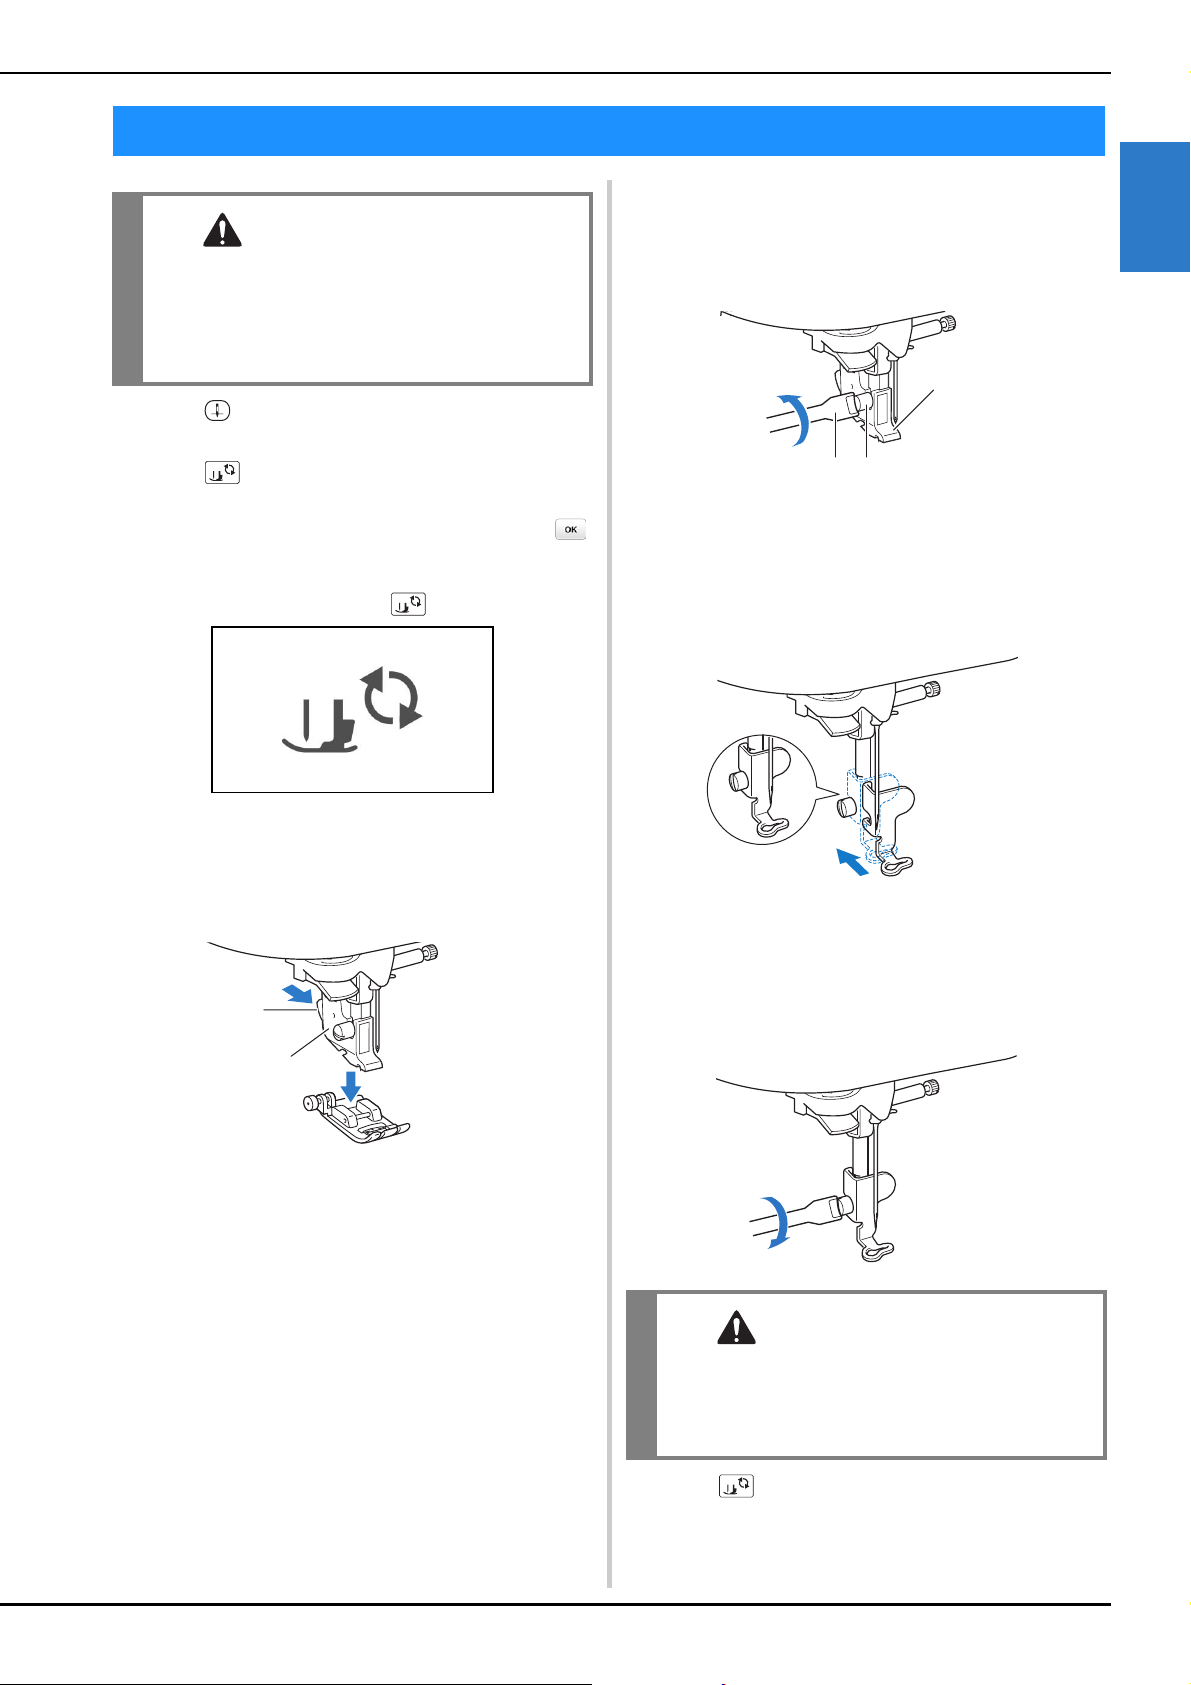
c
Raise the presser foot lever.
d
Press the black button on the presser foot holder to
remove the presser foot.
1 Black button
2 Presser foot holder
e
Use the included screwdriver to loosen the presser foot
holder screw, and then remove the presser foot holder.
• The presser foot holder screw can also be loosened
or tightened with the L-shaped (or disc-shaped)
screwdriver.
1 Screwdriver
2 Presser foot holder
3 Presser foot holder screw
f
Attach embroidery foot “U” so that the presser foot
holder screw fits into the notch in the foot.
• Make sure that embroidery foot “U” is vertical when
it is installed.
g
Hold the embroidery foot in place with your right
hand, and then use the included screwdriver to
securely tighten the presser foot holder screw.
h
Press to unlock all keys and buttons.
Attaching the Embroidery Foot
CAUTION
• Be sure to use embroidery foot when doing
embroidery. Using another presser foot may
cause the needle to strike the presser foot,
causing the needle to bend or break and
possibly cause injury.
a
b
CAUTION
• Use the included screwdriver to firmly tighten
the screw of the embroidery foot. If the screw
is loose, the needle may strike the presser foot
and possibly cause injury.
b
ac
Loading ...
Loading ...
Loading ...