Loading ...
Loading ...
Loading ...
I
NVERTE
R
DEFR
OST
Four defrost se
q
uences are
p
reset in the oven.
The INVERTER DEFROST feature provides
y
ou
with the best defrostin
g
method for frozen foods.
The cookin
g
g
uide will show
y
ou which defrost
t
P
l
ace
f
oods
in
a
s
h
a
ll
o
w
co
nt
a
in
e
r
o
r
o
n
a
m
icrowave roastin
g
rack to catch drippin
g
s.
t
F
ood should still be somewhat ic
y
in the center
wh
e
n r
e
m
o
v
ed
fr
o
m th
e
o
v
e
n.
s
equence is recommended for the food
y
ou are
d
efrostin
g
.
F
or added convenience
,
the INVERTER DEFROST
includes a built-in bee
p
mechanism that remind
s
y
ou to check, turn over, separate, or rearran
ge
to
g
etthe best defrost results. Four defrostin
g
leve is are
p
rovided
.
(
MEAT / POULTRY / FISH / BREAD
)
kg
I
NVERTER DEFR
OS
T
MENU INSTRUCTIONS
Cate
g
or
y
F
ood
to
be
D
e
fr
osted
B
eef
Ground beef
,
Round steak
,
Cubes for stew
,
Tenderloin steak
,
Pot roast, Rib roast, Rum
p
roast
,
Chuck roast, Hambur
g
er patt
y
MEAT
L
a
m
b
)
dEF1
(
C
hops, Rolled roas
t
0
.
1
- 4.
0
kg
0
.
1
- 4.
0
kg
0
.
1
- 4.
0
kg
0
.
1
-
0
.5 kg
V
eal
Cutlets
(
0.5 k
g
, 20 mm thick
)
T
u
rn f
ood
o
v
e
r
a
t BEEP
.
A
fter defrostin
g
, let stand for 5 - 1
5
min
u
t
es.
P
OU
LTR
Y
)
2dEF
(
F
I
S
H
)
3dEF
(
BREA
D
)
4dEF
(
S
liced bread, Buns, Ba
g
uette, etc.
S
e
p
arate slices and
p
lace between
p
a
p
er towel or flat
p
late.
Tu
rn
food
o
v
e
r
a
t BEEP.
Af
ter de
f
rostin
g
, let stand
f
or
1
-
2
min
u
t
es
.
Fish
F
illets
,
Whole
S
teaks
Tu
rn
food
o
v
e
r
a
t BEEP.
Af
ter de
f
rostin
g
, let stand
f
or 5 - 10
mi
n
u
t
es
.
P
ou
l
tr
y
W
hole,
C
ut-up, Breast
(
boneless
)
Co
rni
s
h H
e
n
s
Whole
T
ur
k
e
y
B
r
eas
t
Tu
rn f
ood
o
v
e
r
a
t BEEP.
A
fter defrostin
g
, let stand for 30 - 60
mi
n
u
t
es
.
S
TART
S
TART
t
t
Remove
f
ish, meat
,
7KHOHQJWKR
I
GH
I
URVWLQJWLPHYDULHVDFFRUGLQJWR
how solidly the
f
ood is
f
rozen
.
7KHVKDSHR
I
WKHSDFNDJHD
II
HFWVKRZTXLFNO\
f
ood will de
f
rost.
S
hallow packages will de
f
rost
more qu
i
c
kl
y t
h
an a
d
eep
bl
oc
k.
'HSHQGLQJRQWKHVKDSHR
I
WKH
I
RRGFDQEH
de
f
rosted more or less
.
and poultry
f
ro
m
i
ts or
i
g
i
na
l
wrapp
i
ng paper or p
l
ast
i
c pac
k
age
.
O
therwise, the wrap will hold steam and juic
e
close to the
f
oods, which can cause the oute
r
sur
f
ace o
f
the
f
oods to cook
.
press
A
t beep, open the door and remove an
y
portions
t
h
a
t h
a
v
e
th
a
w
ed
a
n
d
t
u
rn.
p
ress
b
utton,
2. Press
I
NVERTER DEFR
OS
T
u
ntil displa
y
shows ‘dEF1
’.
3
. Press
+
unt
il
di
sp
l
a
y
s
h
ow
s
‘1.2 k
g
’
.
4.
P
r
ess
S
TART
.
1.
Press
S
T
O
P/
C
AN
C
EL
.
2
8
H
O
W T
O
U
S
E
13
HOW TO USE
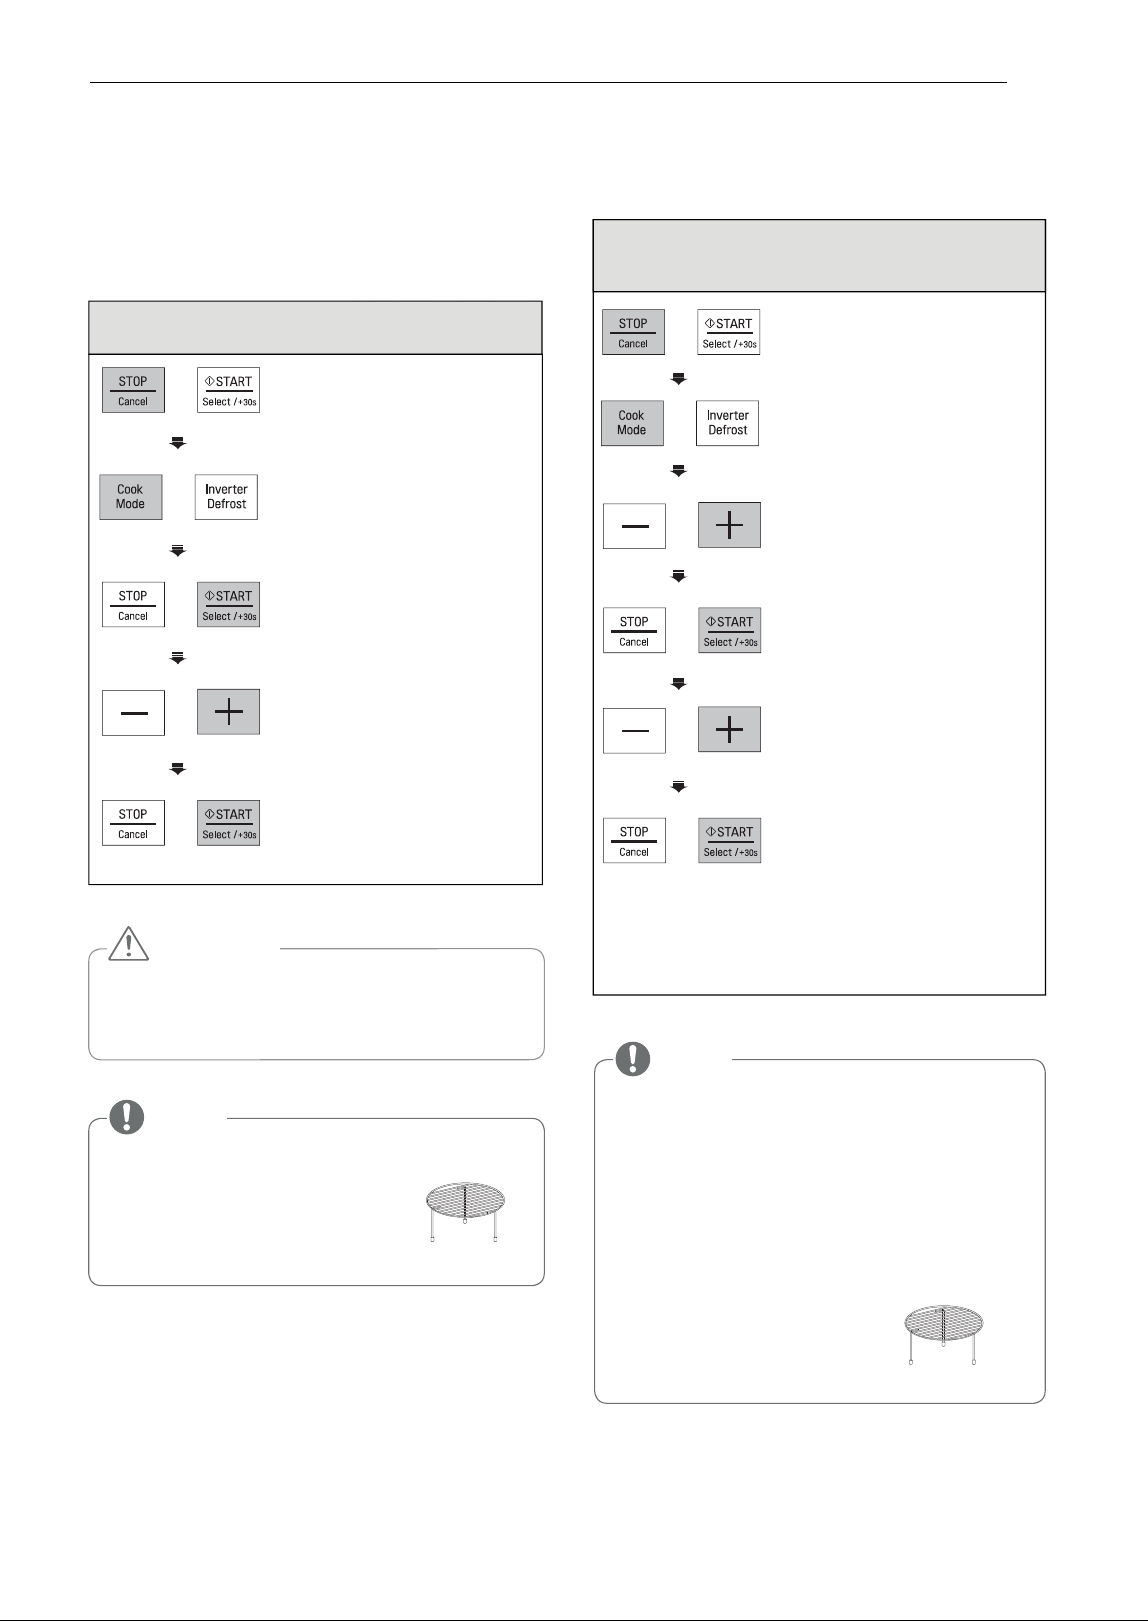
GRILL COOKING
GRILL COMBI. COOKING
This feature will allow you to brown and crisp food
quickly. There is no need for preheating.
Your oven has a combination cooking feature which
allows you to cook food with heater and microwave.
Always use gloves when removing food and
accessories after cooking as the oven & accessories
Example: Programme your oven with micro
power 300 W and combi for a cooking time of
25 minutes
will be very hot.
Example: Use Grill to cook food for 5 minutes
30 seconds
2. Press EDOM KOOC
3. Press once,
+
2. Press EDOM KOOC
display shows ‘Co-2’ .
3. Press START.
4.
Enter 5 minutes 30 seconds
5.
Press + until display
by pressing + until display
shows '
shows ‘25:00’.
5:30 '.
6. Press START.
When cooking you can
press
+ / - to increase or
CAUTION
decrease the cooking time.
Be careful when removing
Always use oven gloves when removing the
food and accessories after cooking as the
oven & accessories will be very hot.
your food as the container
will be hot!
NOTE
NOTE
t Your oven has a combination cooking
feature which allows you to cook food with
Heater and Microwave.
t
You can set three kinds of micro power level
(Co-1 : 200 W, Co-2 : 300 W, Co-3 : 400 W)
in grill combi mode.
t
This feature will allow you to brown and
crispy food quickly.
t
For the best result use
the following accessories.
This generally means it takes less time to
cook your food.
t
This feature will allow you to brown and crisp
food quickly.
t
For the best result use
the following accessories.
Rack
Rack
until display shows
‘
GrIL’
until display shows ‘Co-1’
1.
Press STOP/CANCEL.
1.
Press STOP/CANCEL.
5. Press START.
4. Press START.
Loading ...
Loading ...
Loading ...