Loading ...
Loading ...
Loading ...
10
Functions
PREPARING THE FAST SLOW PRO™
1. Remove and safely discard any packaging
material, promotional labels and tape from
the cooker.
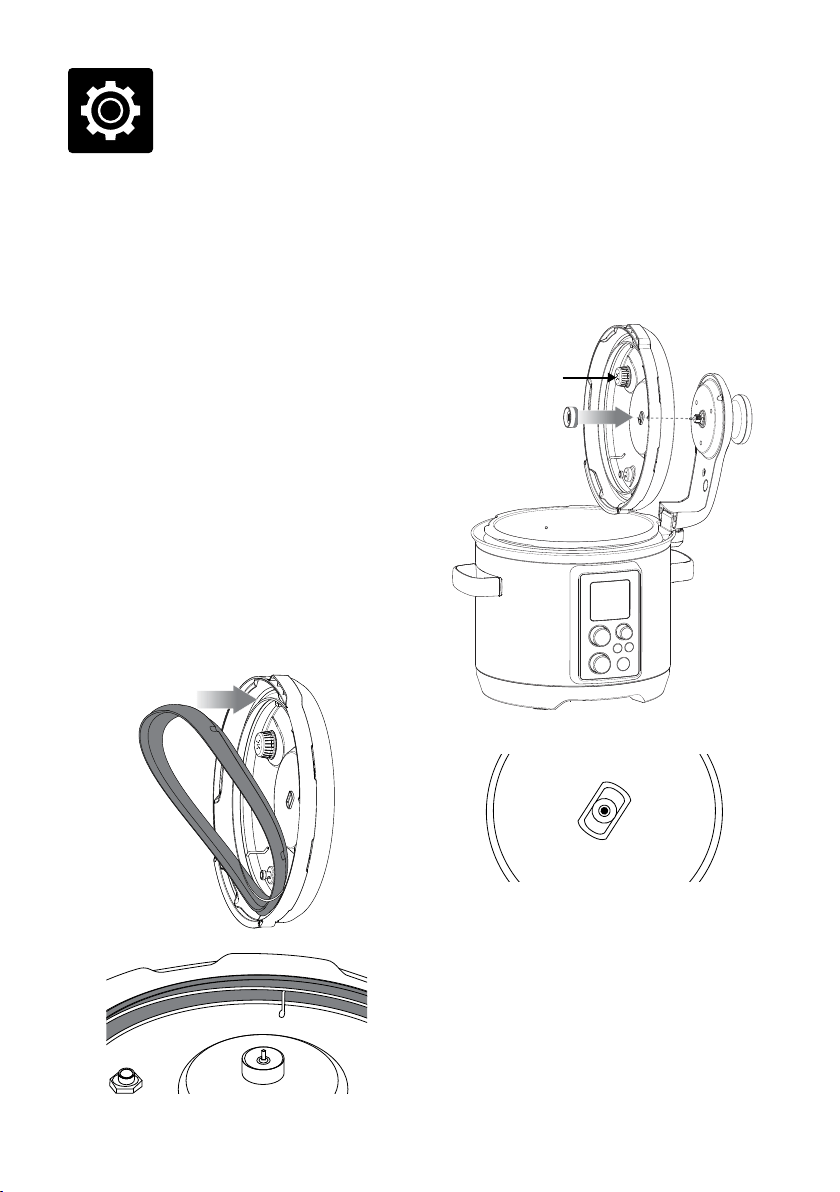
2. Open the lid by turning the lid knob
counter-clockwise and lifting the lid up and
off the cooker until it is in the hinged open
position. Unscrew and remove the sealing
nut from the center of the lid and pull the lid
away from the lid arm.
3. Wash the lid, silicone gasket, removable
cooking bowl and condensation drip cup
in hot, soapy water, then rinse and dry
thoroughly. Wipe the inside and outside of
the cooker base with a soft, damp cloth and
dry thoroughly.
4. The silicone gasket is reversible and can
be inserted in either direction. Insert the
silicone gasket around the outer edge of the
wire ring on the underside of the lid. Ensure
that it is fully inserted and lies flat under the
wire ring.
5. The lid can only be inserted one way and
must be assembled correctly for the cooker
to operate. Position the lid so the steam
release valve cover is to the rear of the
cooker (Image A). Align the center of the
lid with the bolt on the underside of the lid
arm (Image B) and push it into position to
expose the screw thread. Screw the sealing
nut, with the red ring touching the lid, onto
the bolt to secure the lid. Once assembled,
ensure the steam release valve is properly
seated in position and facing the lid knob.
Pressure
Release
Valve Cover
towards rear
of cooker
Image A
Image B
Loading ...
Loading ...
Loading ...