Loading ...
Loading ...
Loading ...
18
3
Reverse the components on the cabinet.
a. Use a Phillips screwdriver to remove the 2 screws and
the latch mechanism on the front panel of the cabinet.
b. Remove the latch hole cover by gently prying it up
with a flat-blade screwdriver, being careful not to
scratch the paint. Install the latch hole cover on
the opposite side, where the latch mechanism was
removed. Install the latch mechanism in the position
from which you removed the latch hole cover, using
the two screws removed in step a.
c. Remove the hinge cover by gently prying it up with a
flat-blade screwdriver, being careful not to scratch
the paint. Rotate the hinge cover 180 degrees and
install it on the opposite side, where the upper hinge
was attached.
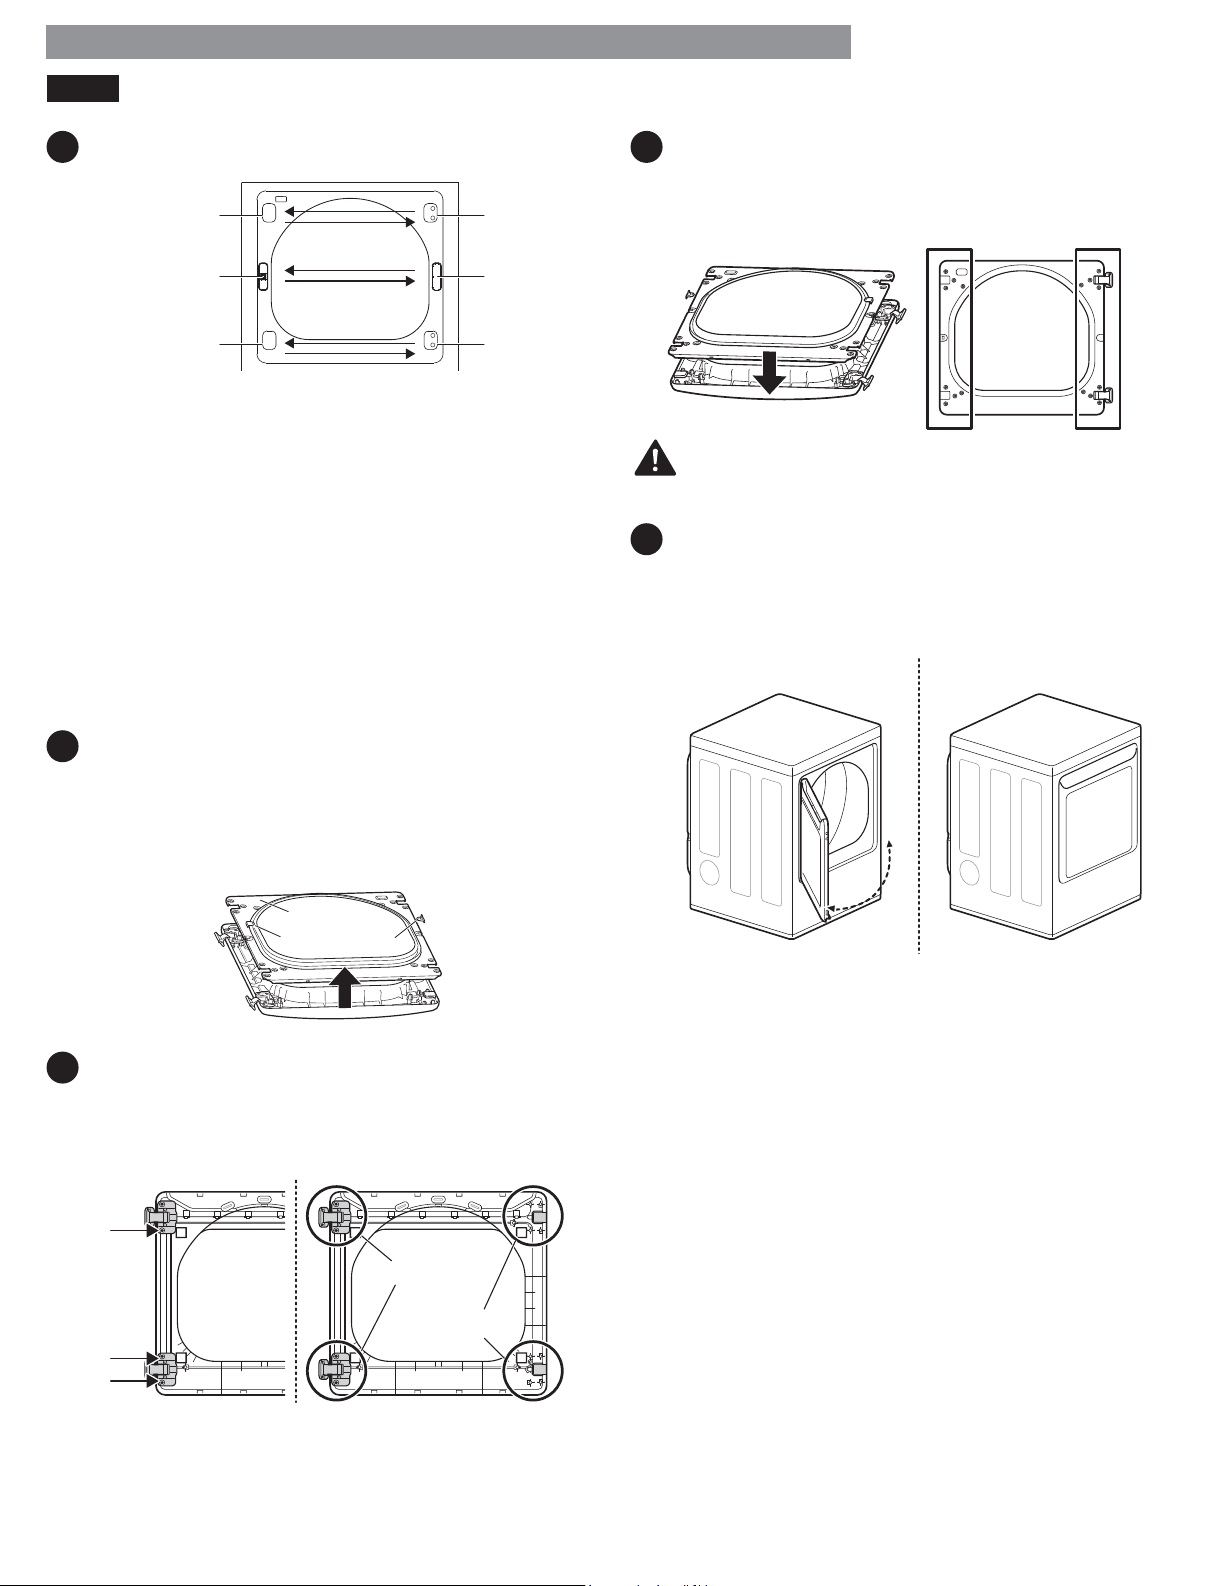
4
Remove the inner door frame.
With the door on a protected surface, remove the 16
screws around the sides of the door and lift off the
inner door frame using a flat blade screwdriver.
Remove the latch hook and blank and install them on
the opposite side.
5
Reverse hinges and cover caps.
Remove the 4 screws securing the hinges to the door
frame. Remove the 2 plastic cover caps. Reinstall the
hinges and cover caps on the opposite sides from
which they were removed.
hinge
hinge
cover
hinge
cover
latch
mechanism
latch
hole
cover
hinge
frame
Blank Latch hook
Inner door
Cover cap
Hinge
assembly
6
Remount the inner door frame.
With the hinges and cover caps in the new locations,
remount the inner door frame onto the outer door
frame with the screws removed in step 4.
WARNING:
Be sure to support the weight of the door before
installing the hinge screws.
7
Reinstall the door.
While supporting the door, install the 4 hinge screws
removed in step 2. Test the swing of the door to make
sure the hinges and latch are properly aligned and
that the door opens, closes, and latches properly.
Door
Swing
REVERSING THE DOOR SWING (continued)
INSTALLATION INSTRUCTIONS
Loading ...
Loading ...
Loading ...