Loading ...
Loading ...
Loading ...
30 Automatic Ice & Water Maker/Dispenser
IMPORTANT
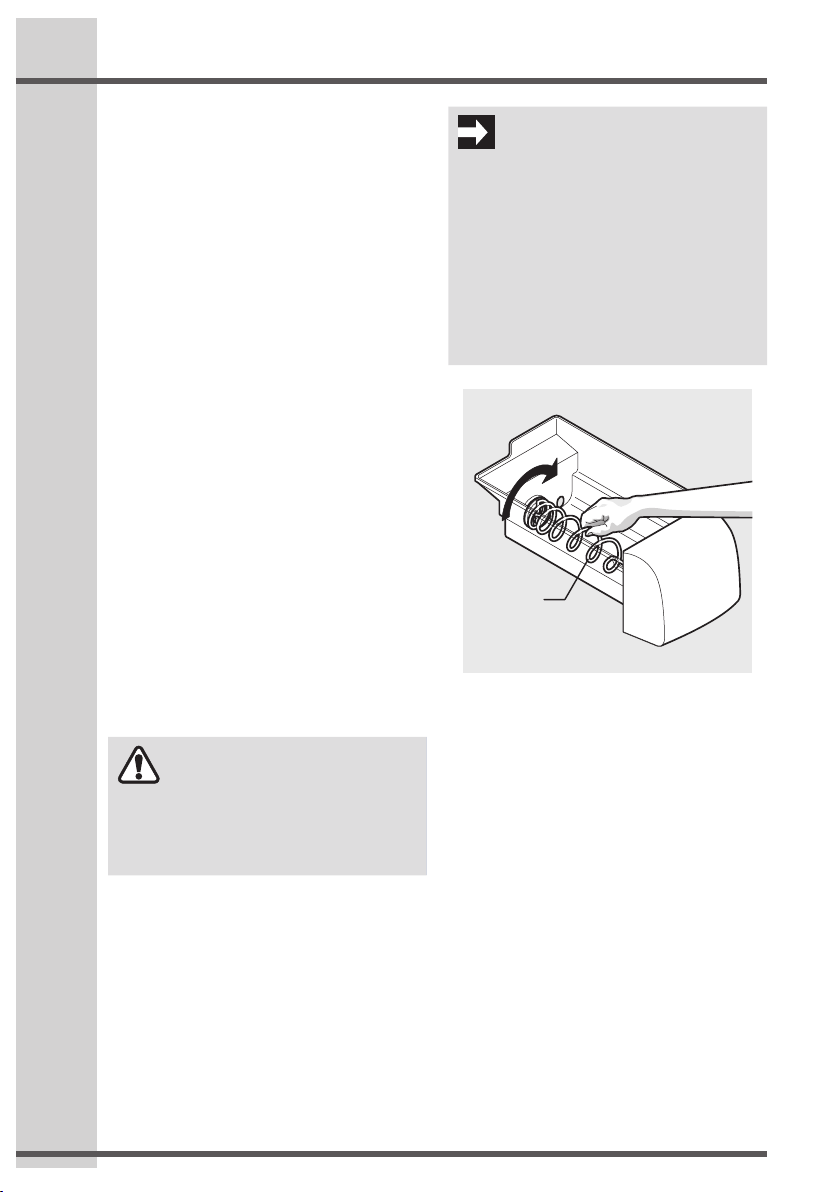
When removing or replacing the ice bin,
DO NOT rotate the auger in the ice bin.
If the auger is accidentally rotated, you
must realign the auger by turning it in 90
degree turns (see below) until the ice bin
fits into place with the drive mechanism.
If the auger is not properly aligned when
replacing the ice bin, the refrigerator will
only dispense Crushed Ice. The freezer
door may also not close properly causing
warm air to leak into the freezer.
CAUTION
NEVER use an ice pick or similar sharp
instrument to break up the ice. This
could damage the ice storage bin and
dispenser mechanism.
Auger
Cleaning the ice maker
Clean the ice maker and ice bin at regular
intervals, particularly before you take a
vacation or move.
To clean the ice maker:
1 Turn off ice production by pressing the
ice maker’s Off/On switch.
2 Remove the ice bin by lifting up and out.
3 Empty and carefully clean the ice bin
with mild detergent. Rinse with clear
water. Do not use harsh or abrasive
cleaners.
4 Allow the ice bin to dry completely before
replacing in the freezer.
5 Remove ice chips and clean the ice bin
shelf and the freezer door chute.
6 Replace the ice bin. Press the ice
maker’s Off/On switch to resume ice
production.
Remove and empty the ice storage bin if:
• An extended power failure (one hour
or longer) causes ice cubes in the ice
storage bin to melt and freeze together,
jamming the dispenser mechanism.
• You do not use the ice dispenser
frequently. Ice cubes will freeze together
in the bin, jamming the dispenser
mechanism.
Remove the ice storage bin and shake to
loosen the cubes or clean as explained above.
Loading ...
Loading ...
Loading ...