• Before using the appliance for the first time, remove and safely discard any packaging material and /or promotional labels.
• Take out all the parts and accessories, wash and thoroughly dry all parts and accessories (see "Cleaning" section).
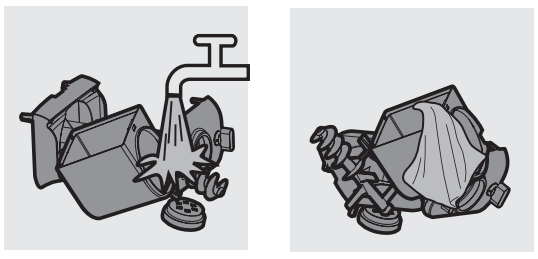
• Do not use water to rinse or soak the main unit.
• Do not use a scourer or similar cleaners as these will scratch the plastic surface and affect the lifetime of the pasta maker.
• The shaping discs and all detachable parts of the appliance are dishwasher proof. When you clean them in a dishwasher, make sure to set the temperature below 60ºC (140ºF).
• This appliance is intended for household use only.
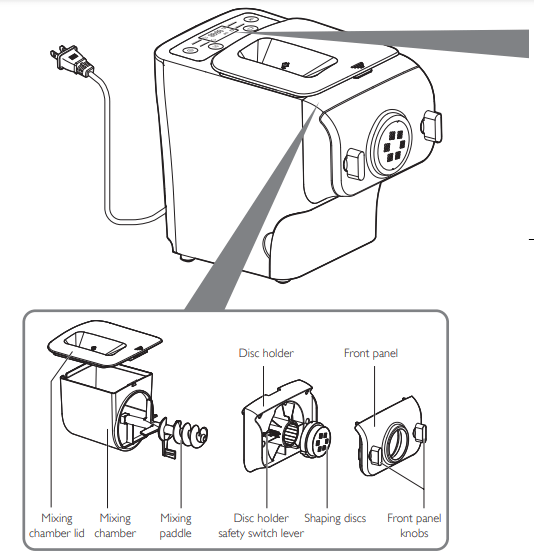
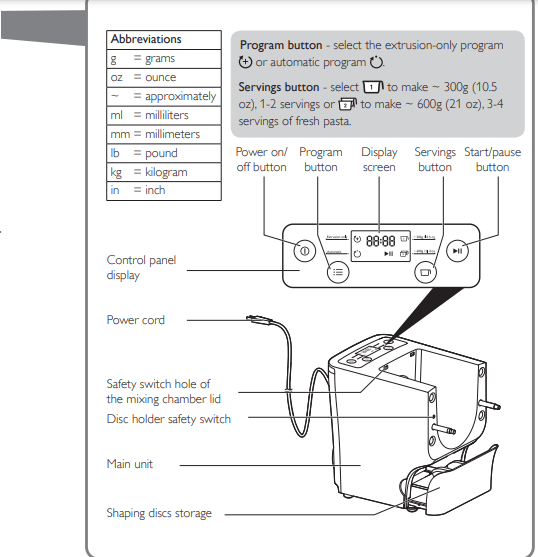
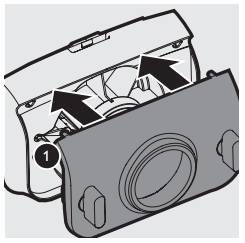
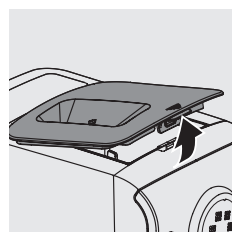
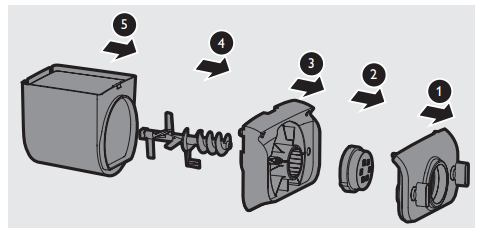
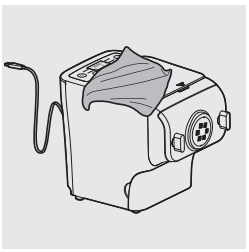
Remove the mixing chamber lid from the appliance.
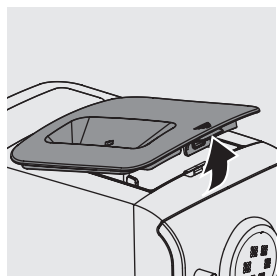
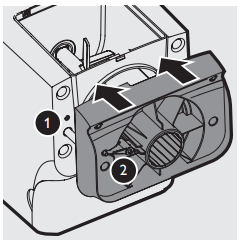
Loosen the front panel control knobs. Note: The front panel is heavy. Take extra caution when removing it.
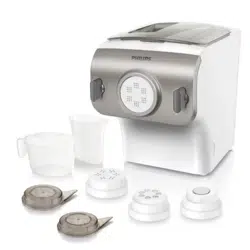
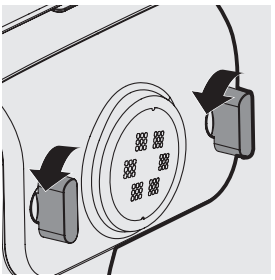
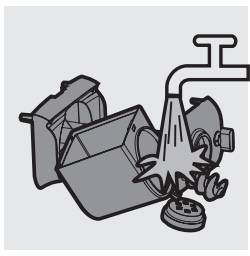
Disassemble the front panel, the shaping disc, the shaping disc holder, the mixing paddle, and the mixing chamber in order.
Clean all detachable parts, and wipe them dry
Assembling
Important
• Make sure to tighten the front panel knobs during assembly.
• Make sure the appliance is not plugged in when assembling the appliance.
1. Push the mixing chamber into the appliance.
2. Point the mixing paddle to the hole in the main unit. Insert the mixing paddle all the way into the main unit.
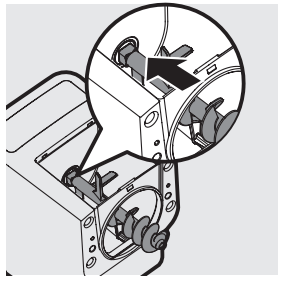
3. Attach the disc holder onto the appliance. ❶ Disc holder safety switch ❷ Disc holder safety switch lever
Note:
• Check that the safety switch ❶ and safety switch lever ❷ are set as shown in the illustration to the right.
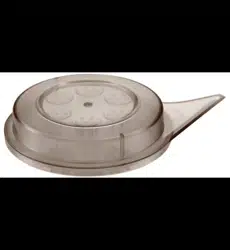
4. Put the shaping disc onto the disc holder ❶ , and make sure it is firmly fixed on the disc holder ❷ .
Note: • Make sure the inner cavity of the shaping disc and disc holder is properly fitted.
5. Attach the front panel to the main unit. ❶ Disc holder safety switch lever
Note:
• Make sure the front panel is completely fastened before using the appliance.
• The front panel is heavy. Take extra caution when assembling it.
6. Fasten the front panel control knobs.
Note:
• If the front panel or the shaping disc is not properly assembled, the safety switch will prevent the appliance from working.
7. Close the mixing chamber lid properly.
Note:
• If the mixing chamber lid is not properly installed, the safety switch will prevent the appliance from working
Using the pasta maker
Important
• Make sure to follow the right order to add flour and water into the mixing chamber. Put the flour into the mixing chamber first, then place the chamber lid onto the chamber. Start the pasta maker, and then slowly pour water along the entire length of the opening in the lid.
• Never put excessive ingredients into the pasta maker. Otherwise, it will damage the appliance. The maximum amount of flour used for each batch is 500g.
• Do not put any ingredients that are 60°C / 140°F or above into the pasta maker, nor place the pasta maker in surroundings with high temperature (60°C / 140°F), for instance in a high-temperature sterilization. This will deform the appliance.
• Never pour water into the mixing chamber before you place the chamber lid onto the chamber. Do not pour any liquids into the safety switch hole.
• Do not pour water into the mixing chamber before turning on the pasta maker. Follow the instruction carefully to enjoy homemade pasta.
Preparing the ingredients
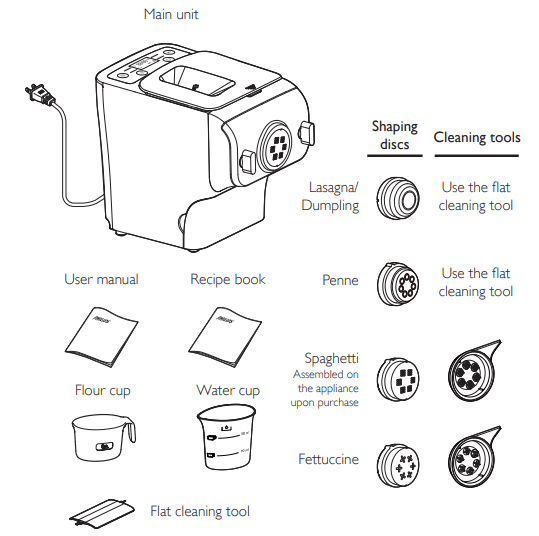
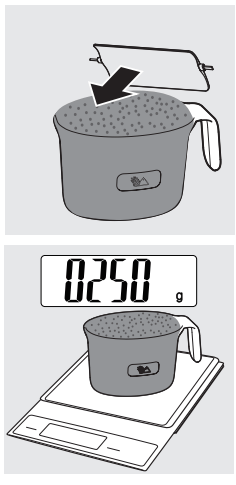
1. Measure one full cup of flour. Scrape off any excessive flour from the cup edge with the supplied flat cleaning tool. One full cup is equivalent to 1-2 servings.
Note:
• Do not shake or hit the flour cup to remove excessive flour. This will affect the flour weight.
You can also use a kitchen scale to measure the flour. For instance, ~250g flour makes approximately 1-2 servings; ~500g flour makes approximately 3-4 servings of fresh pasta.
2. Remove the chamber lid.
3. Pour the flour into the chamber. If you want to make 3-4 servings, add a second cup of flour as you will need 2 cups (~500g) of flour in total.
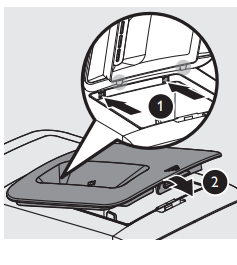
4. Close the chamber lid properly.
Note:
• Insert the two hooks into the appliance first ❶ , and then push the lid against the main unit ❷ .
• The appliance will not start working if the chamber lid is not properly closed. During the pasta making process, if the chamber lid becomes loose, the appliance will automatically stop working
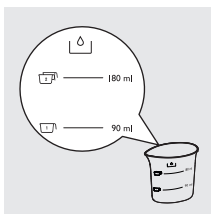
5. Use the “Pasta-making recipe table” and measure the required amount of water.
Note:
• Do not pour water into the mixing chamber before turning on the pasta maker.
• There are 2 sets of water markings on the supplied water cup. One set is for normal pasta making, and the other set is for egg pasta and other flavor pasta making.
Important
• The flour cup included with the pasta maker is not a standard 8 oz measuring cup and should not be used as such. The flour cup holds ~250g (~ 1 2/3 standard cup measure) of flour.
• The pasta recipes provided in the user manual and recipe book have been tested for success. If you experiment with or use other pasta recipes, the flour and water/egg ratios will need to be adjusted to the flour and water cup ratios included with the pasta maker. The pasta maker will not operate successfully without adjusting the new recipe accordingly.
Note:
• To ensure the quality of the pasta, use gluten flour to make pasta. Follow the recommended proportion to add the ingredients.
• Seasonal changes and using ingredients from different regions may affect the flour/ water ratio. You may adjust based on the recommended proportion.
• When making the egg pasta or vegetable pasta, make sure you whisk the egg mixture or vegetable juice evenly with the water before pouring into the chamber When adding ingredients, make sure the ingredient is in a liquid form.
• See the recipe book provided for additional pasta and noodle recipe variations and many delicious new recipes to try
Cleaning
Important
• Disconnect the power and remove the power cord before cleaning or disassembling this appliance.
• Do not immerse the main unit in water.
• Do not use a scourer, caustic cleaners, or abrasive cleaners (for examples, gasoline, alcohol, and propanol) to clean the appliance.
• Clean the appliance each time after use, or the appliance might not operate properly.
• Take extra caution when cleaning the appliance to avoid getting cut by any sharp edges.
• The shaping discs and all detachable parts of the appliance are dishwasher proof.
When you clean them in a dishwasher, make sure to set the temperature below 60°C (140°F).
1. Press the power on/off button to turn off the pasta maker, and then disconnect the plug from the power outlet.
2. Remove the chamber lid from the appliance.
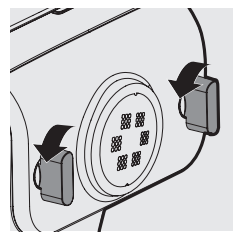
3. Loosen the front panel control knobs.
Note:
• The front panel is heavy. Take extra caution when removing it.
4. Disassemble the front panel, the shaping disc, the shaping disc holder, the mixing paddle, and the mixing chamber in order.
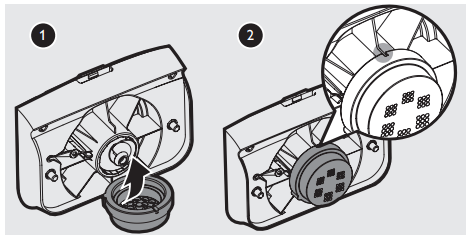
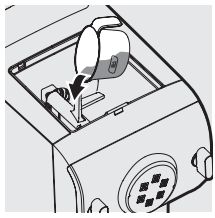
5. Use a dry cloth to clean flour residue in the hole ❶ where the mixing paddle is placed.
6. Clean the shaping disc with the supplied cleaning tool to remove the dough residues. After that, you can clean it with water.
Tip:
• For the spaghetti and fettuccine shaping discs, put the shaping disc into the freezer for 2 hours. Then use the corresponding cleaning tool to poke out the dough in the holes.
7. Clean all detachable parts.
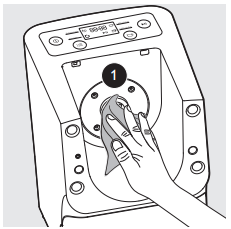
8. Use a dry cloth to clean the main unit, control panel, and the exterior of the pasta maker.
9. Store the pasta maker in a dry, well ventilated place after use.
Note:
• After cleaning, make sure all parts and the shaping disc air dry thoroughly before storing. Assemble the pasta maker back for next use.
Storing the shaping discs and cleaning tools
1. Insert the shaping disc ❶ and cleaning tool ❷ together. Put ❶ and ❷ into the storage drawer. Move the sliding bar ❸ to secure the shaping discs and cleaning tools.
Make sure the cleaning tools and shaping discs are dry before putting them into the storage drawer
Troubleshooting
This chapter summarizes the most common problems you could encounter with the appliance. If you are unable to solve the problem with the information below.
The indicators do not light up.
• The power plug is not connected correctly.
Check whether the power plug is plugged correctly and the outlet is working properly.
• The on/off button is not pressed.
Press the power on/off button ().
After pressing the start/pause button the appliance sounds but it does not work.
• The chamber is assembled incorrectly. The shaping disc, or the front panel is assembled incorrectly.
Make sure you follow the user manual to assemble all parts correctly.
• The preferred servings is not selected.
Make sure you have selected the servings before pressing the start/pause button.
The safety switch is triggered and the appliance suddenly stopped or suddenly restarts during the processing.
• The front panel knob is loose.
Make sure the front panel is securely assembled.
• Excessive ingredients in the pasta maker.
The maximum amount of flour used for each batch is 500g. If more than 500g is added, reduce the amount of flour before next batch.
During processing, the appliance stops. There is no alarm sound or flashes.
• The pasta maker has overheated due to long continuous working time.
Disconnect from the power, and allow the pasta maker to cool down. To better protect the lifetime of the appliance, the continuous working time should be less than 45 minutes. You can restart using the appliance after 15 minutes of rest.
The appliance stops during processing, then the indicators are flashing quickly, and the alarm sounds.
The mixing paddle may be blocked by some foreign objects. The dough may be too dry. The wrong program is selected.
Disconnect from the power; clean the pasta maker and follow the user manual again to restart the pasta making.
Too much leftover dough inside the chamber.
The flour is either exposed to moisture before use, or the dough is too wet.
Keep your flour dry during storage. Follow the user manual instructions to restart the pasta making.
The chamber, the mixing paddle, the shaping disc are not cleaned properly before use.
Make sure all parts are clean before use.
The mixing paddle or the chamber is still wet.
Make sure all parts are completely dry before use.
Water is not added in the right order. The flour type is not suitable. Incorrect servings was selected.
Follow the user manual instructions to make pasta.
Small amount of water is leaking out from the appliance.
• Water is added before the program starts.
Follow the user manual instructions to add water right after the program starts.
The mixing paddle is running idle, and there is no pasta coming out
• The ratio of the flour and water is incorrect.
Disconnect the plug from the power socket and discard dough. Clean the pasta maker, re-measure ingredients correctly and follow the user manual instructions again to restart the pasta making.


 to turn off the pasta maker, and then disconnect the plug from the power outlet.
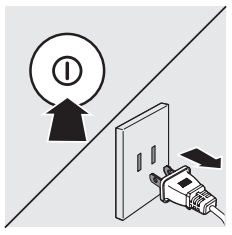

 the appliance sounds but it does not work.