Loading ...
Loading ...
Loading ...
20
Before Use
Basic Guide
Advanced Guide
Camera Basics
Index
Auto Mode /
Hybrid Auto Mode
Other Shooting Modes
P Mode
Tv, Av, and M Mode
Playback Mode
Wi-Fi Functions
Setting Menu
Accessories
Appendix
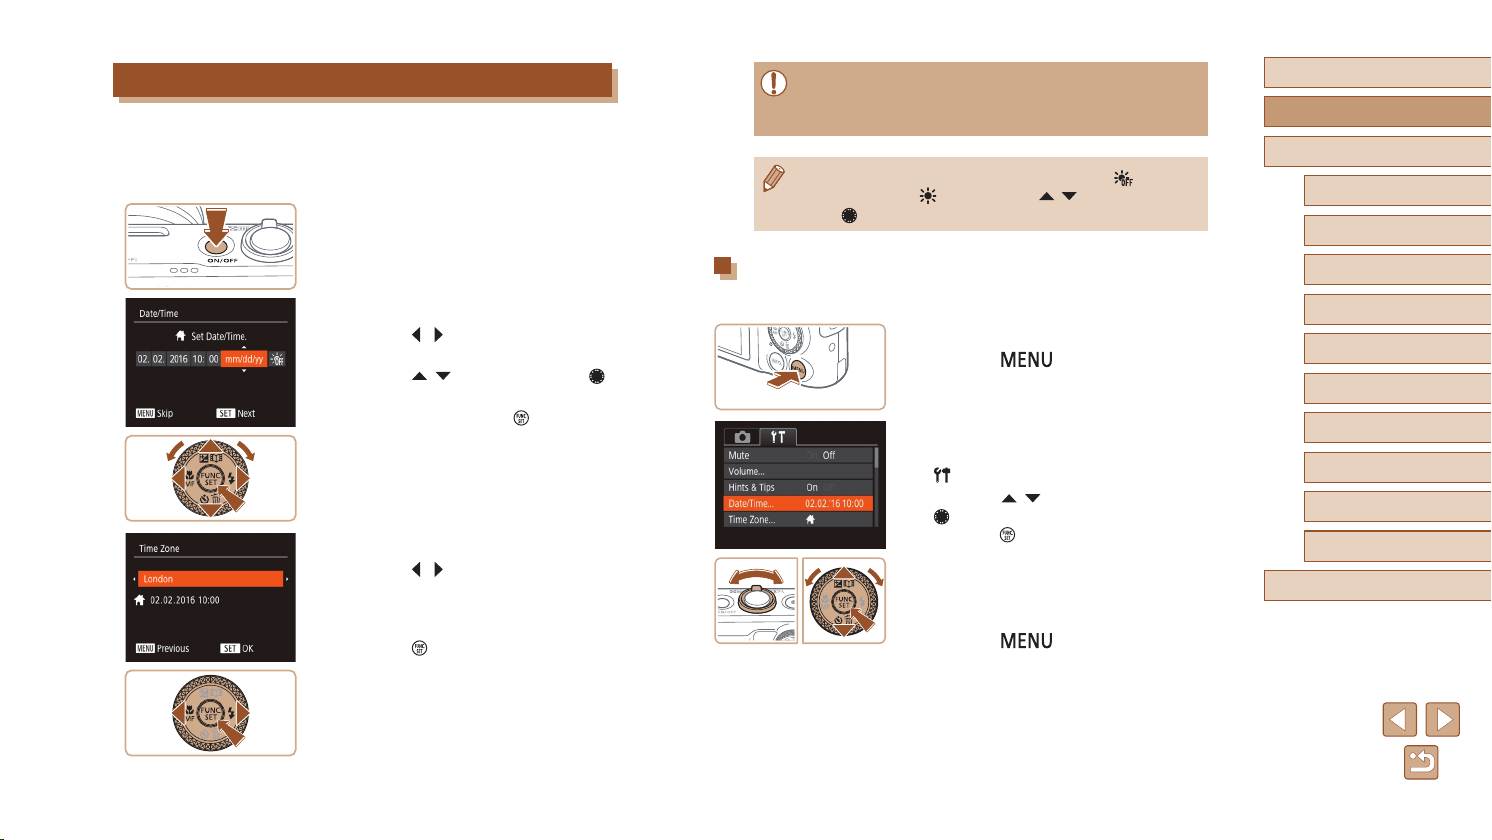
● Unless you set the date, time, and home time zone, the [Date/
Time] screen will be displayed each time you turn the camera on.
Specify the correct information.
● To set daylight saving time (1 hour ahead), choose [ ] in step 2
and then choose [
] by pressing the [ ][ ] buttons or turning
the [
] dial.
Changing the Date and Time
Adjust the date and time as follows.
1
Access the menu screen.
● Press the [ ] button.
2
Choose [Date/Time].
● Move the zoom lever to choose the
[ ] tab.
● Press the [
][ ] buttons or turn the
[ ] dial to choose [Date/Time], and then
press the [ ] button.
3
Change the date and time.
● Follow step 2 in “Setting the Date and
Time” (
=
20) to adjust the settings.
● Press the [
] button to close the
menu screen.
Setting the Date and Time
Set the current date and time correctly as follows if the [Date/Time] screen
is displayed when you turn the camera on. Information you specify this
way is recorded in image properties when you shoot, and it is used when
you manage images by shooting date or print images showing the date.
1
Turn the camera on.
● Press the ON/OFF button.
● The [Date/Time] screen is displayed.
2
Set the date and time.
● Press the [ ][ ] buttons to choose an
option.
● Press the [
][ ] buttons or turn the [ ]
dial to specify the date and time.
● When nished, press the [
] button.
3
Specify your home time zone.
● Press the [ ][ ] buttons to choose your
home time zone.
4
Finish the setup process.
● Press the [ ] button when nished.
After a conrmation message, the setting
screen is no longer displayed.
● To turn off the camera, press the ON/OFF
button.
Loading ...
Loading ...
Loading ...