Product Instruction
Package Contents
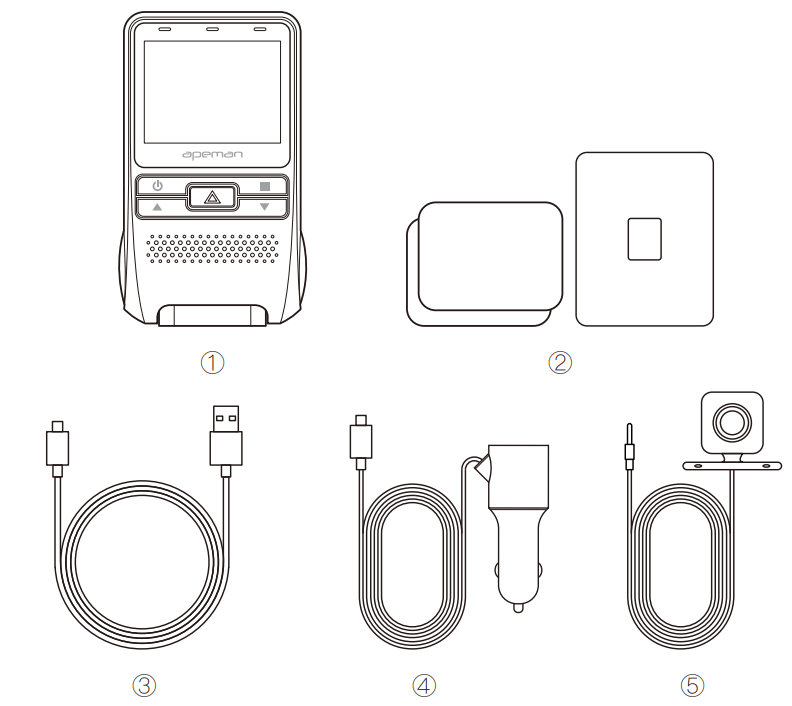
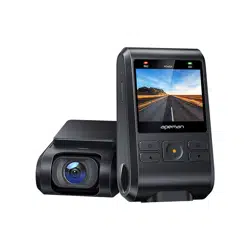
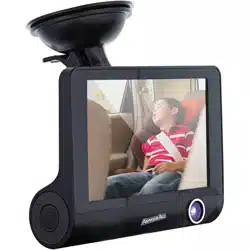
1. Main Body
2. 2x Adhesive, 1x Mount
3. Mini USB Cable
4. Car charger
5. Rear Cam
Button Instruction
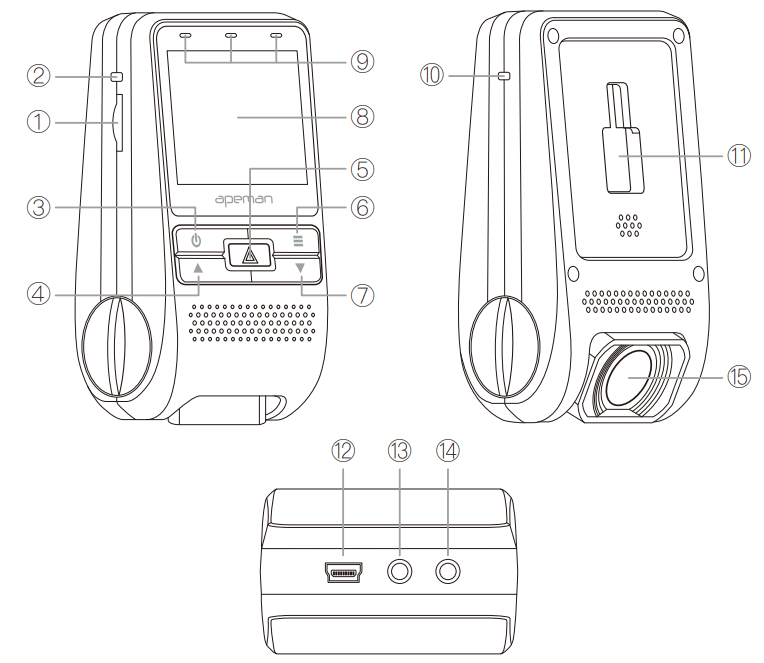
1. TF Card Slot
2. Reset
3. Power On/Off
4. Up
5. Record/OK
6. Menu
7. Down
8. Screen
9. Indicator
10. MIC
11. Slide Slot
12. USB/Power Interface
13. Rear Cam Interface
14. GPS Interface
15. Lens
Operation Instruction
Preparation and Installation
Please clean the front windshield completely.
Please prepare a TF card, class 10, 4G to 32GB.
Please insert it to the dash cam and format it before using.
Please connect the sticker and tachograph chute, and find an appropriate place to paste.
It is advisable to install the power cord along the illustrated wiring path.
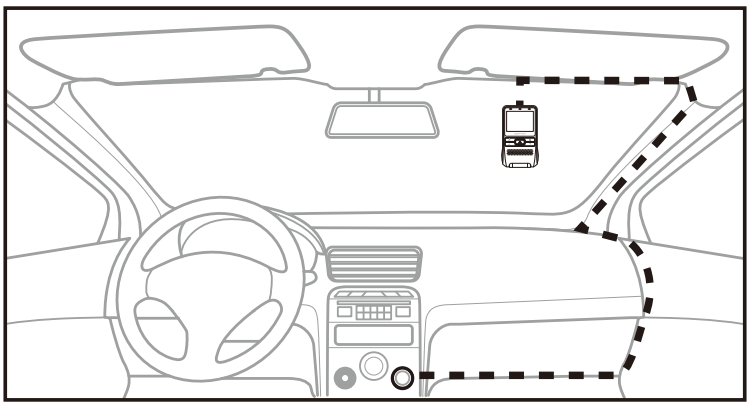
Insert the car charger into the cigarette lighter power hole, start the engine, the dash camera will start recording automatically.
Video Mode
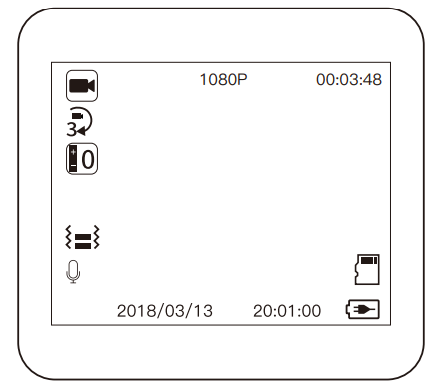
Insert a SD card and connect the camera to the power supply, the dash camera will turn on then record automatically.
Start / Stop Video
In the video mode, short press the “Record/OK”button to start / stop recording.
Up/Down
Insert the rear camera, press the “Up" button, switch from front view/Back view/Picture In Picture view/Split-screen view. Short press the “Down” button, turn on/off the audio.
Lock/Unlock
Video In the recording status, press “Menu" button to lock/unlock the current video.
Camera Mode
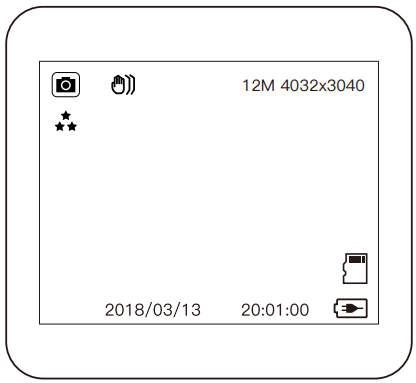
In the recording status, press the “Record/OK" button to suspend the video, and then long press the “Menu" key to enter the camera mode.
Take Pictures
In Camera mode, short press “Record/OK" button to take pictures.
Photo Mode Menu
In Camera mode, press “Menu" button into photo mode menu: Capture Mode/Resolution/Burst Photo/Quality/Anti-Shaking/Date Stamp.
Playback Mode
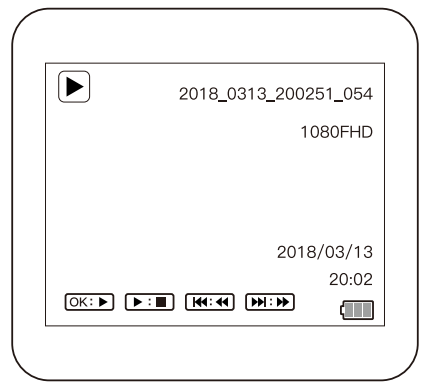
In the camera mode, long press “Menu”button to switch to playback mode.
Start / Stop playback
In playback mode, short press the “Record/OK" key to playback / stop.
Select Video
In playback mode, press “Up" ,“Down" button to select the video you want to play back.
Fast forward/Rewind
While playing video, press the “Up" “Down" button to fast forward/rewind the video.
Playback Mode Menu
In playback mode, press the “Menu" button to enter the Playback Mode menu. Available functions: Delete, Protect, Slide Show .
Back to Video Mode
In playback mode, long press the “Menu" button to the video mode.
Menu Mode
In the recording status, press the “Record/OK" button to suspend the video, and then press the “Menu" key to enter the menu mode.
By entering the menu mode to select different function parameters and turn on and off various functions.
Features:
- G-sensor: Acceleration sensor. When the G-sensor detects the emergency braking of the vehicle during driving, the video of this period of time will be saved separately and will not be automatically deleted.
- WDR: Wide Dynamic Range. It can clearly display the extremely bright part and extremely dark part at the same time.
- Loop Recording: Automatically overwrite the unlocked video when the TF card is full, to ensure the normal recording.
- Parking Monitoring: Under parking mode, the dash cam is in the power-off condition. The dash cam will automatically turn on and record when detect a vibration.
- Motion Detection: In the standby mode, the dash cam is in the power-on condition. The dash cam will automatically start recording when detect a motion in front of the car.
Resolution: This setting allows you to set one of three available video recording resolutions, 1080FHD/720P/VGA. Higher resolutions will give you a sharper image, but take up more memory on the card.
Display Mode: Picture in Picture /Front Camera /Rear Camera/Split-screen
Loop Recording: Off/1 Minutes/3 Minutes/5 Minutes If you set this Off, Once the memory card is full, the camera will stop recording. If you select 1 Minutes /3 Minutes/5 Minutes as the duration of recording length for the individual video files, and the driving recorder will fill the SD card then loop back to the beginning, overwriting the oldest unlocked file.
WDR: Wide Dynamic Range--The ratio of the brightest luminance signal value to the darkest light signal value that can be resolved. Present a crisp and clear picture quality with harmonious contrast in a high contrast, high discrepancy environment. Setting to ON mode is recommended.
Exposure: Adjust exposure level for different light levels +3/+2/+1/0/-1/-2/-3
Record Audio: Enable or disable sound recording with the video.
Off--when Setting it to OFF, sound will not be recorded.
On--when Setting it to ON, sound will be recorded.
Date Stamp: Turn On/Off the time and date stamp shown on recorded files.
OFF--When setting it to OFF, no data stamp will be shown on the recorded files.
ON--When setting it to ON, data stamp will be shown on the recorded files.
License plate number: It will be shown on the video file. Press “Record/OK" button to enter the car NO. setting. Press “UP" and “Down" to select from A to Z and 0 to 9. Then press “Menu" button to the next one. Press “Record/OK" button to save and exit. When finished, it will be shown on the LCD display.
GPS: Records the track of the car accurately. Set the GPS to on and plug the GPS module(3.5mm plug) into the GPS Port on the right side of the unit. There is speed shown on the lower right of the screen.
Warm tips:
a. GPS module is not included.
b. It needs software to playback video. Please download the software: “Registrator Viewer".
Speed unit: Select the speed unit you need, Km/H, Mile/H. Select the speed unit you need, Km/H, Mile/H.
Setting Menu:
In the recording status, press the “Record/OK" button to suspend the video, and then press twice the “Menu" button to enter the Setting Menu.
Date/Time: Press “Record/OK" button to enter the date/time setting, Press “Up" and "Down" buttons to set numbers, Press “Menu" button to enter the setting of the next number. After setting the right numbers, press the “OK" button to save the setting and exit.
Screen savers: If it is recording and set the screen saver to 1/2/3 minutes, the display will go off while the dash camera continues recording and the screen can be woken up at any time by pressing any button. If turn Off, the screen will always light on when it is recording.
Auto Power Off: Please make sure the dash cam is not recording. Choose Off--When not recording, no operation, no action, it will not automatically shut down.
Choose 1 Minute/3 Minutes/5 Minutes--When not recording, no operation, no action, it will automatically shut down 1 Minute/3 Minutes/5 Minutes later.
Frequency: Press “Up" and “Down" to select the frequency (50Hz/60Hz)you need, Press “Record/OK" button to save and exit.
Beep Sound: Turns the sound on or off for each time a button is pressed.
Note: this only affects normal button presses.
Language: Press “Record/OK" button to enter the language setting. Press “Up" and “Down" to select the language you need. Press “Record/OK" button to save and exit, it allows you to set the language for the device from among the 9 supported languages.
Format: Allow you to delete the SD card’s all data.
Cancel: Do not format the SD card.
OK: Format the SD card.
Note: Before formatting the SD card, please back up your data if you need.
Default Setting: If there is a set error, you can use this to return menu setting to defaults. After you have returned to the default setting, all the setting will return to the factory setting. And you need set the date/time, auto power off, Motion detection and so on.
Version: Display the information of the version.
Q&A
Will the dash cam continue working after the car flame-out?
If the cigarette lighter power interface is "constant power" , then it will continue to work after the car flame out. At this time, it is recommended to press the power button to turn off the recorder after flame-out.
Q; Can I turn off the microphone?
A: You can turn off the microphone in the settings, or press “Down” button to turn off it.
Q: The screen prompts "Please insert TF card", but I have already inserted the TF card, what should I do?
A: You need to check whether the TF card is corrupted and formatted, or change to a new class10 TF card with capacity less than 32GB.
Q: Can I view the video on the dash cam?
A: You can view the recording in playback mode. If it is a locked video, there will be a "lock" sign on the video.
Q: Does the dash cam always need power to keep recording?
A: Yes, it needs to be powered all the time with the car charger we provided. The battery that comes with the machine can only guarantee continuous recording for about 15 minutes.