Apeman LC450 1080P Mini Projector
Product's Documents
Below are documents related to this product, you can read online or download:
- Owner's manual - (English) Read Online | Download pdf
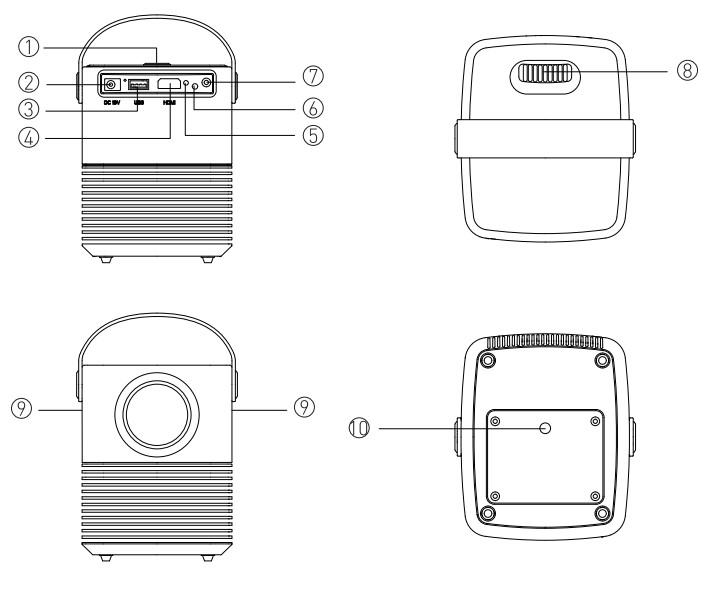
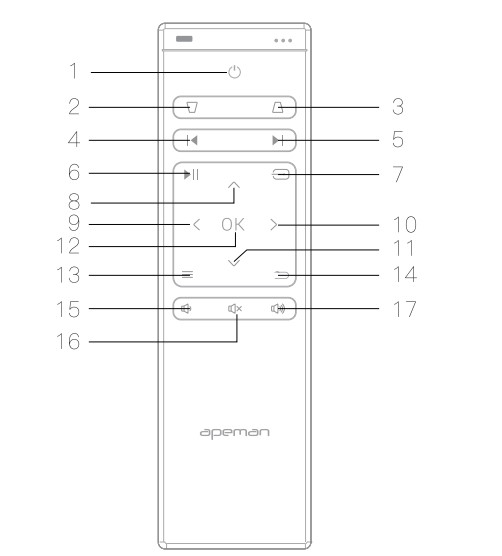
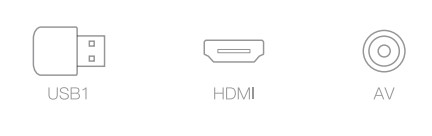
Interfaces and buttons
Tips:
Your projector can be installed in four positions to meet different needs. please go to Menu >Option >Rotate to set up the projection modes. These are the following modes option for installation
Front
Select this mode when the projector is placed in front of the wall/screen. and the image will be directly projected to the wall/screen. This is the most cornmon way to position the projector for quick setup.
Front ceiling
Select this mode when the projector is placed upside-down from the ceiling in front of the screen.
NOTE: To install the projector on the ceiling. an extra four-corner projector mount is needed.
Rear ceiling
Select this mode when the projector is placed upside-down from the ceiling behind the screen.
Rear
Select this mode when the projector gets placed behind the screen.
NOTE: A special rear projection screen is required.
Note:
As a safety precaution. please disconnect the projector and all equipment before connecting the cable.
As shown in Picture (1) connect the projector and the power source with the included DC power cable.
As shown in Picture (2), the projector gets into standby mode as the LED indicator on the back of the projector turns red.
As shown in Picture (3), turn on the projector by pressing the power switch button on the projector itself or on the remote controller. Start-up successes: LED indicator changes color.

As shown in Picture (4) and (5), adjust the Keystone correction on remote controller and the Focus wheel on the projector until you get a clear picture.

Warm Tips:
Warm Tips:
 button on remote controller to choose the right input source to get it connected. if you choose the wrong input source then you will get a “no signal” image.
Connection preparation steps
button to enter an input source menu.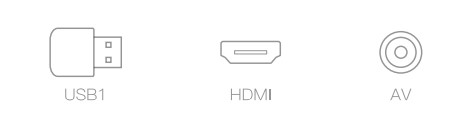
 or
or  to choose the right input source you want.
HDMI devices connection
The projector can be connected to devices via HDMI port. It is compatible with laptops. DVD players. Blueray players, Chromecast. TV Stick. etc. An HDMI cable is included.

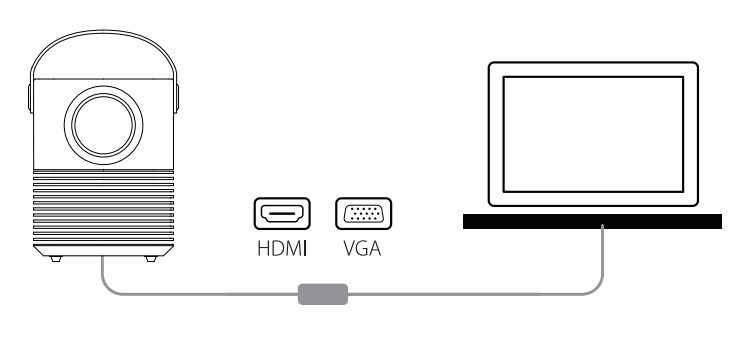
Windows Laptop
A HDMI cable is needed ( included) to connect the Windows Laptop and projector. Plug the HDMI cable to your laptop and projector, then press the [  ] + [P] to connect.
Note: Most Windows laptops support HDMI and VGA connection. for VGA orepare an VGA to HDMI adapter.
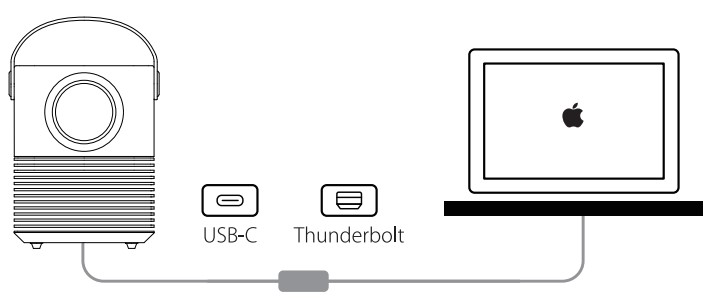
A Thunderbolt/USB-C digital AV Adapter is needed (not included) to connect the MacBook and projector via HDMI port
Miracast is designed for mirroring a smartphone. tablet. or PC’s screen to a bigger screen.
Note: The operating instructions for Miracast are for reference only. As
Miracast from different vendors may have different operations. please consult the supplier of the Miracast you purchased for details.
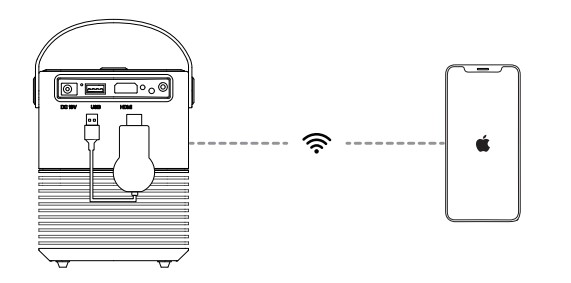
Step 1: Plug the Miracast into the projector
Plug the Miracast into the HDMI port of the projector. and plug the USB cable of the Miracast to the USB output port of the projector to power the
Miracast.
Step 2: Mode(DLNA/Airplay)
For the iOS devices. choose the Mode(DLNA/Airplay) on the Miracast.
Step 3: Open WLAN on Your Phone
Connect to the network of the Miracast. (The password is displayed on the projection screen)
Step 4: Select the "Screen Mirroring” on your phone. and choose the Miracast signal.
Most Android phones must be connected with Miracast / Dongle via HDMI port
Note: The operating instructions for Miracast are for reference only. as
Miracast from different vendors may have different operations. Please consult the supplier of the Miracast you purchased for details.

Step 1: Plug the Miracast into the projector
Plug the Miracast into the HDMI port of the projector. and plug the USB cable of the Miracast to the USB output port of the projector to power the
Miracast.
Step 2: Mode(Miracast)
For the Android devices. choose the Mode(Miracast) on the Miracast
Step 3: Open WLAN on Your Phone
Connect to the network of the Miracast. (The password is displayed on the projection screen)
Step 4: Select the "Wireless Projection” on your phone.

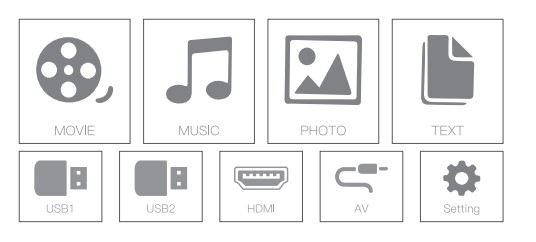
| File Type | Format |
| Video | MP4/AVI/MKV/FLV/MOV/MPG/VOB/RMVB/3GP |
| Music | MP3/WMA/OGG/AAC/ASF/WAV |
| Picture | JPEG/BMP/PNG |
| TEXT | TXT |
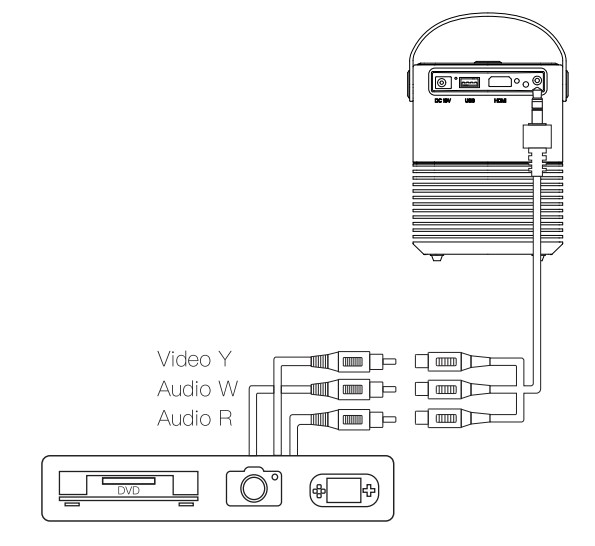
Connect the projector AV interface with the 3 in 1 AV female cable ( included).
You can adjust the projector settings in the projector main menu by pressing the menu button on the remote controller.
Picture Mode: User. Vivid. Standard. Soft
Color Temperature: User. Cool. Medium. Warm
Aspect Ratio: Auto. 4:3. 16:9
Reduce Display
Auto Source: On. Off
LED Temperature
Sound Mode: User. Standard. Music. Movie. Sports
Surround Sound: Off. SRS TruSurround XT. Surround
Time
Clock
Off Time
On Time
Sleep Timer
Auto Sleep
OSD Language: English. Deutsch. Frangais. Italiano. Espafol. A Az
Keystone: Horizontal. Vertical
Rotate: Front. Front Ceiling. Rear Ceiling. Rear
Software Update(USB)
Restore Factory Default
| Light Source | LED |
| Supported Video Resolution | 1080p. 1080i. 720p. 576i. 480p and 480i |
| Lens Life | 50000 Hours |
| Aspect Ratio | 4:3/16:9/Auto |
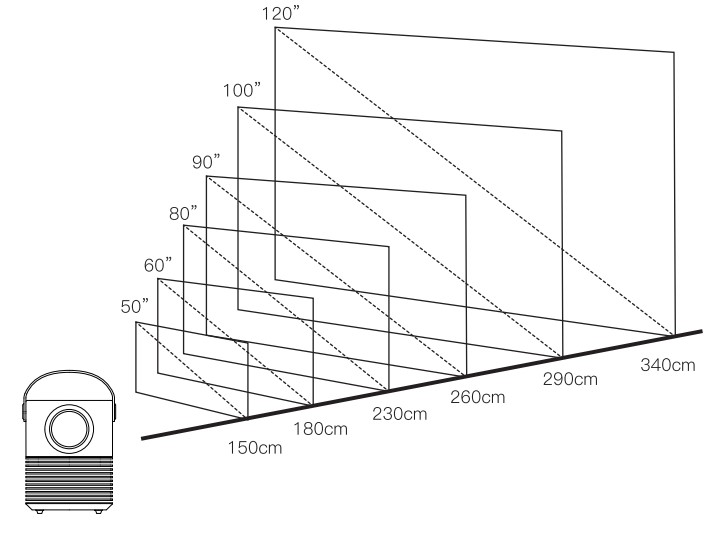
| Projection Distance | 5-12 ft /1.5-4m |
| Screen Size | 50-180 inches |
| Focus | Manual |
| Keystone | Electronic Adjustment |
| Connect Types | HDMI/USB/AV |
| Input | HDMI*1 /AV*1 /USB*1 |
| Built-in Speaker | 4Ω3W *2 |
| Input Voltage (V) | AC 100V-240V(±1 0%). 50/60Hz |
| Power Consumption (W) | 60W (Max) |
| Dimension | 13.7*11.5*14.5 cm |
| Projection Method | Front/ Front Ceiling/Rear Ceiling/Rear |
Q: How do | connect to my Android phone (Samsung. Huawei. Xiaomi. ete.)?
A: Plug the Miracast/Dongle to HDMI port on the projector.
 Power the Miracast/Dongle via plugging the USB cable USB port on projector.
 The Miracast/Dongle main page will be displayed on your projector image
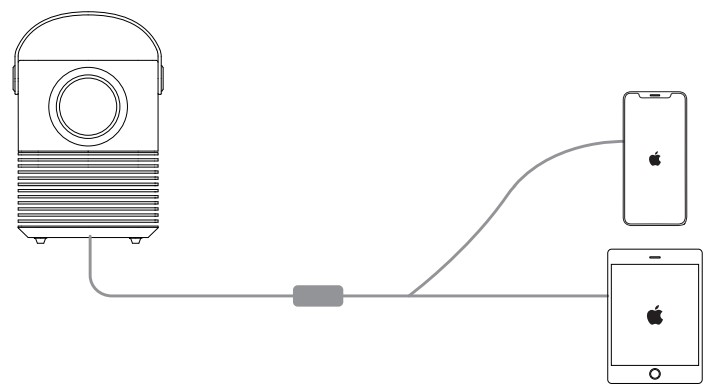
Q: How do | connect to my iPhone?
A: An official Lightning Digital AV Adapter from the Apple Store is necessary. Then connect the projector and iPhone via the Lightning Digital AV Adapter and HDMI cable. If the connection fails. please try: connect the projector to HDMI compatible devices such as a laptop. TV box or DVD with your HDMI cable. If the connection is successful. the projector has no problem.
Please check your adapter or contact the adapter dealer.
Q: What if there is no sound when playing Netflix or YouTube videos?
A: Turn off Dolby surround sound when using Netflix. YouTube. (Settings > Display & Sounds > Audio > Dolby Digital Output > turn off Dolby Digital Plus 5.1)
Q: Does this projector have Wi-Fi connection?
A: No. you can connect the projector to various devices (PC. TV Stick. iOS devices and Android phone. etc.) via HDMI port. and use USB flash drives via USB ports.