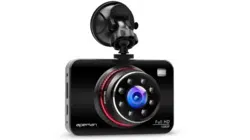
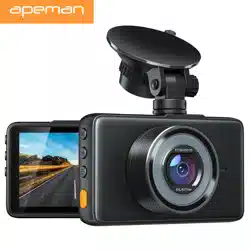
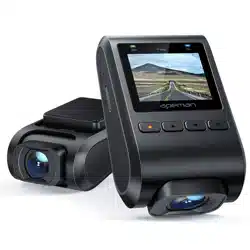
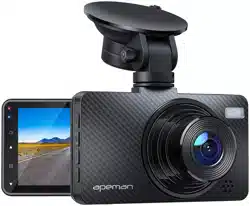
Apeman C450 Dash Cam 1080P
Product's Documents
Below are documents related to this product, you can read online or download:
- Owner's manual - (English) Read Online | Download pdf
Package contents

Car Recorder
Suction Mount
Car Charger
Mini USB Cable
Product introduction
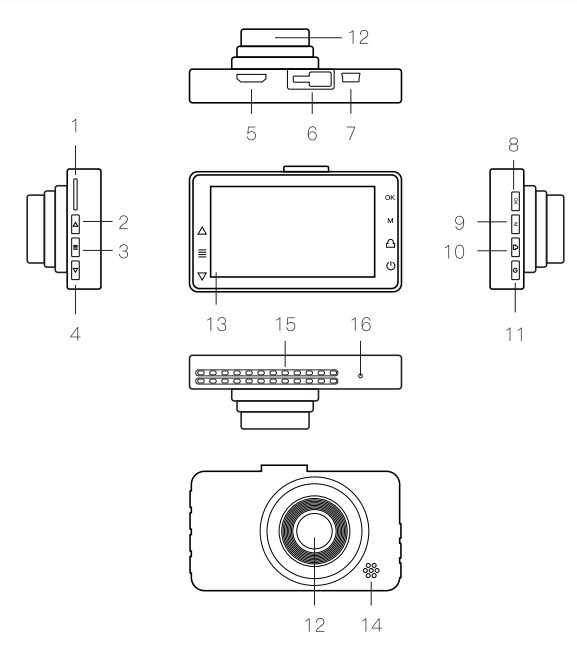
Button and Interface introduction
Power
Reset
OK Button
Mode
Menu Button
Up Button
Down Button
TF card slot
Mount Interface
Car charging interface
Look
Video mode: After being powered on, it enters the video mode and automatically starts recording. The video recording icon is displayed in the upper left corner of the screen. The red dot at the top of the screen flashes. indicating that a video is being recorded. Short press OK Button to stop recording.
Photo mode: After being powered on, it enters the video mode and automatically starts recording. Short press OK Button to stop recording. Press
Mode Button to switch to photo mode. The photographing icon is displayed in the upper left corner of the screen. Short press OK Button to take a photo.
Video / photo playback: After being powered on, it enters the video mode and automatically starts recording. Short press OK Button to stop recording. Press Mode Button twice to switch to playback mode and the playback icon is displayed in the upper left corner of the screen.
Note: If in video mode, please stop video recording first, and then press Mode Button twice to switch to playback mode.
Video recording settings:
After being powered on. it enters the video mode and automatically starts recording. Short press OK Button to stop recording. Short press Menu Button to switch to video recording settings. The screen displays the settings such as: resolution, loop recording, WDR, exposure, motion detection, record audio, date stamp. G-sensor. Short press Up/Down Button to switch to a setting option. Short press OK Button to select the option.
Video resolution: 1080FHD 1920*1080. 720P 1280*720
Loop Recording: The cam will cyclically record new videos under the time interval you set. Off / one minute / three minutes / five minutes. Default value: three minutes
WDR: off/ on. Default value: off.
Used to adjust the brightness of the video clips. Suitable for situations like low light or back light.
Exposure: ”4+2.0". +5/3". +4/3”. +1.0". +2/3". +1/3". +0.0". -1/3”. -2/3”. -1.0". -4 /3”. -5/3”. -2.0” (Default exposure value is 0.0)
Motion detection: on/off. Default value: off. It starts recording once it detects moving subjects within 3 meters in front of the lens, otherwise it stops recording. It automatically starts recording
10s video and stops recording after no dynamic motion appears.
Record Audio: Choose to record audio or not in the video. On/off. Default value: on.
Date stamp: on/off. Default value: on.
G-sensor: off/ Low/ Medium/ High. Default value: Medium. The cam automatically locks video that is being recorded once it detects shaking or collision. Files that are locked won't be overwritten/ covered.
System Settings
After being powered on. it enters the video mode and automatically starts recording. Short press Menu Button to switch to video recording settings. Short press Menu Button again to switch to system setting. The screen displays the settings such as: Date/time, Auto Power off, Screensavers, Beep sound, Language, Frequency, License plate stamp, Format, Default setting, Version.
Date and time: You can set the display order of date and time, such as
Y/M/D. Press OK to enter, press Up or Down to change. After changing each time, press OK button to switch to the next item. After all items are changed. press Menu Button to save and exit. (After restoring the factory settings, the date becomes the factory date)
Auto power off: Off / one minute / three minutes / five minutes. Default value: three minutes.
Note: If there is no operation on the cam within the set time. the cam will automatically turn itself off when the cam is not recording.
Screensavers: Off / one minute / three minutes / five minutes. Default value: one minute
Note: If there is no operation on the cam within the set time, the screen will go black to save power. But the cam still keeps recording.
Beep sound: Turn on / off sound of operation on the camera. On /off. Default value: on.
Language: English/ traditional Chinese/ simplified Chinese/ Japanese/ French/ German/ Thai/ Italian/ Portuguese/ Russian/ Spanish. etc
Frequency: 50HZ/60HZ. Default value: SOHZ
License plate stamp: Press OK Button to enter it. press Up /Down Button to change number or letter. After changing each time, press OK button to switch to the next item. After all items are changed, press Menu Button to save and exit.
Format: “Cancel” or “OK” may be selected. Select “OK” to delete all files on the card. otherwise please select “cancel”.
Default setting: “Cancel” or “OK” may be selected. Select “OK” to restore factory settings. otherwise please select “cancel”.
Version: You can view version information.
Photo recording settings
After being powered on, it enters the video mode and automatically starts recording. Short press OK Button to stop recording. Press Mode Button once to switch to photo mode. The photographing icon is displayed in the upper left corner of the screen. Short press Menu Button to switch to photo settings. The screen displays the settings such as: resolution, burst photo, quality, sharoness, white balance, ISO, exposure, date stamp. Short press Up / Down Button to switch to setting option. Short press OK Button to enter. Short press Up /Down Button to change settings. Short press OK Button to confirm.
Resolution: VGA640x480/ 3M(3648x2736)/ 12M(4032x3024). Default value:12M
Burst photo: on/off. Default value: off. Press OK button once and the cam can take 5 pictures continuously.
Quality: Fine/Normal/Economy. Default value: Fine.
Sharpness: Strong/Normal/Soft. Default value: Strong.
White balance: auto/daylight /cloudy /tungsten/fluorescent. Default value: auto.
ISO: Auto/100/200/300/400. Default value: auto.
Exposure: ”4+2.0". +5/3". +4/3”. +1.0". +2/3”. +1/3”. +0.0". -1/3”. -2/3”. -1.0". -4/ 3”. -5/3”. -2.0” (default value +0.0)
Date stamp: off/date /date/time. Default value: date/time
Playback settings
After being powered on. it enters the video mode and automatically starts recording. Short press OK Button to stop recording. Press Mode Button twice to switch to playback mode. The playback icon is displayed in the upper left corner of the screen. Short press Menu Button again to set. The screen displays the settings such as: delete. protect.
Delete: Delete current/all files. Default value: delete current file.
Protect: Lock current file /unlock current file /lock all files /unlock all files.

1. Suction cup falls off/ unstable
Solution
2. View files on the cam and find that images are blurred
Solution: The front windshield has reflective effect. Please adjust the angel of the machine according to the installation position of the suction cup.
3. Big difference of videos recorded in daytime and at night
Solution: The transmittance of commonly used can front glass thermal insulation films is 68%-—80%. which will affect the recording effect of machine.
4. The cam often shut down or can not connected to the power supply
Solution:
1. The cam can’t be turned on
Solution:
2. The cam freezes. Screen goes black. Buttons do not work
Solution
3. Unable to access menu settings(No response by pressing menu button)
Solution: The cam will stay in video mode after being turned on and will start recording automatically if you have inserted a SD card. Press OK button to stop recording first. Then press menu button to enter settings
4. The screen goes blue and prompts mass storage
Solution: When you connect the cam to computer or power source with low voltage. it is normal that the cam prompts mass storage. You should use the USB cable in the package to connect the cam to power supply with normal voltage.
1. The cam won’t record after being turned on
Solution:
2. Abnormal video recording ending
Solution
3. Screen goes black
Solution:
The screen will go black if there is no operation on the cam within the set time interval even during recording. You can press any button to wake the cam up.
4. Videos have no audio
Solution:
5. Blurred videos
Solution:
6. Video time error
Solution:
1. Unable to read storage and can’t find the connection device
This product carries a one-year warranty from purchase date.
Please feel free to let us know what we can do to assist you when you have any product problem.
Apeman customer service email addresses:
America: [email protected]
Europe: [email protected]
Japan: [email protected]