Loading ...
Loading ...
Loading ...
Attaching the wiper blade
›
Push the windscreen wiper blade until the stop and it locks in place.
›
Check that the wiper blade is correctly attached.
›
Fold the wiper arm back to the windscreen.
›
Turn on the ignition and press the lever into the direction of the arrow
» Fig. 131.
The windscreen wiper arms move into the home position.
Replacing the rear window wiper blade
Fig. 133
Rear window wiper blade
Read and observe on page 133 first.
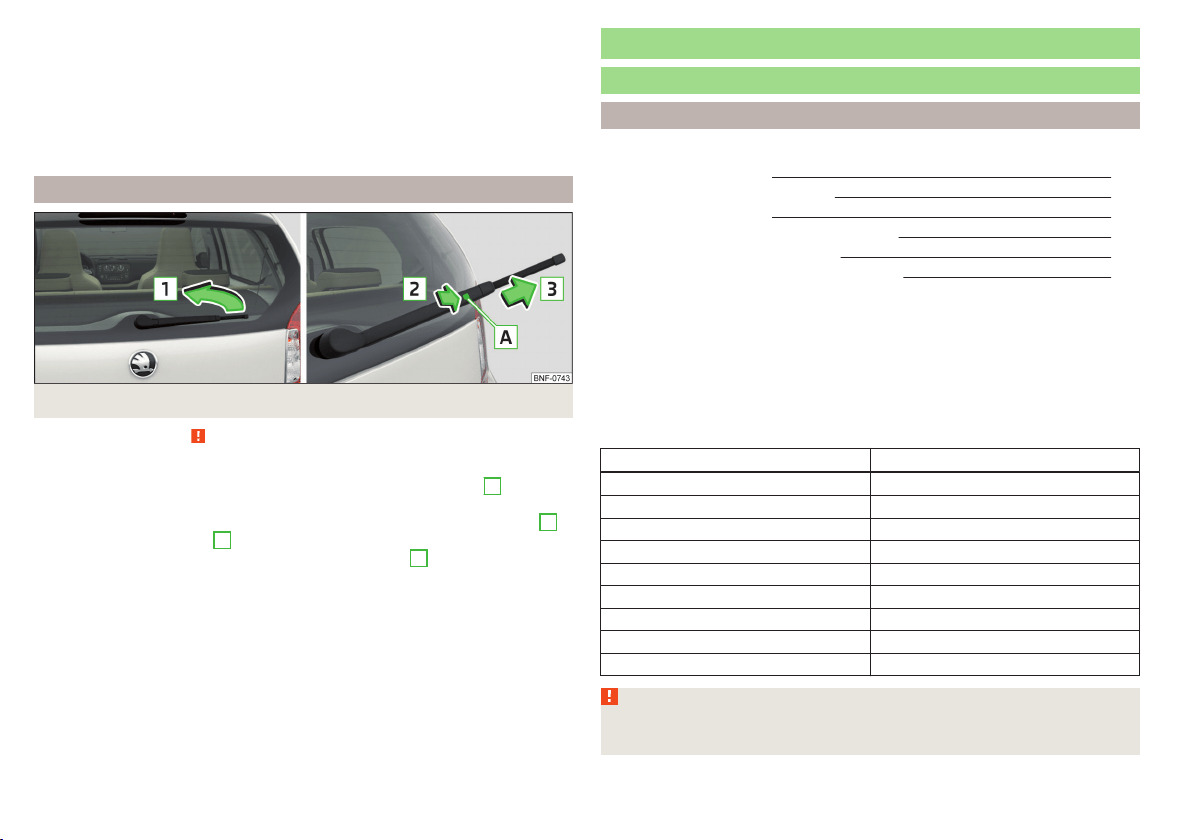
Removing the wiper blade
›
Lift the wiper arm from the windscreen in the direction of arrow
1
» Fig. 133.
›
Tilt the wiper blade as far as it will go in the same direction.
›
Hold the upper part of the wiper arm and press the securing mechanism
A
in the direction of arrow
2
.
›
Remove the wiper blade in the direction of the arrow
3
.
Attaching the wiper blade
›
Push the windscreen wiper blade until the stop and it locks in place.
›
Check that the wiper blade is correctly attached.
›
Fold the wiper arm back to the windscreen.
Fuses and light bulbs
Fuses
Introduction
This chapter contains information on the following subjects:
Fuses in the dash panel 135
Fuse allocation in the dash panel 135
Fuses in the dash panel 136
Assignment of the fuses in the dash panel 137
Fuses in the engine compartment 137
Fuse allocation in the engine compartment 137
Individual electrical circuits are protected by fuses.
Switch off the ignition and the corresponding power consuming device before
replacing a fuse.
Find out which fuse belongs to the component that is not operating
» page 135, Fuses in the dash panel, » page 137, Fuses in the engine com-
partment, or » page 136, Fuses in the dash panel.
Colour coding of fuses
Fuse colour Maximum amperage
purple 3
light brown 5
brown 7.5
red 10
blue 15
yellow 20
white 25
green 30
orange 40
WARNING
Always read and observe the warnings before completing any work in the
engine compartment » page 106.
134
Do-it-yourself
Loading ...
Loading ...
Loading ...