Loading ...
Loading ...
Loading ...
10
Typical Installation - Trolley
TYPICAL INSTALLATION
To prevent possible SERIOUS INJURY or DEATH:
• Header bracket MUST be RIGIDLY fastened to the structural
support on the header wall or ceiling, otherwise the door
might NOT reverse when required. DO NOT install the header
bracket over drywall.
• Concrete anchors MUST be used if mounting the header
bracket or 2x4 into masonry.
• NEVER try to loosen, move or adjust door, springs, cables,
pulleys, brackets, or their hardware, ALL of which are under
EXTREME tension.
• ALWAYS call an Authorized Service Technician if door binds,
sticks, or is out of balance.
1
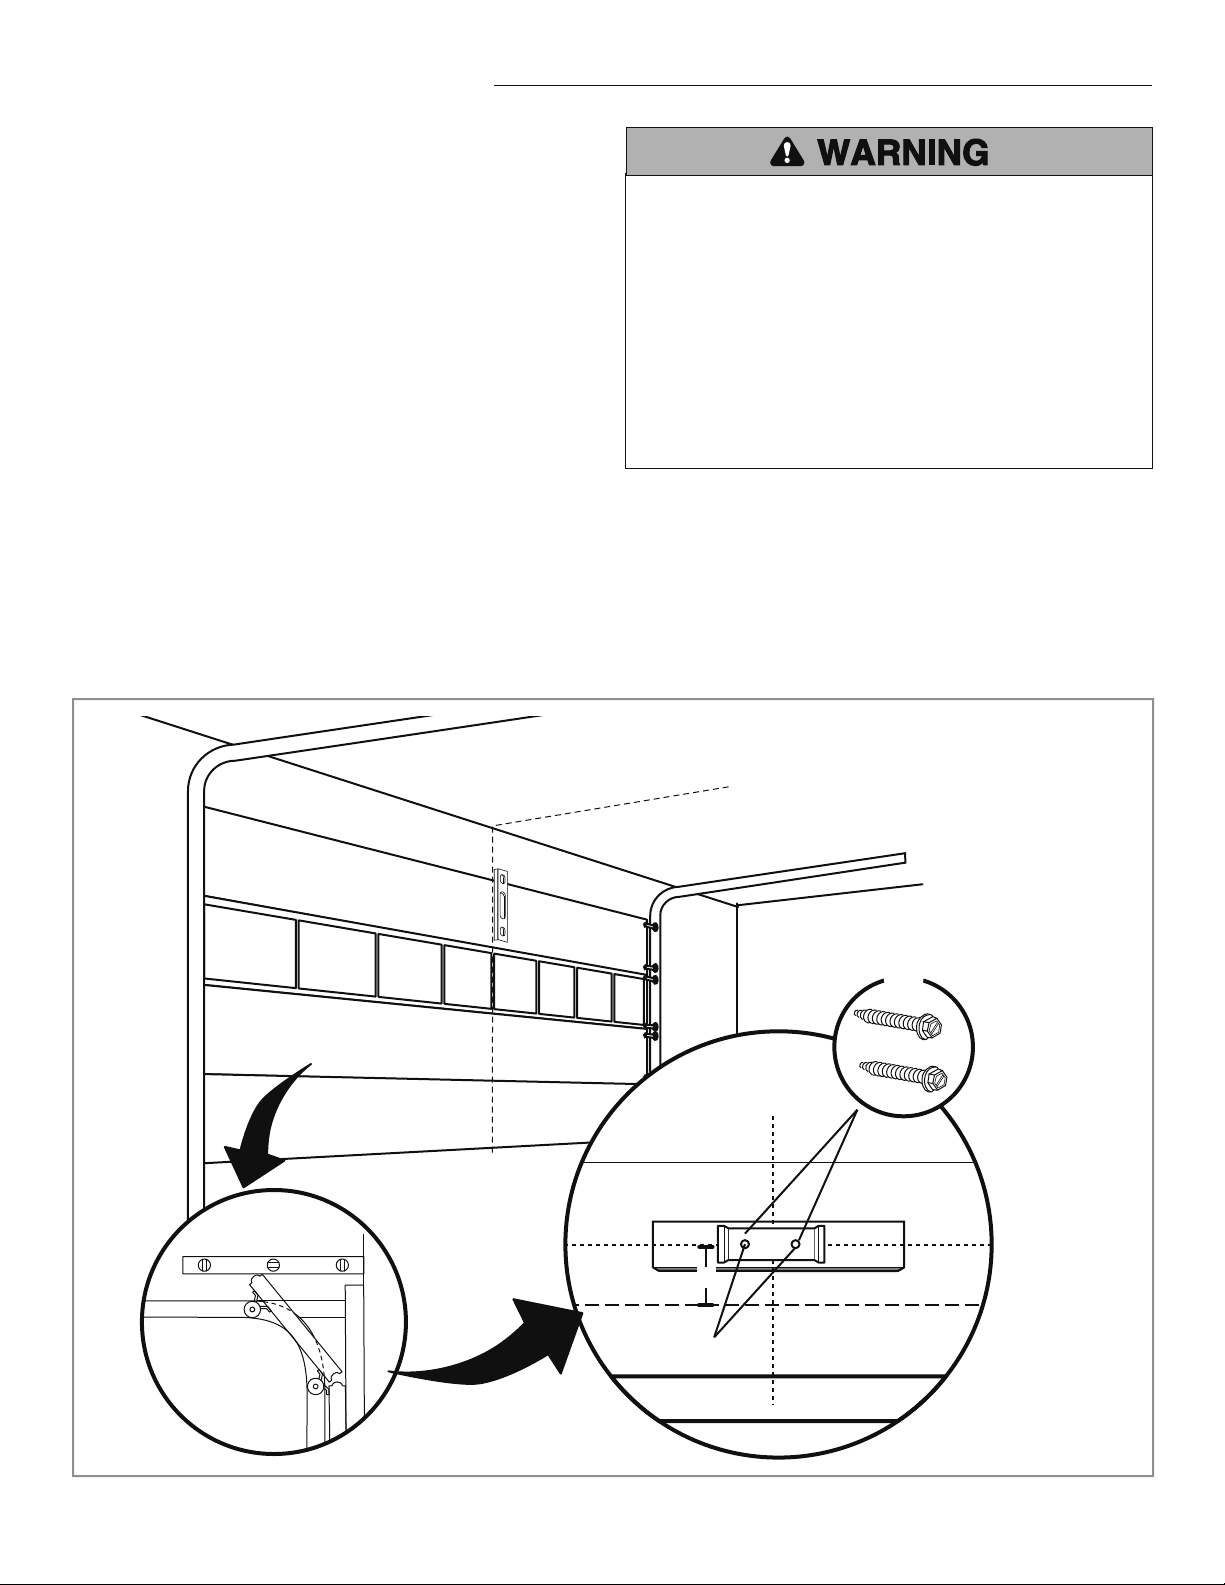
Close the door. Mark the center of the door with a vertical line,
extend the line onto the ceiling.
INSTALL THE HEADER BRACKET
2
Open the door to the highest point of travel mark 4 inches
(10.1 cm) above the highest point of travel.
1
2
4
3
4"
5
The trolley operator is generally mounted over the center of the
door. However, off center mounting may be required due to
interfering structures or location of the door stile / top section
support. Typically, the operator may be mounted up to 24 inches
(60.1 cm) off center on torsion spring doors. Extension springs
require center mounting.
3
4
Center the header bracket on the vertical center line and the
horizontal line.
Drill the pilot holes for the header bracket.
5
Fasten the header bracket with appropriate hardware
(not provided).
4" (10.1 cm)
Loading ...
Loading ...
Loading ...