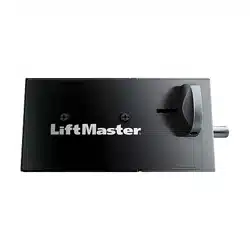
Documents: Go to download!
User Manual
- User Manual - (English, French, Spanish)
- LiftMaster 841LM Automatic Garage Door Lock Brochure - (English)
- Before you begin
- Installation
- Operation
- Troubleshooting
- Warranty
Table of contents
USER MANUAL AUTOMATIC GARAGE DOOR LOCK
Before you begin
For use on Residential Garages with an Entry Door Only. Install On Sectional Doors with Torsion Assemblies Only. This product is intended for installation only by trained garage door technicians. Please read and save these instructions with the instruction manual of the garage door opener. Up to two locks can be installed per compatible garage door opener.
This automatic garage door lock is compatible with LiftMaster® garage door openers with a Security Shield.
Carton Inventory: Automatic Garage Door Lock, Template, 1/4"-20x1/2" Screws (2), 33' (10 m) Wire
Tools needed: Stepladder, Drill, 5/16" and 3/4" Drill Bits, Tape Measure, Screwdriver
UNPLUG THE GARAGE DOOR OPENER AND DISCONNECT THE BATTERY (IF APPLICABLE) BEFORE PROCEEDING. REMOVE ANY MANUAL LOCKS FROM THE GARAGE DOOR. FOR WALL MOUNT GARAGE DOOR OPENERS CONSULT THE GARAGE DOOR OPENER MANUAL FOR INSTALLATION STEPS
Installation
- Attach template (provided) to track.
TIP: The second roller from the bottom is ideal for most installations. - Drill holes as marked on template.
- Fasten automatic garage door lock to the outside of the garage door track with the 1/4"-20x1/2" screws.
- Run wire (provided) from automatic garage door lock to garage door opener. Use insulated staples (not provided) to secure wire in several places.
NOTE: If you are going to cut the wire you will need to reconnect wire using a wire nut. Do not tape the ends together. The lock is polarized and requires you reconnect black to black and white to white wires. - Plug the connector into one of the lock terminals on the garage door opener.
NOTE: To install a second automatic garage door lock, repeat installation steps on the opposite side of the garage door
WARNING! To prevent possible SERIOUS INJURY or DEATH from a closing gate or door:
- Automatic Garage Door Lock MUST be installed per the owner’s manual.
- Be sure to DISCONNECT ALL ELECTRIC AND BATTERY POWER to the garage door opener BEFORE installing the garage door lock.
- The door MUST be in the fully opened or closed position BEFORE installing the garage door lock.
- Be sure to DISASSEMBLE and REMOVE any manual door locks that might be currently installed.
Operation
Typical Operation
- With the garage door fully closed, the automatic garage door lock bolt should be protruding through the track.
- Open the garage door. The automatic garage door lock should retract before the garage door begins to move.
- Close the garage door. When the garage door reaches the fully closed position, the automatic garage door lock should automatically activate to secure the door.
Manual Operation
- The garage door should be fully closed, if possible.
- Disengage the automatic garage door lock by sliding the manual release to the open position.
- Pull the emergency release handle down and back (toward the garage door opener). The garage door can then be raised and lowered manually as necessary.
- To reconnect the trolley, pull the emergency release handle straight down. The trolley will reconnect on the next UP or DOWN operation.
NOTE: The automatic garage door lock will re-engage when garage door opener operation resumes.
Troubleshooting
The garage door doesn’t open completely:
- Ensure any manual locks are removed from the garage door.
- Is something obstructing the garage door? Is the automatic garage door lock in the locked position? Is the garage door out of balance? Are the springs broken? Remove the obstruction or repair the garage door.
Automatic garage door lock does not activate when garage door opens or closes:
- Ensure your garage door opener is compatible with the automatic garage door lock. All compatible garage door openers have a Security Shield icon on the outside cover.
- Ensure the automatic garage door lock connector is plugged into the logic board correctly.
- The wires for the automatic garage door lock may be shorted. Inspect the door lock wire at all staple points and connection points and replace wire as needed.
- Move lock door connector to secondary terminal.
- Call a LiftMaster Dealer for replacement automatic garage door lock. If the problem persists, you may need to replace the garage door opener logic board or transformer.
The garage door opener won’t operate due to power failure:
- In battery backup mode, the automatic garage door lock will unlock when the garage door is opened, and will remain disabled until power is restored.
- If the garage door opener battery charge is depleted, use the Manual Operation process. When power is restored, follow trolley re-engage steps. The automatic garage door lock will work normally.
If the above recommendations do not fix the problem please refer to your original garage door opener manual for additional troubleshooting information.
Warranty
ONE YEAR LIMITED WARRANTY
LiftMaster warrants to the first consumer purchaser of this product that it is free from defect in materials and/or workmanship for a period of 1 year from the date of purchase.
See other models: G892LT H GSD CPS-UN4 8355W
