Owner's Guide Tools - Home Improvement
Overview
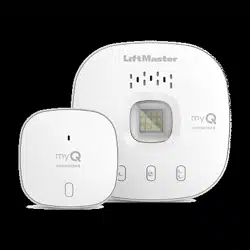
What’s in the Box
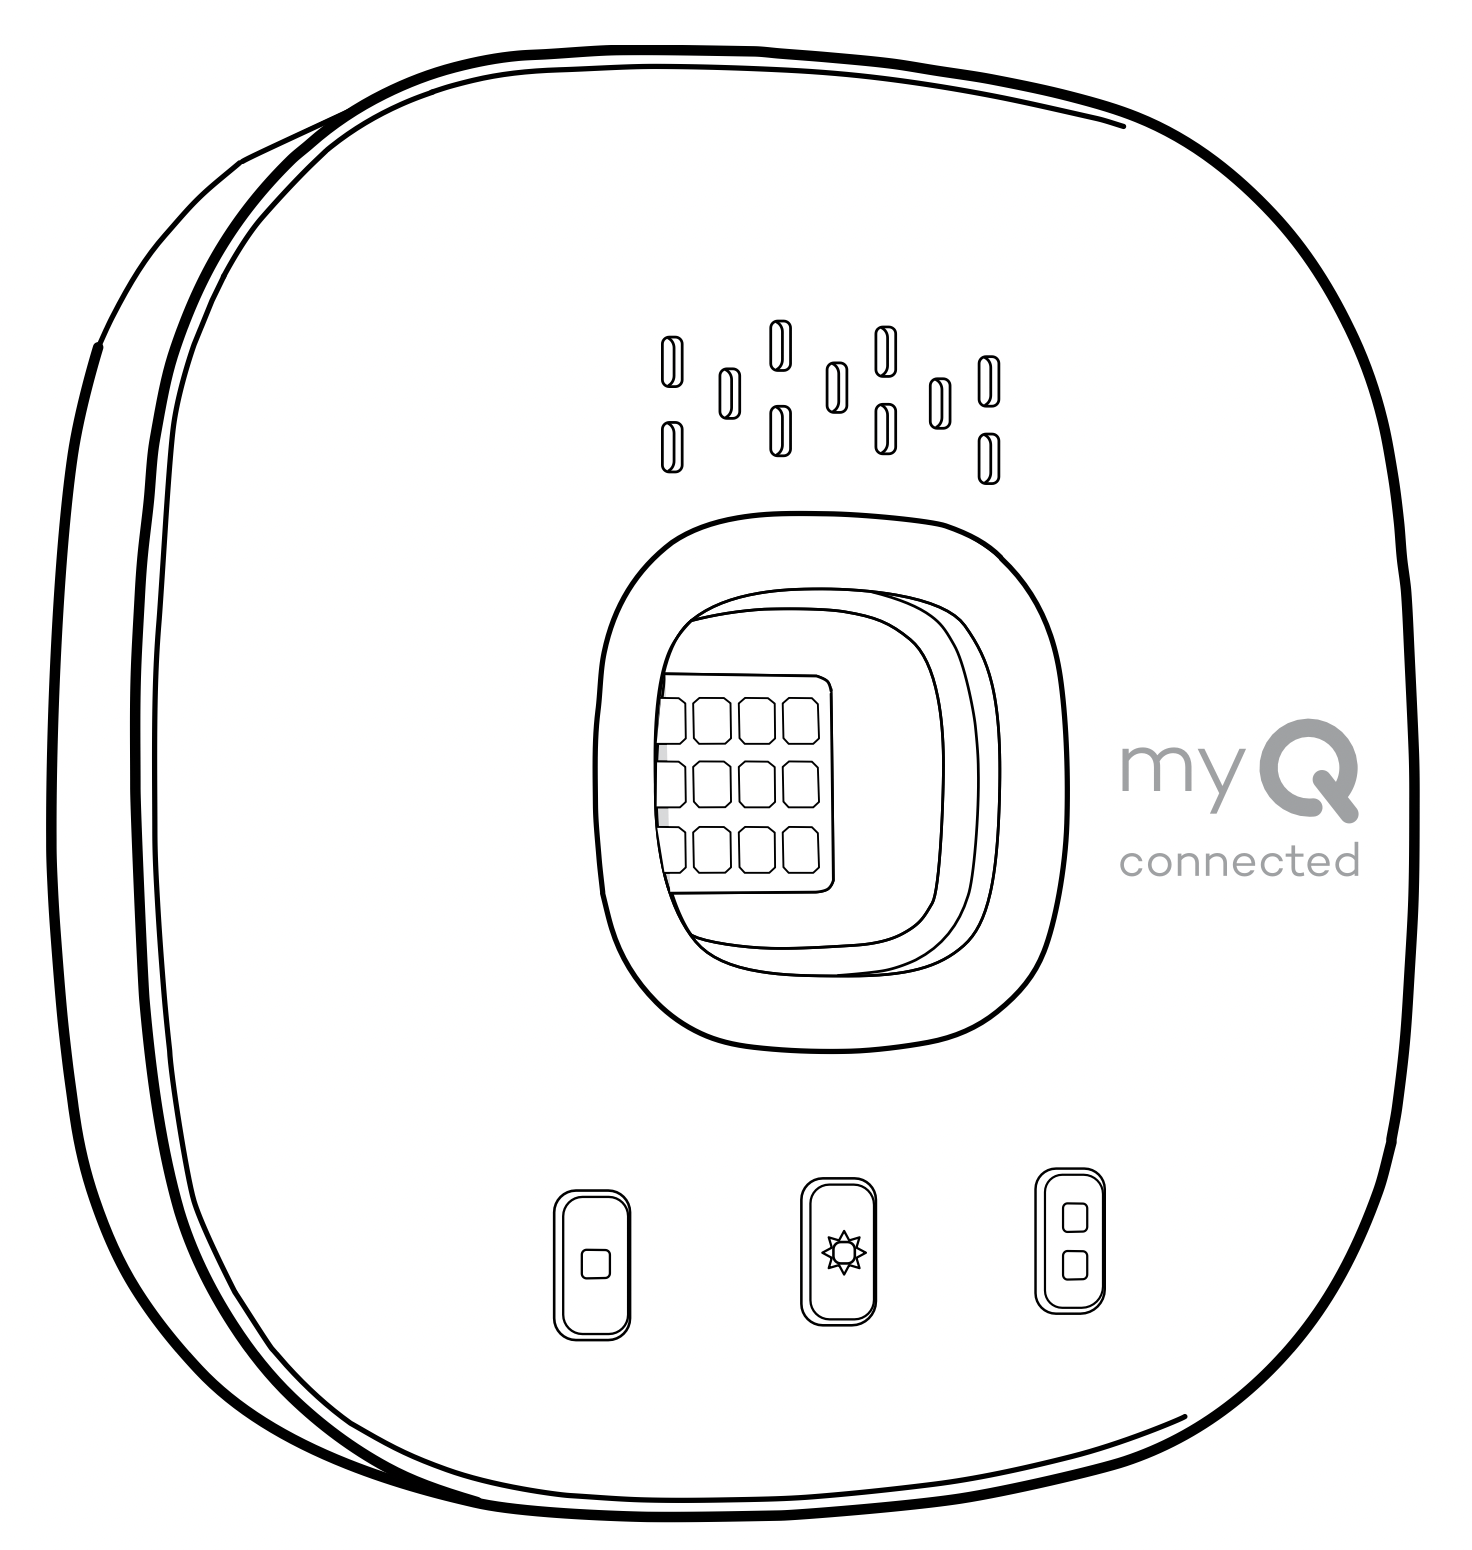
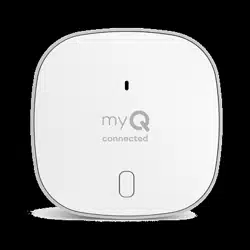
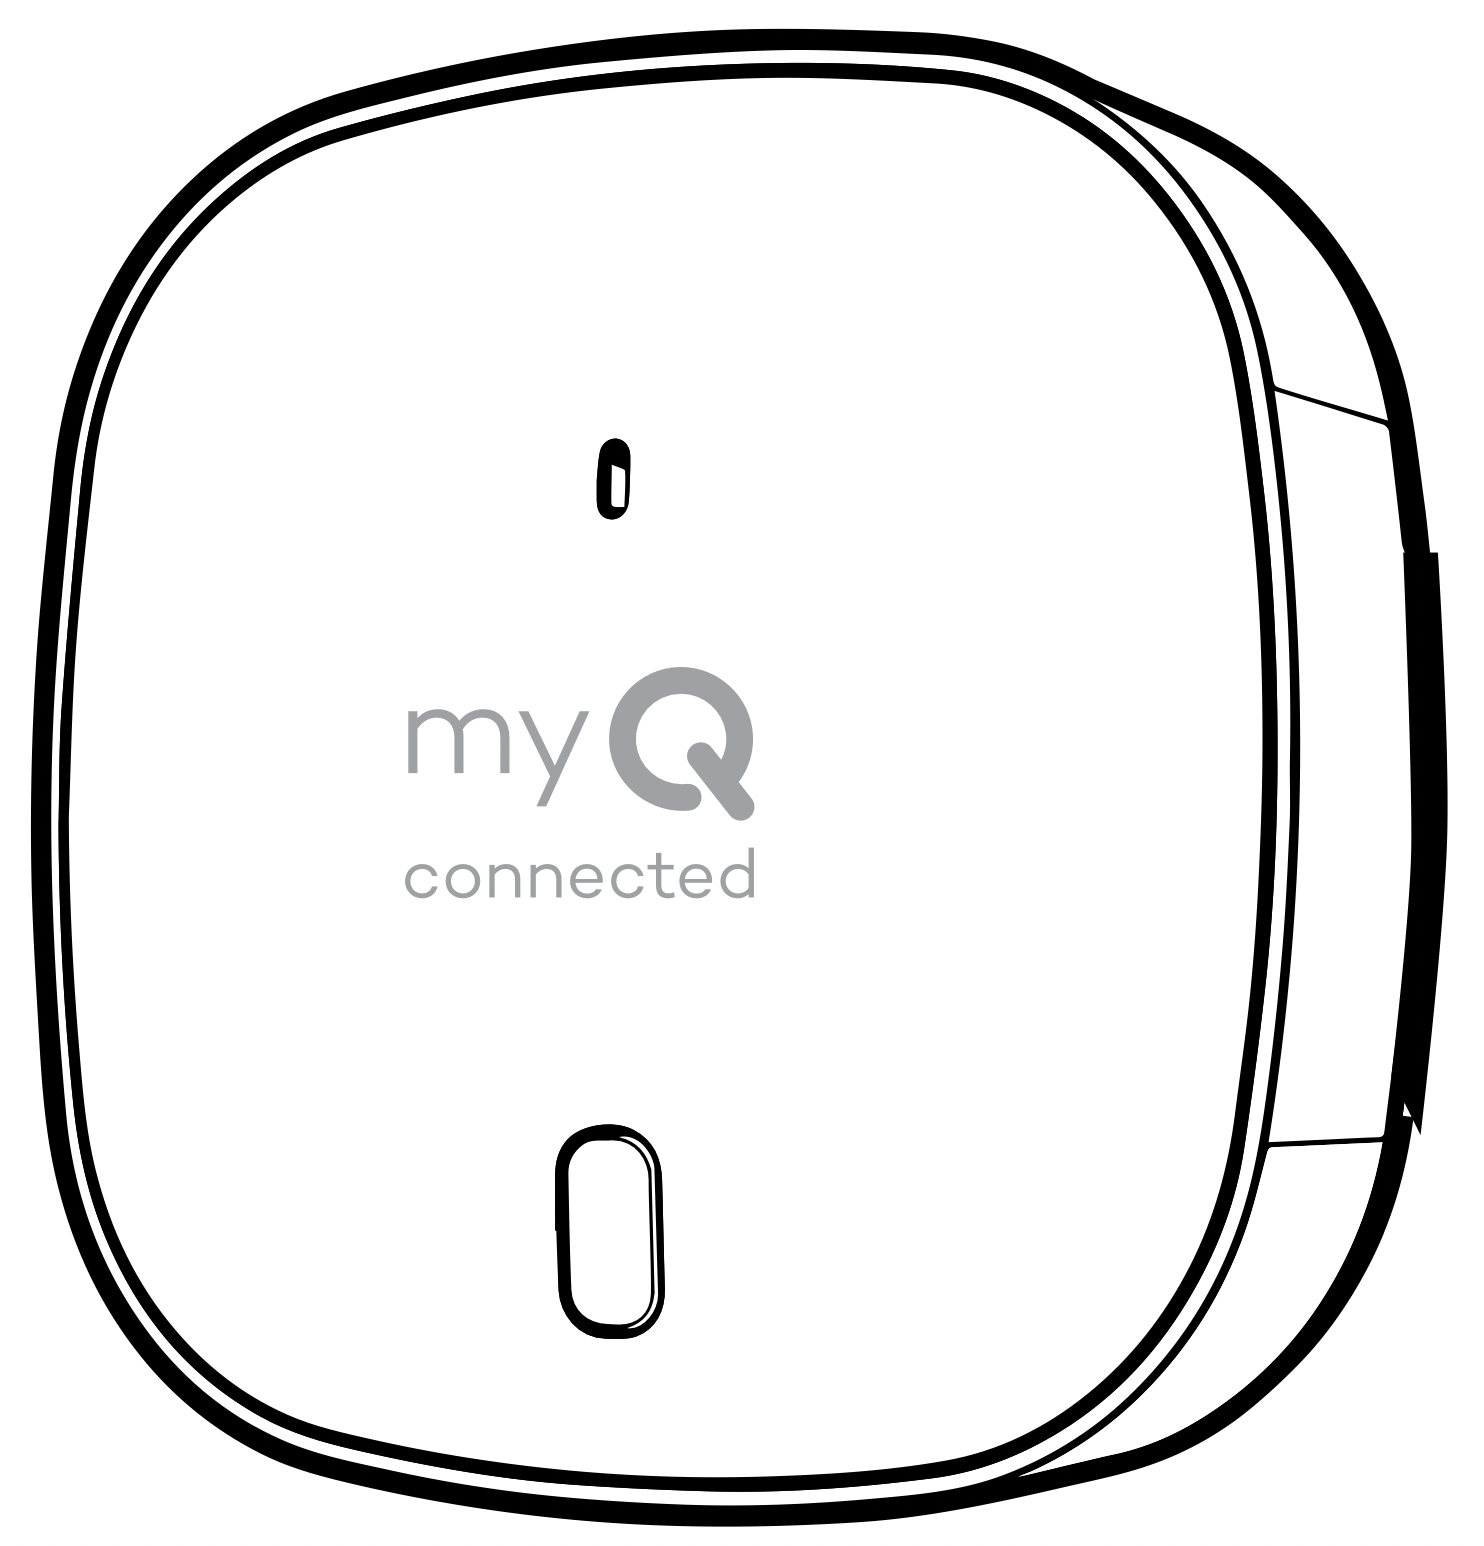
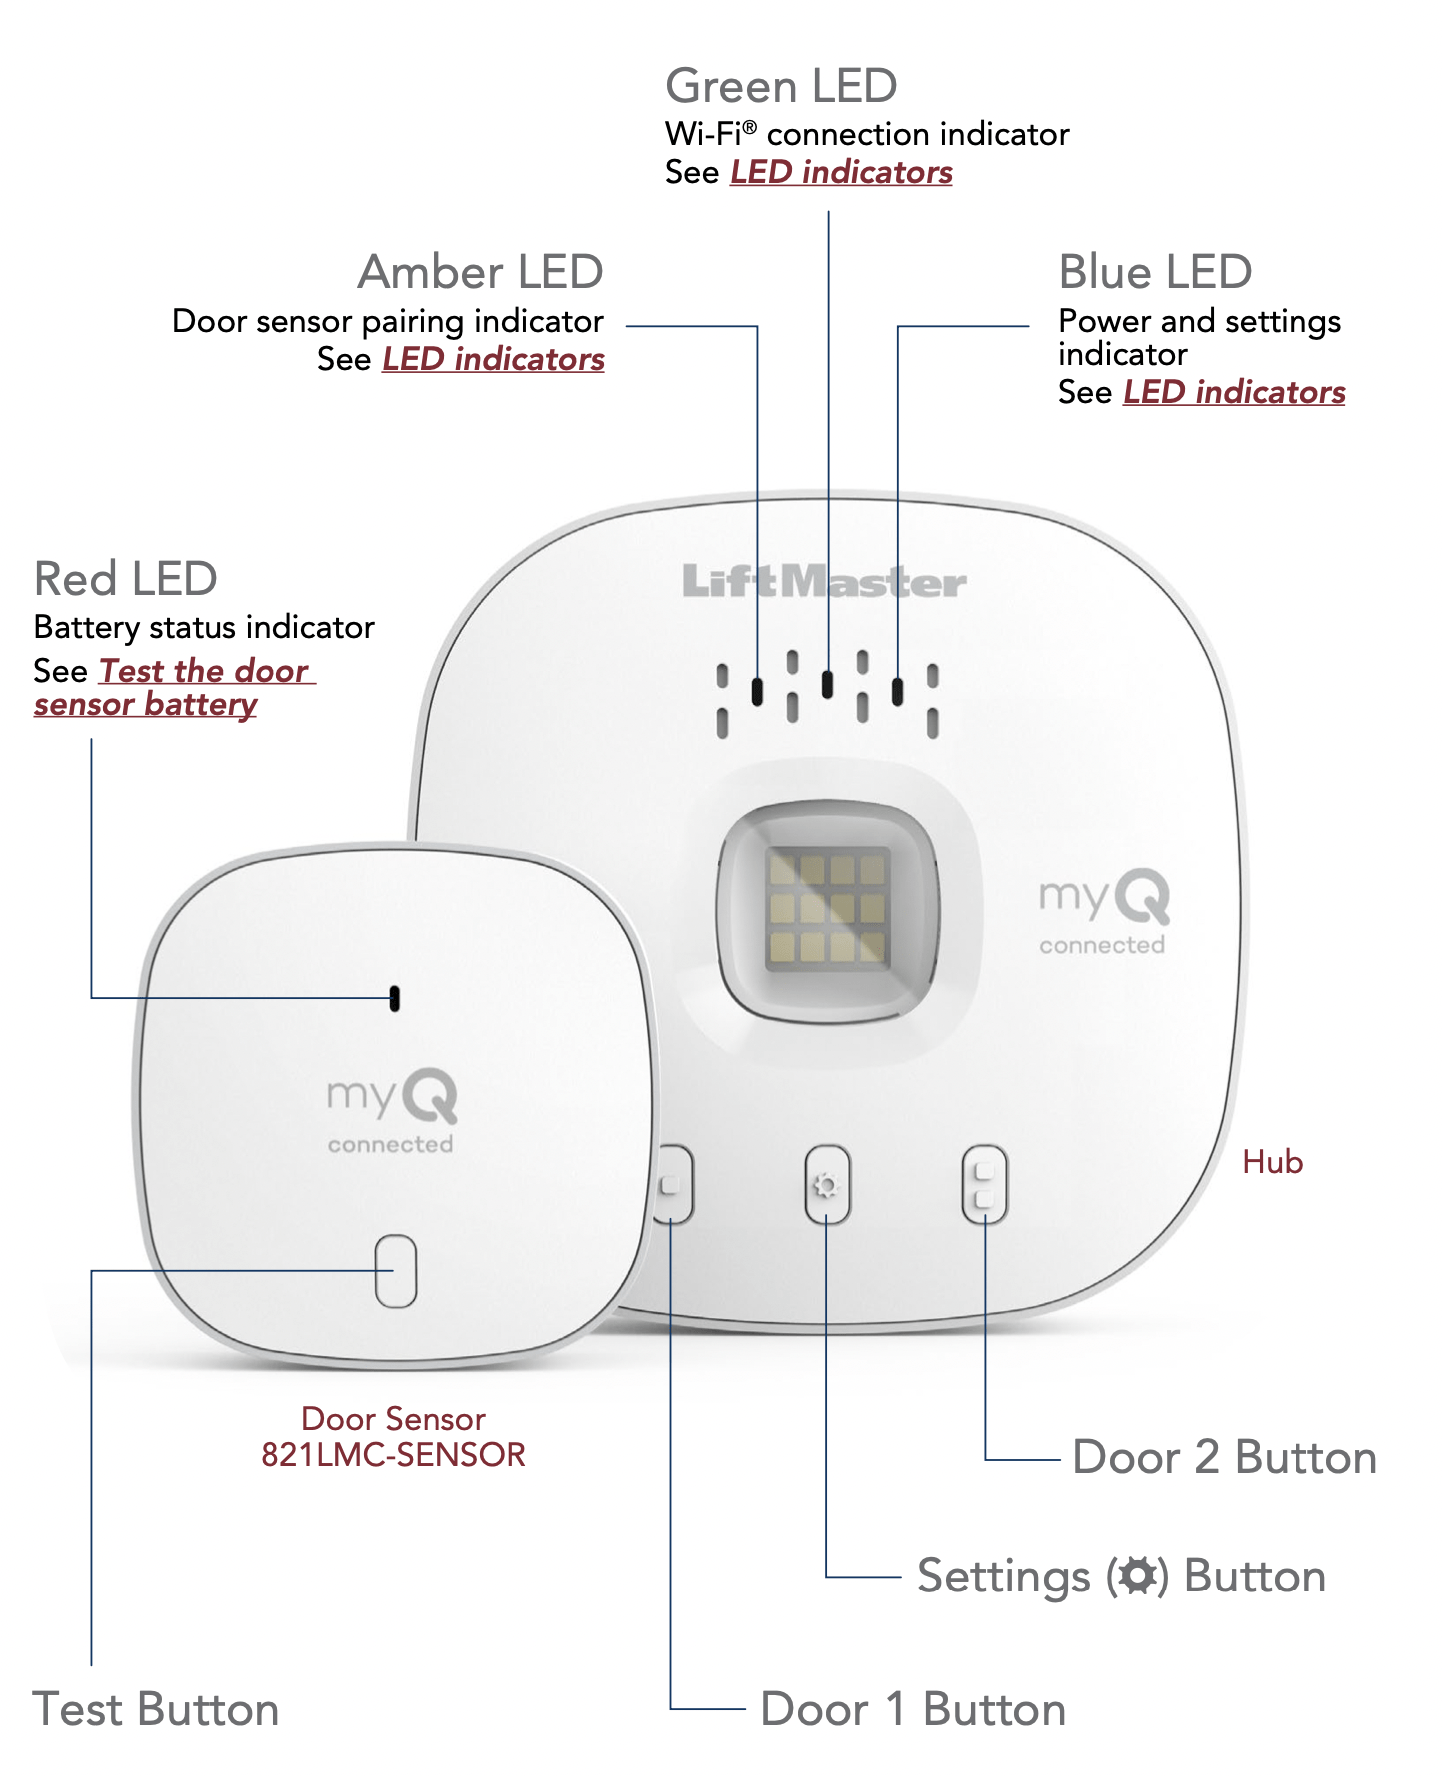
Hub
Hook and Loop Adhesive Strips for Door Sensor
Screws for Door Sensor
Door Sensor 821LMC-SENSOR
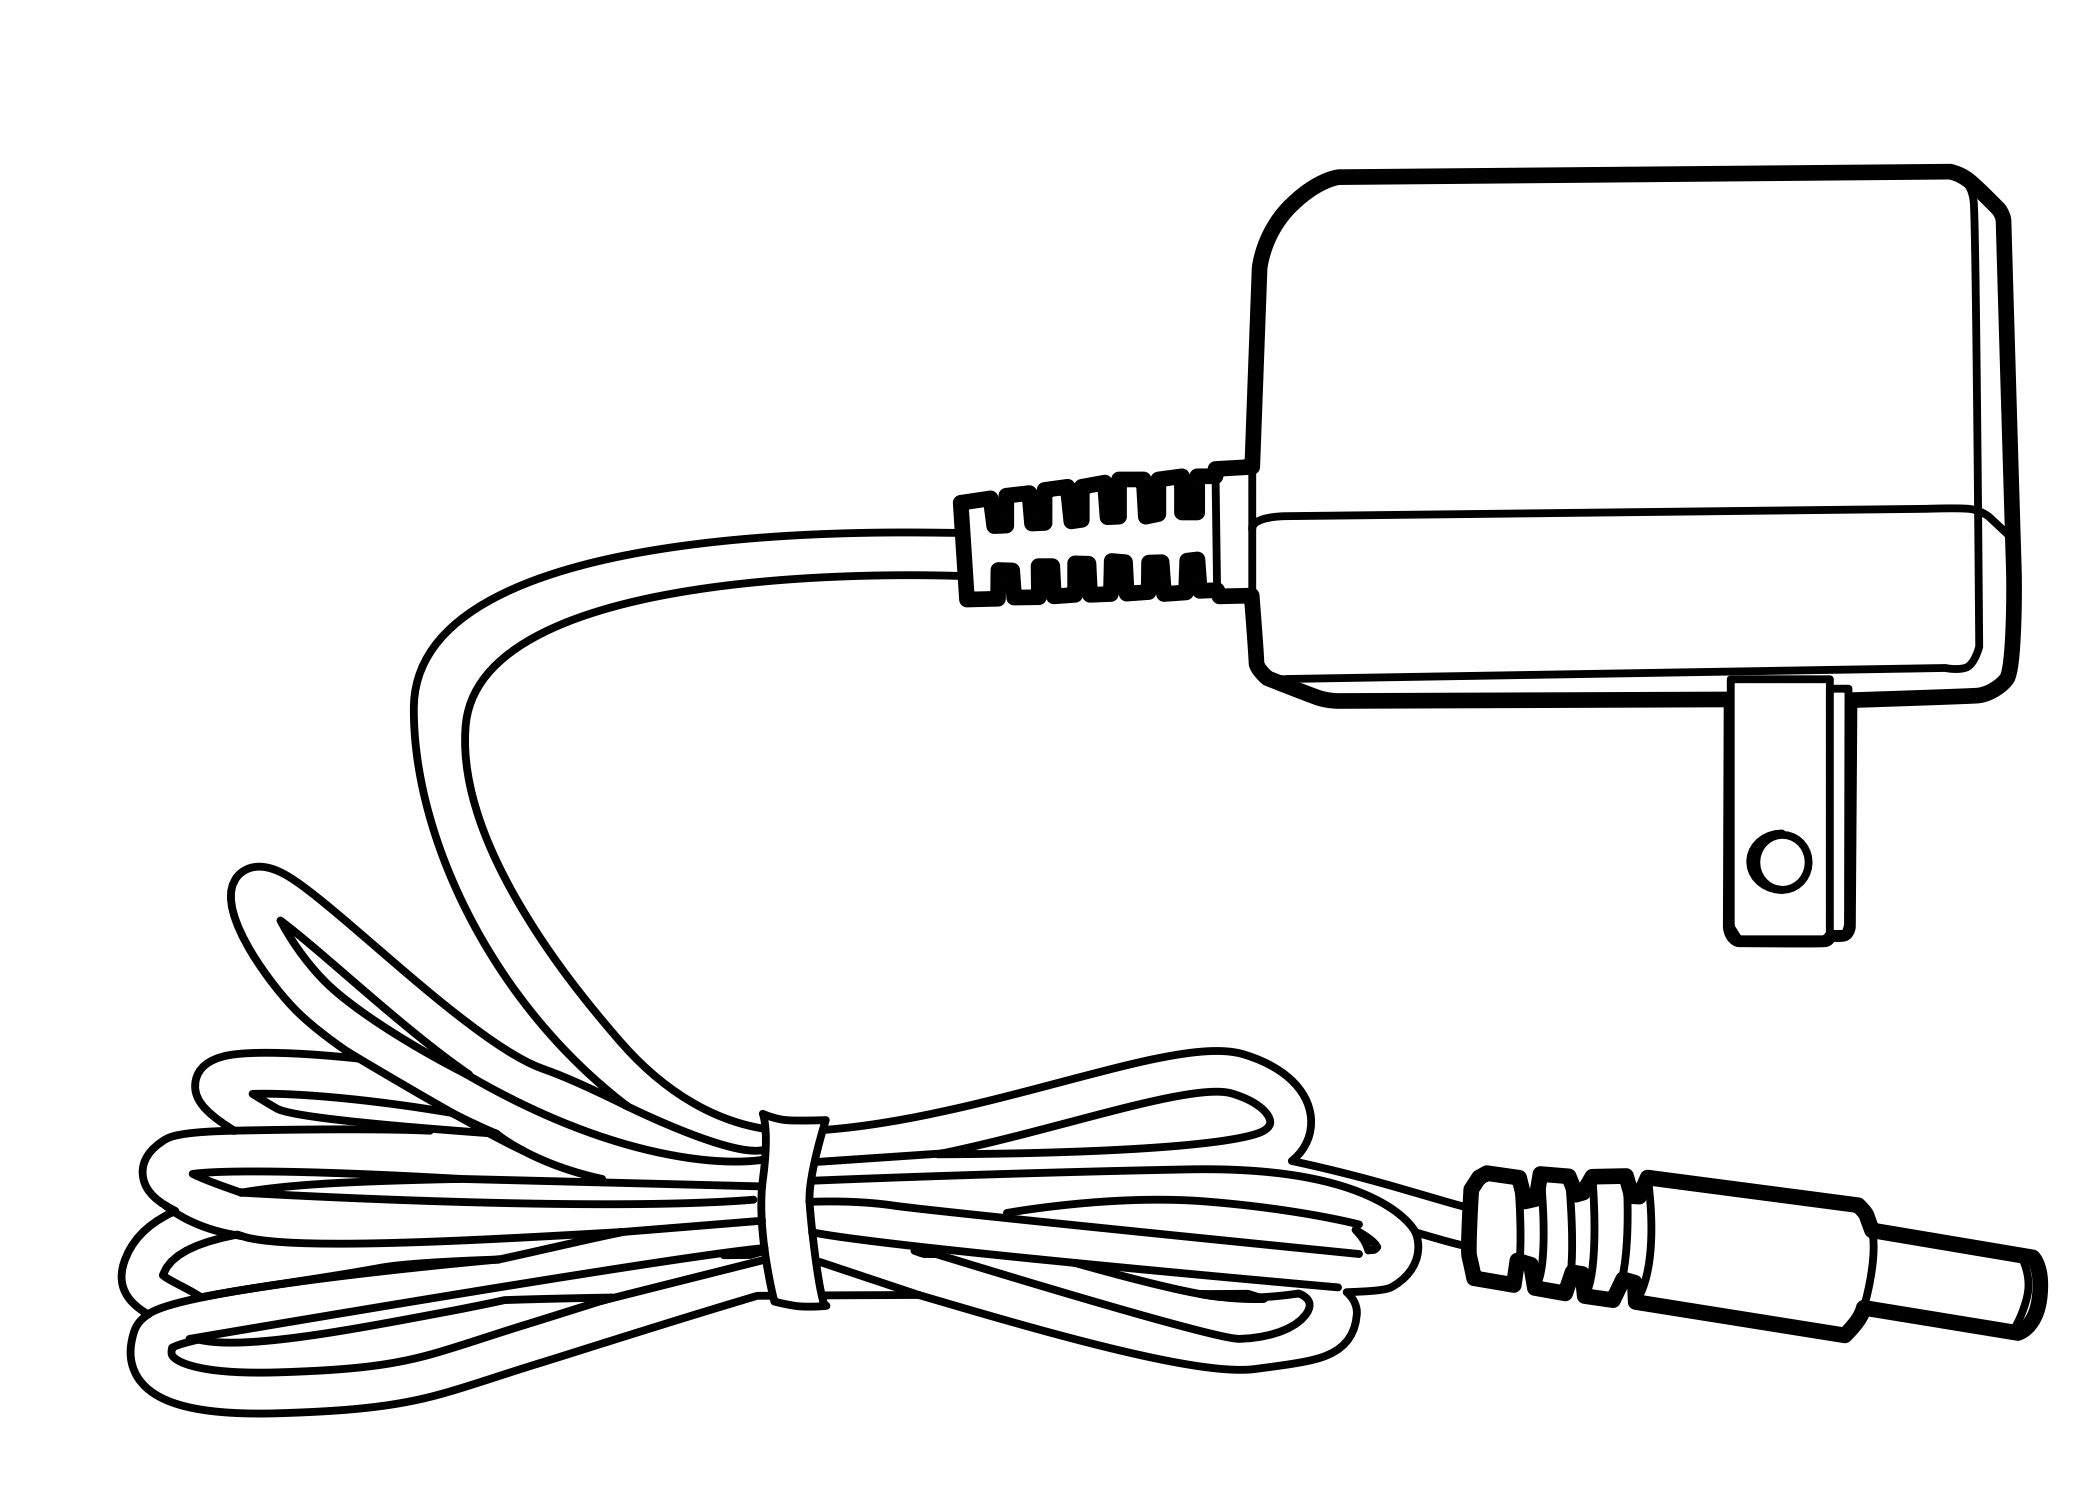
Hub Power Adapter
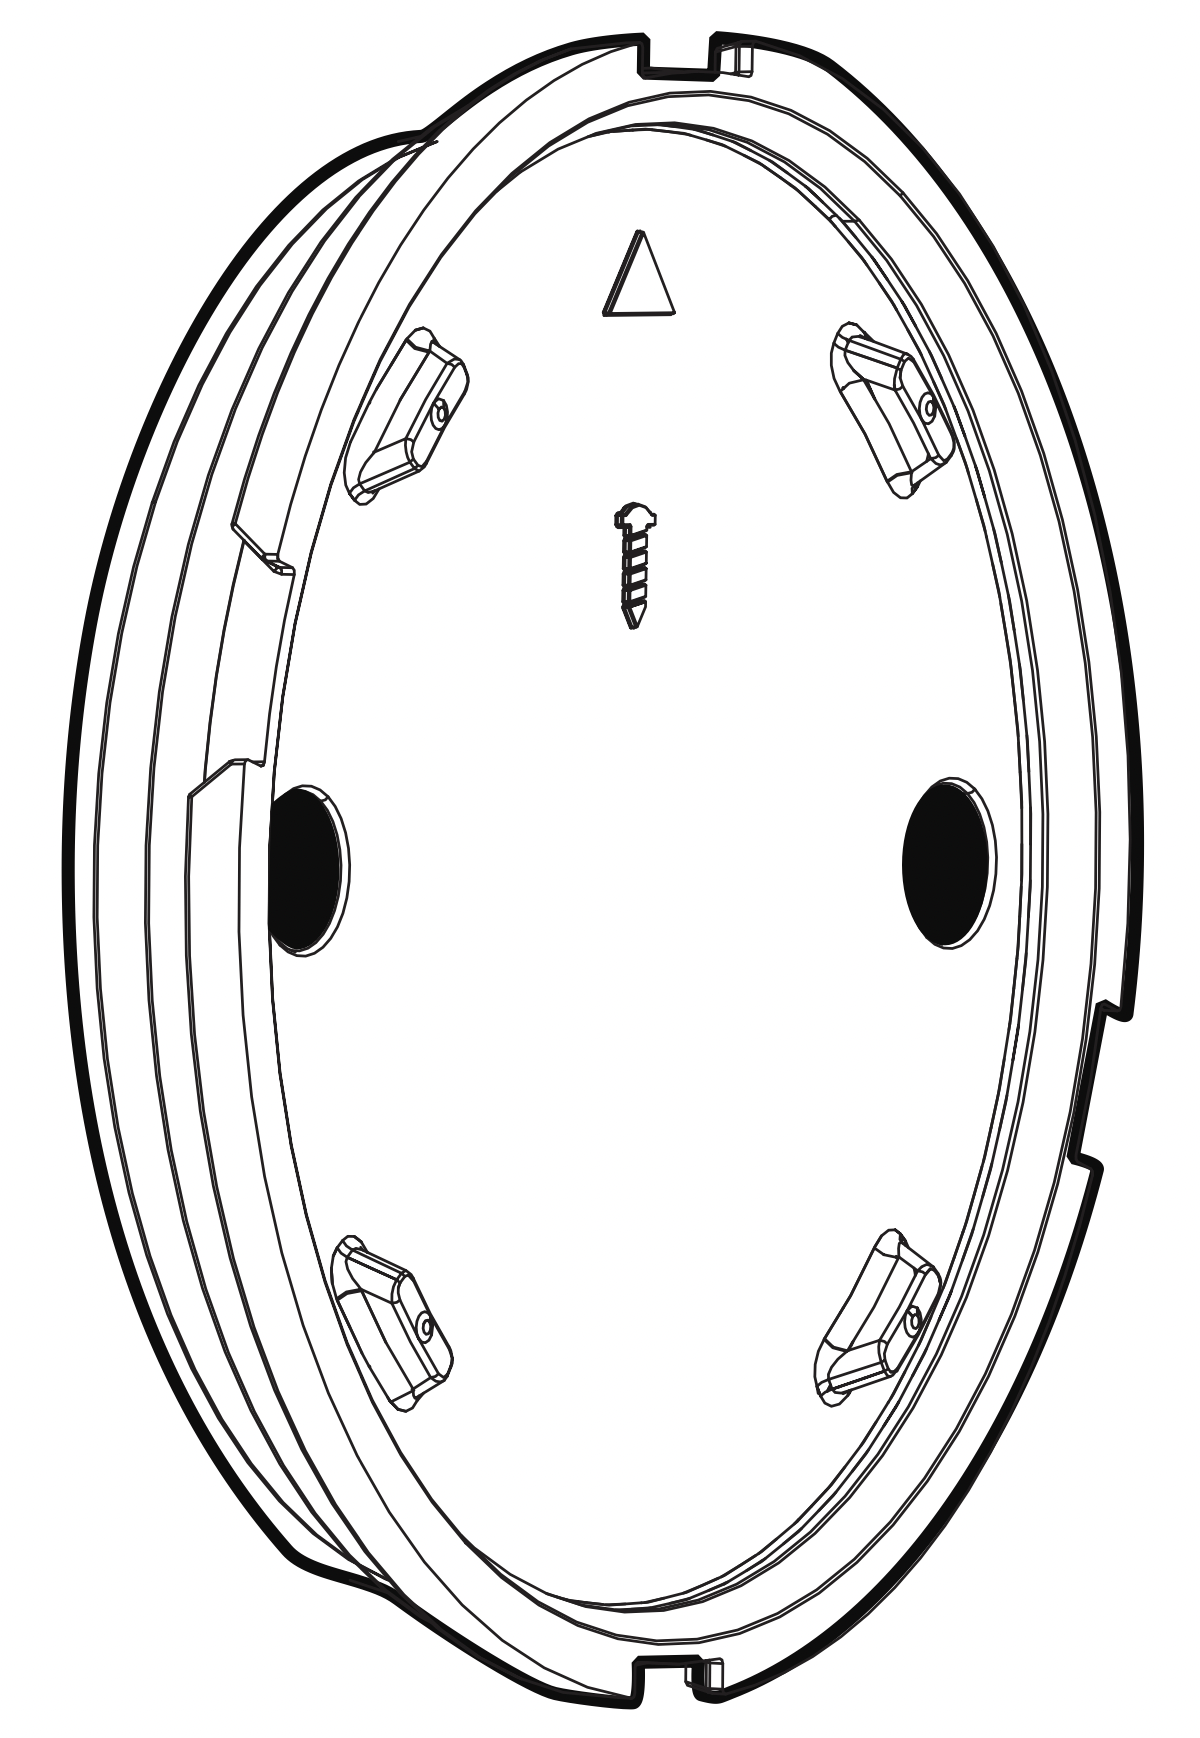
Hub Mounting Plate
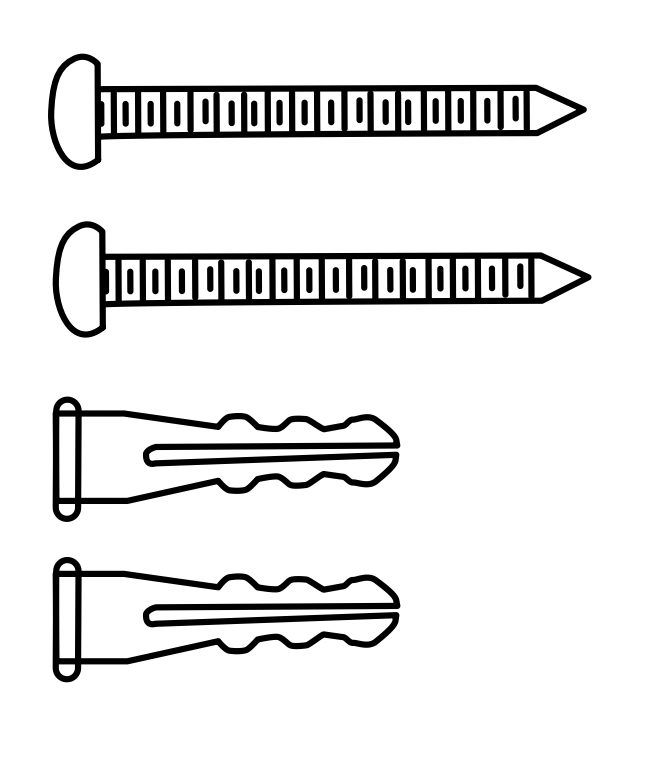
Anchors and Screws for Hub
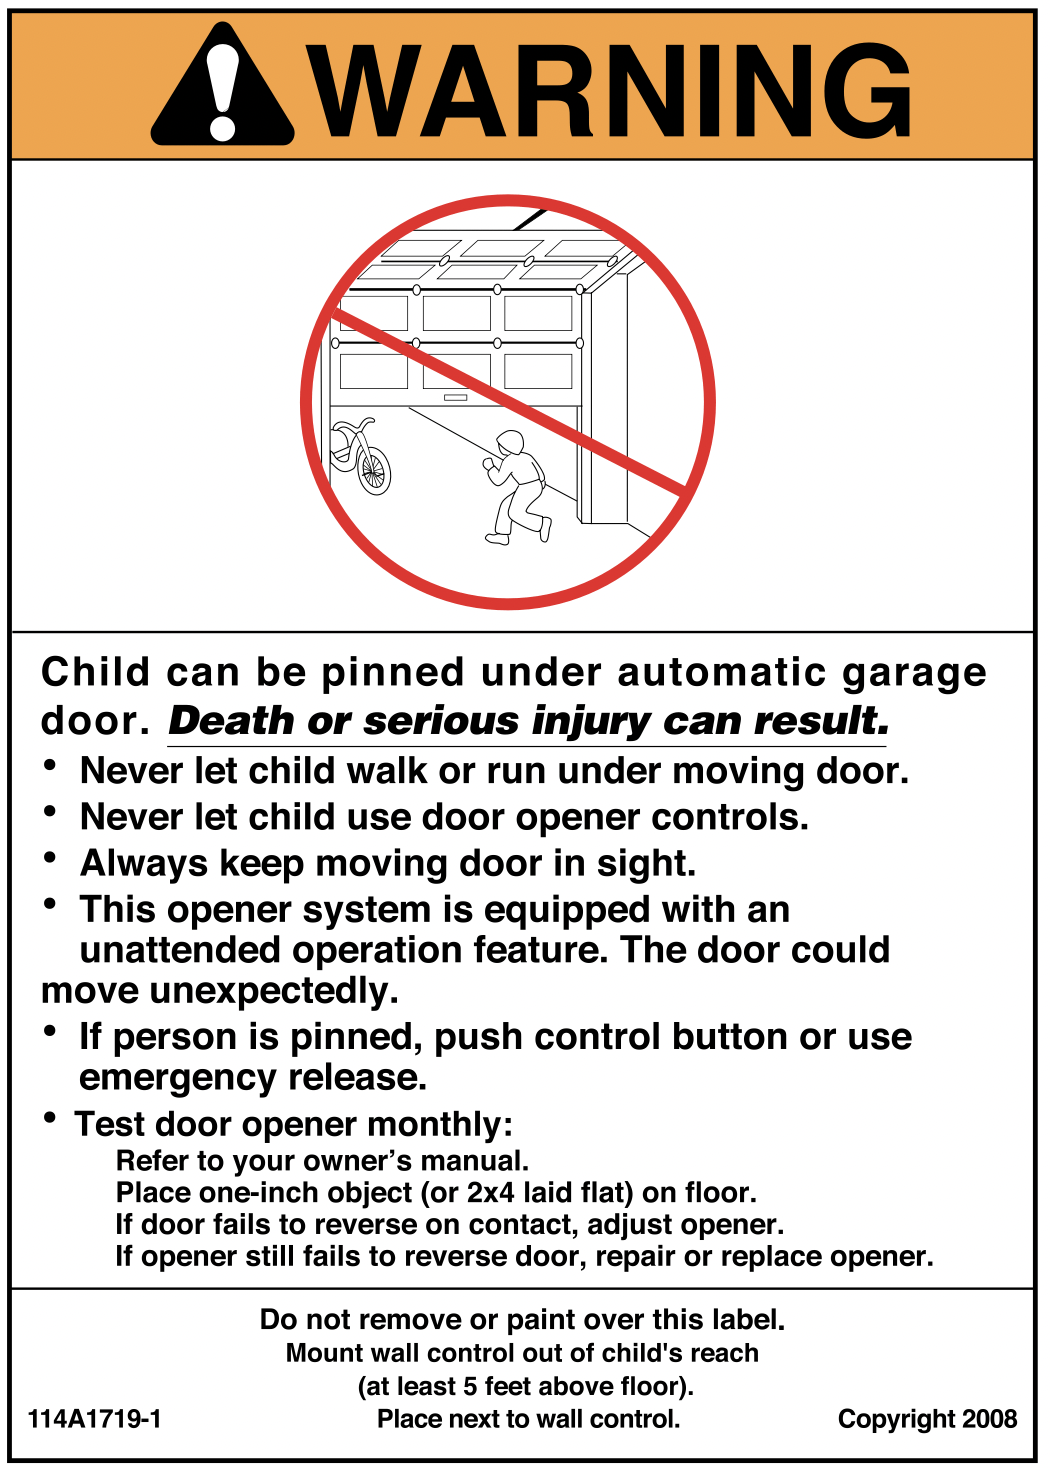
Warning Placard
Specifications
- Smart Garage™ Control can control up to 2 garage door openers (requires a second sensor, sold separately, see Accessories and Parts.)
- Smart Garage Control can control up to 16 myQ® accessories.
- Operating temperature: -4° to 149° F (-20° to 65° C).
- For use with sectional garage doors ONLY.
- The garage door MUST have safety sensors installed.
- Smart Garage Control is NOT compatible with gate operators.
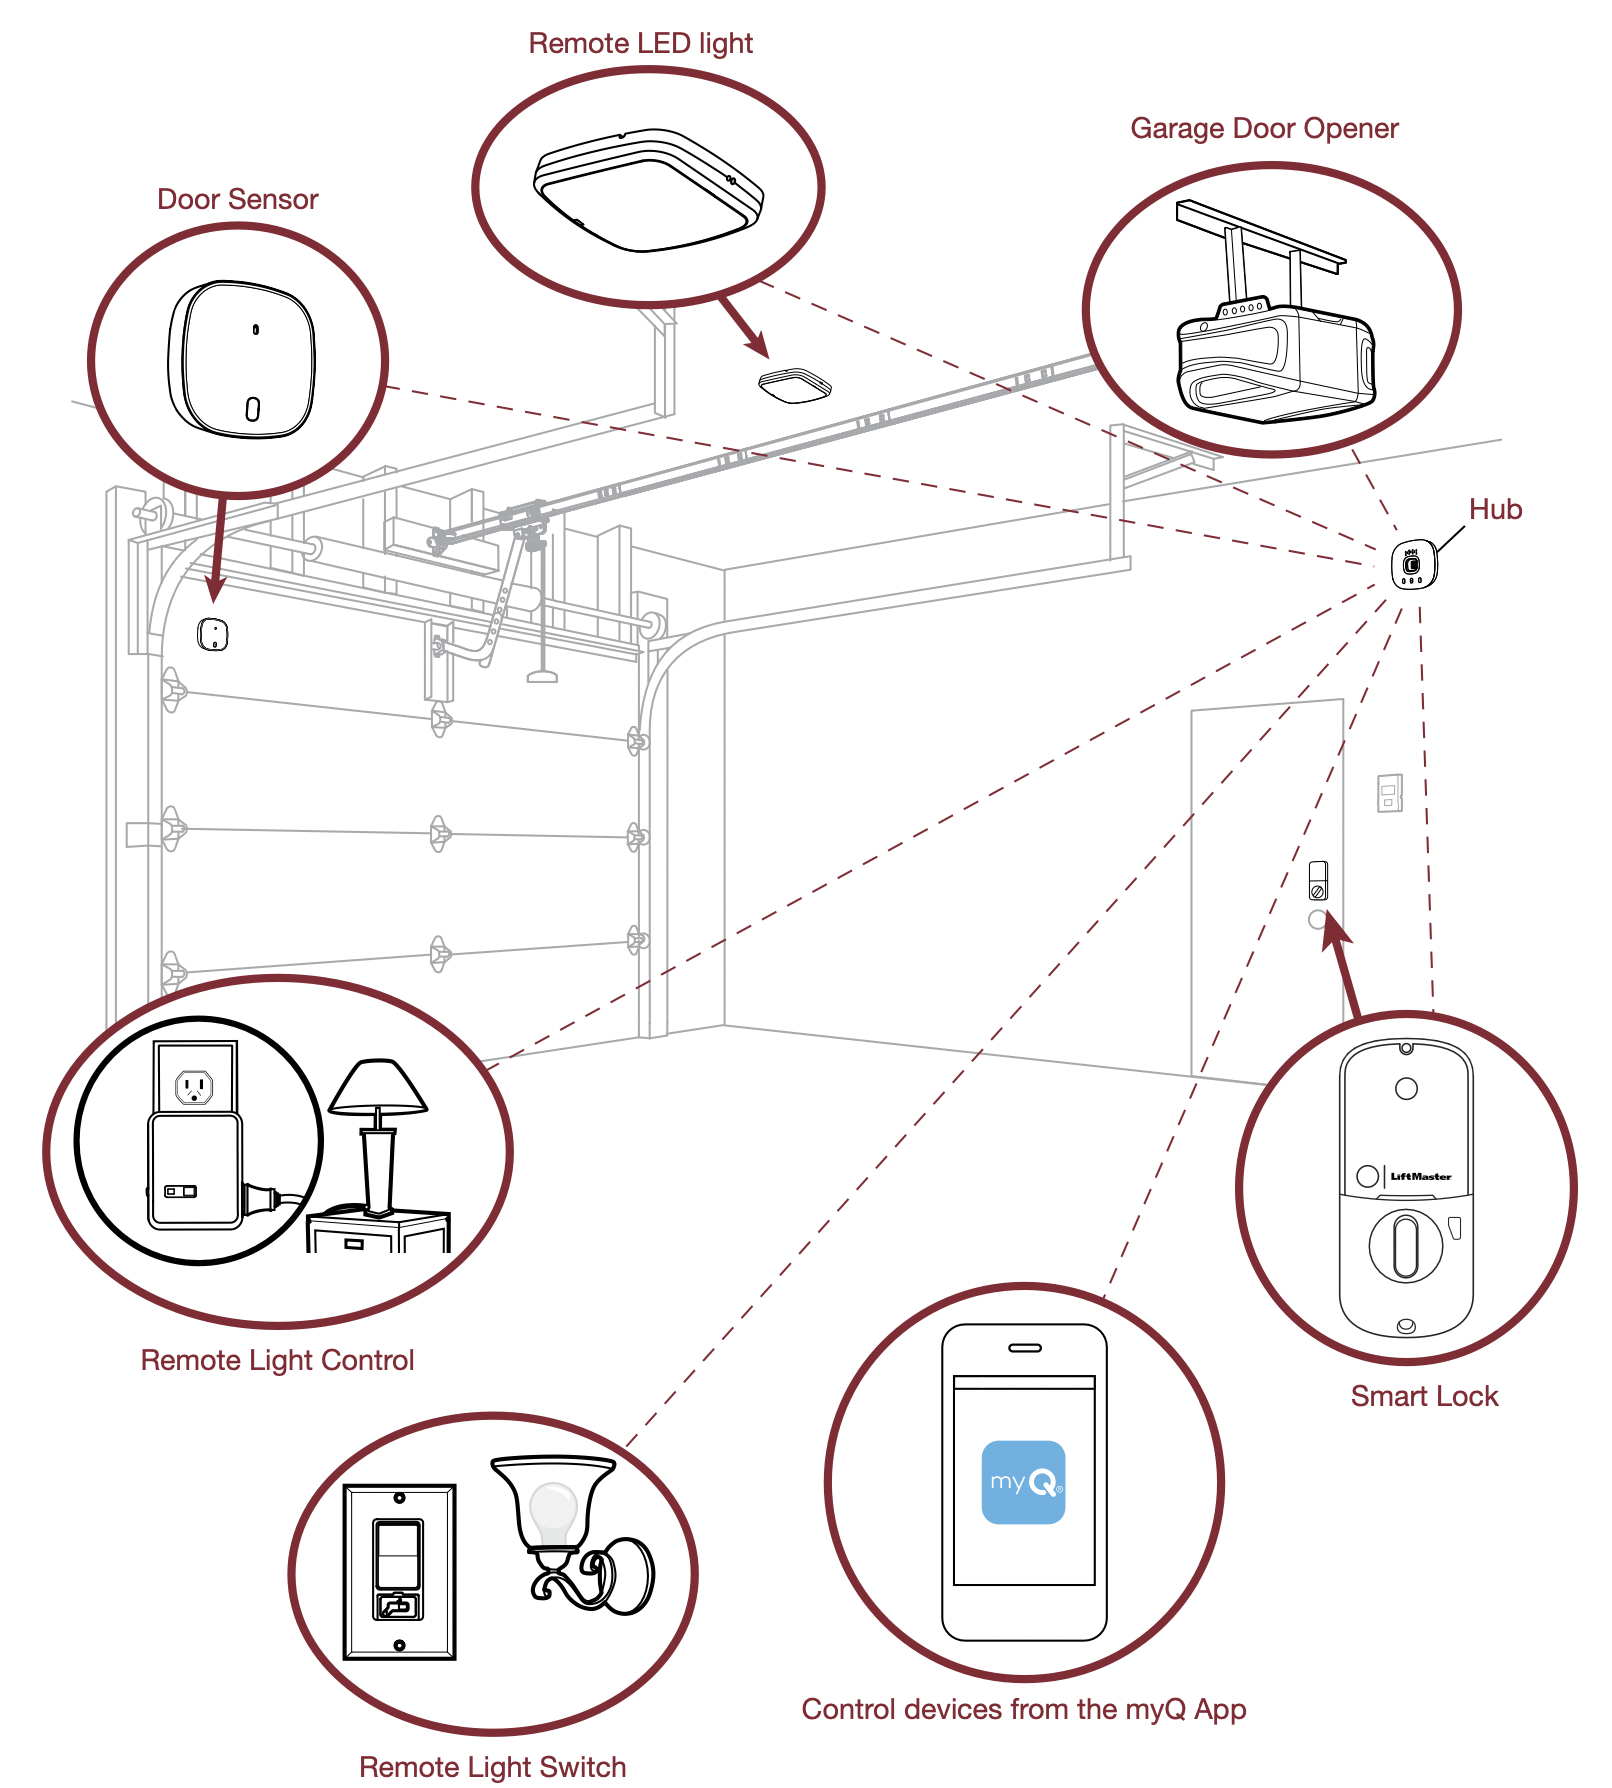
Get to Know your Smart Garage Control
Smart Garage Control lets you control up to 2 garage door openers, 1 Yale® | LiftMaster® Lock and 16 devices from the myQ App.
See Accessories and Parts.
Buttons and LEDs
Set Up Your Smart Garage Control
What You Need
- Access to your compatible garage door opener, check opener compatibility by manufacturer
- A strong Wi-Fi signal in the garage, see Check Your Wi-Fi Signal
- Your Wi-Fi network password
- A ladder
- A drill with 5/32" bit
- A Phillips screwdriver
- Bluetooth enabled on your mobile device
Connect Your Smart Garage Control
1. Download the myQ App.

If you have already installed the app, make sure you have the latest version to optimize your myQ experience.
2. Set up your account and log in.
3. Tap (+) to add your Smart Garage Control.
The app will guide you through installing and connecting your Smart Garage Control and show you how to:
- Pair the Door Sensor to the Hub.
- Mount the Door Sensor.
- Pair the hub to your garage door opener.
- Mount the Hub.
Congratulations! Installation of your Smart Garage Control is now complete.
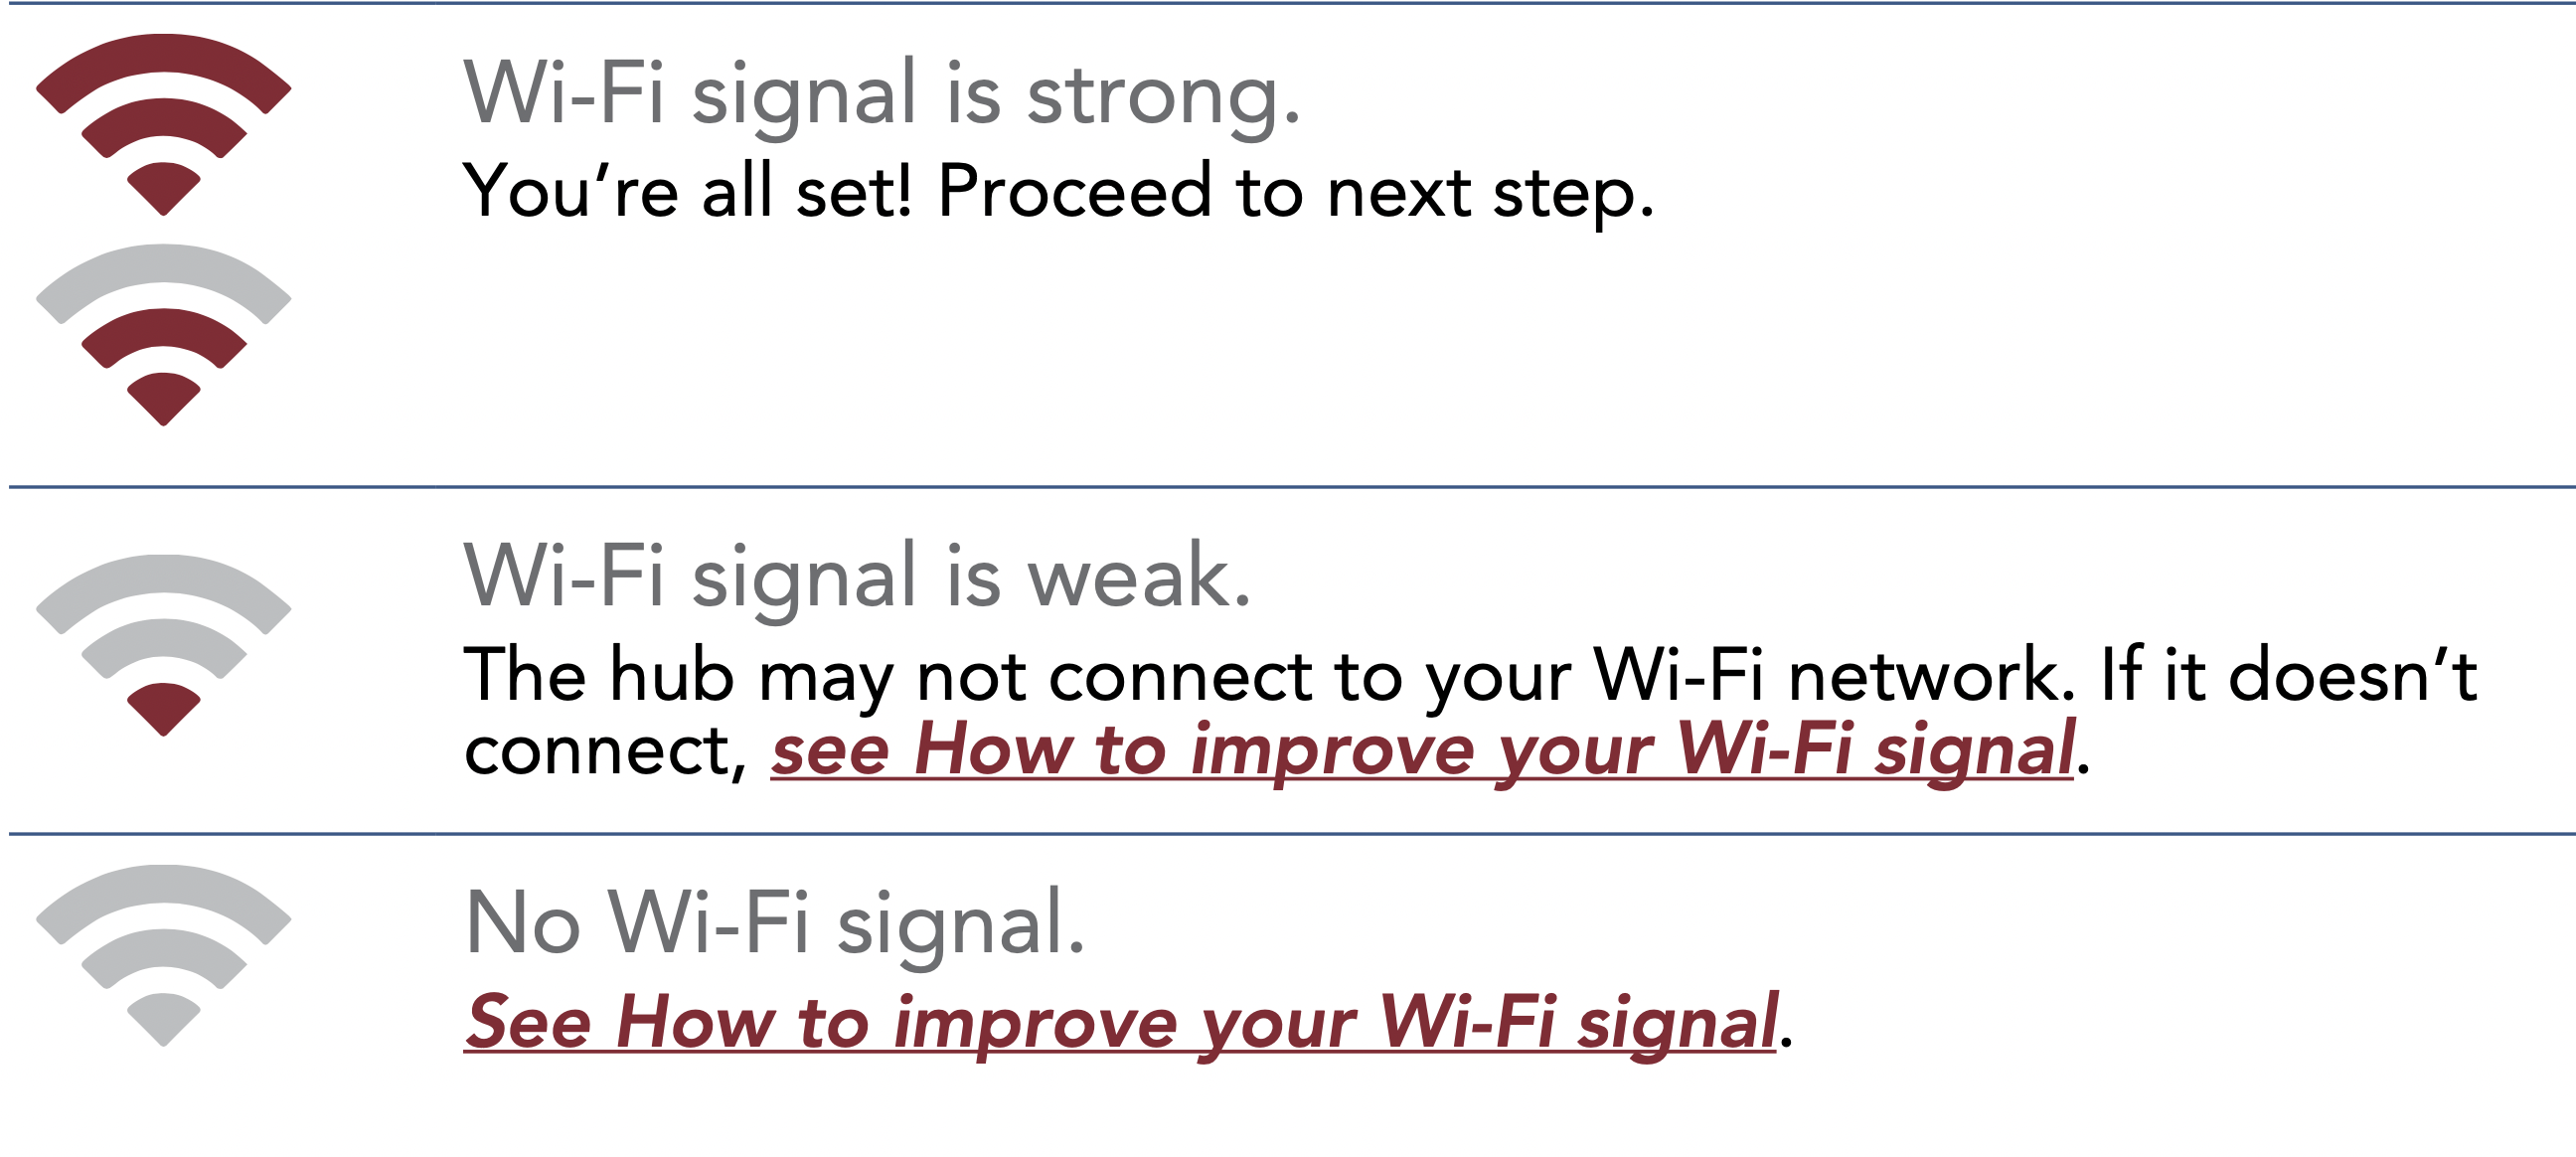
Check Your Wi-Fi Signal
Make sure your device is connected to your Wi-Fi network. Hold the device where you plan to mount the hub.
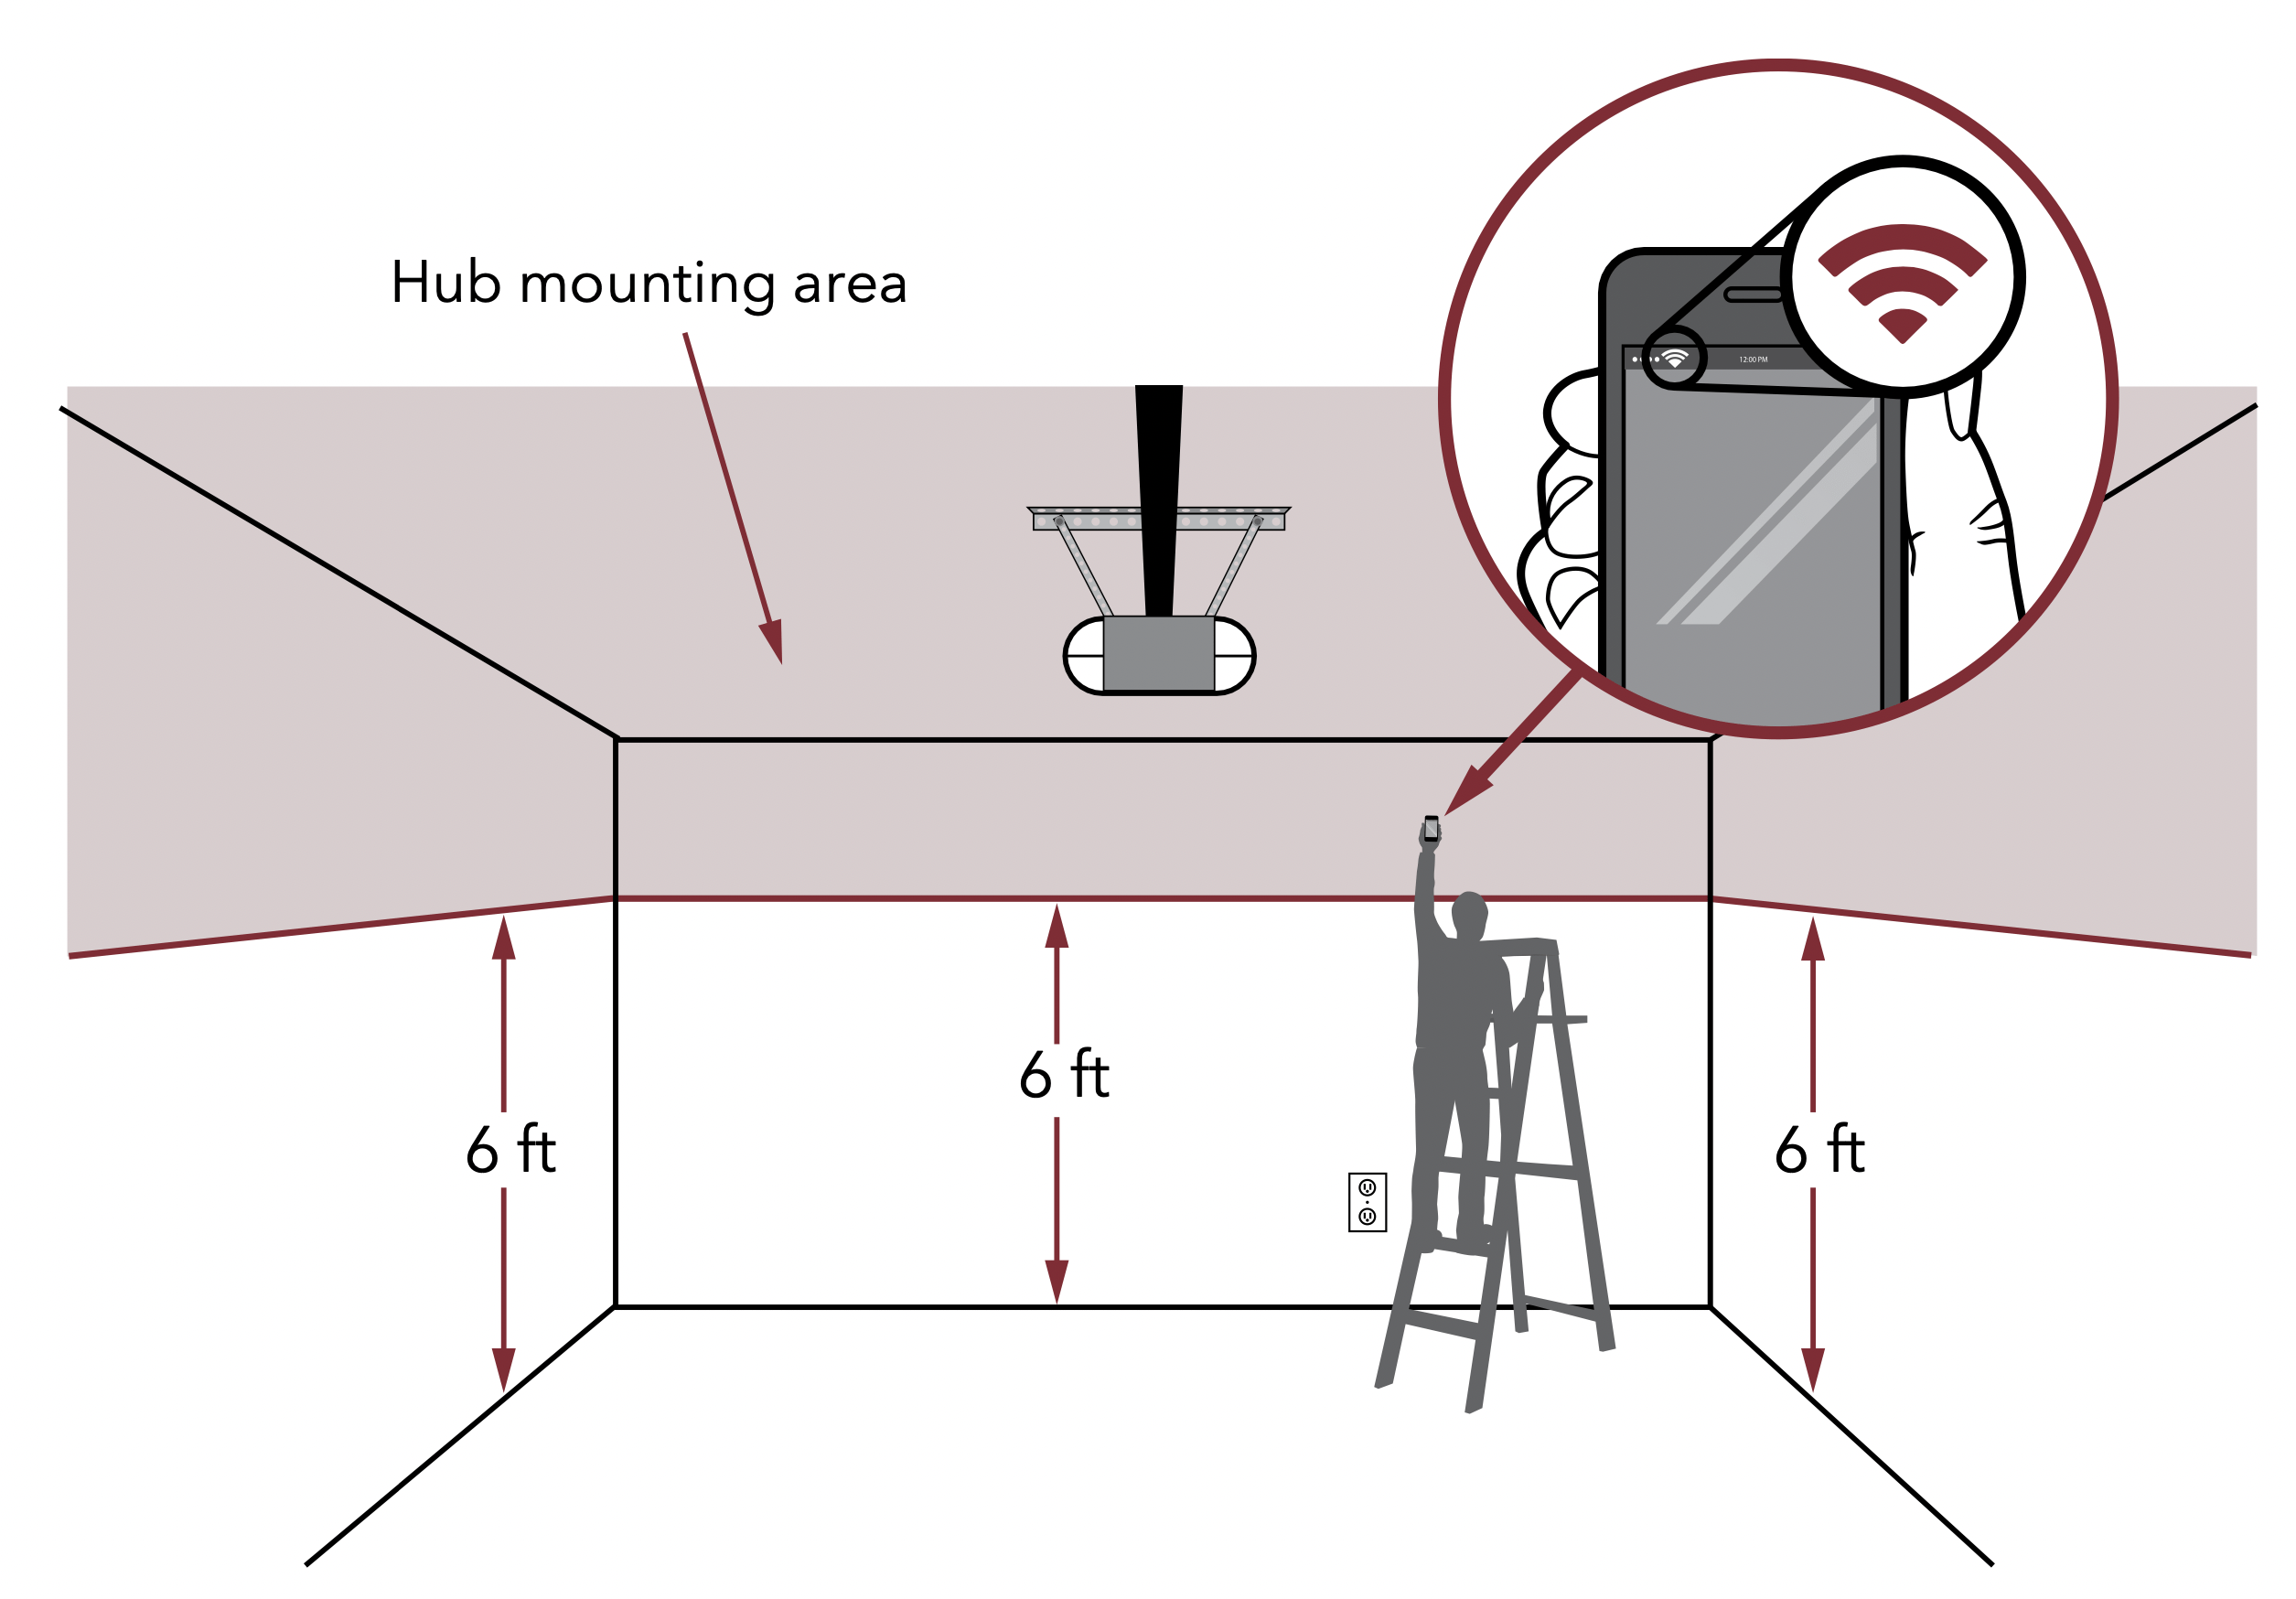
If you see:
Pair the Door Sensor to the Hub
The myQ App will pair the door sensor to the hub during initial set up.
Pair a second door sensor
To add a door sensor to a second garage door opener, in the myQ App tap (+) to add a door sensor. Follow the instructions in the app.
Pair a replacement door sensor
To replace an existing door sensor follow the steps below.
- The existing sensor is programmed to the hub as door 1 or door 2. Press the test button on the existing door sensor. The hub beeps one time if the sensor is door 1, and twice if door 2.
- On the hub, press the button for door 1 or 2, corresponding to the number of beeps heard. The LED lights solid amber.
- Remove the pull tab from the new door sensor to activate the battery.
- Press and release the test button. The hub will flash and beep indicating successful programming.

Need Help?
Garage door opener compatibility
The Smart Garage Control is compatible with most garage door opener brands manufactured starting January 1, 1993 and that have photoelectric safety sensors. Check opener compatibility by manufacturer.
Router compatibility and settings
Make sure the router has the following settings:
- 2.4 GHz is enabled, 5 GHz is NOT compatible
- 802.11g or 802.11n (802.11 b/g/n) is enabled
- DHCP is enabled.
- Security is set to WPA2.
- Inbound and outbound /TCP port 8883 is open
See more information about router settings and compatibility here.
How to improve your Wi-Fi signal
The Wi-Fi signal in a garage can be diminished because of the structure in the walls. If you have a weak signal in your garage, try the following:
- Make sure the router is within 50 ft. of the hub.
- Move the router closer to your garage to minimize interference from walls and other objects.
- Use a Wi-Fi extender, see a list of tested Wi-Fi extenders.
- Use a LiftMaster ® Internet Gateway model 828LM.
Test the door sensor battery
Test the door sensor battery every 6 months or if the Smart Garage Control is not working as expected.
- Press and release the test button on the door sensor. The red LED on the door sensor should blink and the hub should beep.
- Wait 5-10 seconds, then repeat this test 5 more times (wait 5-10 seconds between each test).
- If the LED doesn’t blink or the hub doesn’t beep with each press, try the following:
- Make sure you remove the pull tab from the door sensor.
- Debris may be present on the battery. Remove the sensor cover and slide the battery out to check.
- Replace the battery, see Accessories and Parts.
Change the door sensor battery
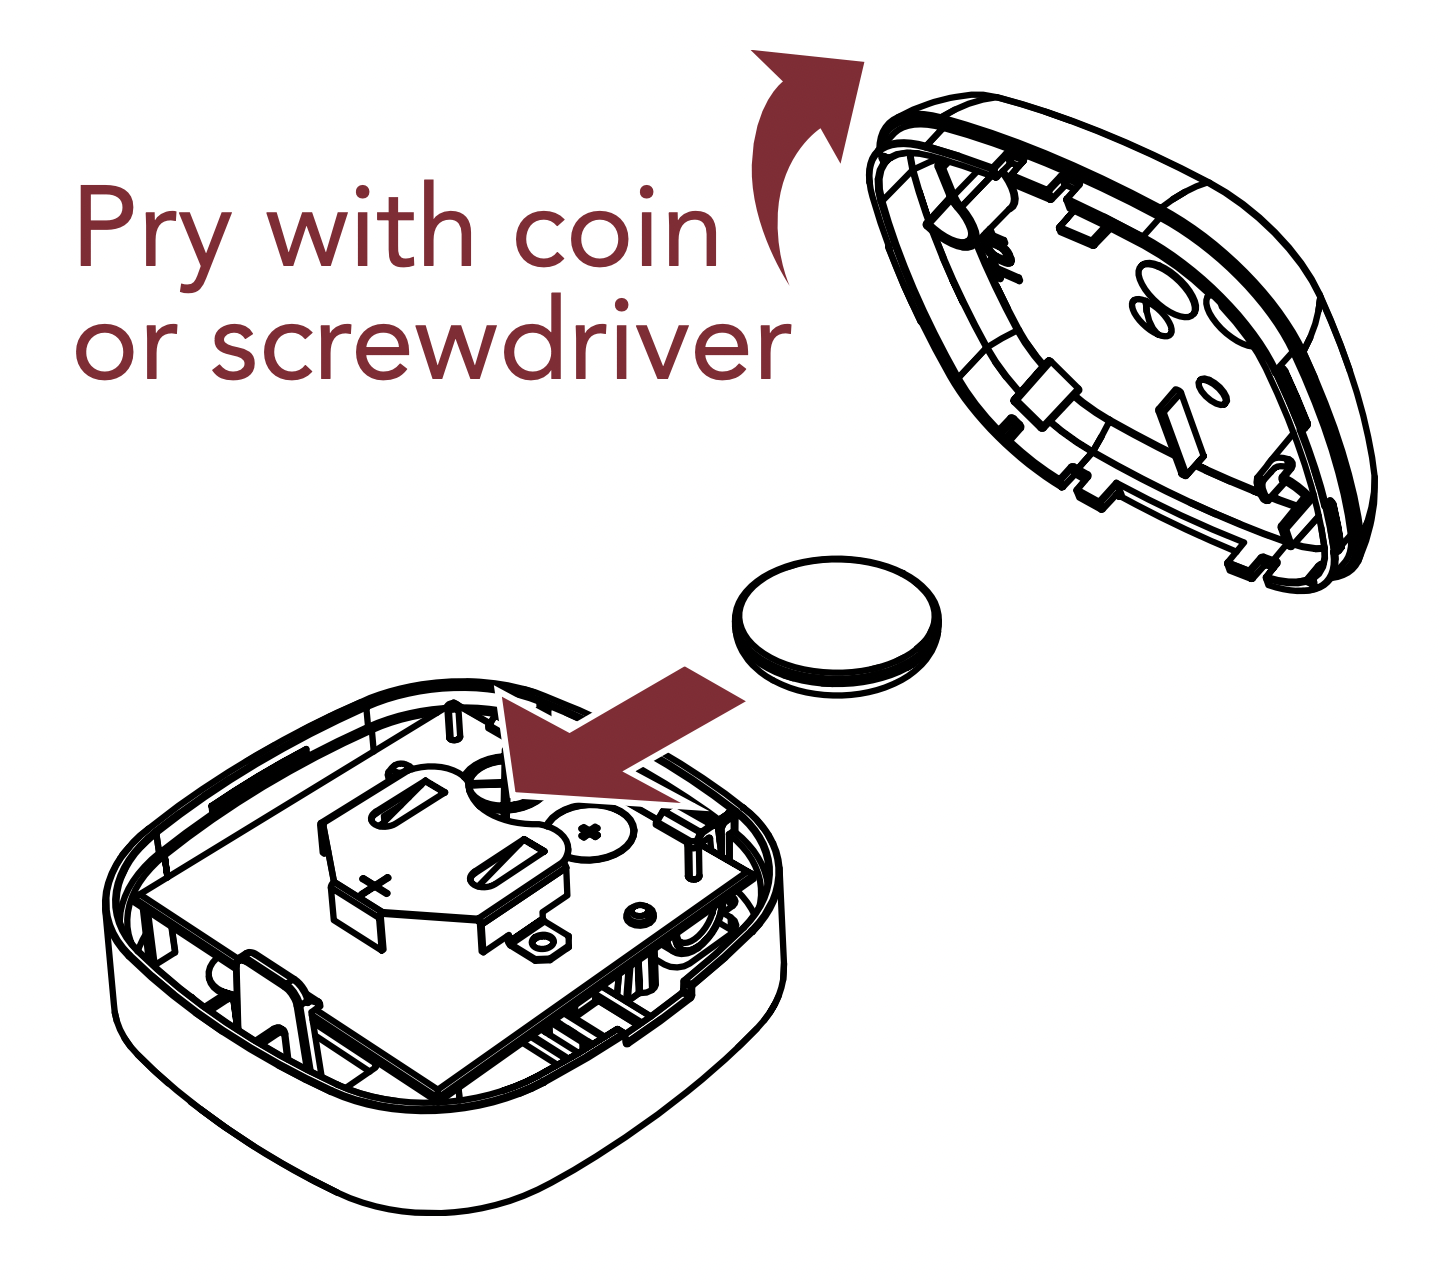
- Pry the latch panel on the bottom of the door sensor with a coin or screwdriver and lift the top to remove it.
- Using a soft non-conductive tool (such as a cotton swab), gently push the coin battery out of the clip.
- Gently but firmly insert the new battery into the clip and replace the cover.
Dispose of batteries properly. Replace ONLY with 3V CR2450 coin batteries, see Accessories and Parts.
Erase Wi-Fi settings from the hub
Erasing the Wi-Fi settings allows you to reset the Wi-Fi settings on the hub.
- The green LED MUST be on or blinking to erase Wi-Fi settings.
- Press and hold the
 button on the hub until the blue LED blinks.
Reset the hub to factory default
Resetting the hub to factory default will erase the Wi-Fi settings, and removes the device from the myQ account.
- Press and hold the button on the Wi-Fi hub until the blue LED blinks then release.
- While the blue LED is blinking, press and hold the button again until the blue LED pauses then blinks or beeps. The Wi-Fi hub is set to factory default.
To install and connect the hub, see Connect Your Smart Garage Control.
Update my network settings in the myQ App
When you replace your router or update any of your home network settings or password, you need to update the settings in the myQ app and reconnect your Smart Garage Control.
LED indicators
The LEDs indicate the status of the Smart Garage Control.
 |
Blinking blue and green |
The hub was unable to connect to your home's Wi-Fi router. |
If unable to connect:
- Check router compatibility and settings, see Router compatibility and settings.
- Check the Wi-Fi signal, see How to improve your Wi-Fi signal.
- Unplug power to the router and plug it back in.
- Reset the hub, see Reset the hub to factory default.
|
 |
Blinking blue |
The hub is attempting to connect to your home Wi-Fi network. |
If unable to connect:
- Verify you entered the correct password for your home Wi-Fi network.
- Make sure Bluetooth is enabled on your phone.
- Check the Wi-Fi signal, see How to improve your Wi-Fi signal.
|
 |
Solid blue |
The hub was unable to connect to your home Wi-Fi network. |
- Unplug power to your hub and plug it back in. If it's not blinking blue, press and hold the button until the LED goes to a blinking blue.
- Turn off the feature in your mobile device settings to automatically switch between Wi-Fi and mobile data.
|
 |
Blinking green |
The hub was unable to connect to the myQ internet server. |
If unable to connect:
- Unplug power to the router and plug it back in.
- Make sure router TCP/ UDP port 8883 is open, see Router compatibility and settings.
|
 |
Solid green |
The hub has successfully connected to the myQ server.
|
|
 |
Solid amber |
Door button 1 or 2 has been pressed |
Press the test button on the door sensor to pair the sensor with the hub.
|
 |
Blinking amber
|
Door sensor is pairing to the hub. |
|
| |
No LED |
No power to the hub. |
Check the power connection.
|