Loading ...
Loading ...
Loading ...
16 17USING YOUR OVENUSING YOUR OVEN
USING YOUR OVEN (continued) USING YOUR OVEN (continued)
Pyro Clean
(WVEP916SC & WVEP917DSC models only)
The oven has a Pyrolytic self-cleaning function. It cleans
by burning off the spatters and accumulated dirt and
grease from the oven liner, at high temperature. This
process produces ash which can then be wiped out
of the oven cavity.
Pyrolytic cleaning will not remove salt and mineral
residue left in the cavity well when water evaporates.
It is recommended that such residue is cleaned prior
to conducting pyrolytic cleaning cycle.
Roast
(WVEP917DSC model only)
The Roast Function is designed for roasting meats and
poultry by utilising heat from all elements in combination
with the fan to surround the food. This provides even
cooking throughout and enhanced browning. This
function starts at a higher temperature to seal the meat.
The oven will then automatically reduce to the selected
temperature to cook the meat for as long as desired. For
example, if you use the default 200°C the “Roast” cycle
will start at 220°C and then lower to 200°C.
Cooling/Venting fan
Your built-in appliance is fitted with a cooling fan.
This prevents your kitchen cabinet from overheating and
reduces the condensation inside the oven. It will operate
whenever you are using your oven or grill and will blow
warm air across the top of the oven door. In some
appliances the cooling fan may continue to operate after
the appliance is turned off. It will switch off by itself once
oven is cool.
Condensation
Excess condensation may fog the oven door. This may
happen when you are cooking large quantities of food
from a cold start. You can minimise condensation by:
• Keeping the amount of water used whilst cooking
to a minimum.
• Making sure that the oven door is firmly closed.
• Baking custard in a baking dish that is slightly
smaller than the water container.
• Cooking casseroles with the lid on.
NOTE: If you are using water in cooking, this will turn
to steam and may condense outside your appliance.
This is not a problem or fault with your oven.
Preheating your oven with rapid heat
To preheat your oven select the “Rapid Heat” function.
This function allows your oven to reach the preset
temperature quicker than any other cooking function.
1. Turn the function selector to “Rapid Heat”.
2. Set the desired preheat temperature, by rotating
your oven temperature selector. When the indicator
light above the temperature selector goes out, the
oven has reached the desired temperature. Select
the oven function you require for cooking or baking
and place the food in the oven.
NOTE: WVE915SCA, WVE915DSCA and WVEP917DSC
have Fast Heat Up function. See ‘Operating WVE915SCA,
WVE915DSCA and WVEP917DSC’ chapter.
On completion of cooking
• The heat source will turn off, the timer will beep and
the end time and/or cook time ‘indicators’ will flash.
• Even though the heating element turns off the oven
will still retain substantial heat. This will continue to
cook the food until it is removed or the oven cools
down. If you do not plan on being present when the
oven turns off, you should take this extra heating
time into account.
• Turn the function and temperature controls to the
off position.
• Press any button to stop the timer beeping.
Operating the touch control clock model
WVE915SC
Select the cooking function
Turn the function selector in any direction to the desired
cooking function. The oven cavity light will come on.
Select the temperature
To set the temperature, turn the temperature selector in
a clockwise direction to the desired setting. An indicator
light in the display will come on.
A thermostat controls the temperature in your oven.
When the temperature is reached, the heating source
switches itself off and the indicator light goes out. When
the oven temperature falls below the desired setting, the
heating source switches on and the indicator light comes
on again.
Once the food is cooked, turn the temperature selector
back in an anti-clockwise direction. Do not force it
right round in a clockwise direction as this will result in
damage to the thermostat.
NOTE: The desired cooking function must be selected
before the oven will operate.
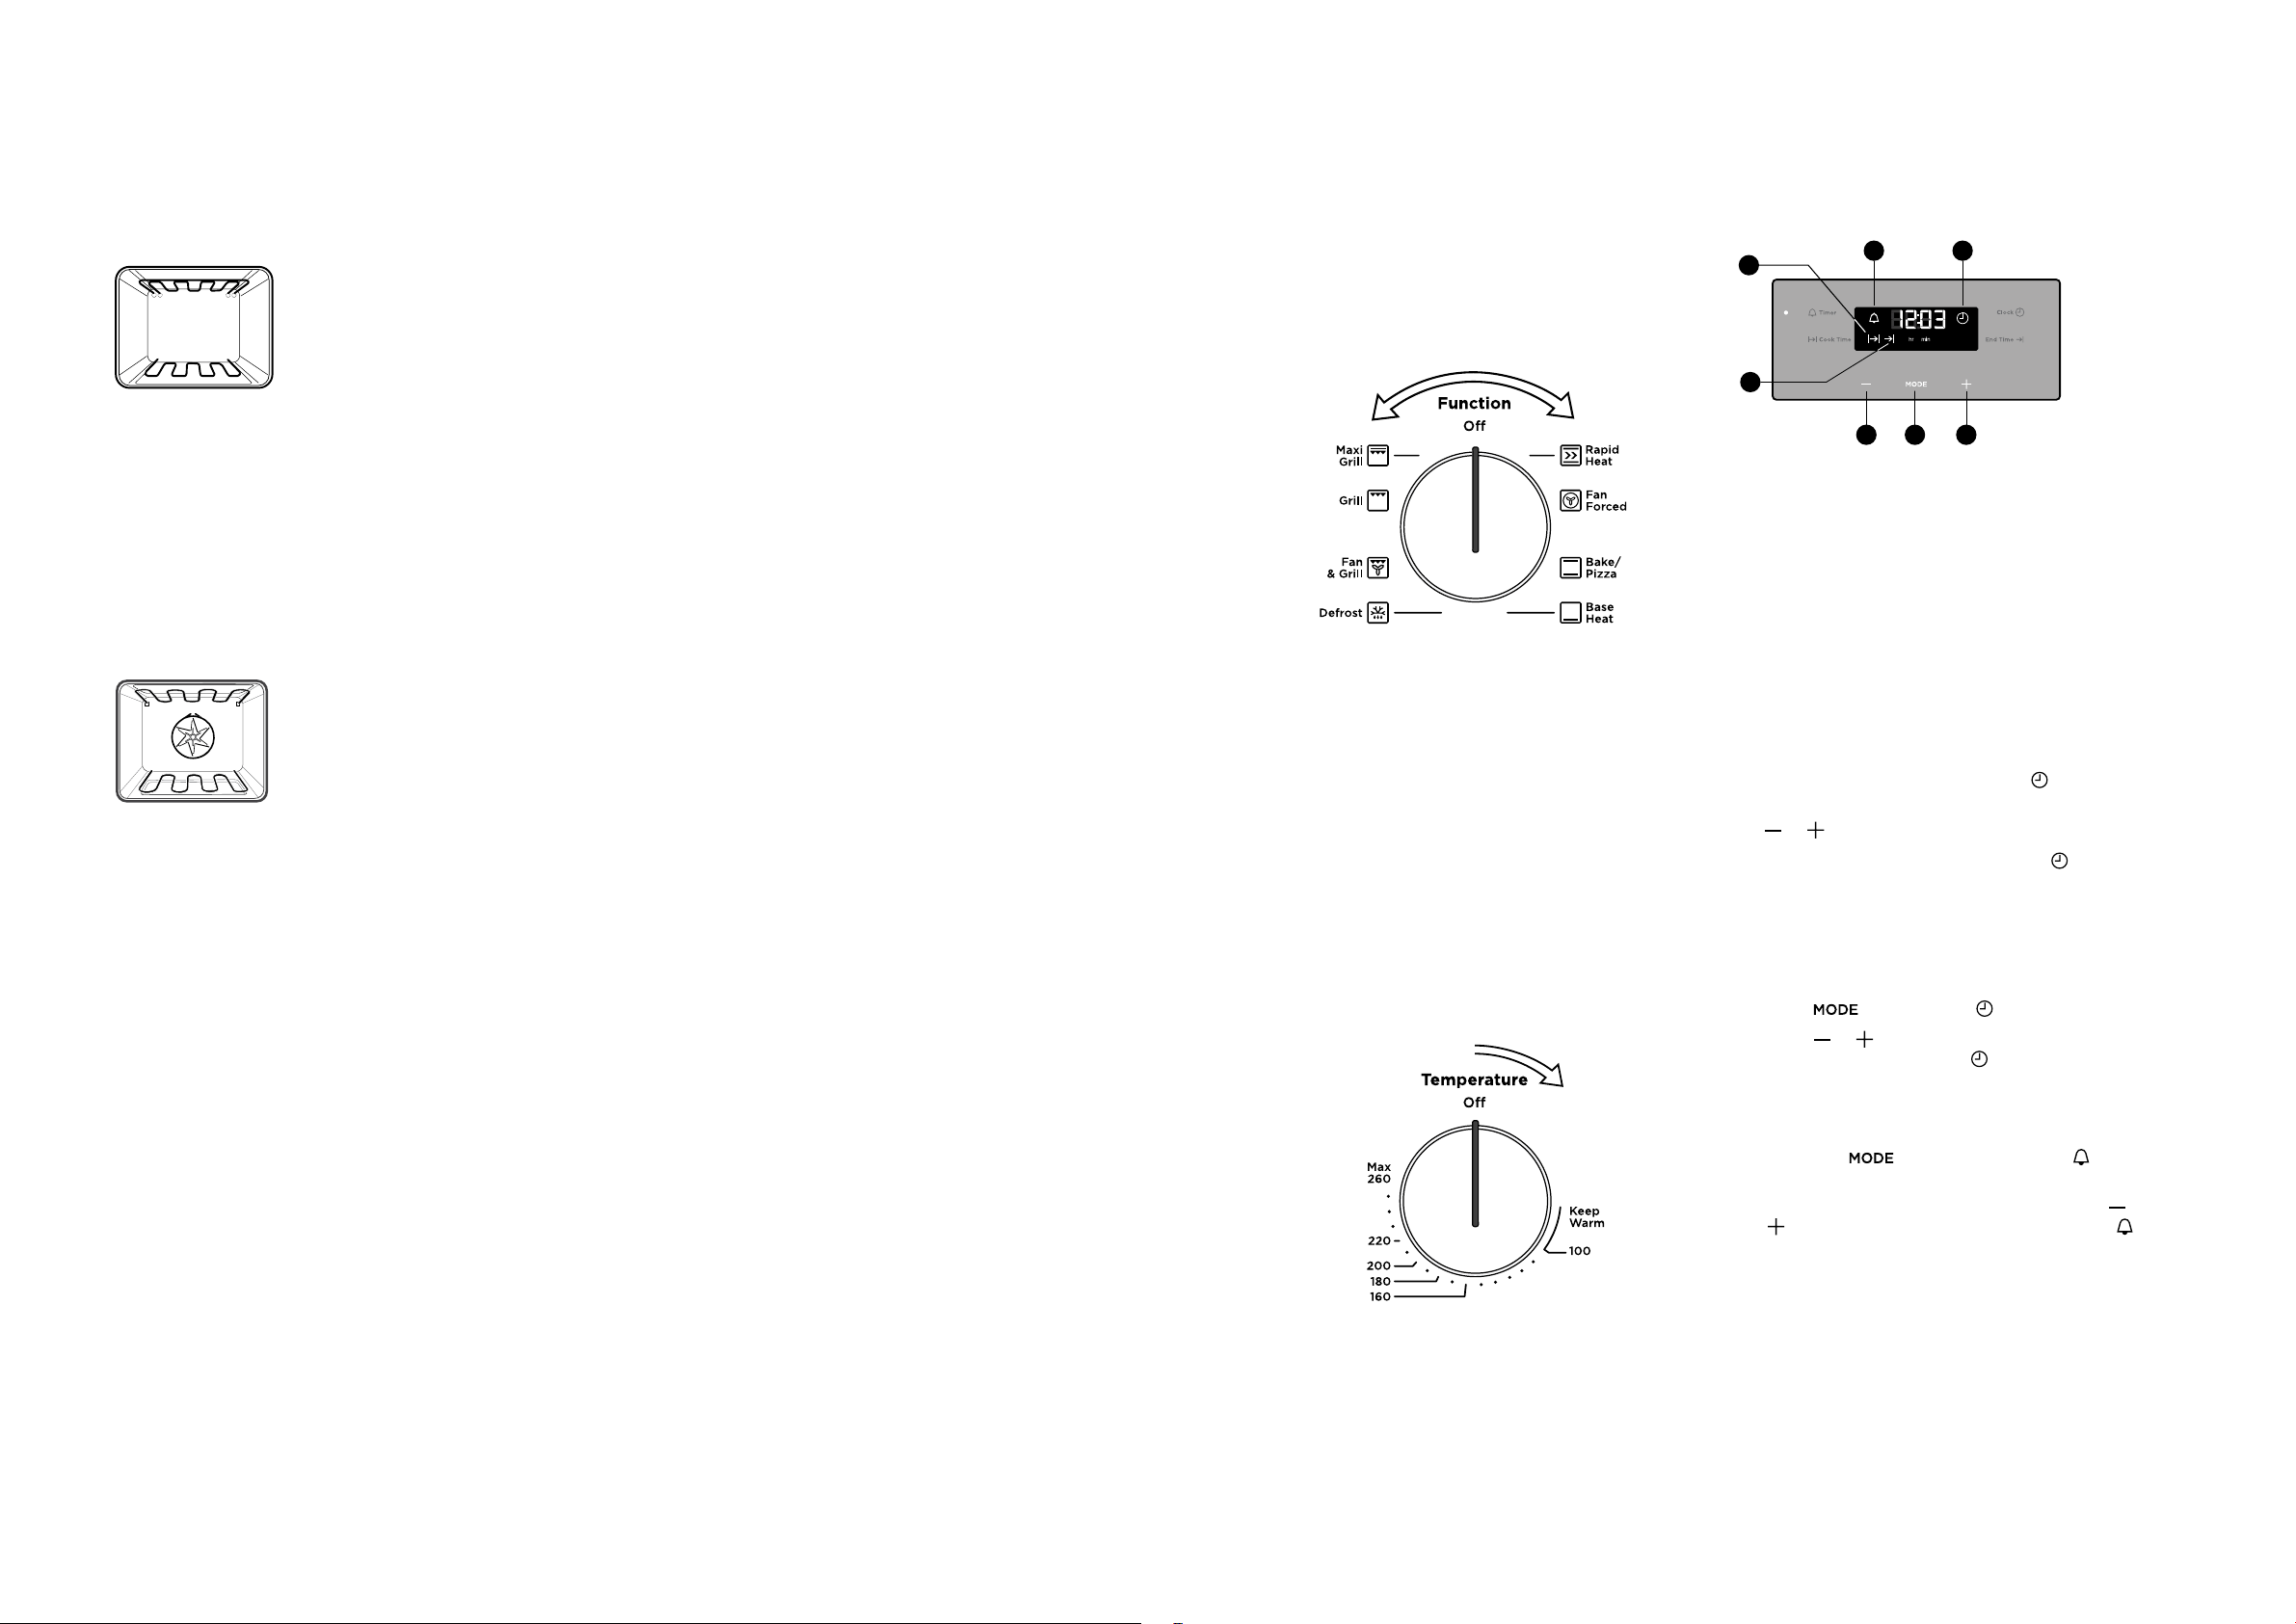
Cooking with timer
1
1
1
2
1
4
1
3
1
5
1
6
1
7
1. On when timer is set
2. Time of day icon
3. Cook time icon
4. End time icon
5. Minus
6. Touch to toggle through timer modes
7. Plus
Setting the time of day
Before the appliance can be used, the time must be set.
After the appliance has been electrically connected,
‘12:00’ will be displayed and the clock
icon will flash.
To set the time of day in hours and minutes touch
the
or
symbols. Refer to the diagram above.
5 seconds after the last change, the clock
icon will
disappear, confirming the time has been set. Once the time
has been entered, the clock advances minute by minute.
NOTE: The clock has a 24 hour display.
Change the time of day (Daylight saving)
1. Press until the clock icon begins flashing.
2. Press
or
to change the time. 5 seconds after
the last change, the clock
icon will disappear,
confirming the time has been set.
Setting the timer
1. Touch the symbol until the timer icon
begins flashing.
2. Set the countdown time you want by using
and
. 5 seconds after the last change the timer icon
will stop flashing and the countdown will start in
minutes.
3. To stop the beeper, touch any symbol.
4. Maximum countdown time is 2hrs 30mins.
Loading ...
Loading ...
Loading ...