Loading ...
Loading ...
Loading ...
18 19USING YOUR OVENUSING YOUR OVEN
Setting the cooking duration
1. Check the clock displays the correct time of day.
2. Select the desired oven function and temperature.
The oven indicator light will glow and the heating
source will come on.
3. Press
until the cook time icon begins
flashing.
4. Set the cooking duration you want by using
or
.
5 seconds after the last change, the cook time
icon will stop flashing, and the time of day will be
displayed.
NOTE: Do not forget to add preheating time if necessary.
Setting the cooking end time
1. Check the clock displays the correct time of day.
2. Select the desired oven function and temperature.
The oven indicator light will glow and the heating
source will come on.
3. Touch the
symbol until the end time icon
begins flashing.
4. Enter the time of day you want the cooking to finish
by using the
or
symbols. 5 seconds after the
last change, the end time
icon will stop flashing
and the current time will be displayed.
NOTE: To stop the beeper, touch any symbol.
Setting the delayed start cooking time
1. Program the cook time and end time as
described in the relevant sections. Once both
the cook time
and end time
have been set,
the cook time
and end time
icons will
stop flashing and the current time of day will
be displayed.
USING YOUR OVEN (continued)
To check or cancel settings
1. To check settings, touch the symbol until
the desired setting is displayed. The relevant icon
will flash.
2. To cancel ‘delayed start’ touch the
symbol
until the end time
icon flashes. Touch and hold
the
symbol until the clock no longer reverses (a
beep will be heard). If temperature and function
knobs are still at a setting, the oven will start once
the end time
icon stops flashing.
3. To cancel ‘auto shut off’, touch the
symbol
until the cook time
icon flashes. Touch and hold
the
symbol until the clock no longer reverses
(at 0:00 a beep will be heard). This automatically
cancels ‘auto shut off’. If the temperature and
function knobs are still at a setting, the oven will
start once the cook time
icon stops flashing.
Because ‘auto off’ is cancelled the oven will continue
to heat until it is manually turned off.
On completion of cooking
The oven will turn off, the timer will beep and the end
time
and/or cook time icons will flash.
1. Turn the function and temperature controls to
the off position.
2. Press
or
or
to stop the timer from
beeping.
Switching the clock display ON and OFF
1. Press together and
for 2 seconds to switch
’off’ the display.
2. Press together
and
for 2 seconds to switch
the clock display ’on’ again.
NOTE: If a timer mode is set, then it is not possible
to switch the display off.
Operating WVEP916SC
Setting the time
Before the appliance, can be used, the time must be set.
When power is supplied to the oven the
clock icon will
be displayed. Along with the clock symbol the ‘12’ will be
flashing. This indicates that ‘hour’ portion of the time is
ready to be changed.
Toggle the temp selector
or
, then touch when
you have the right hour.
The minutes will flash and can be set in the same manner.
5 seconds after the last change, the clock display will stop
flashing, confirming that the time has been set.
NOTE: The clock has a 24 hour display.
Select the oven function
Turn the oven function selector clockwise to select
the desired oven function. The default temperature
for that function will be shown on the display.
5 seconds after the last change, the oven will begin heating
and the “Elapsed time” commences on the display.
NOTE: each oven function has a default temperature
which can then be adjusted as outlined below.
This knob cannot be
turned anticlockwise
from o position
Selecting the oven temperature
Toggle the temperature selector left
( )
or right ( )
as required to set the desired cooking temperature.
The temperature setting changes in increments of 5°C.
The set temperature is displayed for 5 seconds from
the last change.
NOTE: the temperature can be adjusted at any time
throughout the cooking time.
USING YOUR OVEN (continued)
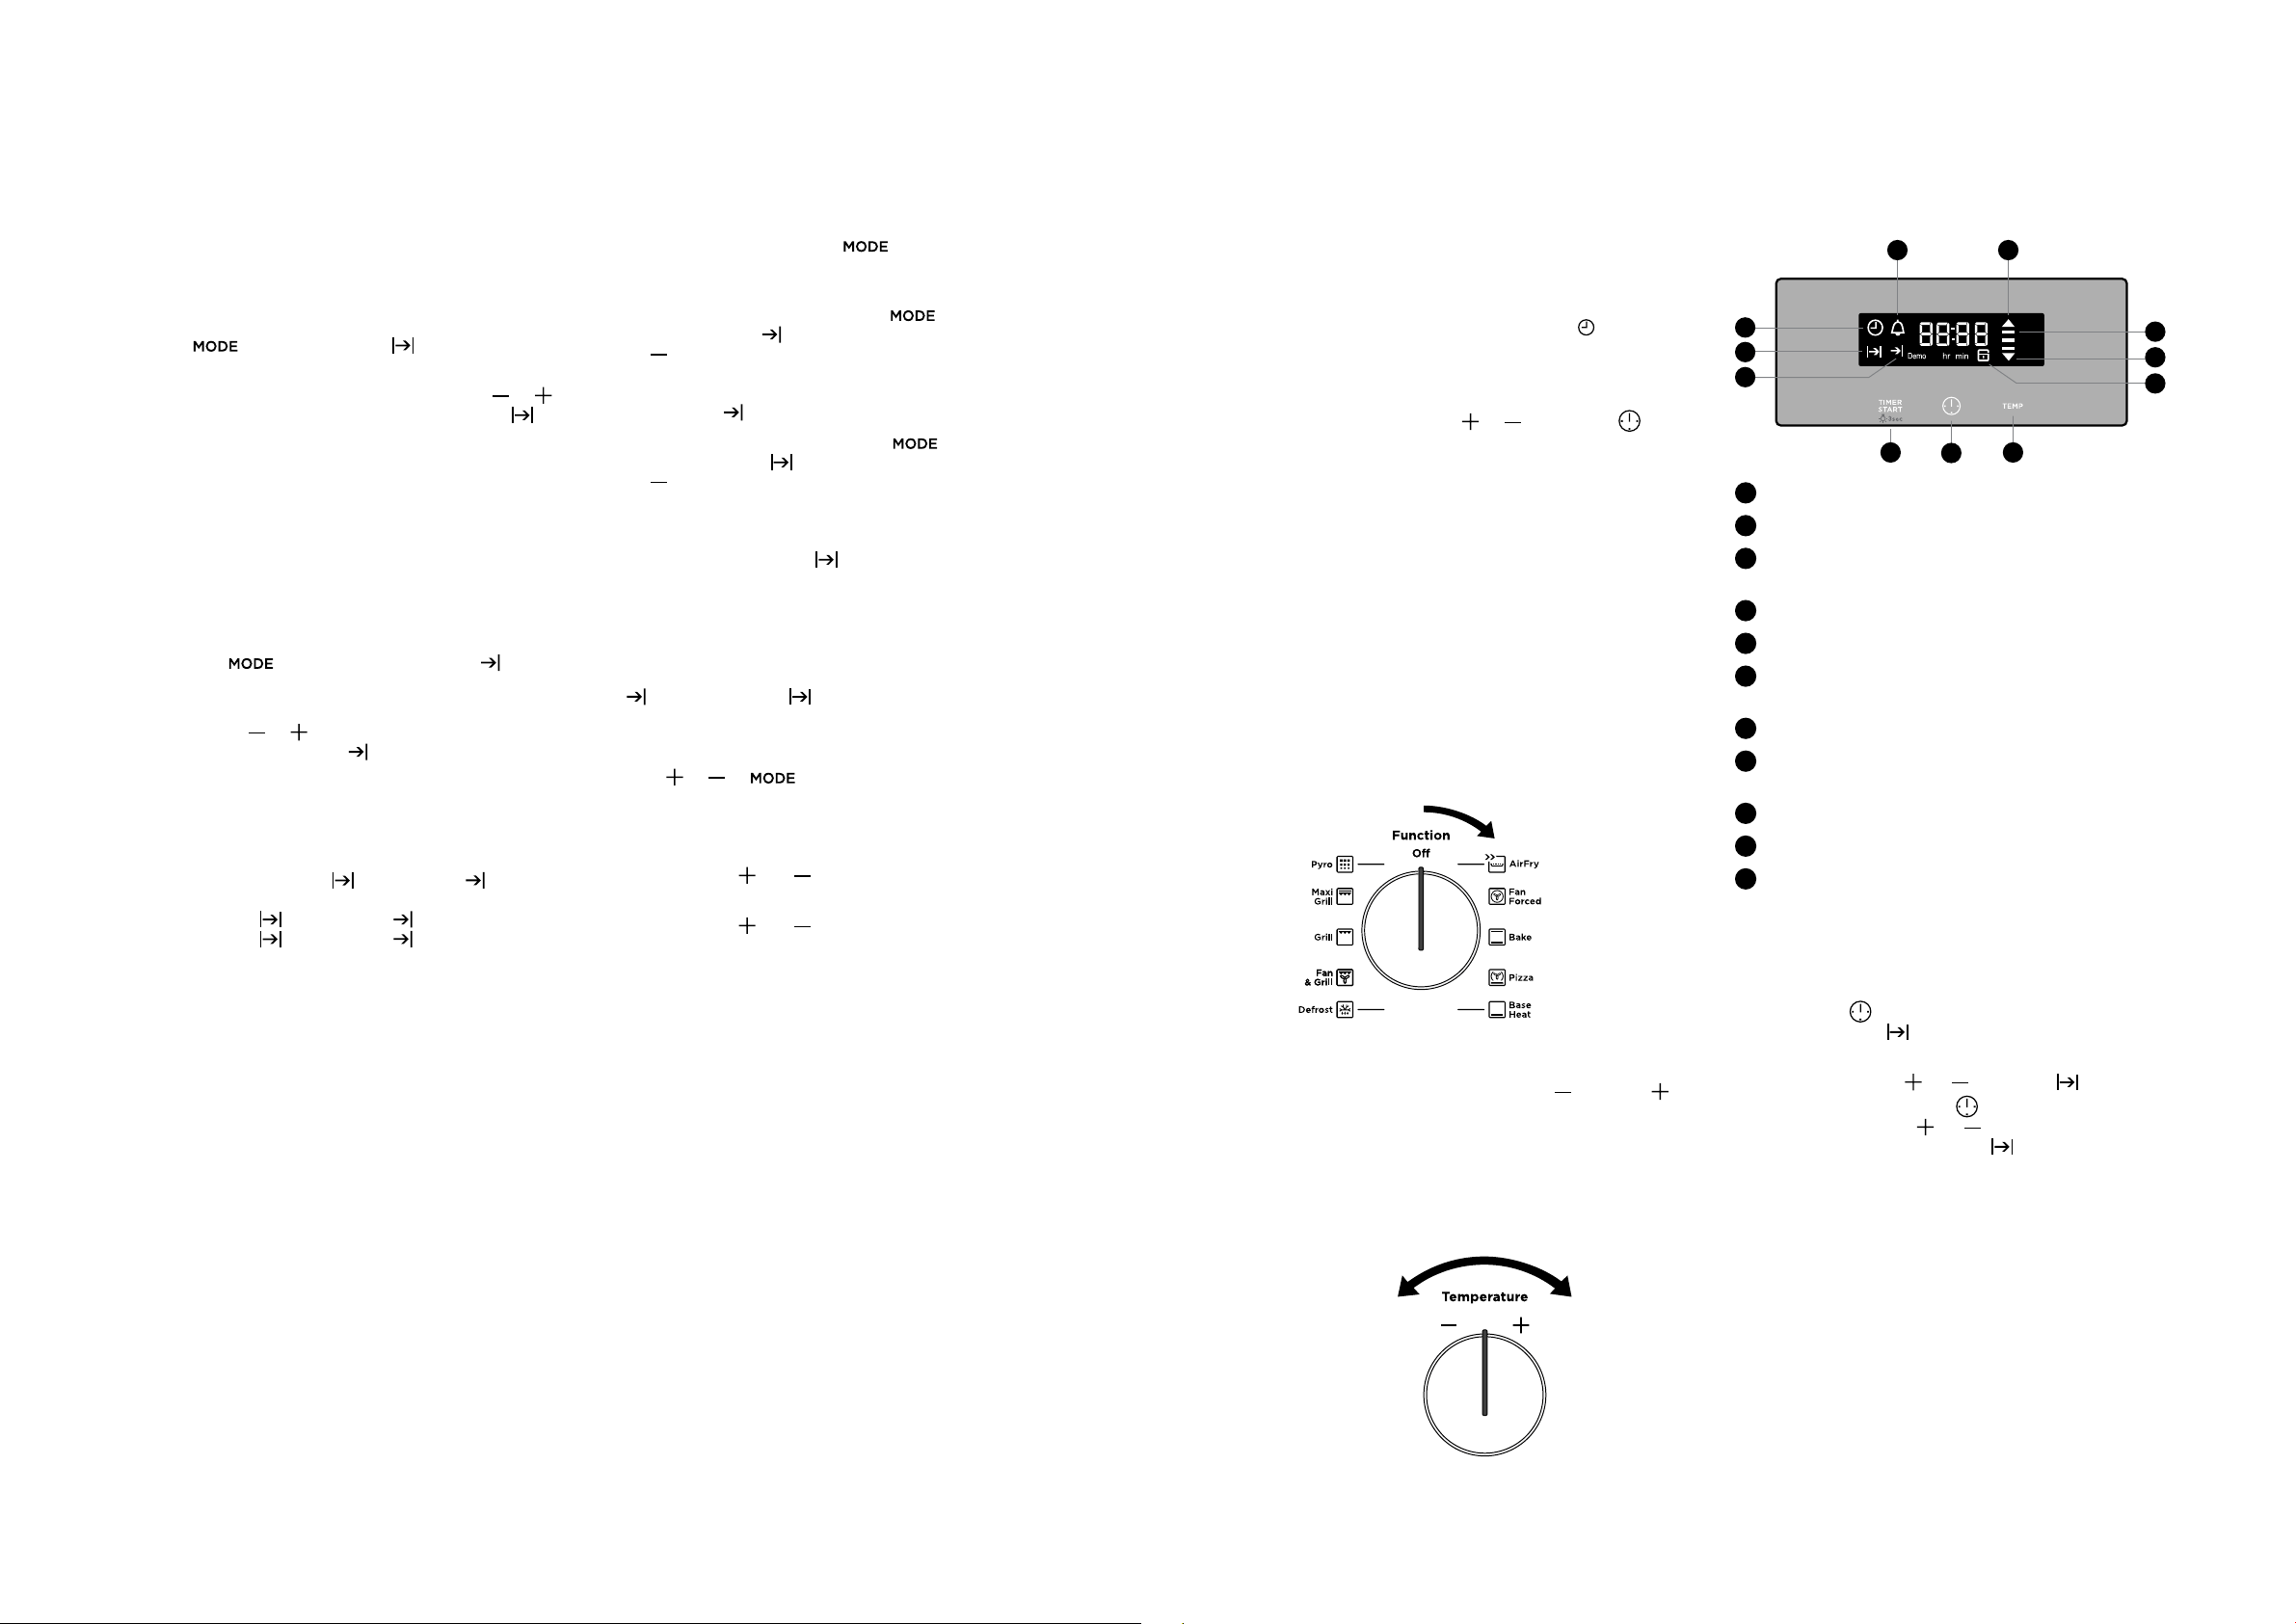
Cooking with the timer
1 2
3
4
5
6
7
8
9
10
11
1
On when the timer is set
2
On when oven warming up
3
3 bars displayed when oven
reaches set temperature
4
On when oven cooling down
5
Oven door locked
6
Touch to toggle through cooking
time & oven set temp
7
Touch to toggle through the timer modes
8
Touch to start timer mode.
Hold to turn oven light on/off
9
End time icon
10
Cook time icon
11
Time of day icon
Setting the cook time
1. Use the knobs to select the desired oven function
and cooking temperature.
2. Touch the
button as often as necessary, until
the ‘cook time’ symbol appears.
3. Set the desired cooking time commencing with
minutes by using
or
, whilst the symbol is
flashing, then touch the
button again and set
the hours by using
or
. After 5 seconds from
the last time adjustment the
symbol will stop
flashing. The appliance is now programmed and
the display will countdown to zero.
4. When the set time has elapsed, a signal will sound
and the appliance will turn off. To stop the signal,
touch any button on the clock and then turn the
oven function selector to OFF.
NOTE: Cooking time cannot be set for the Rapid
Heat function.
The feature can be cancelled at any time by returning
the function selector to OFF.
Loading ...
Loading ...
Loading ...