Loading ...
Loading ...
Loading ...
WIRING REQUIREMENTS
The cooker MUST be installed in compliance with:
• Wiring connections in AS/NZS 3000 Wiring Rules.
• Local regulations, municipal building codes and
other statutory regulations.
For New Zealand Only:
The cooking range must be connected to
the supply by a supply cord fitted with the
appropriately rated plug that is compatible with
the socket-outlet fitted to the final sub-circuit in
the fixed wiring that is intended to supply this
cooking range.
Supply cord size required:
WVE915SC/WVE915SCA/WVE915DSCA - 2.5mm
2
WVEP916SC/WVEP917DSC - 4.0mm
2
The Data plate gives information about rating and is
located behind the bottom of the oven door.
• A functional switch MUST be provided near the
appliance in an accessible position (AS/NZS 3000
- Clause 4.7.1).
• Wiring MUST be protected against mechanical
failure (AS/NZS 3000 - Clause 3.9).
• Disconnection in the fixed wiring must occur in
accordance with the AS/NZS 3000 wiring rules.
• The cooker MUST be properly earthed.
• This range must be connected with cable of 75°C
rating minimum.
• This product has passed the insulation resistance
test after manufacture. If the resistance reading
is low at installation, it is probably caused by
moisture from the atmosphere being absorbed by
the elements after the range has been produced.
(pass at 0.01 M
AS/NZS 3000 Wiring Rules Clause
8.3.6.2).
Note: When connections are made to a multi-phase
230/240V supply, the bridge piece MUST be removed
from between the active connections.
Connecting to services and commissioning
This appliance must be installed by an authorised
person, according to all codes and regulations of:
• ELECTRICAL supply authorities.
• Building regulations.
• Local government and council authorities.
• AS/NZS 5601.1 (particular attention to clause 6.10.1,
including figure 6.3 and subclause 6.10.1.11).
• AS/NZS 3000 (particular attention to clauses 4.7.1
and 3.9).
Securing points
Plastic clips
Plastic clip
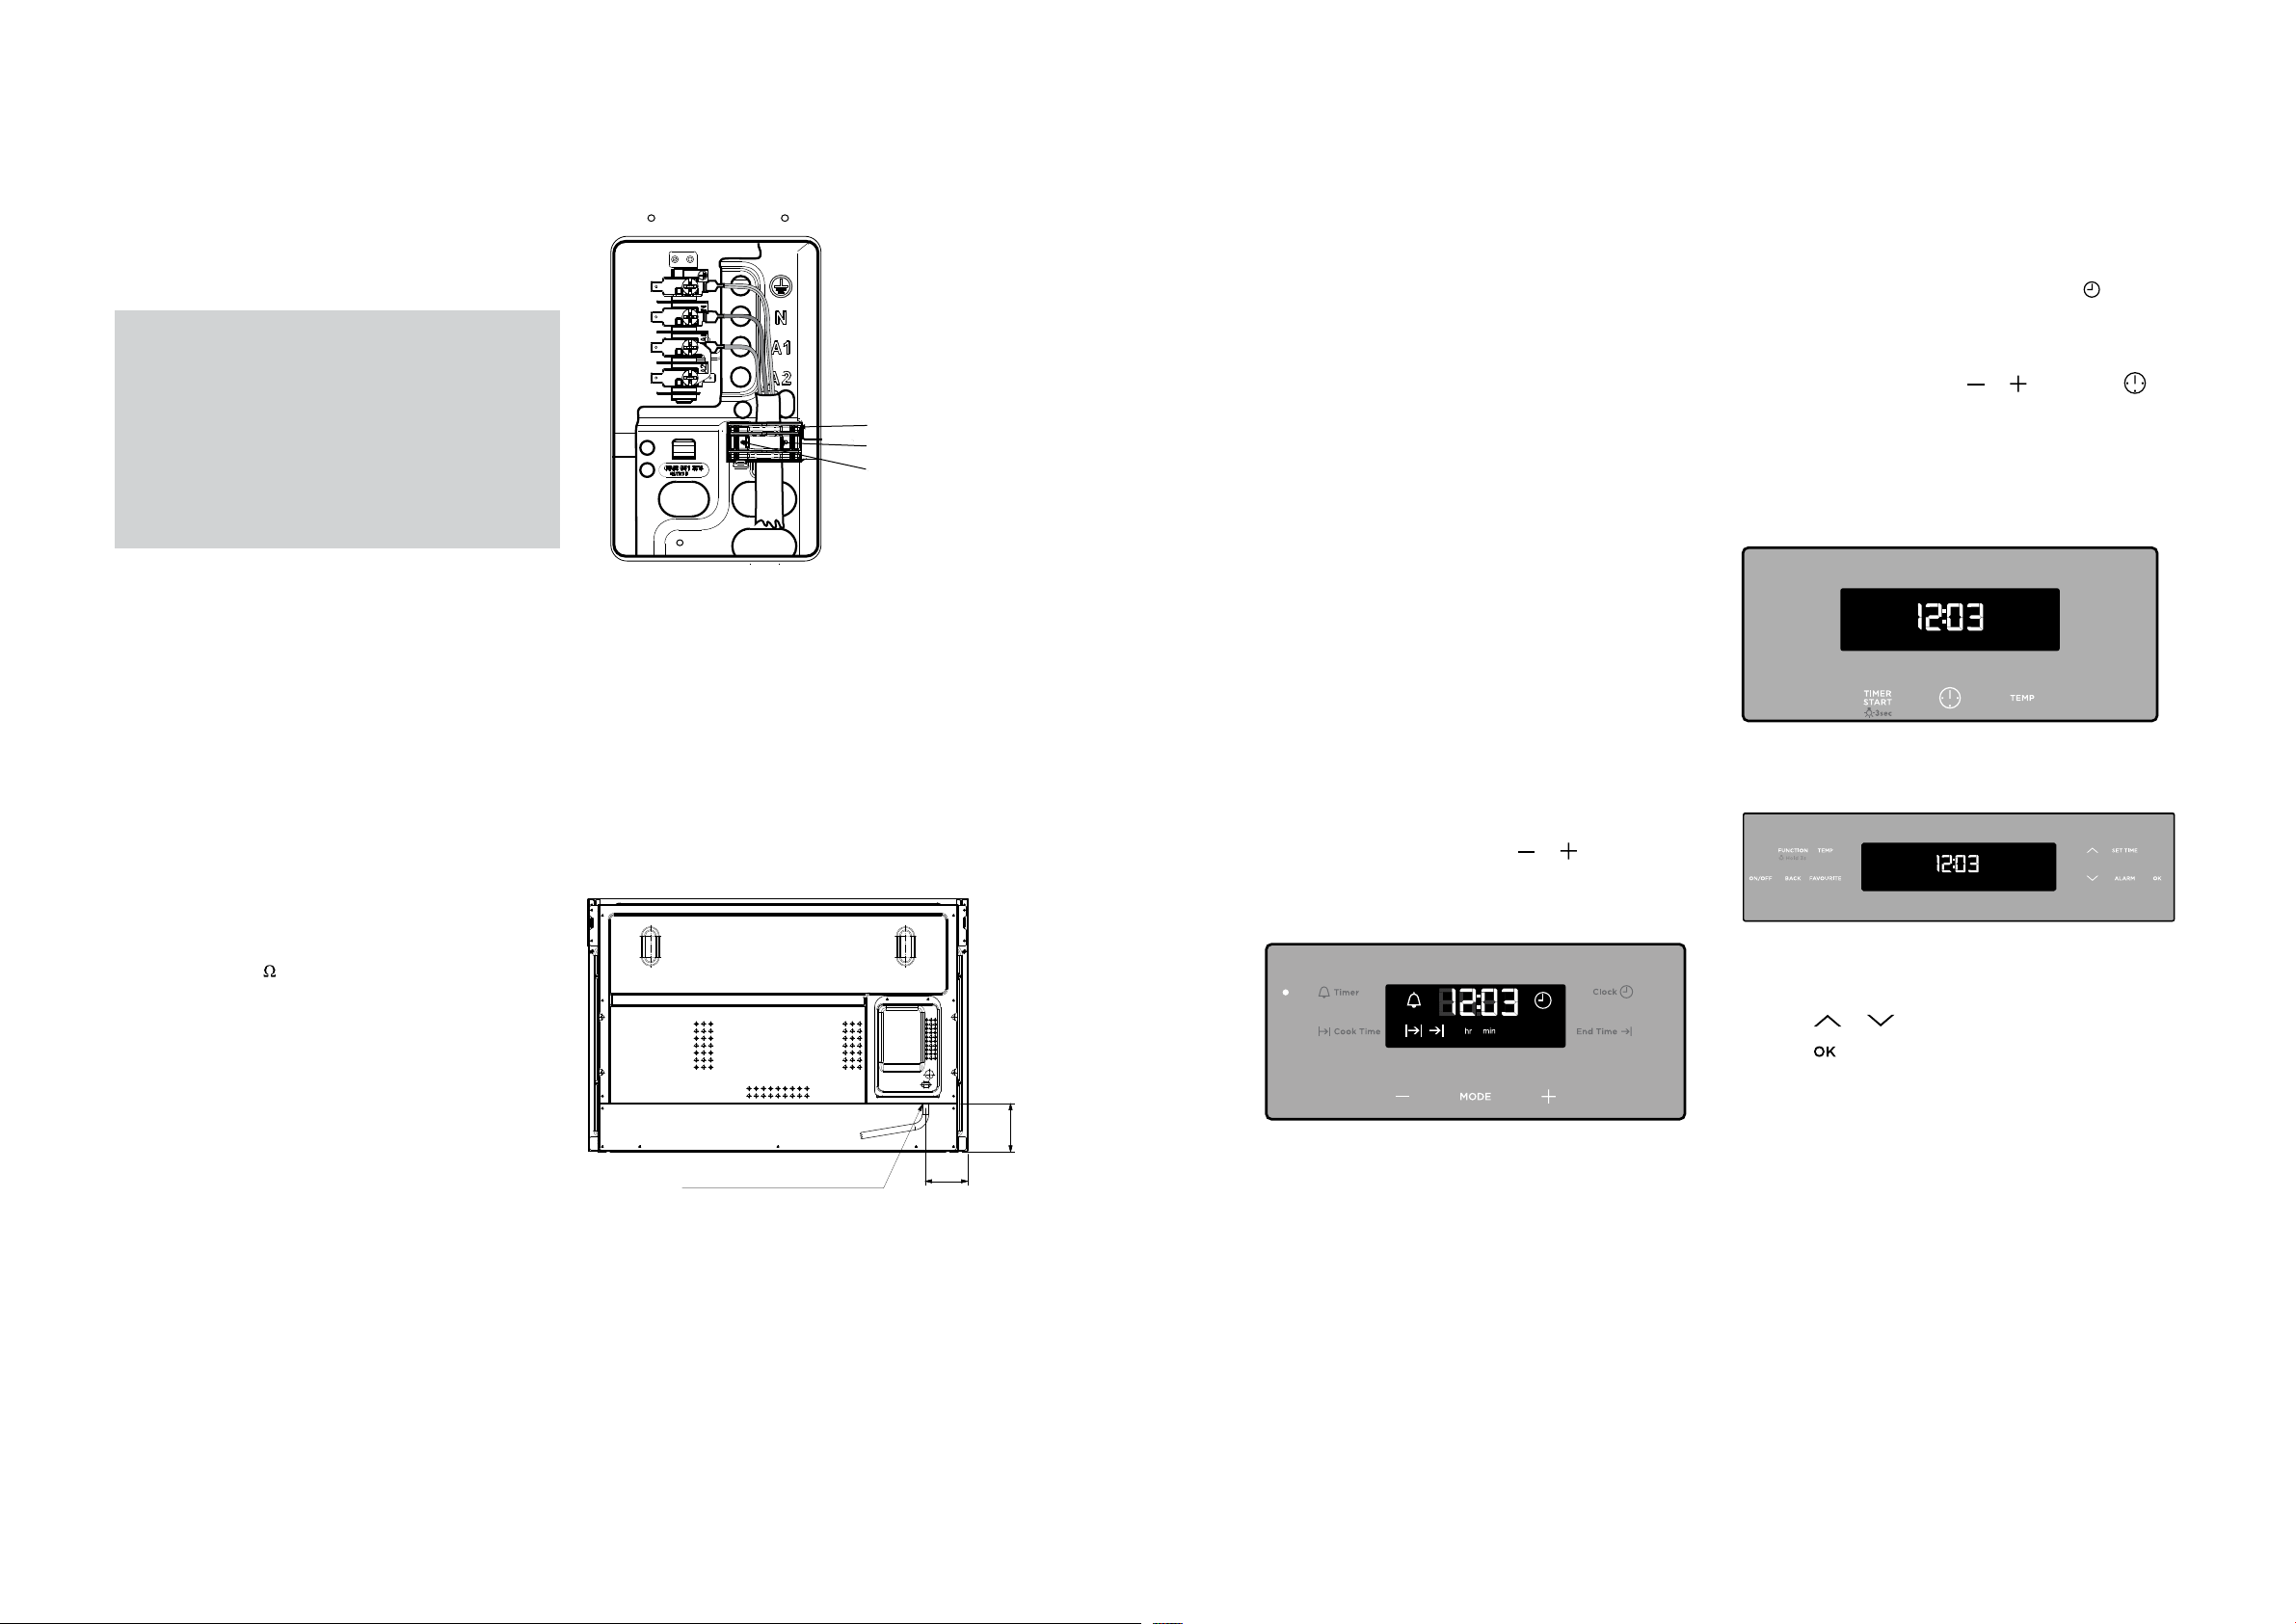
Hard wiring detail
1. Remove terminal cover plate from rear panel
of appliance.
2. Fit wires through hole in back panel below
terminal cover.
3. Engage wires into plastic clip. Secure plastic
clip with two long silver screws (supplied in
separate bag).
4. Replace cover plate onto rear panel.
Electrical connection location - built-in models
Entry point of electrical cable
99
113
10 WIRING REQUIREMENTS
BEFORE OPERATING YOUR APPLIANCE
FOR THE FIRST TIME
Preparing your appliance for the first time
• Please remove all internal boxes and bags from the
oven before operation.
• Please wipe out the oven interior prior to operation
with warm soapy water and polish dry with a soft
clean cloth. Do not close the oven door until the
oven is completely dry.
• New appliances can have an odour during first
operation. It is recommended to ‘run in’ your oven
before you cook for the first time. Run the oven at
180°C for 2 hours and ensure that the room is well
ventilated.
• DO NOT line the oven with foil, it will damage the
enamel.
• Prior to installing accessories, remove all packaging
and remove plastic film from external panels.
Setting the time
After electrically connecting the appliance, you must set
the time of the day before you can operate your oven.
Touch control electronic clock model WVE915SC
1. After the appliance has been electrically connected
“12.00” will be displayed and the “clock” indicator
will flash.
2. To set the time of day, press
or
. 5 seconds after
the last change, the “clock” indicator will disappear,
confirming the time has been set.
NOTE: The clock has a 24-hour display.
WVEP916SC electronic controller
1. When power is supplied to the oven the clock
icon will be displayed. Along with the clock symbol
the “12” will be flashing. This indicates that the ‘hour’
portion of the time is ready to be changed.
2. Toggle the temp selector
or
, then touch
when the correct hour is displayed.
3. The minutes will then flash and can be set in
the same manner as above. 5 seconds after the
last change, the clock display will stop flashing,
confirming that the time has been set.
NOTE: The clock has a 24-hour display.
WVE915SCA, WVE915DSCA, WVEP917DSC
electronic controller
When you connect the appliance to the mains, or
reconnect after a power cut, the display contrast, the
display brightness and the time of day all need to be set.
1. Press
or to set the value.
2. Press
to confirm.
11BEFORE OPERATING YOUR APPLIANCE
Loading ...
Loading ...
Loading ...