Unpack oven, remove all packing material, and examine the oven for any damage such as dents, broken door latches or cracks in the door. Notify dealer immediately if unit is damaged. Do NOT install if unit is damaged.
2.Guarantee
Your receipt is your guarantee, please keep it in a safe place.
3. Cord
If the supply cord of this appliance is dam- aged, it must be replaced by the manufacturer or it’s service agent or a similarly qualified per- son in order to avoid a hazard.
N.B. The appliance should be inspected for damage to the door seals and door seal areas. If these areas are damaged the appliance should not be operated until it has been repaired by a service technician trained by the manufacturer.
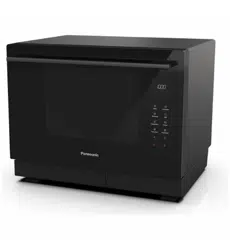
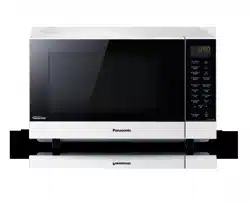
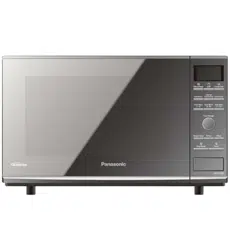
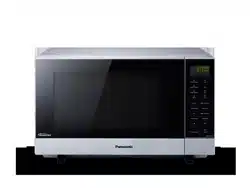
Placement of your oven
This oven is intended for Counter-top use only. It is not intended for built-in use or use inside a cupboard.
Counter top use
1.Oven must be placed on a flat, stable surface 850 mm above floor level. For proper operation, the oven must have sufficient air flow, i.e. 5 cm/2" at one side, the other being open; 15 cm/6" clear over the top; 10 cm/4" at the rear.
2.Do not place the microwave oven on a shelf directly above a gas or electric hob. This may be a safety hazard and the oven may be damaged.
3.Do not block air vents on the rear and bottom or top of the cabinet. Do not place any articles on the top of the oven over the vents. If air vents are blocked during operation, the oven may overheat. If the oven overheats, a thermal safety device will turn the oven off. The oven will remain inoperable with blank display until it has cooled.
4.Do not use outdoors.
5.Only allow children to use oven without supervison when adequate instructions have been given so that the child is able to use the oven in a safe manner and understands the hazards of improper use.
6.This appliance is not intended to be operated by means of an external timer or separate remote-control system.
7.This appliance is intended to be used in household applications only.
Using your oven
1.The appliance must not be operated by Microwave WITHOUT FOOD IN THE OVEN. Operation when empty will damage the appliance.
2.This appliance can be used by children aged from 8 years and above and persons with reduced physical, sensory and mental capabilities or lack of experience and knowledge if they have been given supervi- sion or instruction by a person responsible for their safety concerning the use of the appliance in a safe way and understand the hazards involved. Children shall not play with the appliance. Cleaning and user maintenance shall not be made by children without supervision. Keep the appliance and its cord out of reach of children less than 8 years.
3. Storage of Accessories
Do not store any objects other than oven accessories inside the oven in case it is accidentally turned on. In case of electronic failure, oven can only be turned off at wall socket.
Care & Cleaning of your Microwave Oven
It is essential for the safe operation of the oven that it is kept clean, and wiped out after each use. Failure to maintain the oven in a clean condition could lead to deterioration of the surface that could adversely affect the life of the appliance and possibly result in a hazardous situation.
1.Switch the oven off before cleaning and unplug at socket if possible.
2.Clean the inside of the oven, door seals and door seal areas regularly. When food splatters or spilled liquids adhere to the oven walls, door seals and door seal areas wipe off with a damp cloth. Mild detergent may be used if they get very dirty. The use of harsh detergent or abrasive is not recommended.
3.The outside oven surface should be cleaned with a damp cloth. To prevent damage to the operating parts inside the oven, water should not be allowed to seep into the ventilation openings.
4.If the Control Panel becomes dirty, clean with a soft, dry cloth. Do not use harsh detergents or abrasives on Control Panel. When cleaning the Control Panel, leave the oven door open to prevent the oven from accidentally turning on. After cleaning touch STOP/CANCEL Pad to clear display window.
5.If steam accumulates inside or around the outside of the oven door, wipe with a soft cloth. This may occur when the microwave oven is operated under high humidity conditions and in no way indicates a malfunction of the unit or microwave leakage.
6.The oven cavity floor should be cleaned regularly. Simply wipe the bottom surface of the oven with mild detergent and hot water then dry with a clean cloth. Cooking vapours collect during repeated use but in no way affect the bottom surface.
7.A steam cleaner is not to be used for cleaning.
8.Keep air vents clear at all times. Check that no dust or other material is blocking any of the air vents on the top, bottom or rear of the oven. If air vents become blocked this could cause overheating which would affect the operation of the oven, and could lead to a hazardous situation.
Maintenance of your oven
1. Service
WHEN YOUR OVEN REQUIRES A
SERVICE call your local Panasonic engi- neer. You can look on the web site (www.panasonic.co.uk) under the “support” option, where a service dealer locator can be found or alternatively call our Customer Communications Centre on 0344 844 3899 who can recommend an engineer. It is hazardous for anyone other athan competent person to carry out any service or repair operation which involves the removal of a cover which gives protection against exposure to microwave energy.
2. Door Seals
Do not attempt to tamper with or make any adjustments or repairs to door, control panel housing, safety interlock switches or any other part of the oven. Do not remove outer panel from oven. The appliance should be inspected for damage to the door seals and door seal areas and if these areas are damaged the appliance should not be operated until it has been repaired by a service technician trained by the manufacturer.
3.Oven Light
The oven lamp must be replaced by a service technician trained by the manufacturer. DO NOT attempt to remove the outer casing from the oven.
4.Selected Spares and Accessories
These may be ordered direct; on line at www.panasonic.co.uk or by telephoning the Customer Communications Centre 0344 844 3899. Most major credit and debit cards accepted. Ensure you quote the correct model number.
Parts of Your Oven
1. Do not cook directly on oven cavity floor. Always place food in a microwave safe dish. The only exception to this is when cooking Jacket Potatoes or Auto Program Jacket Potatoes.
2.Arcing may occur if the incorrect weight of food is used or a metal container has been used accidentally. If this occurs, stop the machine immediately.
3.Always refer to instructions for correct accessories to use on all programs.
Microwaving Principles
Microwave energy has been used in this country to cook and reheat food since early experiments with RADAR in World War II. Microwaves are present in the atmosphere all the time, both naturally and from manmade sources. Manmade sources include radar, radio, television, telecommunication links and mobile phones.
How microwaves cook food
In a microwave oven, electricity is converted into microwaves by the MAGNETRON
Reflection
The microwaves bounce off the metal walls and the metal door screen.
Transmission
Then they pass through the cooking containers to be absorbed by the water molecules in the food, all foods contain water to a more or lesser extent.
The microwaves cause the water molecules to vibrate which causes FRICTION, ie. HEAT. This heat then cooks the food. Microwaves are also attracted to fat and sugar particles, and foods high in these will cook more quickly. Microwaves can only penetrate to a depth of 1½ -2 inches (4-5 cm) and as heat spreads through the food by conduction, just as in a traditional oven, the food cooks from the outside inwards.
Important notes
The dish used to cook or reheat the food will get warm during cooking, as the heat conducts from the food. Even when microwaving, oven gloves are required!
MICROWAVES CANNOT PASS THROUGH METAL AND THEREFORE METAL COOKING UTENSILS CAN NEVER BE USED IN A MICROWAVE, FOR COOKING ON MICROWAVE ONLY
This is because these foods rely on dry external heat to cook correctly, do not attempt to cook by microwave.
Foods that require deep fat frying cannot be cooked either.
Boiled eggs
Do not boil eggs in your microwave. Raw eggs boiled in their shells can explode and cause serious injury
Standing time
When a microwave oven is switched off, the food will continue to cook by conduction – NOT BY MICROWAVE ENERGY. Hence
STANDING TIME is very important in microwaving, particularly for dense foods i.e. meat, cakes and reheated meals. (Refer to page 15).
General Guidelines
Standing time
Dense foods e.g. meat, jacket potatoes and cakes, require a STANDING TIME (inside or outside of the oven) after cooking, to allow heat to finish conducting to cook the centre completely.
•MEAT JOINTS – Stand
15 mins. wrapped in aluminium foil.
•JACKET POTATOES – Stand 5 mins. wrapped in aluminium foil.
•LIGHT CAKES – Stand 5 mins. before remov- ing from dish.
•FISH – Stand 2-3 mins.
•EGG DISHES – Stand 1-2 mins.
•PRECOOKED CONVENIENCE FOODS – Stand for 1-2 mins.
•PLATED MEALS – Stand for 1-2 mins.
•VEGETABLES – Boiled potatoes benefit from standing 1-2 mins., however most other types of vegetables can be served immediately.
If food is not cooked after STANDING TIME, return to oven and cook for additional time.
•DEFROSTING – It is essential to allow stand- ing time to complete the process. This can vary from 5 mins. e.g. raspberries, to up to 1 hour for a joint of meat.
Piercing
The skin or membrane on some foods will cause steam to build up during cooking. These foods must be pierced or a strip of skin should be peeled off before cooking to allow the steam to escape. Eggs, potatoes, apples, sausages etc, will all need to be pierced before cooking. DO NOT ATTEMPT TO BOIL EGGS IN THEIR SHELLS.
Moisture content
Many fresh foods e.g. vegetables and fruit, vary in their moisture content throughout the season. Jacket potatoes are a particular example of this. For this reason cooking times may have to be adjusted throughout the year. Dry ingredients e.g. rice, pasta, can dry out further during storage and cooking times may differ from ingredients freshly purchased.
Cling film
Cling film helps keep the food moist and the trapped steam assists in speeding up cooking times. However it should be pierced before cooking, to allow excess steam to escape. Always take care when removing cling film from a dish as the build-up of steam will be very hot. Always purchase cling film that states on the packet “suitable for microwave cooking” and use as a covering only. Do not line dishes with cling film.
Dish size
Follow the dish sizes given in the recipes, as these affect the cooking and reheating times. A quantity of food spread in a bigger dish cooks and reheats more quickly.
Quantity
Small quantities cook faster than large quantities, also small meals will reheat more quickly than large portions.
Spacing
Foods cook more quickly and evenly if spaced apart. NEVER pile foods on top of each other.
Shape
Even shapes cook evenly.
Density
Porous airy foods heat more quickly than dense heavy foods.
Covering
Cover foods with microwave cling film or a self- fitting lid. Cover fish, vegetables, casseroles, soups. Do not cover cakes, sauces, jacket potatoes, pastry items.
Arranging
Individual foods e.g. chicken portions or chops, should be placed on a dish so that the thicker parts are to the outside.
Starting temperature
The colder the food, the longer it takes to heat up. Food from a fridge takes longer to reheat than food at room temperature.
Food temperature should be between 5-8ºC
Turning and stirring
Some foods require stirring during cooking. Meat and poultry should be turned after half the cooking time.
Liquids
All liquids must be stirred before, during and after heating to avoid eruption. Do not heat liquids that have previously been boiled. DO NOT OVERHEAT.
Checking food
It is essential that food is checked during and after a recommended cooking time, even if an AUTO PROGRAM has been used (just as you would check food cooked in a conventional oven). Return the food to the oven for further cooking if necessary.
Cleaning
As microwaves work on food particles, keep your oven clean at all times. Stubborn spots of food can be removed by using a branded microwave spray cleaner, sprayed onto a soft cloth, always wipe the oven dry after cleaning. Avoid any plastic parts and door area.
Control Panel
(1)Display Window
(2)Microwave Power Pad
(3)Reheat Meal Pad
(4)Turbo Defrost Pad
(5)Timer Pad
This can be used to delay a cooking program for up to 99 minutes and 50 seconds,
or used as a kitchen timer or for standing (non-cooking) time.
(6)Auto Weight Pads
(7)Weight Selection Pad (Up & Down Pad)
(8)Stop/Cancel Pad: Before Cooking:
one press clears your instructions.
During Cooking:
one press temporarily stops the cooking program. Another press cancels your instructions and the time of day will appear in the display.
(9)Time Pad
(10) Clock Pad
Press the clock pad. Using the Time pad to set the clock (24 hr clock). Press clock pad again to stop colons flashing.
(11) Start Pad:
Press to start operating the oven. If during cooking the door is opened or Stop/Cancel Pad is pressed once, Start Pad has to be pressed again to continue cooking.
If an operation is set and Start Pad is not pressed, after 6 minutes, the oven will automatically cancel the operation. This display will revert back to clock or colon mode.
Beep Sound:
A beep sounds when a pad is pressed. If this beep does not sound, the setting is incorrect. When the oven changes from one function to another, two beeps sound. After completion of cooking, five beeps sound.
Let's start to Use your Oven
1 Plug in
Plug into a 13 amp fused electrical socket. You will be reminded to read your operating instructions.
2 Press Clock Pad
Set clock as a 24hr clock. Set time using time pads. Press clock pad again. (See page 23 for details).
3a Select Power
For example to select 1000 W, press Micro Power pad once.
3b Press Time Pad
To set a cooking time eg. 1 minute, press 1 minute pad once.
3c Press Start Pad
The time will be displayed in the window and count down. The oven will beep at the end of the cooking program.
4 Child Lock
To operate the child lock facility press the start pad three times, this will deactivate the microwave. “ ” will appear in the display and none of the controls will operate. To clear child lock facility press Stop/Cancel Pad three times. Child Safety Lock can be set when colon or time of day is displayed. To set or cancel child safety lock, Start Pad or Stop/Cancel Pad must be pressed 3 times within 10 seconds.
Setting the Clock
•Press Clock Pad
“ : ” will appear in the display window, and the colon starts to blink.
•Press Time Pads
Enter time of day by pressing Time Pads. e.g. 11.25am (24hr clock).
•Press Clock Pad
Colon stops blinking. Time of day is now locked into the display.
N.B.
1.To reset time of day, repeat step 1 through to step 3.
2.The clock will keep the time of day as long as the oven is plugged in and electricity is supplied.
3.This is a 24 hour clock.
Microwave Cooking and Defrosting
There are 6 different microwave power levels available.
Selecting Microwave Power Level
Note
The maximum time that can be set on 1000 W is 30 minutes. The maximum time that can be set on the other power levels is 99 mins 50 secs.
Using the Timer Feature
The Timer Pad is used as a timing pad either before, during or after a cooking program. When the Timer Pad is selected with a time, there is no microwave power in the oven during this time.
1. To Set a Standing Time: (Example: To stand for 5 minutes after cooking)
2. To Set a Delay Start: (Example: To start cooking 5 minutes later)
NB
1.If the oven door is opened during the stand or delay time, the time in the display window will continue to count down.
2.Delay Start and Standing Time cannot be used before an Auto Program.
Microwave Cooking and Defrosting
Accessory to use:
DO NOT place food directly onto the flat table except in the case of Jacket Potatoes or Auto Program Jacket Potatoes.
Foods reheated or cooked by MICROWAVE are normally covered with a lid or cling film, unless otherwise stated.
Two Stage Cooking:
eg. 1000 W 10 minutes followed by 250 W 20 minutes; Select 1000 W and program 10 minutes then select second power (250 W) with second cooking time (20 minutes) then press Start.
Three Stage Cooking:
eg. 1000 W 5 minutes, Delay 5 minutes, 1000 W 2 minutes; Select first Power level and cooking time, then press TIMER and time, then select final power level and final cooking time. Then press Start. Turbo Defrost and Auto Program can not be used with Three Stage Cooking.
#1 How long does the Acrylic interior lining last without scratching and/or bubbling? Is it as good as stainless steel?
We have had this microwave for a few months and is our first flatbed microwave, but not our first Panasonic. I can't say how long the interior lining will last, but I can describe our experience with it so far. The bottom lining is very hard and glass-like and is in perfect condition after using the microwave daily. There are no scratches on our lining, even though I have put some heavy plates in there to warm food without paying any attention to it. The interior sides seems like they are made from thin metal, but are coated with a synthetic material which seems tough. The whole interior cleans well too. Based on our experience so far, the interior seems as resilient as metal would be.
There is no shelf or revolving plate etc., items are placed directly on the flat bed surface - very pleased with mine so far, four weeks use!
#3 The manufacturer's stated oven depth is 42cm, but would the feet fit on a shelf with a depth of 38cm ?
The 42cm includes both the door and the space required behind for ventilation. The feet measure under 30cm from front to back so would fit on 38cm but you would have an overhang on the front. Whereas you maybe able to get away with the front, you definitely need space at the back for ventilation. Measurement from the feet at the front to the back (including space for ventilation) is approximately 37cm.
#4 How long is the power cord? And which side of the appliance (as seen from the front) does it come out of?
I agree with previous response with cable length and cord input (basically at top back of where clock is). As an aside, this is my 3rd Panasonic microwave since ther invented them. I've not even used the clever techno smart cooking but this is by far the best I've bought. Because no turntable as static you can place all sorts shapes plates i.e.
#5 What are the exterior dimensions of this microwave please?
External measurements are 52cm wide, 39cm depth and 32.5cm high. Do not forget that to operate this microwave oven you have to have a clearance around the oven for airflow. The instruction book states that it requires 2 inches on one side with the other fully open, with 6 inches clearance on the top plus 4 inches at the rear. We have our on the worktop and it works well there.


 ” will appear in the display and none of the controls will operate. To clear child lock facility press Stop/Cancel Pad three times. Child Safety Lock can be set when colon or time of day is displayed. To set or cancel child safety lock, Start Pad or Stop/Cancel Pad must be pressed 3 times within 10 seconds.