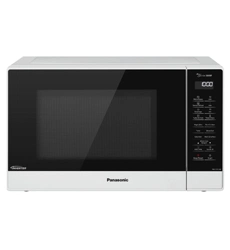
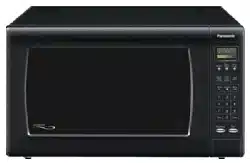
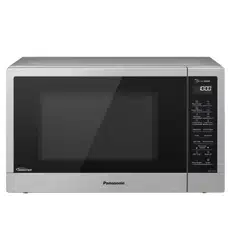
Oven Window Oven window with vapor barrier film (do not remove)
Oven Air Vent
Menu Label
Glass Tray
DO NOT operate the oven without the Roller Ring and Glass Tray in place.
Only use the Glass Tray specifically designed for this oven. Do not substitute any other Glass Tray.
If the Glass Tray is hot, allow to cool before cleaning or placing in water.
DO NOT cook directly on the Glass Tray. Always place food on a microwave-safe dish, or on a rack set in a microwave-safe dish.
If food or utensil on the Glass Tray touches oven walls, causing the tray to stop moving, the tray will automatically rotate in the opposite direction. This is normal.
Glass Tray can rotate in either direction.
Power Supply Cord
Power Supply Plug
Control Panel
Door Release Button Push to open the door. Opening the door during cooking will stop the cooking process without cancelling the program. Cook resumes as soon as the door is closed and Start pad is pressed. It is quite safe to open the door at any time during a cooking program and there is no risk of Microwave exposure.
Identification Plate
Waveguide Cover (do not remove)
Roller Ring
Roller Ring should be cleaned regularly to avoid excessive noise.
Roller Ring and Glass Tray should be used at the same time.
Warning Label
Oven Light Oven light will turn on during cooking and also when door is opened.
Note
1. The above illustration is for reference only.
2. The Glass Tray is the only accessory with this oven. All other cooking utensils mentioned in this manual must be purchased separately.
Control Panel
Before cooking: One press clears all your instructions. During cooking: One press
temporarily stops the cooking process. Another press cancels all your instructions and colon or time of day appears in the display window.
Start Pad
One press allows oven to begin functioning. If door is opened or Stop/Reset pad is pressed once during oven operation, Start pad must again be pressed to restart oven.
Note: If an operation is set and Start Pad is not pressed, after 6 minutes, the oven will automatically cancel the operation. The display will revert back to clock or colon mode.
Beep Sound
When a pad is pressed correctly, a beep sound will be heard. If a pad is pressed and no beep is heard, the unit does not or cannot accept the instruction. The oven will beep twice between programmed stages. At the end of any complete programme, the oven will beep five times.
Let’s Start To Use Your Oven!
1 Plug in.
Plug into a properly earthed electrical outlet. “ ” appears in the display window, then you can start to operate.
2 Open Door.
Open the door and place container with food in a dish on Glass Tray in the oven. Then close the door.
3 Select Power Level.
e.g. 440 W
Press Micro Power pad 4 times (see page 15 for Micro Power chart).
4 Set Time.
e.g. 12 minute 20 seconds
5 Press .
Cooking will start. The time in the display window will count down.
Display Window
Micro Power Feature
Power Level Display
Turbo Defrost Feature/
Defrost Display
Auto Cook Feature
More/Less Feature
Press More Pad ( ):
“+” will appears in the display window
Press Less Pad ( ):
“-” will appears in the display window.
Number (Time/Weight/Menu)
Weight Display (g/kg)
Child Safety Lock Display
Start Display
To Set Clock
You can use the oven without setting the clock.
1 Press Twice.
Colon will blink in the display window.
2 Enter Time of Day.
e.g. 12:35
Enter time of day using Time Pads.
Time appears in the display window, colon is blinking.
Verify time of day in the display window.
3 Press .
Colon stops blinking; time of day is entered and locked in the display window.
Note
1. To reset time of day, repeat steps 1-3.
2. The clock will keep the time of day as long as oven is plugged in and electricity is supplied.
3. Clock is a 12-hour display.
4. Oven will not operate while colon is blinking.
To Use Child Safety Lock
This feature allows you to prevent operation of the oven by a young child; however, the door will open. This feature can be set when colon or time of day is displayed.
To set:
Press Start 3 times.
Colon or time of day will disappear. Actual time will not be lost. " " appears in the display window.
To cancel:
Press Stop/Reset 3 times. Colon or time of day will reappear in the display window.
To set or cancel child safety lock, Start pad or Stop/Reset pad must be pressed 3 times within 10 seconds.
To Cook on Micro Power by Time Setting
1 Press to Select Micro Power Level.
Press Micro Power pad until your desired power level appears in the display window. (see chart below)
Press
Power Level
Example Of Use
once
1100 W (HIGH)
Boil water. Reheat. Cook vegetables, rice, pasta and noodles.
twice
800 W (MED-HIGH)
Cook poultry, meat, cakes, desserts. Heat milk.
3 times
600 W (MEDIUM)
Cook beef, lamb, eggs, fish and seafood. Melt butter.
4 times
440 W (MED-LOW)
Simmer soups, stews and casseroles (less tender cuts).
5 times
300 W (DEFROST)
Thaw foods.
6 times
100 W (LOW)
Keep cooked foods warm, simmer slowly.
2 Set Cooking Time.
e.g. 15 minutes
Enter cooking time by using Time pads.
1100 W: up to 30 minutes, Other Powers: up to 99 minutes 50 seconds.
3 Press .
Cooking will start.
The time in the display window will count down.
Note
1. It is possible to programme no more than 3 stages cooking as one cooking set. For 2 or 3 stages cooking, repeat steps 1 and 2 above before pressing Start pad. When operating, two beeps will be heard between each stage. (Please refer to page 26 for details).
2. You can increase the cooking time during cooking if required. Time can be increased in 1 minute increments, up to 10 minutes. Press Add Time pad once, then press 1 min pad to a maximum of 10 minutes. After selecting add time function, time should be added within a 5 second period. Cooking time can not be decreased during cooking.
3. Do not use metal containers on microwave mode.
4. Standing time can be programmed after Micro Power and time setting.
Refer to using the timer page 27.
To Defrost on Micro Power by Time Setting
This feature allows you to defrost meat, poultry and seafood by 300 W and time.
1 Press .
Press 5 times to select 300 W. (Defrost power level, refer to page 15)
2 Set Defrosting Time.
Set defrosting time by using Time pads. (up to 1 hour and 30 minutes)
3 Press .
Defrost time appears in the display window and begins to count down.
Note
1. Opening the door and taking out the defrosted parts during the operating time is recommended. turn over, stir or rearrange the parts which are still in icy.
2. For manual defrosting times, please refer to defrosting chart on page 28.
To Defrost Using Turbo Defrost
This feature allows you to defrost meat, poultry and seafood automatically by just setting the weight. The serving/weight is 0.1 kg to 3.0 kg.
1 Press .
Press once to select Turbo Defrost feature.
2 Select Desired Weight.
Pressing Turbo Defrost pad or More/Less/Weight pads until your desired weight appears in the display window.
or
3 Press .
Press Start. Defrosting time appears in the display window and begins to count down.
Food
Maximum Weight
Minced meat, chicken pieces, chops
3 kg
Beef roast, lamb, whole chickens
3 kg
Whole fish, scallops, prawns, fish fillets
1 kg
Tips for Turbo defrost
Meat, which is with bones. For example, if the meat with bones has the same weight as the pure meat, the meat in the former one is lighter than the latter one. So, subtract 0.5 kg for 2 kg meat with bones is better for defrosting and 0.25 kg for meat with bones which is less than 2 kg.
Two buzz beeps
Turn over the meat, chicken, fish and shellfish. Separate the stewed meat, chicken pieces and meat loaf. Apart the meat loaf from the hamburger. Shield the edge of chicken wings, roast, fat or bones.
Key to defrosting For evenly defrosting, turn over the foods or move the position of the foods in the containers during the progress of defrosting.
Remove the package of the raw meat and place it on the plate.
Shield the front part of the chicken drumsticks by using aluminum foil.
Shield the head and tail of the whole fish by using aluminum foil.
Remove the package of the fish fillet and place it on the plate.
To Cook Using the Quick 30 Feature
This feature allows you to quickly set cooking time in 30 second increments.
1 Press .
Press Quick 30 to set the desired cooking time (up to 5 minutes). Each press is 30 seconds. Time appears in the display. Power level is pre-set at 1100 W.
2 Press .
The cooking will start and the time in the display will count down. At the end of cooking, five beeps will sound.
Note
1. This feature is only available for Micro Power mode. Select desired micro power level before pressing Quick 30.
2. After setting the time by Quick 30, you cannot use Time pads.
Using the Add Time Feature
1 Press .
After cooking, press Add Time pad once to select the Add Time feature.
2 Enter Cooking Time.
e.g. 5 minutes
Enter cooking time by using Time pads.
1100 W: up to 30 minutes, Other powers: up to 99 minutes and 50 seconds.
3 Press .
Time will be added. The time in the display window will count down.
Note
1. This feature is not available for Turbo Defrost, Beverage, Melt & Soften, Sensor Reheat and Sensor Cook menus.
2. The Add Time feature will not operate after 1 minute cooking.
3. The Add Time feature can be used after the 3-stage cooking.
4. The power level is the same as the last stage.
To Use Sensor Reheat Feature
This feature allows you to reheat foods without selecting times and power levels. The sensor detects the heat and humidity generated by the food and reheat your food automatically.
1 Press .
2 Press .
After the heat and humidity is detected by the SENSOR, the remaining time appears in the display window and begins to count down.
Note
1. If desired, press More/Less/Weight pads to adjust the cooking time before pressing Start.
2. Reheating by Sensor is suitable for pre-cooked foods. There is a setting for frozen and refrigerator temperature or room temperature foods. It is suitable for casseroles, plated meals, soup, stews, pasta dishes (except lasagne) and canned foods. Food being reheated should weigh between 125 g and 1.0 kg. For foods weighing less than 125 g and more than 1.0 kg, use a manual micro power setting.
3. Do not reheat bread or pastry products (raw or uncooked), or beverages.
4. Do not use if oven cavity is warm (from previously cooked foods).
5. Cover foods securely with plastic wrap. (Do not use any snap closing lids.)
6. The door should not be opened before the time appears in the display window.
7. During the heating time, the oven will ‘beep’ and prompt you to stir/rearrange the food. There is no need to recover if not required.
8. All foods should have a covered standing time of at least 3 to 5 minutes.
To Use Beverage Feature
1 Press .
Press Beverage pad until the desired menu appears in the display window (see chart below).
Menu No.
Menu
Serving/Weight
Recommended containers
1
Coffee
1-1 (1 cup coffee)
1-2 (2 cups coffee)
Microwave safe cup
2
Milk
2-1 (1 cup milk)
2-2 (2 cups milk)
2 Select the Serving/weight.
Select the Serving/Weight by using the More/Less/Weight pads.
3 Press .
Reheat will start. The time in the display window will count down.
Note
1. Use a microwave safe cup. Heated coffee/milk can erupt if not mixed with air. Do not heat coffee/ milk in your microwave oven without stirring before and halfway through heating.
2. Care must be exercised not to overheat coffee/milk when using the Beverage feature. It is programmed to give proper result when heating 1 cup or 2 cups of coffee/milk, starting from room temperature for coffee and refrigerator temperature for milk. Overheating will cause an increased risk of scalding, or water eruption.
3. 1 cup of milk is 200 ml to 250 ml and 1 cup of coffee is 150 ml to 200 ml.
To Use Sensor Cook Menus
This feature allows you to cook foods without selecting time and power level. Only set desired menu number and Serving/Weight, the oven will cook your food automatically.
1 Press Desired Food Category Pad.
Select and press the desired food category pad. Menu number will appears in the display window. e.g. Vegetable pad
Press once for Vegetables.
Press twice for Root Vegetables
2 Press .
The time in the display window will count down.
Press
Menu No.
Menu
Recommended Weight
Recommended containers
3
Vegetables
125 g - 500 g
Microwave safe casserole with lid or plastic wrap
4
Root Vegetables
125 g - 1 kg
5
Frozen Vegetables
125 g - 1 kg
Press
Menu No.
Menu
Recommended Weight
Recommended containers
6
Fish
125 g - 500 g
Microwave safe plate with plastic wrap
7
Chicken Pieces
400 g - 1 kg
Microwave safe casserole with lid or plastic wrap
Press
Menu No.
Menu
Recommended Weight
Recommended containers
8
Dried Pasta
150 g - 500 g
Microwave casserole with lid
9
Instant Noodles
1 serv.-2 servs.
Press
Menu No.
Menu
Recommended Weight
Recommended containers
10
Porridge
100 g - 300 g
Microwave casserole with lid
11
Scrambled Egg
50 g - 200 g
Press
Menu No.
Menu
Recommended Weight
Recommended containers
12
Legumes
1 cup-4 cups
Microwave casserole with lid
13
Jacket Potatoes
400 g - 900 g
Paper tower
14
Rice
1cup -2.5 cups
Microwave casserole with lid
15
Rissoto
0.5 cup-3cups
16
Quinoa
¼ cup-1 cup
Note
1. If desired, press More/Less/Weight pads to adjust the cooking time before pressing Start.
2. The door should not be opened before the time appears in the display window.
3. Do not use plastic dishes as a secure seal cannot be achieved and inaccurate cooking may occur.
4. Only cook foods within the weight ranges described and accessories as indicated.
5. To prevent any mistakes during auto sensor programs ensure that the base of the oven and container are dry.
6. To allow for some variations that occur in food, check that food is thoroughly cooked and piping hot before serving.
3. Vegetables
It is suitable for cooking all types of leaf, green and soft varieties of vegetables, including broccoli, squash caulifl ower, cabbage, asparagus, beans, celery, zucchini, spinach, capsicum or a mixture of these. All vegetables should be trimmed or prepared and cut into evenly sized pieces. Clean the vegetables and place them in a microwave safe container, add 1 tablespoon to ¼ cup of water to vegetables if dehydrated or a softer cooked texture is desired. Butter, herbs, etc., may be added before heating, but do not salt vegetables until serving. Cover dishes securely with plastic wrap and place container at the center of the glass tray. Select the program then press Start. Open the door to STIR WHEN TWO BEEPS HEARD during cooking, press Start Pad to continue. At the end of cooking, stir larger quantities of vegetables. Let stand, covered, for 2 to 3 minutes.
4. Root vegetables
Suitable for cooking root vegetables such as potatoes, sweet potatoes, pumpkin, onions, swede , carrots, turnip and beetroot. All vegetables should be trimmed or prepared and cut into even sized pieces. Add 1 tablespoon to ¼ cup of water to vegetables if dehydrated or a softer cooked texture is desired .Place into an appropriate size dish and cover securely with plastic wrap . If desired, butter, herbs etc. may be added but do not add salt until after cooking. Open the door to STIR WHEN TWO BEEPS HEARD during cooking, press Start Pad to continue. At the completion of cooking, stir larger quantities of vegetables. Let stand, covered, for 2 to 3 minutes.
5. Frozen Vegetables
It is suitable for all types of frozen vegetables. Put them in a microwave safe container. Do not use plastic dishes. Best results are achieved if large quantities are placed in a single layer. Add 1 tablespoon to ¼ cup water to vegetables, if desired. Butter, herbs etc. may be added before heating, but do not add salt until serving. Cover dishes securely with plastic wrap and place container at the center of the glass tray. Select the program then press Start. Open the door to STIR WHEN TWO BEEPS HEARD during cooking, press Start Pad to continue. At the end of the cooking, stir vegetables and let stand, covered, for 2 to 3 minutes.
6. Fish
It is suitable for cooking whole fish and fish fillets (thickness of fish should not be more than 3 cm). Select fish suitable for microwave cooking and place in a single layer in a shallow microwave safe dish, with skin side down. Add butter, spices, herbs, or lemon juice to fl avour. Overlap thin edges of fillets to prevent overcooking. Shield the eye and tail area of whole fish with small amounts of aluminum foil to prevent overcooking. Cover dishes securely with plastic wrap and place container at the center of the glass tray. Select the program then press Start. Allow large amounts of fish to stand for 3 to 5 minutes after cooking before serving.
7. Chicken Pieces
It is suitable for cooking chicken pieces, such as wings, thighs, legs, breast fillets. Chicken pieces should be completely thawed before cooking. Pierce the chicken pieces. Marinate chicken pieces before cooking for added fl avour and colour. Put the prepared chicken pieces onto a microwave safe dish. Cover securely with plastic wrap and place container at the center of the glass tray. Select the program then press Start. Open the door to STIR WHEN TWO BEEPS HEARD during cooking, press Start Pad to continue. Let stand 5 to 10 minutes at the end of cooking.
8. Pasta
It is suitable for cooking a variety of pastas such as spaghetti, fettuccine, tagliatelle, macaroni, penne, spiral and various pasta shapes. Place pasta in an appropriate size microwave safe dish with boiling water. Use the above chart as a guide:
Pasta
150 g
250 g
350 g
500 g
Boiling Water
4 cups
5 cups
6 cups
8 cups
Dish Size
3 litre
3 litre
4 litre
4 litre
Always allow at least ½ depth of volume for evaporation to prevent boiling over. Add 1 tablespoon of oil, if desired, before cooking to prevent pasta from sticking together. Cover securely with plastic wrap and place container at the center of the glass tray. Select the program then press Start. Open the door to STIR WHEN TWO BEEPS HEARD during cooking, press Start pad to continue. At the end of the cooking, cover and let stand for 5 to 10 minutes, if required, before draining.
9. Instant Noodle
It is suitable for cooking instant noodle. Place the instant noodle and seasoning in a suitable size microwave safe casserole with boiling water. Use the above chart as a guide:
Instant Noodle
1 Serv.
2 Serv.
Boiling Water
500 ml
800 ml
Dish Size
3 litre
4 litre
Allow at least ½ depth of volume for evaporation to prevent boiling over. Cover securely with plastic wrap and place container at the center of the glass tray. Select the program then press Start. Open the door to STIR WHEN TWO BEEPS HEARD during cooking, press Start pad to continue.
10. Porridge
Porridge
Recommended Water
Recommended Containers
100 g
700-800 ml
1.5 L
200 g
1000-1200 ml
3 L
300 g
1500-1700 ml
4 L
It is suitable for cooking congee/porridge. Place the rice in a suitable size microwave safe casserole. Add recommended water listed below. Allow at least ½ depth of volume for evaporation to prevent boiling over. Partially cover with lid. Open the door to STIR WHEN TWO BEEPS HEARD during cooking, press Start Pad to continue. Stand 5-10 minutes covered after cooking.
11. Scrambled Eggs
Scrambled Eggs
50 g
100 g
150 g
200 g
Milk
1 T
2 T
3 T
4 T
Dish Size
2 litre
2 litre
3 litre
3 litre
In a 1-litre dish, beat eggs lightly with a whisk. Add milk and whisk until well combined (add pinch of salt). Cover dish with plastic wrap and place container at the center of the glass tray. Select the program then press Start. Stand covered for 1 minute before serving.
12. Legumes
It is suitable for cooking chickpeas, split peas dried beans and peas. Cover legumes with cold water and soak overnight, drain. Place legumes and boiling water into an appropriate sized microwave safe container. (See table for quantities)
Legumes
1 cup
2 cups
3 cups
4 cups
Boiling Water
3 cups
4 cups
6 cups
8 cups
Dish Size
3 litre
3 litre
4 litre
4 litre
Cover dishes securely with plastic wrap and place container at the center of the glass tray. Select the program then press Start. Open the door to STIR
WHEN TWO BEEPS HEARD during cooking, press Start Pad to continue. At the end of cooking, allow legumes to stand for 5 minutes if required. If food needs more time cooking, cook using 600 W.
13. Jacket potatoes
Suitable for cooking whole potatoes with their skin left on. Choose medium sized potatoes weighing approximately 200-250 g each. Wash and scrub potatoes and dry well. Prick with a fork several times. Place on glass tray lined with paper tower. At the end of cooking time, allow the potato to stand for 5 to 10 minutes.
14. Rice
It is suitable for cooking short and long grain rice including specialty rice. It is not suitable for cooking brown rice or wild rice. Place rice with water at room temperature in a suitable microwave safe dish. We recommend the following proportions of rice to cold tap water:
Rice
1 cup
1½ cups
2 cups
2½ cups
Water
1½ cups
2½ cups
3½ cups
4½ cups
Dish Size
3 litre
3 litre
4.5 litre
4.5 litre
It may be necessary to adjust the water to your personal preference. Soak in water for 10 - 15 minutes. Always allow at most ½ depth of volume for evaporation to prevent boiling over. Do not cook rice in plastic dishes as incorrect cooking times may result. Cover securely with plastic wrap and place container at the center of the glass tray. Select the program then press Start. Open the door to STIR WHEN TWO BEEPS HEARD during cooking, press Start Pad to continue. At the end of the cooking, let stand 5 to 10 minutes, covered.
15. Risotto*
It is suitable for cooking many basic risotto recipes and variations. Onions and garlic should be pre-cooked with 1 tablespoon of oil before adding rice and stock. The quantities of rice and amounts of stock, please follow the chart below. Always use arborio rice or short grain rice. Chicken, vegetable, beef or fish stock may be used. Stock should be boiling when added to rice otherwise cooking times may be incorrect. Cover dish securely with plastic wrap at stage 1. Open the door to STIR WHEN TWO BEEPS HEARD during cooking. Remove a lid or plastic wrap completely from dish. Add remaining stock. There is no need to re-cover for stage 2. At the end of stage 2 add grated parmesan cheese, stir through and cook for 2 to 4 minutes on High. Standing time may be required at the end to allow risotto to finish cooking.
16. Quinoa
It is suitable for cooking quinoa. Place quinoa in a microwave safe casserole dish. Use the above chart as a guide:
Quinoa
¼ cup
½ cup
¾ cup
1 cup
Tap water
¾ cup
1 cup
1½ cups
2 cups
Dish Size
2 litre
2.5 litre
3 litre
3.5 litre
Allow at least ½ depth of volume for evaporation to prevent boiling over. Soak in water for 10 - 15 minutes. Cover securely with plastic wrap and place container at the center of the glass tray. Select the program then press Start. Open the door to STIR WHEN TWO BEEPS HEARD during cooking, press Start Pad to continue. At the end of the cooking, let stand 10-15 minutes.
* General Quantities For Cooking Risotto
Preparation
(Manual Setting)
Sensor Cook
Finish
(Manual Setting)
Stage 1
Stage 2
High for 1 to 2 min. (all quantities)
Rice
Boiling Stock
Boiling Stock
High for 2 to 4 min.
0.5 cup
½ onion
1 clove garlic
1 tablespoon oil
0.5 cup
200 ml
200 ml
2 tablespoons
parmesan
1 cup
1 onion
1 cloves garlic
1 tablespoon oil
1 cup
400 ml
400 ml
2 tablespoons
parmesan
2 cups
1 onions
2 cloves garlic
2 tablespoons oil
2 cups
650 ml
650 ml
¼ cup
parmesan
3 cups
2 onions
3 cloves garlic
3 tablespoons oil
3 cups
850 ml
850 ml
½ cup
parmesan
To Use Melt & SoftenFeature
1 Press.
Press Melt & Soften pad until the desired menu appears in the display window (see chart below).
Menu No.
Menu
Serving/Weight
Recommended containers
17
Cream Chese
50 g
100 g
150 g
200 g
250 g
300 g
Microwave safe bowl/dish with plastic wrap
18
Chocolate
50 g
100 g
150 g
200 g
250 g
300 g
Microwave safe dish
19
Butter
50 g
100 g
150 g
200 g
250 g
300 g
Microwave safe dish with plastic wrap
20
Ice Cream
300 g
600 g
900 g
1200 g
-
-
-
2 Select the Serving/weight.
Select the Serving/Weight by using the More/Less/Weight pads.
3 Press .
Reheat will start. The time in the display window will count down.
For best results on Melt & Soften, follow these recommendations:
■ Chocolate:
Remove wrapper and place chocolate into a microwave safe dish. Cook without cover. After heating, stir until completely melted.
Note: Chocolate holds its shape even when softened.
■ Butter:
Remove wrapper, cut butter into 3 cm cubes, and place into a microwave safe dish. Melt with plastic wrap. Stir after cooking.
■ Cream Cheese:
Remove wrapper and place in a microwave safe bowl/dish. Soften with plastic wrap.
■ Ice Cream:
Soften slightly without lid.
Note If food needs more time cooking or weight exceeds range, cook using 300 W for melting or softening.
3-Stage Setting
This feature allows you to program 3 Stages of cooking continuously.
E.g.: Continually set [1100 W] 2 minutes, [600 W] 3 minutes and [100 W] 2 minutes.
1. Press once to select “1100 W”.
2. Set as 2 minutes by using Time Pads.
3. Press 3 times to select “600 W”.
4. Set as 3 minutes by using Time Pads.
5. Press 6 times to select “100 W”.
6. Set as 2 minutes by
7. Press once. The time will count down at the first stage in the display window.
Note
1. When operating, two beeps will sound between each stage.
2. This feature is not available for Turbo Defrost, Beverage, Melt & Soften, Sensor Reheat and Sensor Cook menus.
INGREDIENT CONVERSION CHART
INGREDIENT CONVERSION CHART
¼ cup
60 ml
¼ teaspoon
1 ml
⅓ cup
85 ml
½ teaspoon
2 ml
½ cup
125 ml
1 teaspoon
5 ml
⅔ cup
165 ml
2 teaspoons
10 ml
¾ cup
190 ml
3 teaspoons
15 ml
1 cup
250 ml
1 tablespoon
20 ml
1¼ cups
310 ml
1½ tablespoons
30 ml
1½ cups
375 ml
2 tablespoons
40 ml
2 cups
500 ml
3 tablespoons
60 ml
3 cup
750 ml
4 tablespoons
80 ml
3½ cups
875 ml
4 cups
1-litre
6 cups
1.5-litre
8 cups
2-litre
All recipes are tested using standard measurement that appear in the above chart.
To Use Timer
This feature allows you to program standing after cooking is completed and to program the oven as a minute or a second timer or program delay start.
To Use as a Kitchen Timer
1. Press once.
2. Set desired amount of time. (up to 99 minutes and 50 seconds)
3. Press Start.
Time will count down without oven operating.
To Set Standing Time
1. Set the desired cooking programme, up to 2 stages. (see page 26)
2. Press once.
3. Set desired amount of standing time.
(up to 99 minutes and 50 seconds)
4. Press Start. Cooking will start. After cooking, standing time will count down without oven operating.
To Set Delay Start
1. Press once.
2. Set desired amount of delay time. (up to 99 minutes and 50 seconds)
3. Set the desired cooking programme, up to 2 stages. (see page 26)
4. Press Start.
Delayed time will count down without oven operating. Then cooking will start.
Note
1. If oven door is opened during the Standing Time, Delay Start or Kitchen Timer, the time in the display window will continue to count down.
2. Delay Start and Standing Time cannot be programmed together with Turbo Defrost, Beverage, Melt & Soften, Sensor Reheat and Sensor Cook menus. This is to prevent the standing temperature of the food from rising before defrosting or cooking begins. A change in the starting temperature could cause inaccurate results.
3. When using Standing time or Delay time, it’s up to 2 Power stages.
Defrosting Chart
The times given below are a guideline only. Always check the progress of the food by opening the oven door and then re-starting. For larger quantities adjust times accordingly. Food should not be covered during defrosting.
Food
Weight/Quantity
Time & Mode
Method
Beef/Lamb/Joint (1)(3)
450 g (1 lb)
300 W 6-8 mins
standing 30 mins
Steaks (1)(3)
2 pcs 250 g
300 W 3-4 mins
standing 3 mins
Minced beef (1)(3)
450 g (1 lb)
300 W 6-7 mins
standing 5 mins
Stewing steak (1)(3)
450 g (1 lb)
300 W 6-8 mins
standing 10 mins
Whole chicken (1)(3)
450 g (1 lb)
300 W 5-7 mins
standing 10 mins
Chicken portions (1)(3)
450 g (1 lb)
300 W 6-8 mins
standing 5 mins
Whole fish (1)(3)
450 g (1 lb)
300 W 6-8 mins
standing 5 mins
Fish fillets (2)(3)
450 g (1 lb)
300 W 5-7 mins
standing 5 mins
Prawns (2)(3)
450 g (1 lb)
300 W 4-6 mins
standing 5 mins
Fruits, soft (1)
250 g
300 W 2-3 mins
standing 2 mins
Margarine (3)
250 g
300 W 1-2 mins
standing 2 mins
Cheese (3)
450 g (1 lb)
300 W 2-4 mins
standing 2 mins
Plated meals homemade adult size (2)
350 g
300 W 5-6 mins
standing 3-5 mins
Cooked Fruit (2)
540 g
300 W 4-5 mins
standing 3-5 mins
Cooked meat (2)
520 g
300 W 6-8 mins
standing 3-5 mins
Quiche (3)
1 pc 65 g
300 W 1-2 mins
standing 2 mins
Casseroles (1)
750 g
1100 W 6-7 mins
standing 3-5 mins
Bread rolls (1)
1 pc 85 g
1100 W 20-30 secs
standing 5 mins
Pastry puff (1) (3)
1 roll 375 g
300 W 2 mins-2 mins 30 secs
Stand time 20 mins in refrig erator
Pastry shortcrust (1) (3)
1 roll 500 g
300 W 4-5 mins
Stand time 20 mins in refrig erator
Pizza dough (1) (3)
1 ball 240 g
300 W 2 mins-2 mins 30 secs
standing 10 mins
Fruit tarte (3)
470 g
300 W 4-5 mins
standing 5 mins
Cheese cake (3)
600 g
300 W 2-3 mins
standing 5 mins
Fruit pie (3)
500 g
300 W 6-8 mins
standing 5 mins
Meat pie (3)
300 g
300 W 4-6 mins
standing 3 mins
(1) Turn or stir at half time.
(2) Separate and turn several times.
(3) Remove packaging and place on a heat resistant plate.
Reheating Chart
The times given in the charts below are a guideline only, and will vary depending on starting temperature, dish size etc.
Food
Weight/
Quantity
Time & Mode
Method
Drinks-Coffee-Milk
Coffee
1 mug 235 ml
1100 W 1 min 30 secs
Stir before, and after
reheating.
Coffee
2 mugs 470 ml
1100 W 2 mins 30 secs
3 mins
Milk
1 mug 235 ml
1100 W 1 min 20 secs
1 min 30 secs
Breads
Croissants
1 pc 50 g
1100 W 10-20 secs
Place on microwave safe plate on Glass Tray. Do not cover. Turn at half time.
2 pcs 100 g
1100 W 30-40 secs
Rolls
1 pc
1100 W 10-20 secs
4 pcs
1100 W 30-40 secs
Naan bread
225 g
1100 W 30-40 secs
Pitta bread
2 pcs
1100 W 20-30 secs
Plated meals-Homemade
Vegetables (cooked)
300 g
1100 W 2 mins
Cover. Stir at half time.
700 g
1100 W 5 mins-5 mins 30 secs
Potato puree
500 g
1100 W 3-4 mins
Rice, quinoa, couscous
300 g
1100 W 2 mins-2 mins 20 secs
Babyfood
120 g
600 W 30-40 secs
Canned Food
Baked beans
225 g
1100 W 1 min 30 secs-2 mins
Place in a microwave safe bowl on Glass Tray. Cover. Stir halfway.
Spaghetti in tomato sauce
200 g
1100 W 1 min 30 secs
Cream of tomato soup
400 g
1100 W 2 mins 30 secs
Chicken soup
425 g
1100 W 3 mins 30 secs
Pastry Products
Quiche
400 g
1100 W 2-3 mins
Place on microwave safe plate on Glass Tray. Do not cover.
Samosas/spring rolls
4 pcs 240 g
1100 W 1-1 min 30 secs
Purchased Convenience Foods
Cottage pie (chilled)
450 g
1100 W 5-6 mins
Place on microwave safe plate on Glass Tray. Do not cover.
Lasagne (chilled)
400 g
1100 W 7-8 mins
Sausage rolls
250 g
600 W 3-5 mins
Cooking Chart
Food
Weight/Quantity
Time & Mode
Method
Beans & Pulses-should be pre-soaked (except lentils)
Chick peas
225 g
1100 W 8 mins then
440 W 15-20 mins
Use 600 ml (1 pt) boiling water in a large bowl. Cover. Stir halfway.
Lentils
225 g
440 W 35-40 mins
Red kidney beans
225 g
1100 W 15 mins then 440 W 35-40 mins
Fruit-Peel, slice, chop into even sized pieces. Place in shallow microwave safe dish.
Apples, Rhubarb, stewed
450 g
1100 W 7-8 mins
Add 30 ml (2 tbsp.) of water. Only half fill dish. Cover. Stir halfway.
Plums-stewed
450 g
1100 W 8-10 mins
Lamb/Beef-from raw-Caution: Hot Fat! Remove dish with care.
Chops
450 g (1 lb)
800 W 4-5 mins then 600 W 3-4 mins
Place on heatproof plate. Turn halfway.
Cultets
450 g (1 lb)
600 W 10-12 mins
Pasta-Place in a large 3-litre (6 pints) microwave safe bowl
Macaroni
225 g
1100 W 13-15 mins
Use 1-litre (1¾ pints)
boiling water. Cover. Stir halfway.
Spaghetti, Tagliatellie
225 g
1100 W 11-12 mins
Pizza-Fresh chilled- N.B. Remove all packaging. Pizza will have a soft base.
Thin & Crispy
300 g
1100 W 2-3 mins
Place on heatproof plate on Glass Tray. Do not cover.
Deep pan
400 g
1100 W 4-6 mins
Fish & Shellfish
Whole fish
350 g
600 W 7-8 mins
Place on heatproof dish. Turn or stir halfway.
Sea scallops
450 g
600 W 8-10 mins
Green prawns
250 g
600 W 4-5 mins
Sausages-from raw-Caution: Hot Fat! Remove dish with care.
Thick
4 pcs 240 g
1100 W 2-3 mins
Place on microwave safe plate on Glass Tray. Cover. Turn halfway.
Thin
4 pcs 120 g
1100 W 1 min 30 secs 2 mins 30 secs
Note
Always check that food is piping hot after reheating in the microwave. If unsure, return to oven. Foods will still require a stand time, especially if they cannot be stirred. The denser the food the longer the stand time.
Before Requesting Service
THESE THINGS ARE NORMAL
The oven causes interference with my TV.
Some radio, TV, Wi-Fi, cordless telephone, baby monitor, blue tooth or other wireless equipment interference might occur when you cook with the microwave oven. This interference is similar to the interference caused by small appliances such as mixers, vacuums, blow dryers, etc. It does not indicate a problem with your oven.
Steam accumulates on the oven door and warm air comes from the oven vents.
During cooking, steam and warm air are given off from the food. Most of the steam and warm air are removed from the oven by the air which circulates in the oven cavity. However, some steam will condense on cooler surfaces such as the oven door. This is normal.
I accidentally ran my microwave oven without any food in it.
Running the oven empty for a short time will not damage the oven. However, we do not recommend this.
PROBLEM -POSSIBLE CAUSE -REMEDY
Oven will not turn on.
The oven is not plugged in securely.
Remove plug from outlet, wait 10 seconds and re-insert.
Circuit breaker or fuse is tripped or blown.
Reset circuit breaker or replace fuse.
There is a problem with the outlet.
Plug another appliance into the outlet to check if the outlet is working.
Oven will not start cooking.
The door is not closed completely.
Close the oven door securely.
Start Pad was not pressed after programming
Press Start Pad.
Another program has already been entered into the oven.
Press Stop/Reset Pad to cancel the previous program and program again.
The program has not been entered correctly.
Program again according to the
Stop/Reset Pad has been pressed accidentally.
Program oven again.
When the oven is turning on, there is noise coming from Glass Tray.
The roller ring and oven bottom are dirty.
Clean these parts according to care of your oven (See next page).
appears in the display window.
The Child Lock was activated by pressing Start Pad 3 times.
Deactivate Lock by pressing Stop/Reset Pad 3 times.
“H97”, “H98” or “H00” appears in the Display Window.
The display indicates a problem with microwave generation system.
Contact the specifi ed service centre.
Care of your Microwave Oven
Turn the oven off and remove the power plug from the wall socket before cleaning.
Keep the inside of the oven clean. When food splatters or spilled liquids adhere to oven walls, wipe with a damp cloth. Mild detergent may be used if the oven gets very dirty. The use of harsh detergent or abrasives is not recommended.
It is occasionally necessary to remove the Glass Tray for cleaning. Wash the tray in warm sudsy water or in a dishwasher.
The outside oven surfaces should be cleaned with a damp cloth. To prevent damage to the operating parts inside the oven, water should not be allowed to seep into the ventilation openings.
Do not allow the Control Panel to become wet. Clean with a soft, damp cloth. Do not use detergents, abrasives or spray-on cleaners on the Control Panel. When cleaning the Control Panel, leave oven door open to prevent oven from accidentally turning on. After cleaning press Stop/ Reset pad to clear display window.
If steam accumulates inside or around the outside of the oven door, wipe with a soft cloth. This may occur when the microwave oven is operated under high humidity conditions and in no way indicates malfunction of the unit.
The roller ring and oven cavity floor should be cleaned regularly to avoid excessive noise. Simply wipe the bottom surface of the oven with mild detergent, water or window cleaner and dry. The roller ring may be washed in mild sudsy water or dish washer. Cooking vapors collect during repeated use but in no way affect the bottom surface or roller ring wheels. When removing the roller ring from cavity floor for cleaning, be sure to replace in the proper position.
Note
1. When it becomes necessary to replace the oven light, please consult a dealer to have it replaced.
2. The oven should be cleaned regularly and any food deposits removed.
3. Do not use harsh abrasive cleaners or sharp metal scrapers to clean the oven door glass, since they can scratch the surface, which may result in shattering of the glass.


 ” appears in the display window, then you can start to operate.

 .
.
 ):
): ):
): Twice.

 " appears in the display window.
 to Select Micro Power Level.
 .
.
 .
.


 .
. .
.
 .
. .
.
 Press once for Vegetables.


 .
.


 appears in the display window.