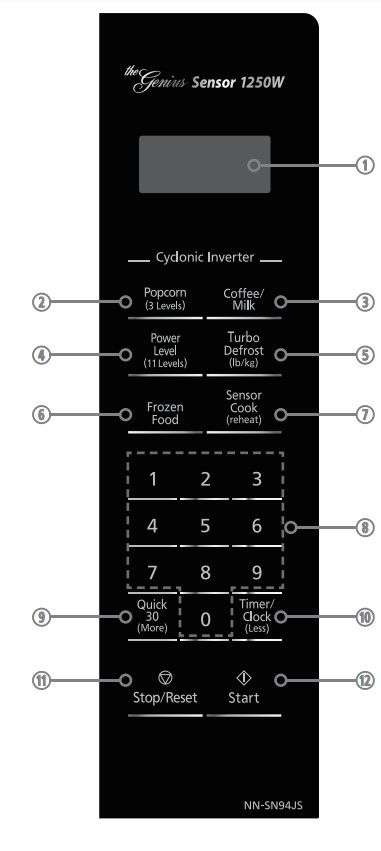
* The control panels of NN-SN94JS/NN-SN96JS/NN-SN97JS/NN-SN98JS have same key layout.
Display Window
Popcorn Pad (See page 14)
Coffee/Milk Pad (See page 18)
Power Level Pad (See page 12)
Turbo Defrost Pad (See page 15)
Frozen Food Pad (See page 16)
Sensor Cook (reheat) Pad (See page 16)
Number Pads
Quick 30 (More) Pad (See page 12, 14, 16)
Timer/Clock (Less) Pad (See page 11, 13, 14, 16)
Stop/Reset Pad Before cooking: One press clears all your instructions. During cooking: one press temporarily stops the cooking process. Another tap cancels all your instructions, and time of day or colon appears in the display window.
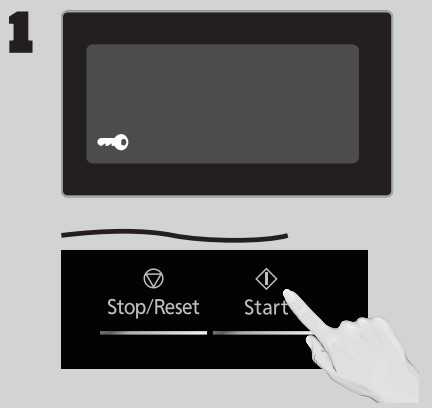
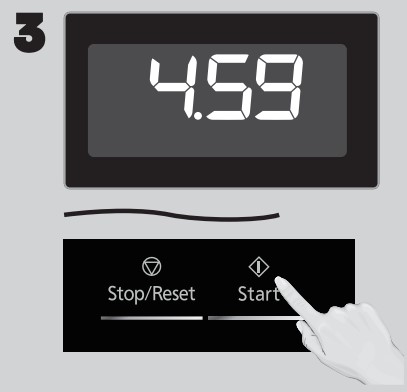
Start Pad After cooking program setting, one press allows oven to begin functioning. If door is opened or Stop/Reset Pad is pressed once during oven operation, Start Pad must be pressed again to restart oven.
Beep Sound:
When a pad is pressed correctly, a beep will be heard. If a pad is pressed and no beep is heard, the unit did not or cannot accept the instruction.
When operating, the oven will beep twice between programmed stages. At the end of any complete program, the oven will beep 5 times.
NOTE: If no operation after cooking program setting, 6 minutes later, the oven will automatically cancel the cooking program. The display will return to clock or colon display.
NOTE: The illustration is for reference only
Operation
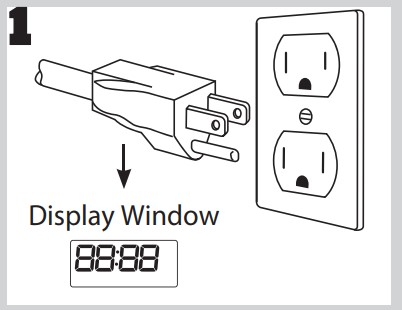
Using the Microwave for the First Time
Plug into a properly grounded electrical outlet.
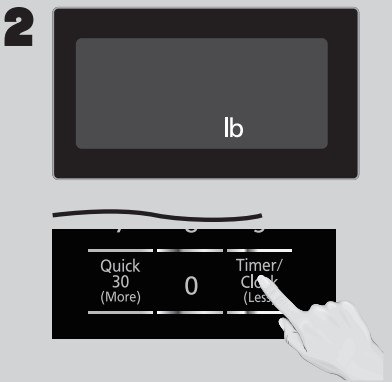
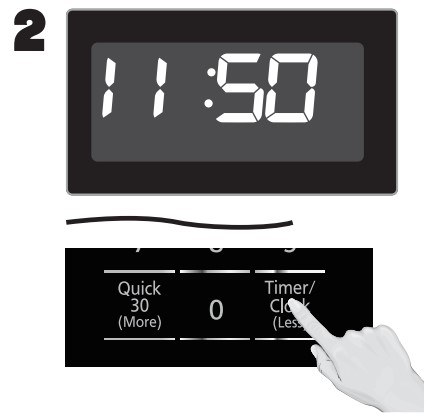
Press Start once, then Press Timer/Clock (Less) to cycle between the weight system, Metric (g/kg) or Imperial (oz./ lb).
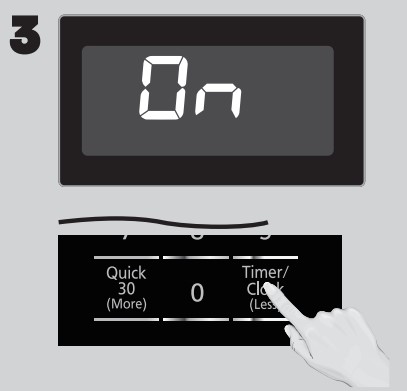
Press Start once, then Press Timer/Clock (Less) to cycle between the Beep on or Beep off.
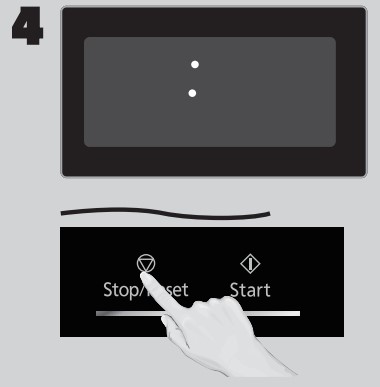
Press Stop/Reset to confirm; a colon (:) will appear in the display window.
NOTES:
These choices can be selected only when you plug-in the oven.
Setting the Clock
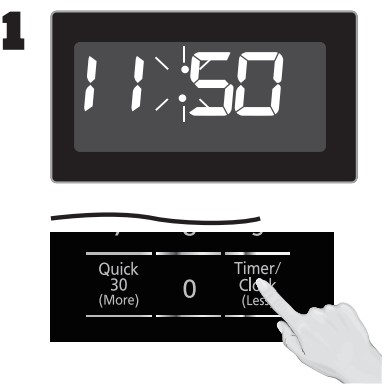
With the oven NOT cooking, press Timer/Clock (Less) twice; the colon will blink. Enter time of day using the Number pads.
Press Timer/Clock (Less) to finish setting and the colon (:) will stop blinking.
NOTES:
To reset the clock, repeat steps.
The clock will retain the time of day as long as the oven is plugged in and electricity is supplied.
The clock is a 12-hour display.
Oven will not operate while colon (:) is flashing.
Setting the Child Safety Lock
When the time of day appears in the display, press Start three times; “ ” will appear in the display.
Press Stop/Reset three times; the display will return to the time of the day and Child Lock will be cancelled.
NOTES:
This feature prevents the electronic operation of the oven until cancelled. It does not lock the door.
To set or cancel child safety lock, Start or Stop/Reset pad must be pressed 3 times within 10 seconds.
You can set Child Lock feature when the display shows a colon or time of day.
Cooking
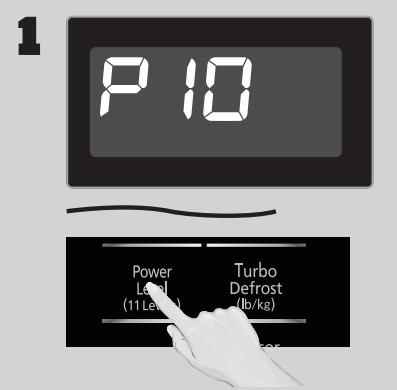
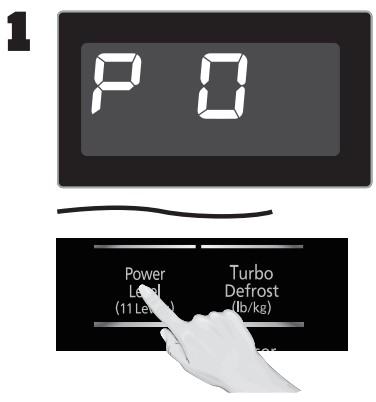
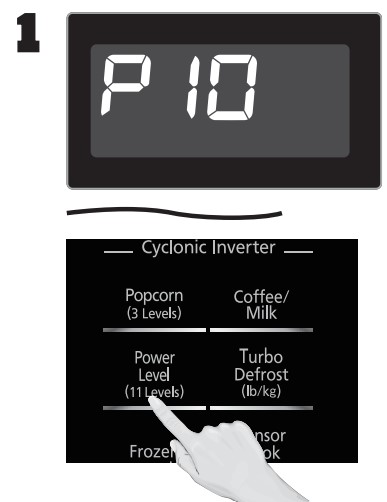
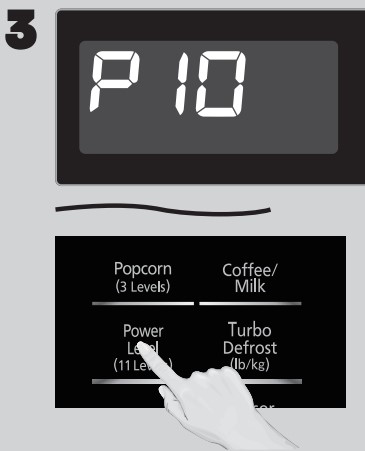
If cooking at high power (10), skip to step 2. Press Power Level until the desired power level appears in the display. P10 is the highest and P1 is the lowest. P0 is the keep warm feature.
Press
Power Level
once twice 3 times 4 times 5 times 6 times 7 times 8 times 9 times 10 times 11 times
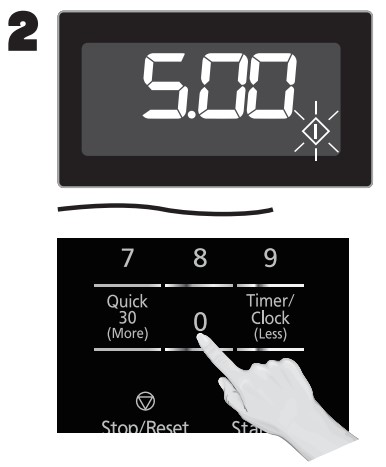
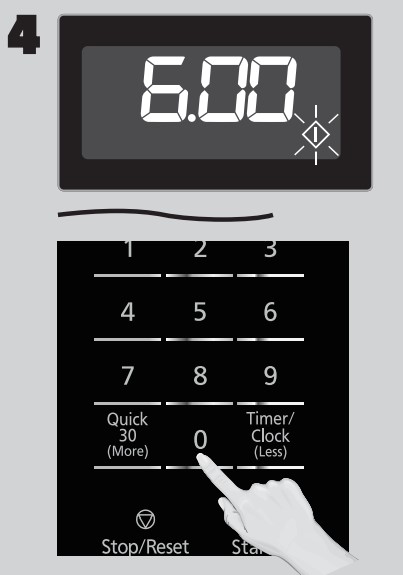
Set Cooking Time using the Number pads. P10 (HIGH) andP0 (KEEP WARM) have max. cooking time of 30 minutes. For other power levels, the max. time is 99 minutes, 99 seconds.
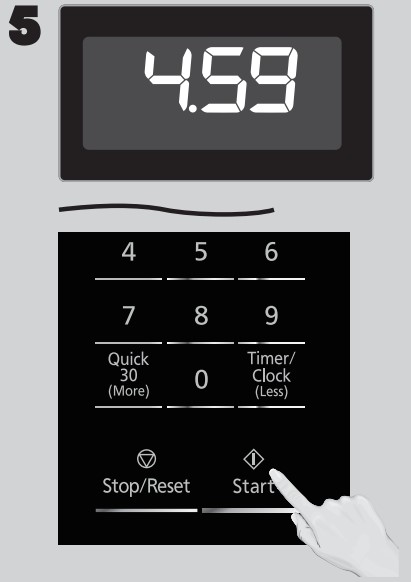
Press Start; the cooking will start and the time will count down in the display. At the end of cooking, five beeps will sound.
NOTES:
For reheating, use P10 (HIGH) for liquids, P7 (MED-HIGH) for most foods, and P6 (MEDIUM) for dense foods.
For defrosting, use P3 (MED-LOW).
DO NOT OVERCOOK: This oven requires less time to cook than older units. Overcooking will cause food to dry out and may cause a fire. A microwave oven’s cooking power tells you the amount of microwave power available for cooking.
Stage Cooking:
For more than one stage of cooking, repeat steps 1 and for each stage of cooking before pressing Start. The maximum number of stages for cooking is three. When operating, two beeps will sound between each stage.
Five beeps will sound at the end of the entire sequence.
Automatic function (such as frozen food, sensor cook reheat), popcorn, coffee/milk and turbo defrost) can not be used with 3 stage cooking.
Keep Warm (Will keep food warm for up to 30 minutes after cooking)
Press Power Level 11 times to select the P0 (KEEP WARM).
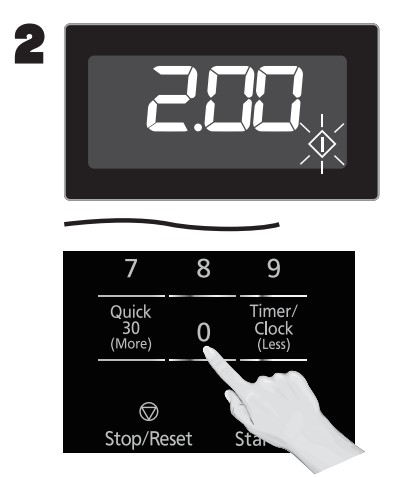
Set warming time using Number pads (up to minutes). This example shows two minutes.
Press Start; the cooking will start and the time will count down in the display. At the end of cooking, five beeps will sound.
NOTES:
P0 (KEEP WARM) can be set as the final stage after cook time has been manually entered. It cannot be used with Automatic function (such as frozen food, sensor cook (reheat), popcorn, coffee/milk and turbo defrost).
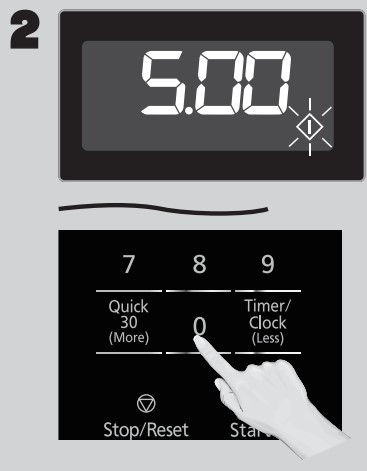
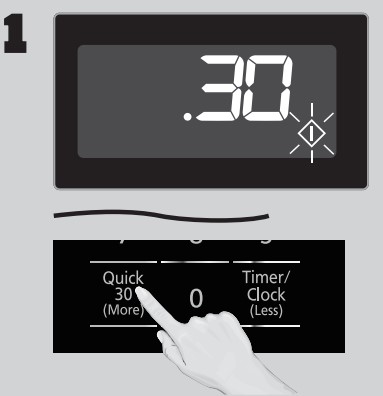
Quick 30 (Set or add cooking time in seconds increments)
Press Quick 30 (More) until the desired cooking time (up to 5 minutes) appears in the display. Power Level is pre-set at P10.
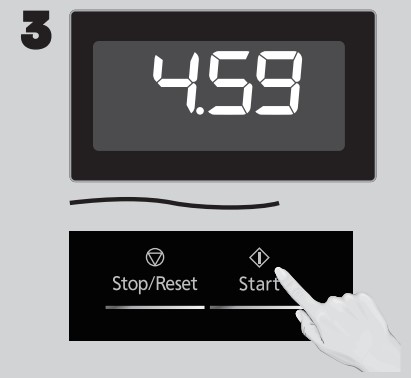
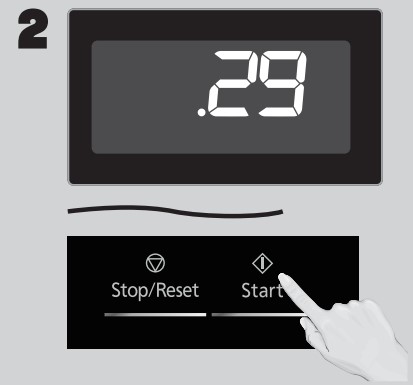
Press Start; the cooking will start and the time will count down in the display. At the end of cooking, five beeps will sound.
NOTES:
If desired, you can use other power levels. Select desired power level before pressing Quick 30 (More).
After setting the time by Quick 30 (More) pad, you cannot use the Number Pads.
Quick 30 (More) pad can also be used to add more time during manual cooking.
It cannot be used with Automatic function (such as frozen food, sensor cook reheat), popcorn, coffee/ milk and turbo defrost).
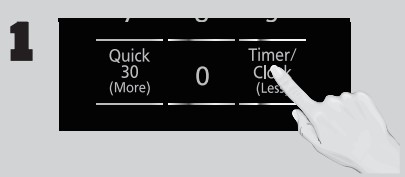
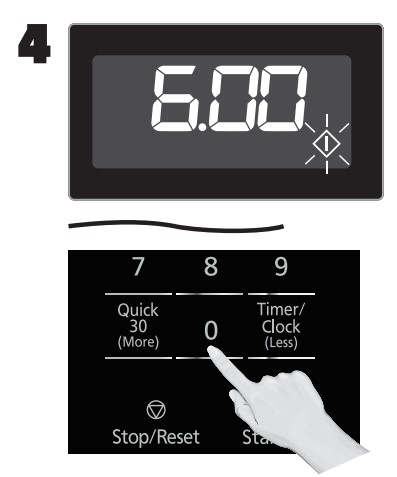
Setting the Timer
This feature allows you to program the oven as a kitchen timer. Press Timer/Clock (Less) once
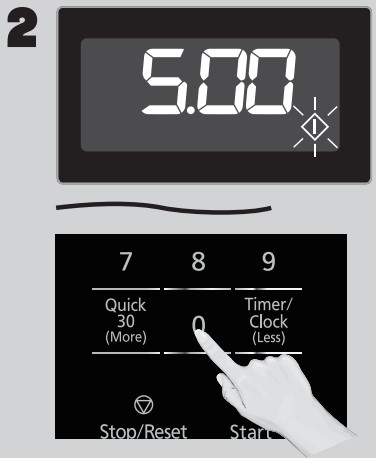
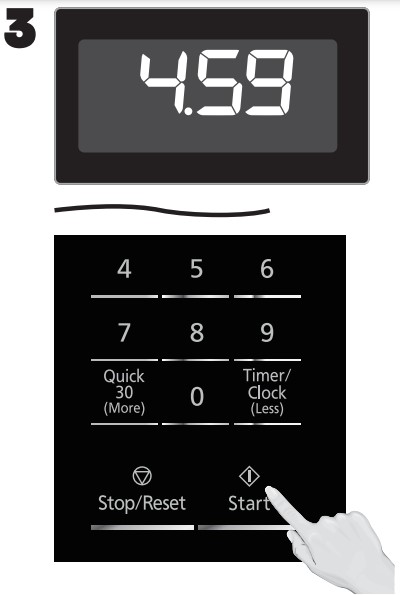
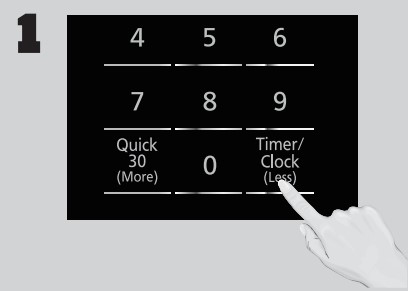
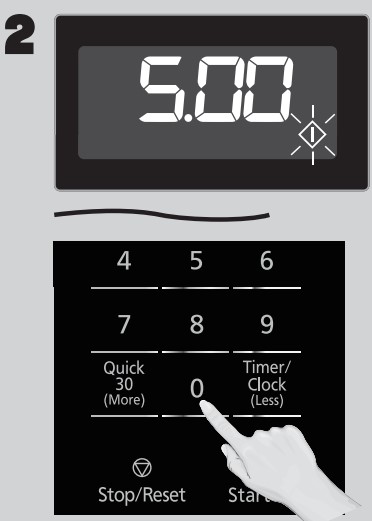
Set desired amount of time using Number pads (up to 99 minutes, 99 seconds).
Press Start. The timer will count down without cooking and beep five times when done.
Caution: If oven lamp is lit while using the timer feature with door closed, the oven is NOT set properly; STOP OVEN IMMEDIATELY and re-read instructions.
Setting a Standing Time
Some recipes call for a standing time after cooking. Press Power Level until the desired power level appears in the display.
Set Cooking Time using the Number pads (see previous page for maximum times).
This feature allows you to program the oven as a kitchen timer. Press Timer/Clock (Less) once.
Set desired amount of stand time using Number pads (up to 99 minutes, 99 seconds).
Press Start. The timer will start and then beep twice at the end of cooking time (the beginning of standing time). Five beeps will sound when standing time is done.
Setting a Delayed Start
The start time can be delayed to start cooking at a later time. To do this, first press Timer/ Clock (Less) once.
Enter the desired delay time up to 99 minutes, 99 seconds) using the Number pads.
Press Power Level until the desired power level appears in the display.
Set Cooking Time using the Number pads (see previous page for maximum times).
Press Start; the delay time will count down, then cooking will begin. At the end of cooking, five beeps will sound.
NOTES:
When each stage finishes, the oven will beep twice. At the end of the program, the oven will beep five times.
If the oven door is opened during Stand Time, Kitchen Timer or Delay Time, the time on the display will continue to count down.
Stand Time and Delay start cannot be programmed before any automatic function (such as frozen food, sensor cook (reheat), popcorn, coffee/milk and turbo defrost). This is to prevent the starting temperature of food from rising.
When using Standing time or Delay Start, it’s up to 2 power stages.
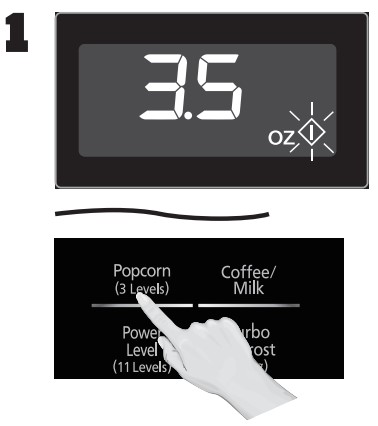
Popcorn (Example: To pop 3.5 oz. (99 g) of popcorn)
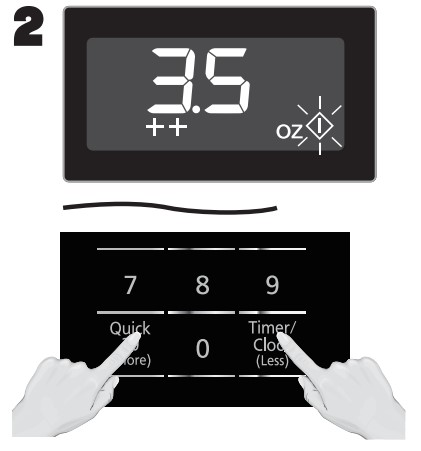
Press Popcorn until the desired size appears in the display.
Once for 3.5 oz. (99 g), twice for oz. (78 g), or three times for 1.5 oz. (42 g).
If desired, press Quick 30 (More) once to add 10 seconds or twice to add 20 seconds.
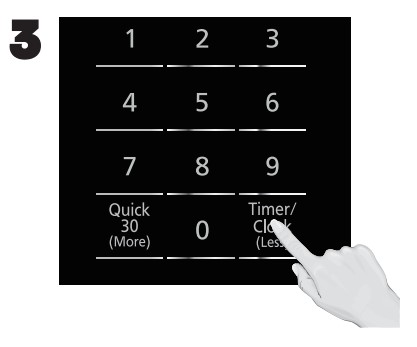
Press Timer/Clock (Less) once to subtract 10 seconds or twice to subtract 20 seconds.
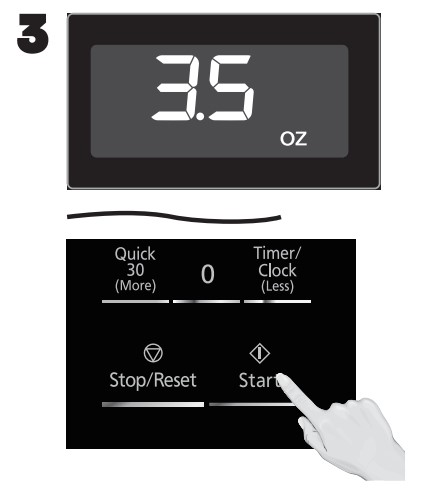
Press Start; After several seconds, cooking time appears in the display window and begins to count down.
NOTES:
Pop one bag at a time.
Place bag in oven according to manufacturers’ directions.
Start with popcorn at room temperature.
Allow popped corn to sit unopened for a few minutes.
Open bag carefully to prevent burns, because steam will escape.
Do not reheat unpopped kernels or reuse bag.
If popcorn is of a different weight than listed, follow instructions on popcorn package.
Never leave the oven unattended.
If popping slows to 2 to seconds between pops, stop oven. Overcooking can burn popcorn or cause fire.
When popping multiple bags one right after the other, the cooking time may vary slightly. This does not affect the popcorn results.
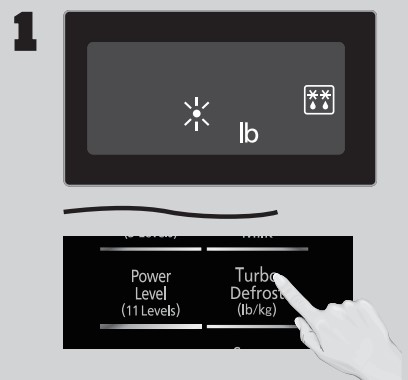
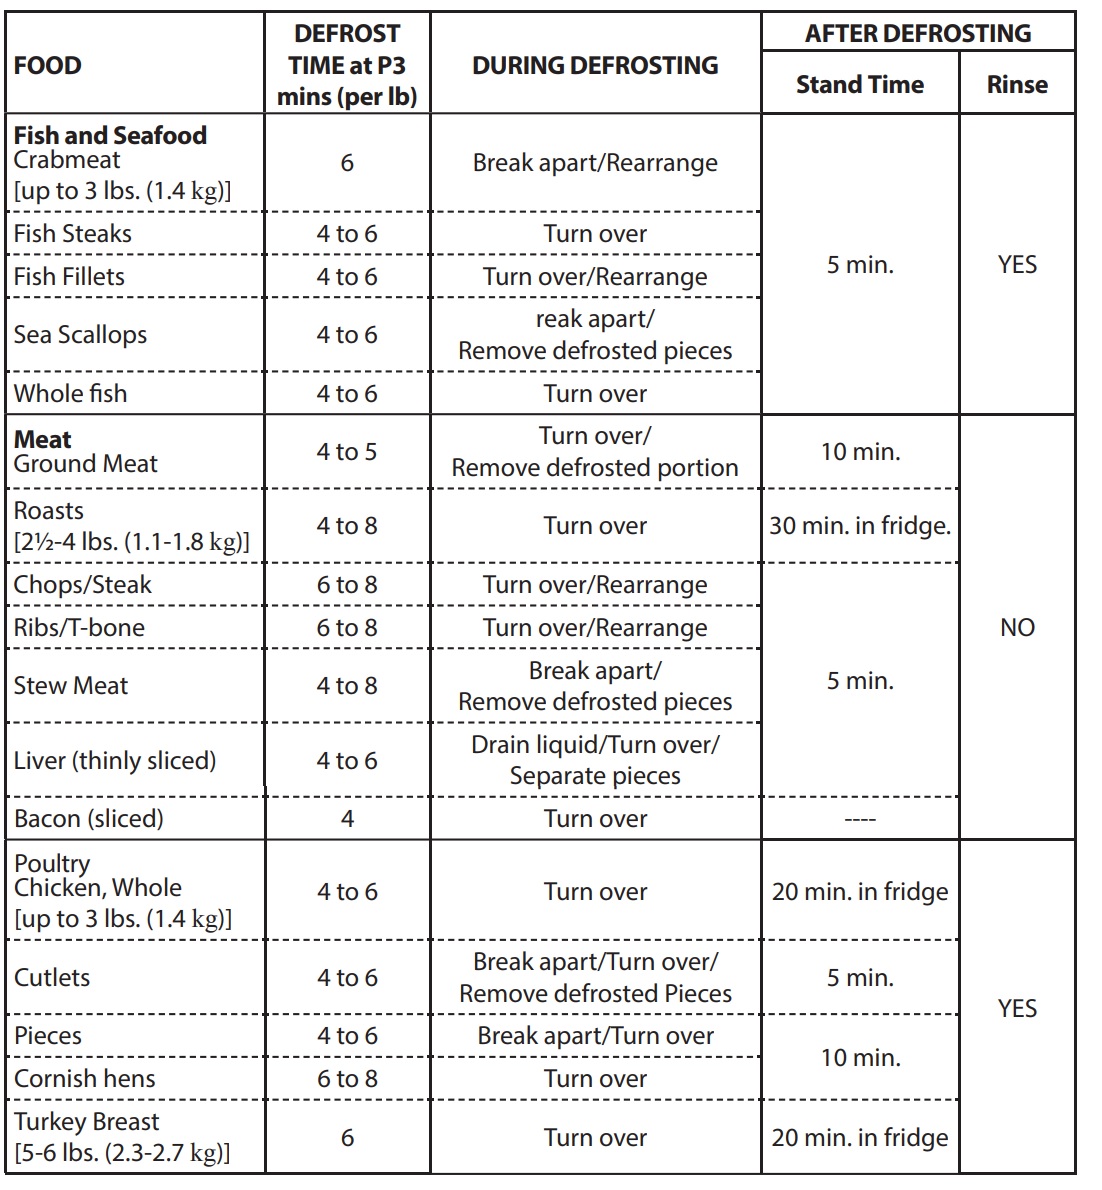
Turbo Defrost
This feature allows you to defrost foods such as meat, poultry and seafood, simply by entering the weight. Press Turbo Defrost.
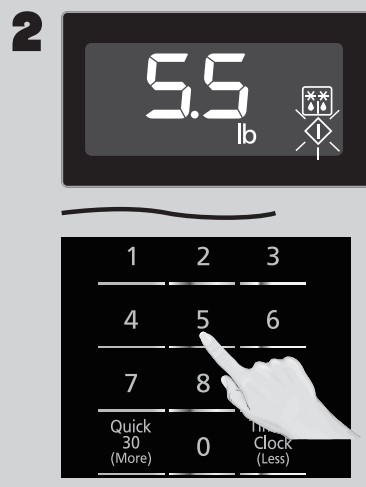
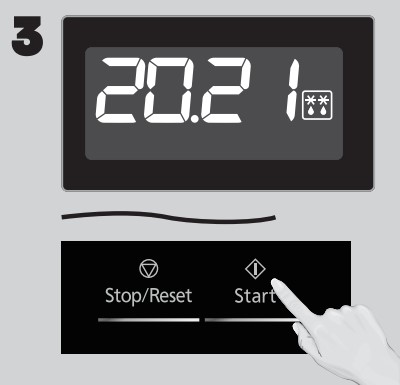
Enter weight of the food using the Number pads.
Press Start. Defrosting will start. Larger weight foods will cause a signal midway through defrosting. If two beeps sound, turn over and/or rearrange foods.
NOTE:
The maximum weight for Turbo Defrost is 6 lbs. (3 kg).
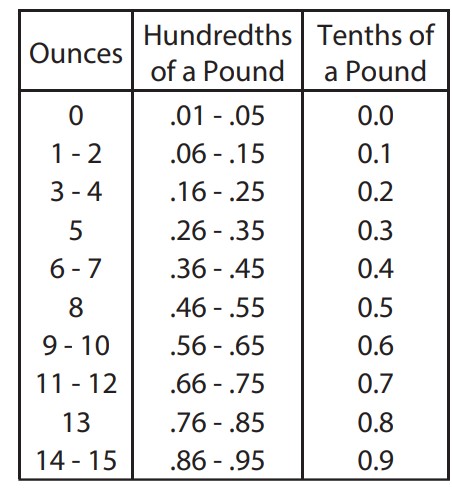
Conversion
Follow the chart to convert ounces or hundredths of a pound into tenths of a pound. To use Turbo Defrost, enter the weight of the food in pounds and tenths of a pound If a piece of meat weighs lbs or 1 lb 14 oz., enter lbs.
Defrosting Tips & Techniques
Preparation For Freezing:
Freeze meats, poultry, and fish in packages with only one or two layers of food. Place wax paper between layers.
Package in heavy-duty plastic wraps, bags (labeled “For Freezer”), or freezer paper.
Remove as much air as possible.
Seal securely, date, and label.
To Defrost:
Remove wrapper. This helps moisture to evaporate. Juices from food can get hot and cook the food.
Set food in microwave safe dish.
Place roasts fat-side down. Place whole poultry breast-side down.
Select power and minimum time so that items will be underdefrosted.
Drain liquids during defrosting.
Turn over (invert) items during defrosting.
After Defrosting:
Large items may be icy in the center. Defrosting will complete during Standing Time.
Let stand, covered, following stand time directions on page 13.
Rinse foods indicated in the chart.
Items which have been layered should be rinsed separately or have a longer stand time.
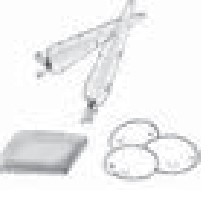
Sensor Reheat
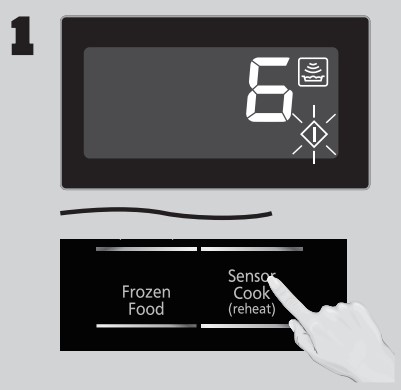
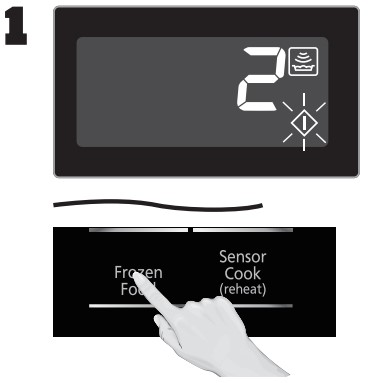
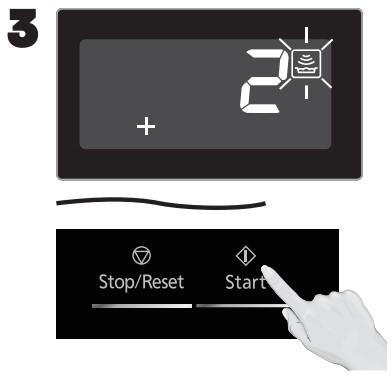
Press Sensor Cook (reheat) once.
If desired, press Quick 30 (More) to add 20% more time than suggested. Press Timer/Clock (Less) to subtract 20% cooking time.
Press Start. Reheating is complete when five beeps sound.
NOTES:
After having used the Sensor Reheat feature a few times, you may decide you would prefer your food cooked to a different doneness – that is why you would utilize the Quick 30 (More) or Timer/Clock (Less) pads.
When steam is detected by the Genius Sensor and two beeps sound, the remaining cooking time will appear in the display.
Casseroles:
Add 3 to 4 tablespoons (45 to ml) of liquid, cover with lid or vented plastic wrap. Stir when time appears in the display window.
Canned foods:
Empty contents into casserole dish or serving bowl, cover dish with lid or vented plastic wrap. After reheating, let stand for a few minutes.
Plate of food:
Arrange food on plate; top with butter, gravy, etc. Cover with lid or vented plastic wrap. After reheating, let stand for a few minutes.
DO NOT USE SENSOR REHEAT:
To reheat bread and pastry products. Use manual power and time for these foods.
For raw or uncooked foods.
If oven cavity is warm.
For beverages.
For frozen foods.
Frozen Food / Sensor Cook
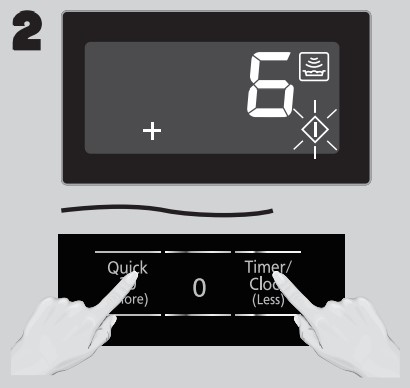
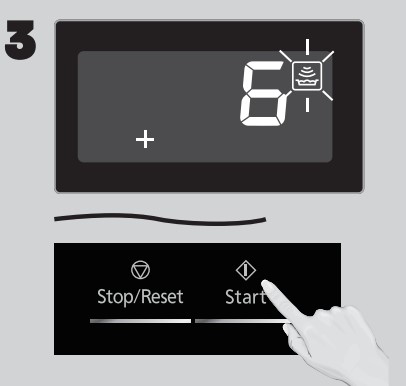
Press Frozen Food or Sensor Cook (reheat) until the number corresponding to the desired food appears in the display (see chart on the next page).
If desired, press Quick 30 (More) to add 20% more time than suggested. Press Timer/ Clock (Less) to subtract 20% cooking time.
Press Start. Cooking is complete when five beeps sound.
NOTES:
After having used the Sensor Cook feature a few times, you may decide you would prefer your food cooked to a different doneness – that is why you would utilize the Quick 30 (More) or Timer/ Clock (Less) pad.
When steam is detected by the Genius Sensor and two beeps sound, the remaining cooking time will appear in the display.
Automatic features are provided for your convenience. If results are not suitable to your individual preference, or if serving size is other than what is listed on page 17, please refer to manual cooking on page 12.
For the best results with the GENIUS SENSOR, follow these recommendations:
BEFORE Reheating/Cooking:
The room temperature surrounding the oven should be below 95 °F (35 °C).
Food weight should exceed oz. (110 g).
Be sure the Glass Tray, the outside of the cooking containers and the inside of the microwave oven are dry before placing food in the oven. Residual beads of moisture turning into steam can mislead the sensor.
Cover food with lid, or with vented plastic wrap. Never use tightly sealed plastic containers—they can prevent steam from escaping and cause food to overcook.
DURING Reheating/Cooking:
DO NOT open the oven door until two beeps sound and cooking time appears in the display. Doing so will cause inaccurate cooking since the steam from food is no longer contained within the oven cavity.
Once the cooking time begins to count down, the oven door may be opened to stir, turn or rearrange foods.
AFTER Reheating/Cooking:
All foods should have a standing time.
Frozen Food Chart
See the chart below for Frozen Food categories.
Recipe
Serving/Weight
Hints
Frozen Entrées
8 - 28 oz. (220 - 800 g)
Follow manufacturers' directions for preparation. After 2 beeps, stir or rearrange. Be careful when removing the film cover after cooking. Remove facing away from you to avoid steam burns. If additional time is needed, continue to cook manually
Frozen Pizza (single)
8 oz. (220 g)
Follow manufacturers’ directions for preparation. Add more time of cooking if needed.
Frozen Vegetables
6 - 16 oz. (170 - 450 g)
Wash thoroughly, add 1 tbsp (15 ml). of water per ½ cup (125 ml) of vegetables, and cover with lid or vented plastic wrap. Do not salt/butter until after cooking. (Not suitable for vegetables in butter or sauce.)
Frozen Dinners
11 - 16 oz. (300 - 450 g)
Follow manufacturers' directions for covering or removing covers. Do not use frozen foods packaged in foil trays. After 2 beeps, stir or rearrange.
Frozen Pocket Sandwich
1 sandwich 4.5 oz. (128 g)
Follow manufacturer’s directions for preparation.
Sensor Cook Chart
See the chart below for Sensor Cook categories.
Food Characteristics
Bone and Fat
Both bone and fat affect cooking. Bones may cause irregular cooking. Meat next to the tips of bones may overcook while meat positioned under a large bone, such as a ham bone, may be undercooked. Large amounts of fat absorb microwave energy and the meat next to these areas may overcook.
Density
Porous, airy foods such as breads, cakes or rolls take less time to cook than heavy, dense foods such as potatoes and roasts. When reheating donuts or other foods with different centers be very careful. Certain foods have centers made with sugar, water, or fat and these centers attract microwaves (for example, jelly donuts). When a jelly donut is heated, the jelly can become extremely hot while the exterior remains warm to the touch. This could result in a burn if the food is not allowed to cool properly in the center.
Quantity
Two potatoes take longer to cook than one potato. As the quantity of the food decreases so does the cooking time. Overcooking will cause the moisture content in the food to decrease and a fire could result. Never leave microwave unattended while in use.
Shape
Uniform sizes heat more evenly. The thin end of a drumstick will cook more quickly than the meaty end. To compensate for irregular shapes, place thin parts toward the center of the dish and thick pieces toward the edge.
Size
Thin pieces cook more quickly than thick pieces.
Starting Temperature
Foods that are at room temperature take less time to cook than if they are chilled, refrigerated or frozen.
Cooking Techniques
Piercing
Foods with skins or membranes must be pierced, scored or have a strip of skin peeled before cooking to allow steam to escape. Pierce clams, oysters, chicken livers, whole potatoes and whole vegetables. Whole apples or new potatoes should have a 1-inch (2.5 cm) strip of skin peeled before cooking. Score sausages and frankfurters. Do not Cook/Reheat whole eggs, with or without the shell. Steam buildup in whole eggs may cause them to explode, and possibly damage the oven or cause injury. Reheating SLICED hard-boiled eggs and cooking SCRAMBLED eggs is safe.
Browning
Foods will not have the same brown appearance as conventionally cooked foods or those foods which are cooked utilizing a browning feature. Meats and poultry may be coated with browning sauce, Worcestershire sauce, barbecue sauce or shake-on browning sauce. To use, combine browning sauce with melted butter or margarine and brush on before cooking. For quick breads or muffins, brown sugar can be used in the recipe in place of granulated sugar, or the surface can be sprinkled with dark spices before baking.
Spacing
Individual foods, such as baked potatoes, cupcakes and appetizers, will cook more evenly if placed in the oven equal distances apart. When possible, arrange foods in a circular pattern.
Covering
As with conventional cooking, moisture evaporates during microwave cooking. Casserole lids or plastic wrap are used for a tighter seal. When using plastic wrap, vent the plastic wrap by folding back part of the plastic wrap from the edge of the dish to allow steam to escape. Loosen or remove plastic wrap as recipe directs for stand time. When removing plastic wrap covers, as well as any glass lids, be careful to remove them away from you to avoid steam burns. Various degrees of moisture retention are also obtained by using wax paper or paper towels.
Shielding
Thin areas of meat and poultry cook more quickly than meaty portions. To prevent overcooking, these thin areas can be shielded with strips of aluminum foil. Wooden toothpicks may be used to hold the foil in place.
CAUTION is to be exercised when using foil. Arcing can occur if foil is too close to oven wall or door and damage to your oven will result.
Cooking Time
Cooking times will vary because of food shape variations, starting temperature, and regional preferences. Always cook food for the minimum cooking time given in a recipe and check for doneness. If the food is undercooked, continue cooking. It is easier to add time to an undercooked product. Once the food is overcooked, nothing can be done.
Stirring
Stirring is usually necessary during microwave cooking. Always bring the cooked outside edges toward the center and the less cooked center portions toward the outside of the dish.
Rearranging
Rearrange small items such as chicken pieces, shrimp, hamburger patties or pork chops. Rearrange pieces from the edge to the center and pieces from the center to the edge of the dish.
Turning
It is not possible to stir some foods to distribute the heat evenly. At times, microwave energy will concentrate in one area of the food. To help ensure even cooking, these foods need to be turned. Turn over large foods, such as roasts or turkeys, halfway through cooking.
Standing Time
Most foods will continue to cook by conduction after the microwave oven is turned off. After cooking meat, the internal temperature will rise 5 °F to 15°F (3 °C to 8 °C), if allowed to stand, tented with foil, for 10 to 15 minutes.
Casseroles and vegetables need a shorter amount of standing time, but this standing time is necessary to allow foods to complete cooking to the center without overcooking on the edges.
Test for Doneness
The same tests for doneness used in conventional cooking may be used for microwave cooking. Meat is done when fork-tender or splits at fibers. Chicken is done when juices are clear yellow and drumstick moves freely. Fish is done when it flakes and is opaque. Cake is done when a toothpick or cake tester is inserted and comes out clean.
Check foods to see that they are cooked to the United States Department of Agriculture’s recommended temperatures. To test for doneness, insert a meat thermometer in a thick or dense area away from fat or bone. NEVER leave the thermometer in the food during cooking, unless it is approved for microwave oven use.
Care and Cleaning of Your Microwave Oven
Please see below and the following page for particular cleaning instructions for each section of the oven.
BEFORE CLEANING: Unplug oven at wall outlet. If outlet is inaccessible, leave oven door open while cleaning.
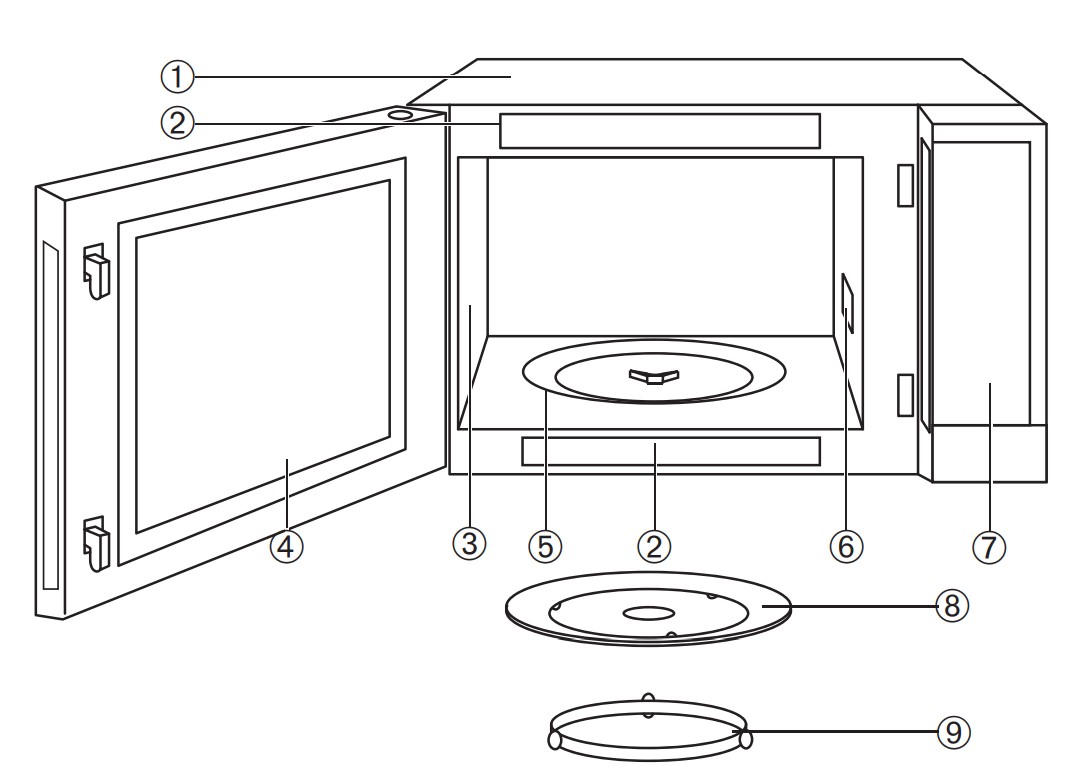
AFTER CLEANING: Be sure to place the Roller Ring and the Glass Tray in the proper position and press Stop/Reset Pad to clear the Display.
Outside oven surfaces: Clean with a damp cloth. To prevent damage to the operating parts inside the oven, water should not be allowed to seep into ventilation openings.
Label: Do not remove. Wipe with a damp cloth.
Inside the Oven: Wipe with a damp cloth after using. Mild detergent may be used if needed. Do not use harsh detergents or abrasives.
Oven Door: Wipe with a soft dry cloth when steam accumulates inside or around the outside of the oven door. During cooking, especially under high humidity conditions, steam is given off from the food. (Some steam will condense on cooler surfaces, such as the oven door. This is normal.) Inside surface is covered with a heat and vapor barrier film. Do not remove.
Oven Cavity Floor: Clean the bottom surface of the oven with mild detergent, water or window cleaner, and dry.
Wave Guide Cover: Do not remove Wave Guide Cover. It is important to keep cover clean in the same manner as the inside of the oven.
Control Panel: The Control Panel is covered with a removable protective film to prevent scratches during shipping. Small bubbles may appear under this film, so if this is the case, remove by applying masking or clear tape to an exposed corner and pull gently. If the Control Panel becomes wet, clean it with a soft dry cloth. Do not use harsh detergents or abrasives.
Glass Tray: Remove and wash in warm soapy water or in a dishwasher.
Roller Ring: Roller Ring may be washed in mild soapy water or dishwasher. These areas should be kept clean to avoid excessive noise.
IT IS IMPORTANT TO KEEP THE OVEN CLEAN AND DRY. FOOD RESIDUE AND CONDENSATION MAY CAUSE RUSTING OR ARCING AND DAMAGE TO THE OVEN. AFTER USE, WIPE DRY ALL SURFACES, INCLUDING VENT OPENINGS, OVEN SEAMS, AND UNDER GLASS TRAY.
Before Requesting Service
See below before calling for service, as most problems can easily be remedied by following these simple solutions:
Problem
Solution
The oven causes TV interference
Some radio, TV, Wi-Fi, cordless telephone, baby monitor, blue tooth or other wireless equipment interference might occur when you cook with the microwave oven. This interference is similar to the interference caused by small appliances such as mixers, vacuums, blow dryers, etc. It does not indicate a problem with your oven.
Steam accumulates on oven door and warm air comes from the oven vents.
During cooking, steam and warm air are given off from the food. Most of the steam and warm air are removed from the oven by the air which circulates in the oven cavity. However, some steam will condense on cooler surfaces such as the oven door. This is normal. After use, the oven should be wiped dry (see page 21).
Oven will not turn on
The oven is not plugged in securely or needs to be reset; remove plug from outlet, wait ten seconds and re-insert. Main circuit breaker or main fuse is tripped; reset main circuit breaker or replace main fuse. There is a problem with the outlet; plug another appliance into the outlet to check if it is working.
Oven will not start cooking.
The door is not completely closed; close the oven door securely. Start was not pressed after programming; press Start. Another program is already entered into the oven; press Stop/Reset to cancel the previous program and enter new program. The program is not correct; program again according to the Operating Instructions. Stop/Reset has been pressed accidentally; program oven again.
The Glass Tray wobbles.
The Glass Tray is not positioned properly on the Roller Ring or there is food under the Roller Ring; take out Glass Tray and Roller Ring. Wipe with a damp cloth and reset Roller Ring and Glass Tray properly.
When the oven is operating, there is noise coming from the Glass Tray.
The Roller Ring and oven bottom are dirty; clean these parts according to Care and Cleaning of Your Microwave Oven (see page 21).
The word “ ” appears in the display.
The CHILD SAFETY LOCK was activated by pressing Start three times; Deactivate CHILD SAFETY LOCK by pressing Stop/Reset three times.
The oven stops cooking and “H00“, “H97” or “H98” appears in the display
The oven’s power supply has failed; please contact an authorized Service Center (see next page).
 ” will appear in the display.
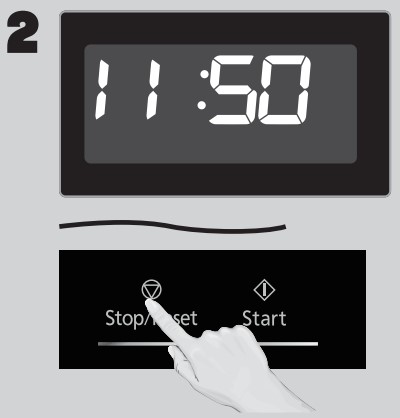


 ” appears in the display.