Loading ...
Loading ...
Loading ...
7
ENGLISH
Minimum Gauge for Cord Sets
Volts
Total Length of Cord in Feet
(meters)
120 V 25 (7.6) 50 (15.2) 100 (30.5) 150 (45.7)
240 V 50 (15.2) 100 (30.5) 200 (61.0) 300 (91.4)
Ampere Rating
American Wire Gauge
More
Than
Not
More
Than
0 6 18 16 16 14
6 10 18 16 14 12
10 12 16 16 14 12
12 16 14 12 Not Recommended
WARNING: Be sure your extension cord is
properly wired and in good condition. If it is not,
replace it with another cord. Do not use a damaged
extension cord. Protect your extension cords from
sharp objects, excessive heat and damp or wet areas.
The label on your tool may include the following symbols. The
symbols and their definitions are asfollows:
V ......................... volts
Hz .......................hertz
min ..................... minutes
or DC ......direct current
...................... Class I Construction
(grounded)
…/min ..............per minute
BPM .................... beats per minute
IPM ..................... impacts per minute
RPM .................... revolutions per
minute
sfpm ................... surface feet per
minute
SPM .................... strokes per minute
OPM .................... oscillations per
minute
A ......................... amperes
W ........................watts
or AC ...........alternating current
or AC/DC .... alternating or
direct current
...................... Class II
Construction
(double insulated)
n
o
.......................no load speed
n .........................rated speed
......................earthing terminal
.....................safety alert symbol
.....................visible radiation
..................... avoid staring at
light
..................... wear respiratory
protection
..................... wear eye
protection
..................... wear hearing
protection
SAVE THESE INSTRUCTIONS FOR
FUTURE USE
Motor
Be sure your power supply agrees with the nameplate
marking. Voltage decrease of more than 10% will cause loss
of power and overheating. These tools are factory tested; if
this tool does not operate, check power supply.
Intended Use
This miter saw is designed for wood cutting.
DO NOT use under wet conditions or in presence of
flammable liquids orgases.
This miter saw is a professional power tool. DO NOT let
children come into contact with the tool. Supervision is
required when inexperienced operators use thistool.
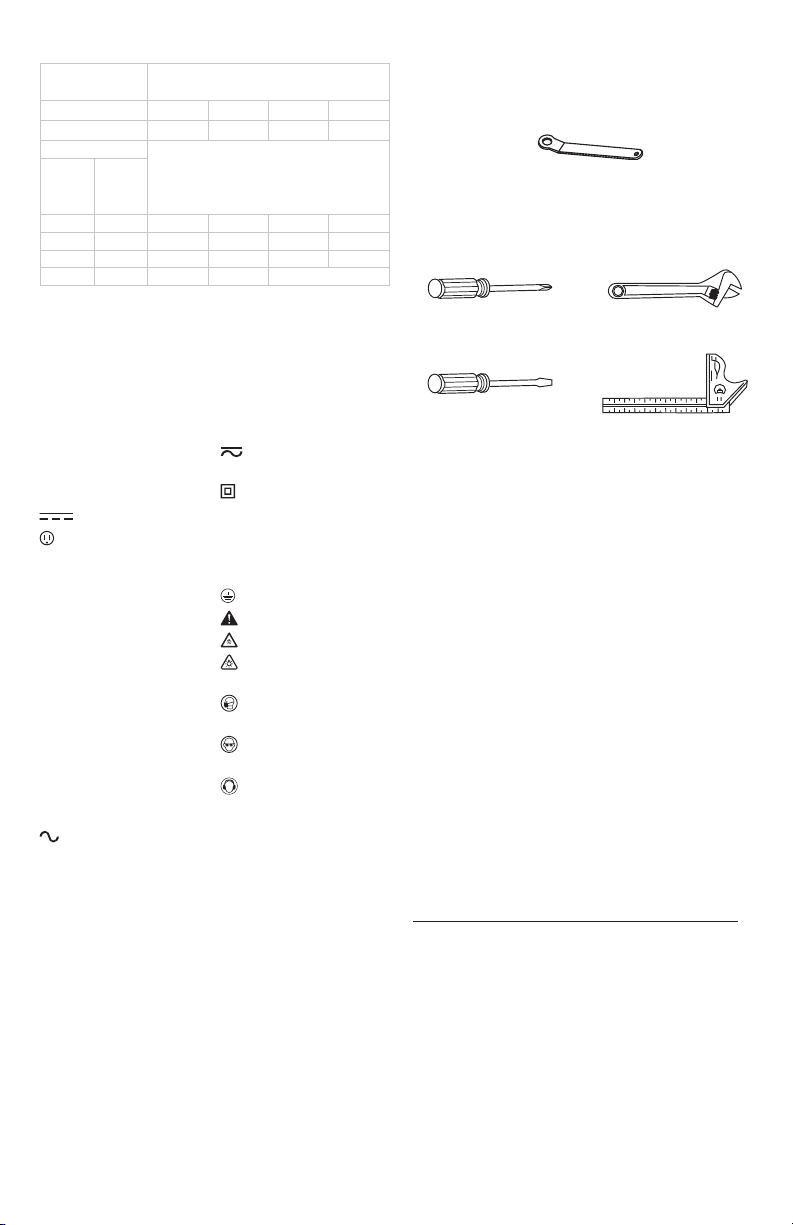
TOOLS NEEDED TO REMOVE OR INSTALL
BLADE
TOOLS NEEDED FOR ADJUSTMENT
CARTON CONTENTS
Unpacking And Checking Contents
Carefully unpack the miter saw and all its parts, and
compare against the list below and the illustration on the
next page. With the help of an assistant place the saw on a
secure surface and examine it carefully.
WARNING: To avoid injury from unexpected starting
or electrical shock, do not plug the power cord into
a source of power during unpacking and assembly.
The cord must remain unplugged whenever you are
adjusting/assembling the miter saw.
WARNING: The miter saw is heavy and should
be lifted with care. If needed, get the assistance of
someone to lift and move the miter saw.
WARNING: If any part is missing or damaged, do
not attempt to assemble the miter saw, or plug in
the power cord until the missing or damaged part is
correctly replaced.
Table of Loose Parts
ITEM DESCRIPTION Q’TY
A.
Miter saw
1
B.
Instruction manual
1
C.
Blade wrench
1
D.
Hold-down clamp
1
E.
Miter handle
1
F.
Dust bag
1
G.
Support base
1
Supplied
Blade wrench
Not supplied
Phillips Screwdriver
Slotted Screwdriver
Adjustable Wrench
Combination Square
Loading ...
Loading ...
Loading ...