Loading ...
Loading ...
Loading ...
11
ENGLISH
NOTE: Mounting hardware is not included with this
tool. Bolts, nuts, washers, and screws must be purchased
separately.
2. For portable use, place the saw on a 3/4 in. thick piece
of plywood. Bolt the base of the miter saw securely to
the plywood using the mounting holes on the base. Use
C-clamps to clamp this mounting board to a stable work
surface at the worksite. (Fig. J)
NOTE: If a miter saw stand is used, please follow all
instructions shown in that product’s instructions for proper
mounting.
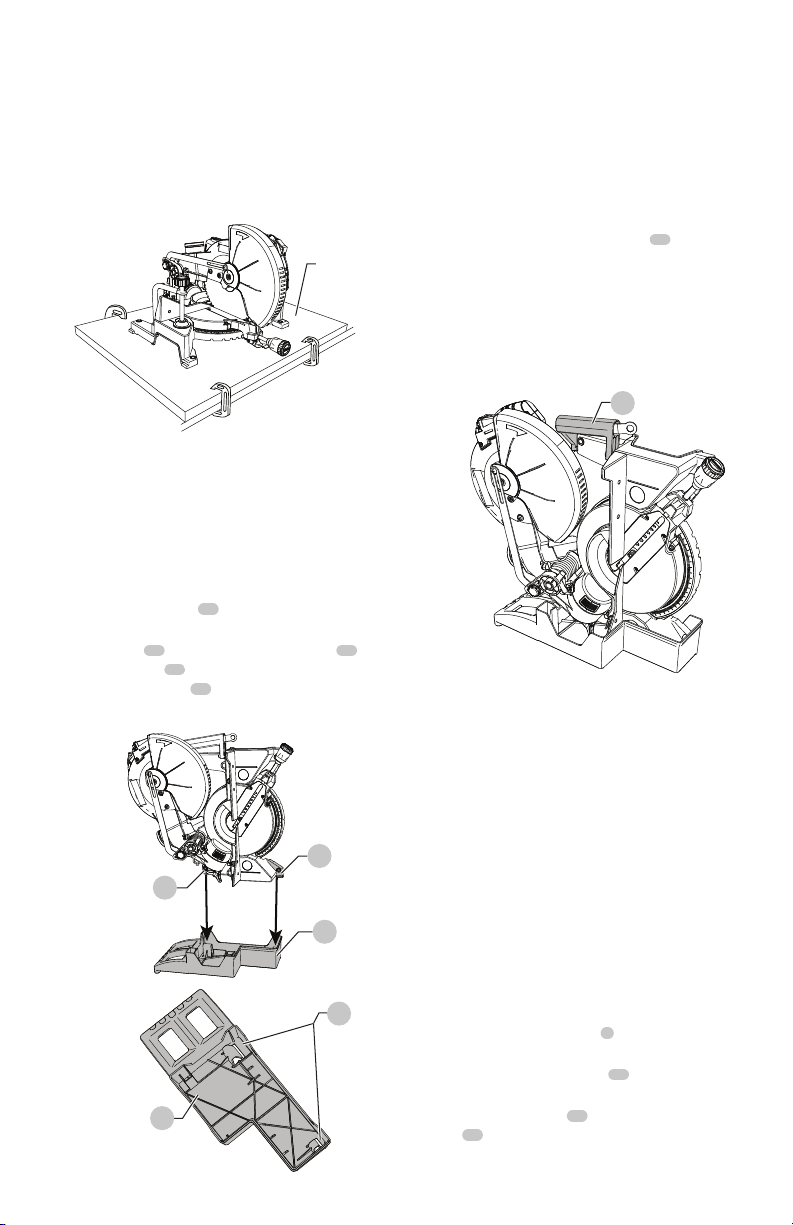
Using The Support Base (Fig. K)
1. Fold the miter saw. (See the section of “FOLDING THE
CUTTING HEAD FOR TRANSPORTATION AND STORAGE”
on page 9.)
2. Place the support base
10
on a flat surface or ground as
shown in Fig. K.
3. Align the feet
23
of the base with the grooves
24
of
the support base
10
and then insert the folded saw
into the support base
10
, so that the miter saw could
stand on the ground.
Fig.J
3/4 in.
plywood
Fig.K
23
23
10
10
24
FRONT
REAR
REAR FRONT
Transporting The Saw (Fig. L)
WARNING: To reduce the risk of serious personal
injury, ALWAYS lock the miter lock handle, bevel lock
knob, lock down pin before transporting saw.
NOTE: To avoid damage, never carry the miter saw by the
switch handle. To reduce the risk of serious personal injury,
ALWAYS secure all clamps, knobs, latches and locks before
lifting the saw.
1. Never carry the saw by the switch handle, miter clamp
or cutting head. The carrying handle
17
is appropriate
for when the saw is folded only. When saw is not folded,
the hand holds should be used.
2. ALWAYS use the support base when storing the saw
vertically.
WARNING: Do not transport the unit standing up in
a vehicle.
Removing And Installing The Blade
WARNING: Only use 10 inch diameter crosscut blades
on this saw. Do not use blades with deep gullets.
These can deflect and contact the guard, and can
cause damage to the machine and/or serious injury.
To avoid injury from an accidental start, make sure
the switch is in the OFF position and the plug is not
connected to the power source outlet.
NOTE: The miter saw comes with the saw blade
already installed.
WARNING: Make sure the blade is installed correctly
and is tight before operating.
Removing the Blade (Fig. M, N, O)
1. Unplug the saw from the outlet.
2. Raise the cutting head to the upright position.
3. Raise the lower blade guard
3
to the uppermost
position. (Fig. M)
4. Loosen the cover plate screw
25
with a Phillips
screwdriver.
5. Rotate the cover plate
26
back to expose the arbor
bolt
27
.
Fig.L
17
Loading ...
Loading ...
Loading ...