Loading ...
Loading ...
Loading ...
5352
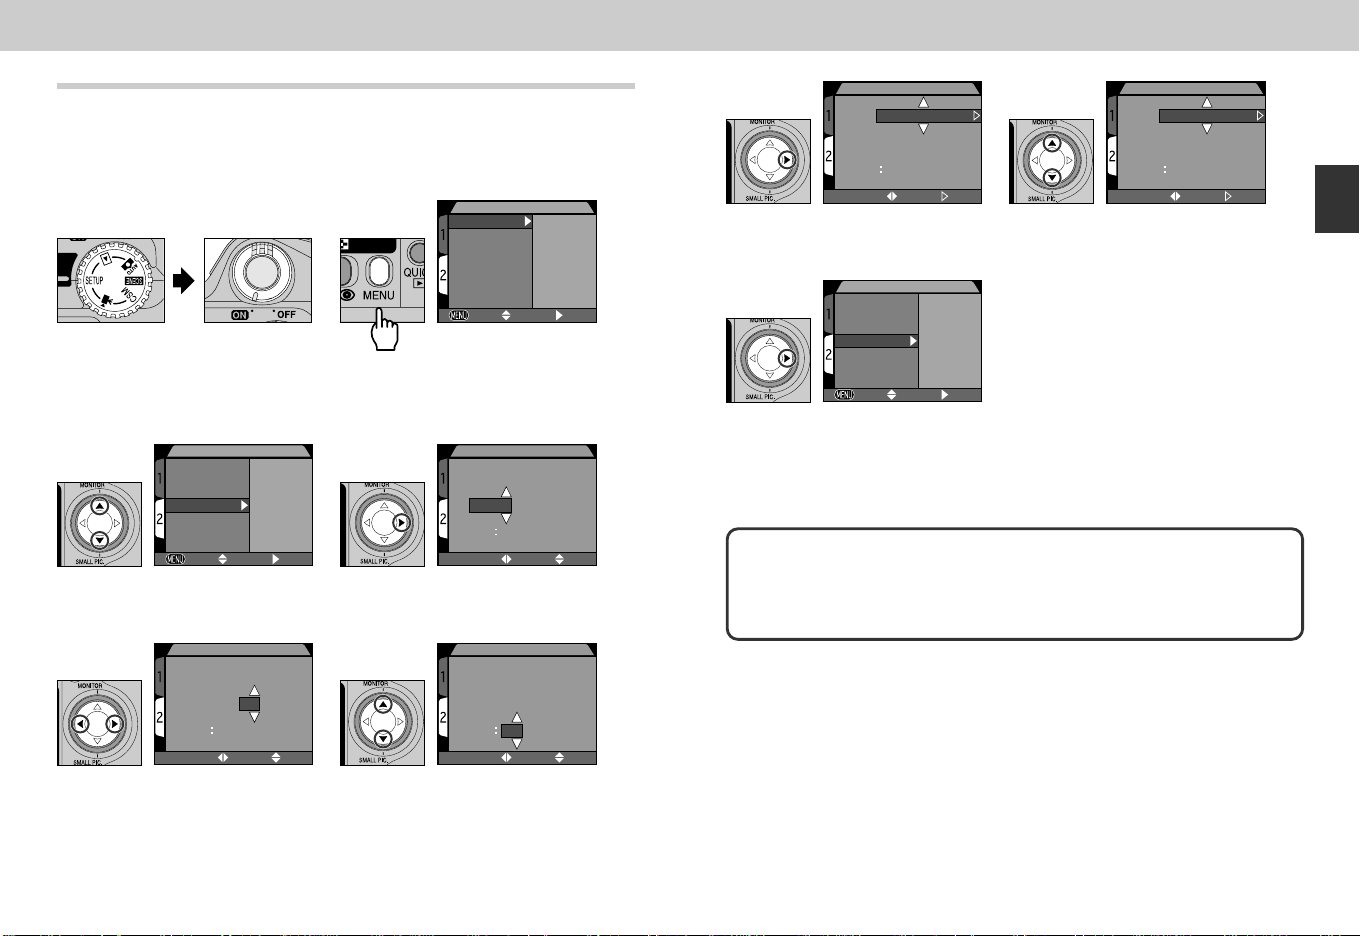
Step 6—Set the Date and Time
Information on the time and date of recording is included with all
pictures and movies taken with your Nikon digital camera. To set the
camera’s internal clock to the correct time and date:
Set the mode dial to SETUP and
turn camera on
•The appearance of the menu will
vary depending on the language
currently selected.
1
SET-UP2
Controls
Shot Confirm Lamp
Pic data/Transfer
Date
Video Mode
Language
Reset All
PAGE1 SELECT SET
Press MENU button to display
SET-UP 2 menu
2
SET-UP2
Controls
Shot Confirm Lamp
Pic data/Transfer
Date
Video Mode
Language
Reset All
PAGE1 SELECT SET
Highlight “Date”
3
DATE
Y M D
2001
.
09
.
01
00 00
SELECT SET
Highlight Year, Month, Day, hour or
minute (the selected digit blinks in
red)
5
DATE
Y M D
2001
.
09
.
15
15 30
SELECT SET
Edit selected item
•Repeat steps 5 and 6 until all
items have been set.
6
DATE
Y M D
2001
.
01
.
01
00 00
SELECT SET
Display DATE menu
4
Any pictures taken before the time and date have been set will have a time
stamp of “0000.00.00 00:00.” If the time and date have not been set, a flashing
clock icon will be displayed in the top right corner of the monitor when the
camera is in shooting mode.
DATE
Y M D
2001
.
09
.
15
15 30
SELECT SET
Highlight YMD
7
SET-UP2
Controls
Shot Confirm Lamp
Pic data/Transfer
Date
Video Mode
Language
Reset All
PAGE1 SELECT SET
Press > to save changes to
settings and return to SET-UP menu.
9
DATE
M D Y
09
.
15
.
2001
15
30
SELECT SET
Choose order in which year, month
and day will be displayed
8
Tutorial—First Steps
COOLPIX885 (E) 01.10.22 6:00 PM Page 52
Loading ...
Loading ...
Loading ...