Loading ...
Loading ...
Loading ...
Before Setting Oven Controls 7
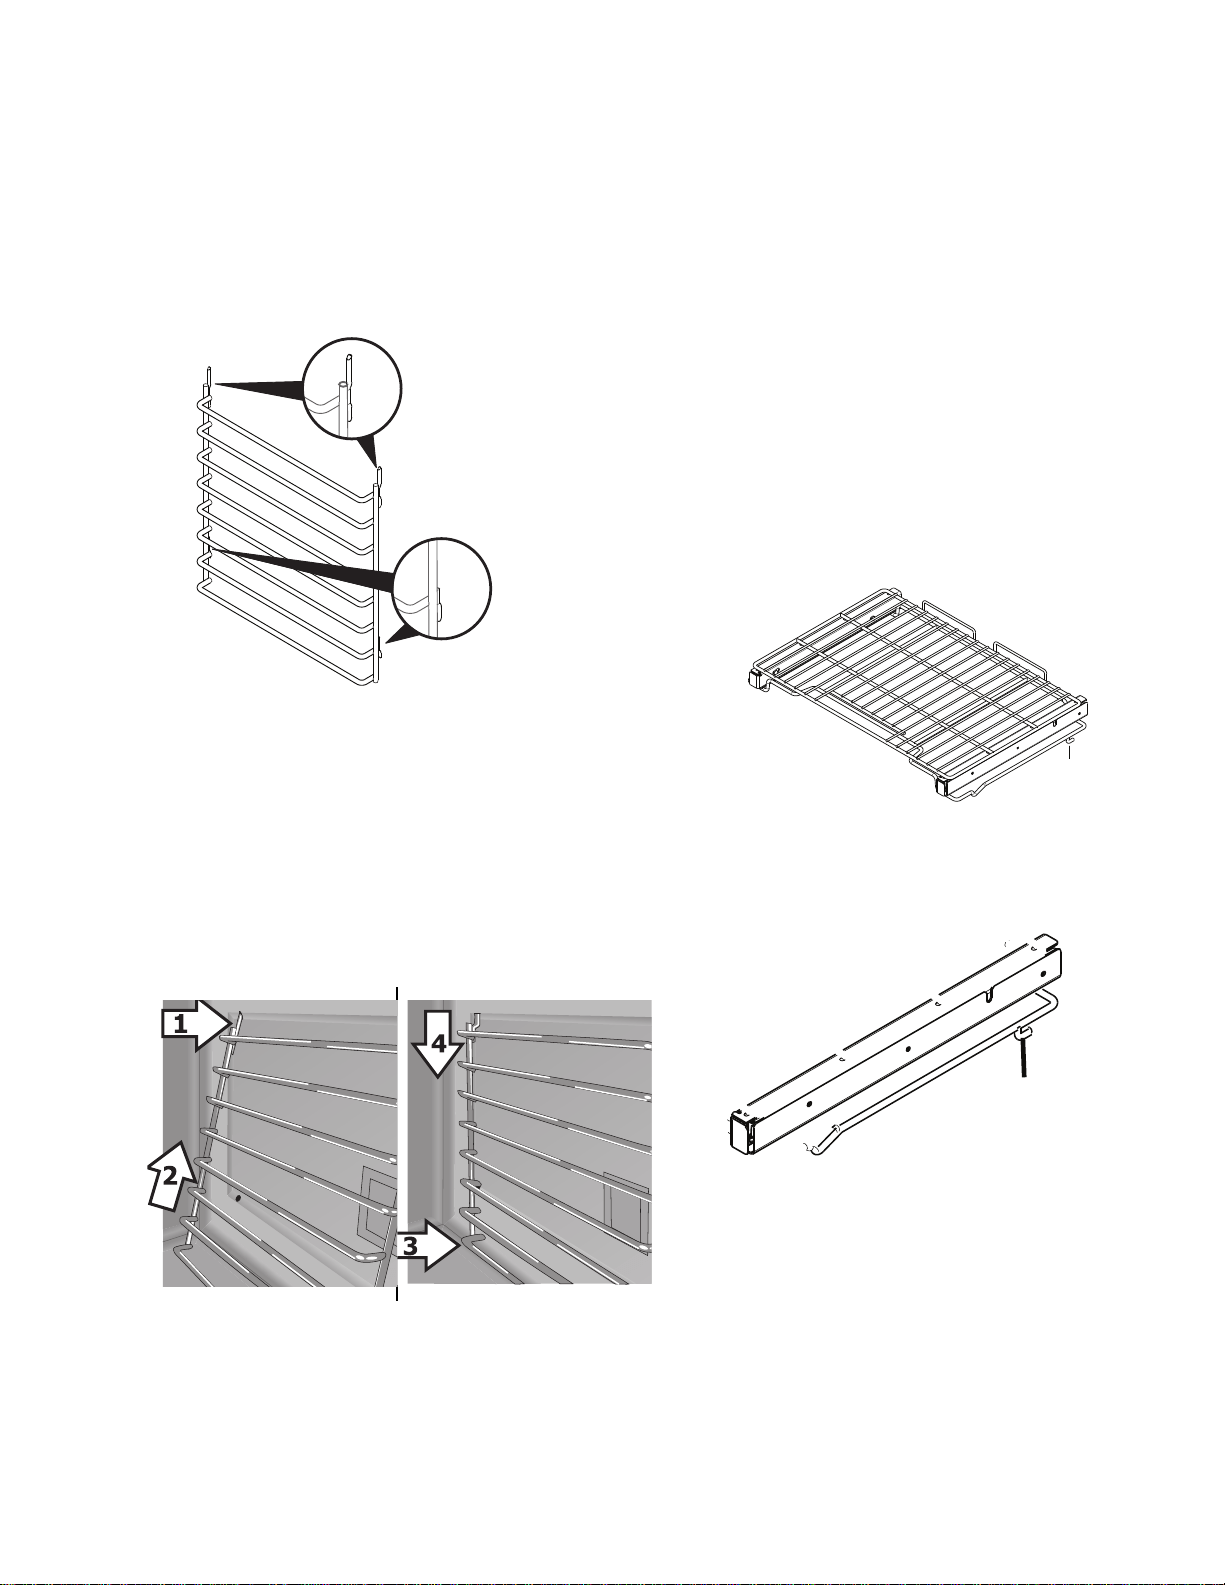
Installing Oven (Ladder) Rack Supports
IMPORTANT! Always install oven rack support before turning
on the oven (when the oven is cool).
To aid installation of the porcelain oven rack supports, apply a
thin layer of cooking oil to all the prongs of the supports shown
below.
To install oven rack supports:
1. Hold the oven rack support at a slight angle and insert
prongs into the holes at the top of the oven cavity (Arrow 1).
2. Lift the rack into the top holes, aligning the bottom prongs
with the bottom holes (Arrow 2).
3. Once the upper prongs are in place, hold the oven rack
support flush with the oven side and insert the bottom
prongs into the bottom holes (Arrow 3).
4. Slide the bottom prongs down into the lower holes. Some
force may be required to set the rack into place (Arrow 4).
To remove the ladder rack support for a self-clean cycle,
reverse the order used when installing the ladder rack supports.
Luxury Glide™ oven racks
The fully extendable Luxury Glide™ rack makes food prepara-
tion easier. This oven rack has glide tracks that allow the rack to
be pulled away from the oven without rubbing the sides of the
oven wall.
The Luxury Glide™ rack installs like all other oven racks. Before
sliding the rack all the way in, lift the back of the rack slightly to
set the rack past the stop position (Figure 6). Be sure to slide
the rack all the way in so that the back of the rack stops by
touching the vertical support of the ladder rack. The glide
portion of the rack can be easily pulled in and out in this position
while the frame of the rack remains locked into the ladder
supports.
This allows bakeware to remain in place on the Luxury Glide™
rack and slide out easily to check food items without removing
them from the oven.
.
IMPORTANT!
Luxury Glide
™ racks may be left in the oven if they are soiled.
After a clean cycle, or anytime the gliding is rough, the glide
racks should be treated with graphite lubrication. Refer to
“Caring for your porcelain enameled glide racks” on page 37.
Figure 4: Follow 4 steps to install ladder racks
Top prong inserts
into oven piercing
Bottom prong inserts
into piercing to make
support ush with
oven wall
Figure 5: Glide rack showing glide stop
Figure 6: Carefully lift rack while inserting to ensure the
glide stop is behind the ladder rack support
Luxury Glide™
glide stop
When setting the rack in,
the glide stop must be
behind the rack support in
order for the rack to be
properly installed
Loading ...
Loading ...
Loading ...