Loading ...
Loading ...
Loading ...
11
2.3 INSTALLING THE DASH CAM
1. Remove the protective stickers from the Dash Cams lens and screen
2.
Clean your desired mounting position on your vehicles windscreen making sure it is dry
and free from dust.
3.
Connect the Dash Cam to the magnetic mount.
4. Remove the 3M label from the adhesive on the magnetic mount and press the adhesive
onto your desired position of your windscreen using the Dash Cam as a guide to where
the camera will be facing.
5. Once the mount is in position, remove the Dash Cam from the magnetic mount and
irmly press the mount onto the windscreen for 30 seconds securing it in position.
6. With the mount now installed re attach the Dash Cam to the mount
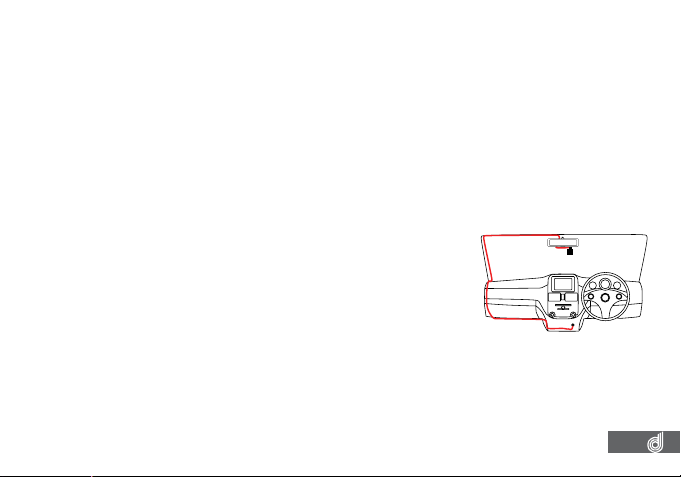
2.4 CONNECTING TO POWER
Only use the included charger to power and charge the Dash
Cam.
1. Once the Dash Cam is securely installed on your vehicle’s
windscreen, plug the 12v charger into your vehicle’s cigarette
lighter.
2. Run the cable along your vehicle’s console and windscreen and
plug the USB Micro plug into the Dash Cam Mount.
__________________________________________________________________________________________________________________________
NOTE:
• It is recommended that the Dash Cam is installed behind your vehicle’s rear view mirror.
• Make sure that the camera view or GPS module is not obstructed by any window tint or any other objects.
• When Installing, to make sure that the Dash Cam is positioned correctly it is recommended that you power up the
Dash Cam and use the viewinder screen to ensure the Dash Cam is positioned correctly.
__________________________________________________________________________________________________________________________
Loading ...
Loading ...
Loading ...