Loading ...
Loading ...
Loading ...
44
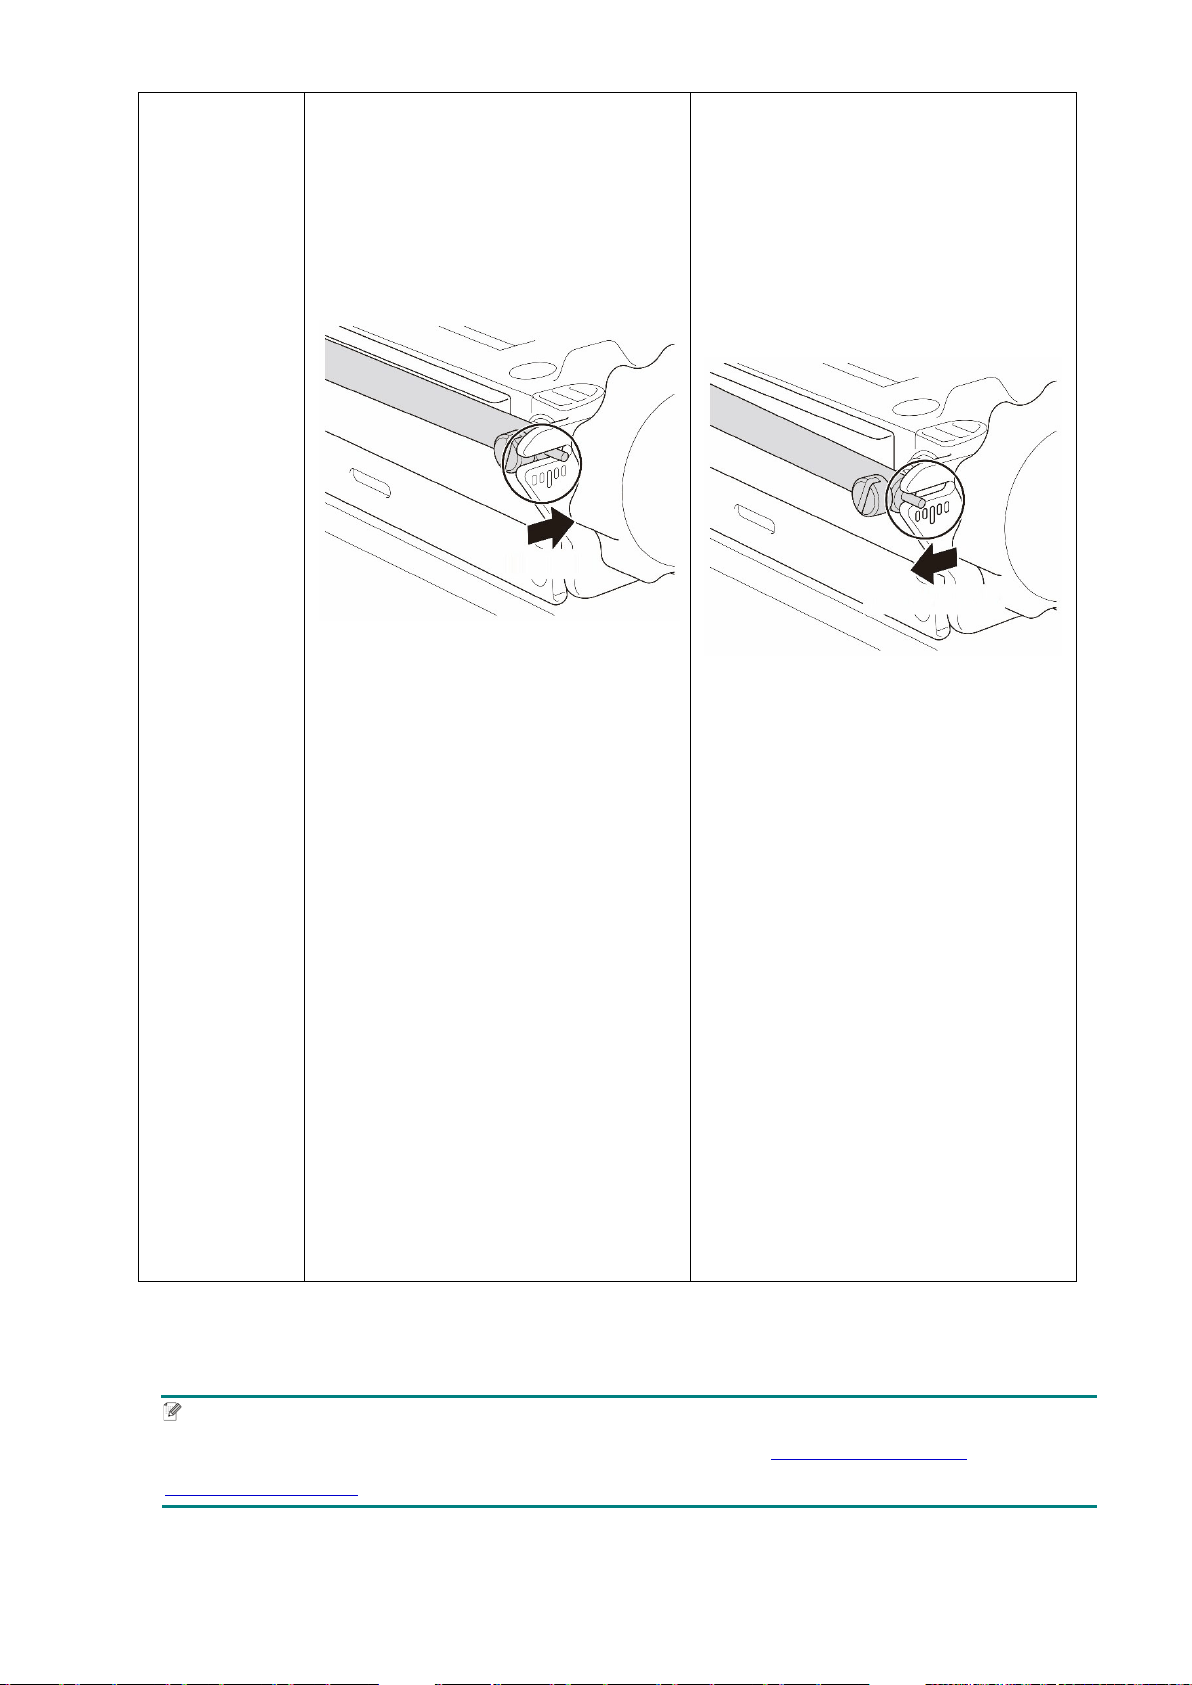
1. Turn the Ribbon Tension
Adjustment Screw clockwise once
per level on the Ribbon Tension
Adjustment Scale and print the
label again to check if the wrinkle
is gone.
2. If the Ribbon Tension Adjustment
Screw is positioned on the
innermost side but the ribbon
wrinkle has not improved, move
the
Print Head Tension Position
Adjustment Slider one level at a
time, print the label again, and
check if the wrinkle is gone.
3. If the ribbon wrinkle still has not
improved after moving the Print
Head Tension Position Adjustment
Slider, turn the Print Head Tension
Adjustment Knob one level at a
time again and check if the wrinkle
is gone.
1. Turn the Ribbon Tension
Adjustment Screw
counterclockwise once per level
on the Ribbon Tension
Adjustment Scale and print the
label again to check if the wrinkle
is gone.
2. If the Ribbon Tension
Adjustment Screw is positioned
on the outermost side but the
ribbon wrinkle has not
improved, move the Print Head
Tension Position Adjustment
Slider one level at a time, print
the label again, and check if the
wrinkle is gone.
3. If the ribbon wrinkle still has not
improved after moving the Print
Head Tension Position
Adjustment Slider, turn the
Print Head Tension Adjustment
Knob one level at a time again
and check if the wrinkle is
gone.
4.2.2 Change the Print Density/Darkness Settings
Note
For information about the print density/darkness, see sections 7.1.1 FBPL Settings and
7.1.2 ZPL2 Settings.
Clockwise
Counterclockwise
Loading ...
Loading ...
Loading ...