Loading ...
Loading ...
Loading ...
- 9
Installation position of roller brush in direc-
tion of travel (top view)
Note: When installing the new roller brush,
ensure correct positioning of the bristle as-
sembly.
Install new roller brush. The nuts of the
roller brush must be inserted on the
notches of the opposite crank.
Note: Once the new roller brush has been
installed, the sweeping track must readjust-
ed.
Note: The sweeping track is factory-set to
80 mm; it is steplessly adjustable if the
brush roller wears down.
Switch off suction blower.
Drive sweeper on to a smooth, even
surface covered with a visible layer of
dust or chalk.
Roller brush and side brush control le-
ver (1) backwards: Switches the roller
brush on.
Roller brush control lever (3) back-
wards: Lowers the roller brush.
Allow the roller brush to run for approx.
10 seconds.
Roller brush and side brush control le-
ver (1) to middle position.
Roller brush control lever (3) forwards:
Raises the roller brush.
Raise waste container.
Drive machine backwards.
Check sweeping mirror.
The sweeping track should have an even
rectangular shape which is 80-85 mm wide.
Undo and adjust the stop screw for
wear adjustment (12).
Stop screw at the top: narrow sweeping
area.
Stop screw at the bottom: broad sweep-
ing area.
Tighten the stop screw again.
Check the sweeping area of the roller
brush again as described.
The side-brushes lift up.
Drive sweeper on to a smooth, even
surface covered with a visible layer of
dust or chalk.
Lower the side brushes using the con-
trol lever and allow them to run for ap-
prox. 10 seconds.
The side-brushes lift up.
Drive machine backwards.
Check sweeping mirror.
The width of the sweeping track should lie
between 40-50 mm.
Set the sweeping track using the two
adjusting screws.
Check sweeping mirror.
DANGER
Risk of injury! Always apply the safety bar
when the waste container is raised.
Lift the emptied waste container to the
end position.
Secure the waste container. See chap-
ter "Securing the raised waste contain-
er".
Open the side cover as described in
Chapter "Replace brush roller".
Rel
ease the 6 wing nuts on the side
holding plate.
Loosen 3 nuts (SW 13) on the front
holding plate.
Press the side seal down (elongated
hole) until it is about 1 to 3 mm to the
floor.
Screw in the holding plates.
Repeat the procedure on the other side
of the appliance.
몇 WARNING
Risk of injury!
Wear a dust mask when working
around the dust filter. Observe safety
regulations on the handling of fine parti-
cles.
Clean the fine dust filter with the filter
cleaning button.
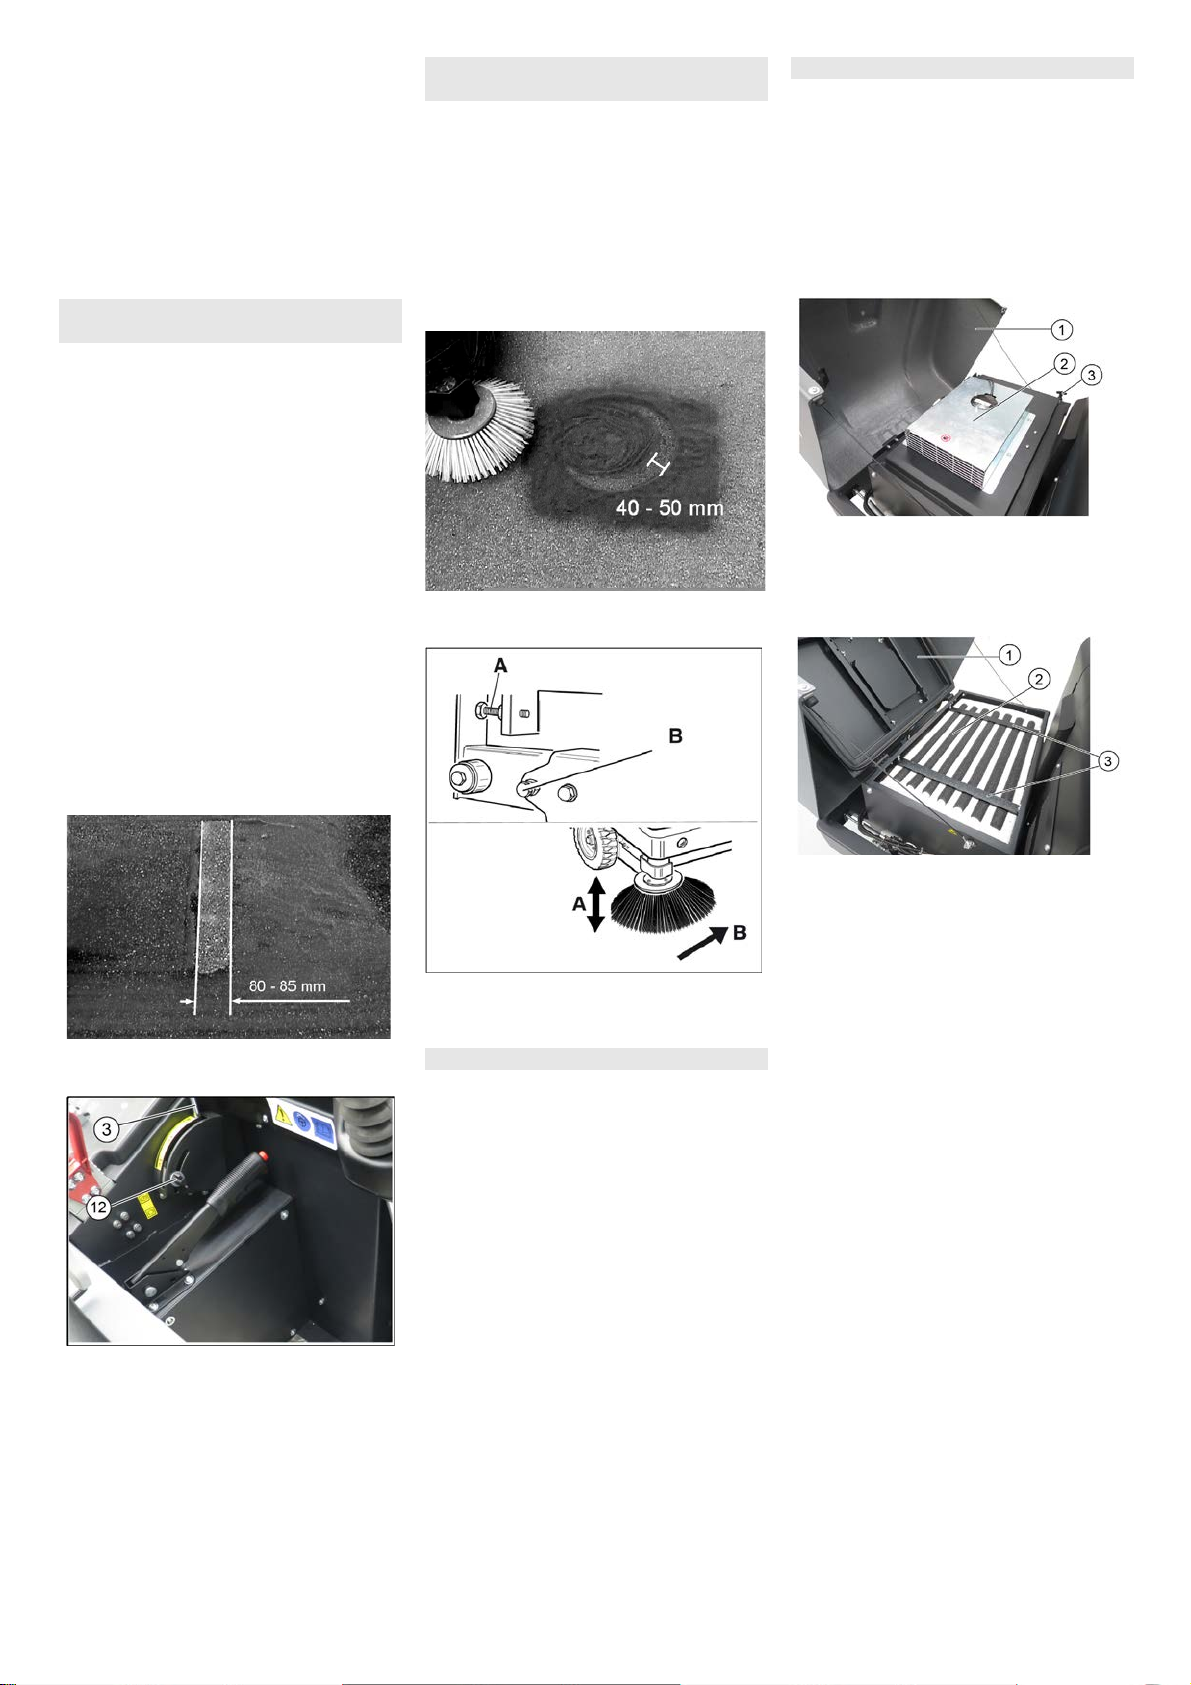
Empty waste container.
1Cover
2 Filter cover (vibrator system)
3 Lock, filter cover (2x)
Fold cover forwards.
1Cover
2 Fine dust filter
3 Cross struts
Open the lock.
Open filter cap.
Check the fine dust filter, clean or re-
place if necessary.
Note
Exchanging the fine dust filter may only
be done by Kärcher Customer Service.
Insert and lock the filter cover.
Check and adjust roller brush sweeping
track
Check and adjust sweeping track of the
side-brush
Adjust the side seals
Checking/changing the fine dust filter
37EN
Loading ...
Loading ...
Loading ...