Loading ...
Loading ...
Loading ...
- 8
Maintenance to be carried out after 50
operating hours:
Have the first maintenance performed
by the customer service in accordance
with the inspection check list.
Maintenance to be carried out after 250
operating hours:
Have the maintenance performed by
the customer service in accordance
with the inspection check list.
In order to safeguard warranty claims, all
service and maintenance work during the
warranty period must be carried out by the
authorised Kärcher Customer Service in
accordance with the maintenance booklet.
Preparation:
Park the sweeper on an even surface.
Turn ignition key to "0" and remove it.
Lock parking brake.
DANGER
Risk of injury! Always apply the safety bar
when the waste container is raised.
Perform the safeguarding only from outside
the hazard zone.
1 Holder of safety rod
2 Safety rod
Fold the safety rod for the high empty-
ing up and insert it into the holder (se-
cured).
ATTENTION
Observe the orientation of the battery ter-
minals when installing the batteries. Battery
terminals are installed on the left in the di-
rection of travel.
The batteries can only be exchanged as a
set. The exchange has to be performed by
trained personnel.
Due to the heavy weight (300 kg), the
batteries must be exchanged using a
crane.
Battery terminals - travel direction left
1 Negative terminal
2 Positive terminal
When removing the battery, disconnect
the negative terminal wire first.
Fasten the crane chains in the four eye-
lets of the battery set and carefully lift
out the batteries.
NOTICE
The waste container must not be raised.
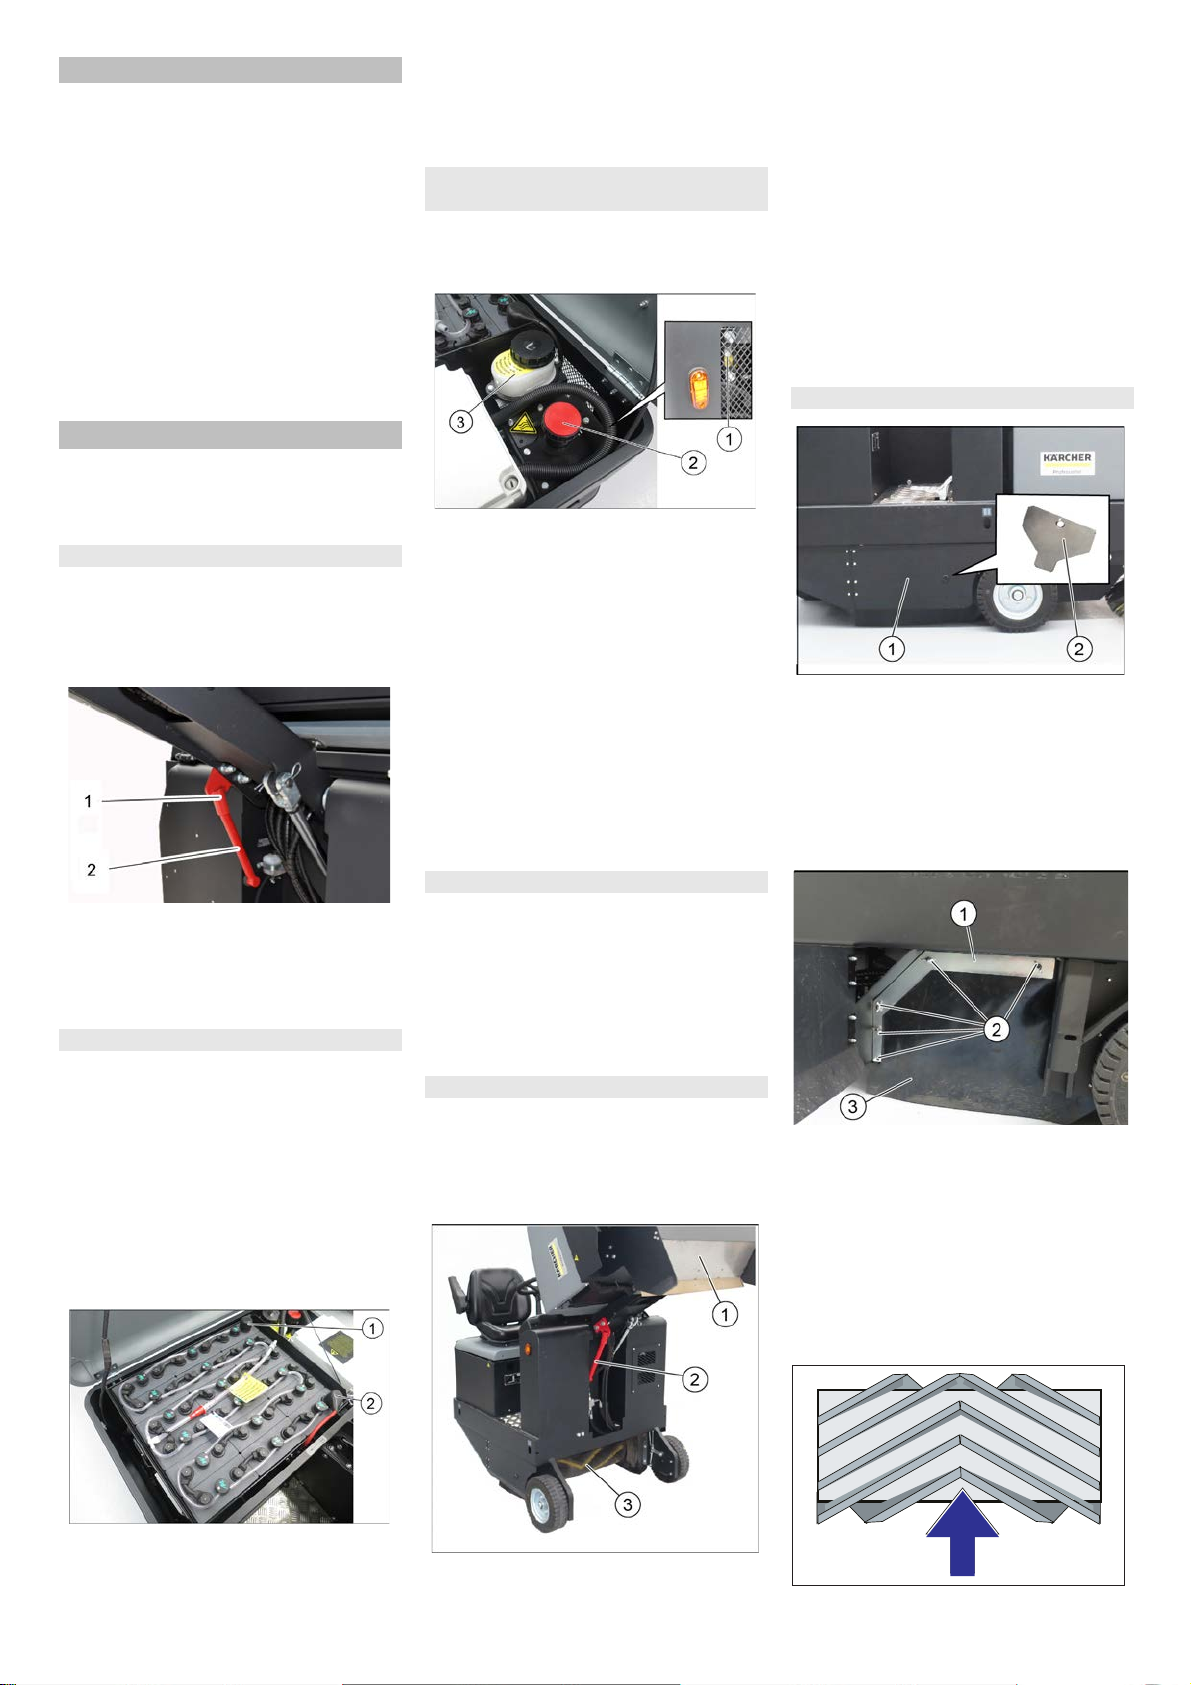
Open the engine hood.
1 Looking glass
2 Screw cap, oil fill opening
3 Container (without function)
Check hydraulic oil level in the looking
glass.
– The oil level must lie between “MIN“
and “MAX“ marking.
– Add hydraulic oil if the oil level is below
the "MIN" marking.
Loosen the closing cap of the oil filling
opening.
Clean the filling area.
Refill hydraulic oil.
Oil grade: see Technical Data
Replace and tighten the closing cap of
the oil filling opening.
Lock parking brake.
Start the motor.
Only the authorised customer service is
permitted to carry out maintenance tasks
on the hydraulic unit.
Check all hydraulic hoses and connec-
tions and ensure that they are leak-
proof.
DANGER
Risk of injury! Always apply the safety bar
w
hen the waste container is raised.
Perform the safeguarding only from outside
the hazard zone.
1 Waste container
2 Safety rod
3 Roller brush
Switch off device.
Lift the emptied waste container to the
end position. The roller brush is visible.
Secure the waste container. See chap-
ter "Securing the raised waste contain-
er".
Turn ignition key to "0" and remove it.
Check the roller brush for damage, re-
move wrapped tapes or cords.
Fold the safety rod down into the recep-
tacle (raised waste container is unse-
cured).
Lower the waste container up to the
end-position.
1 Side panel, right
2 Key for roller brush access
Lift the emptied waste container to the
end position.
Secure the waste container. See chap-
ter "Securing the raised waste contain-
er".
Open the side covers using a key.
1 Holding bow
2 Wing nut
3Side seal
Unscrew the wing nuts.
Remove the retaining clamp.
Flip the side seal out.
Uncscrew the retaining screw of the
roller brush intake, and swing the intake
to the outside.
Pull out roller brush.
Maintenance by Customer Service
Maintenance Works
Securing the raised waste container
Replace batteries
Check hydraulic oil level and refill
hydraulic oil
Check hydraulic unit
Checking roller brush
Replacing roller brush
24 EN
Loading ...
Loading ...
Loading ...