Loading ...
Loading ...
Loading ...
8
Drill and insert wall anchors (if necessary)
Drill two 7/32” holes where you marked the location of the
mounting screws and then insert the wall anchors provided
into these mounting holes.
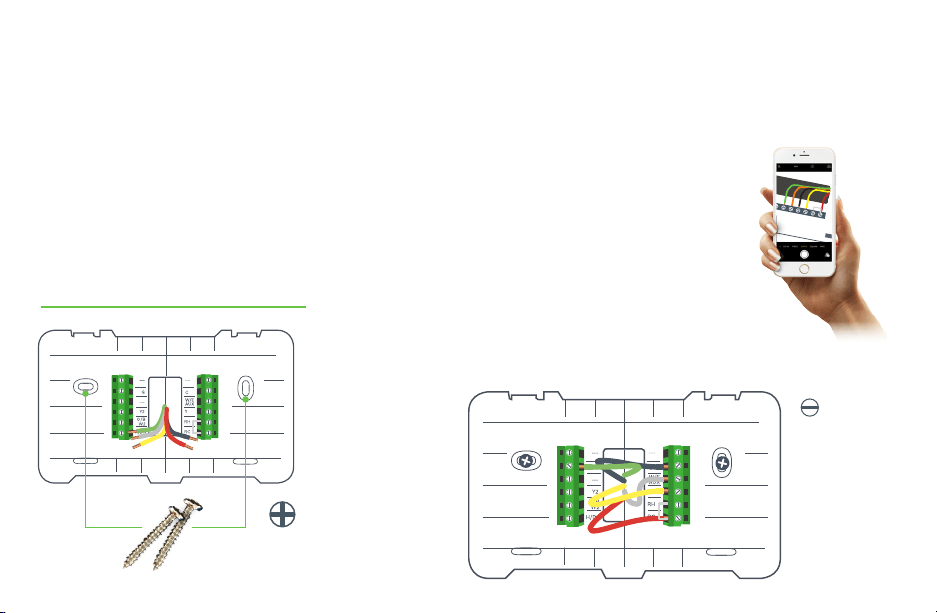
Check if the wall plate is level and insert screws
Make sure your new BCC50 wall plate is level and insert the
included screws from the package and mount your new wall
plate to the wall using a Phillips head screw driver.
Step 8
Insert each wire into the corresponding
terminal and close each terminal using a
flat head screw driver
Use the image you took with your
smartphone of your old thermostat wiring
or the wire labels as a reference for where
to place each wire. Be sure that you insert
each wire, one by one, and then
immediately close the terminal and confirm
that the wire is secure inside the terminal
before moving to the next wire. Repeat this
process for each wire to be installed. If you
are unsure of the terminal names on the
BCC50 Wall Plate, refer to BCC50 Terminal
Key on the next page:
Step 9
SMALL
FLAT HEAD
SCREWDRIVER
NEEDED
PHILLIPS HEAD
SCREWDRIVER NEEDED
Thermostat Installation
LEVEL
Loading ...
Loading ...
Loading ...