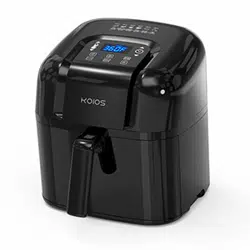
Koios 39006 Air Fryer, Electric Hot Airfryers Oven

INSTRUCTION MANUAL

For 39006.

PDF File Manual, 12 pages, Read Online | Download pdf file

background
Loading page 2...
Loading page 3...
Loading page 4...
Loading page 5...
Loading page 6...
Loading page 7...
Loading page 8...
Loading page 9...
Loading page 10...
Loading page 11...
Loading page 12...

Other documents for Koios 39006

The following documents are available:
User Manual Photos

Specifications

Koios 39006 Questions and Answers

Find answers or Ask a question.


  • Total questions: 1
  • Questions unAnswered : 1

Q: When I am airfrying some thing and I have yo pause it to flip stuff when I close it and hit the start button again it won't come back on do I reset the temperature and the minutes and push start the time just blinks an won't come back on.. Why is it flashing. Is it trying to raise the temp back up because i opened it.. Please help me Reply
INSTRUCTION MANUAL - Transcript

  • Page 2 - English - : CONTACT US To learn more about KOIOS. please scan the QR-code to start chatting (Live chat): 7 SCAN ME | LY. ris: (ae erE \ 1-855-558-8777 mw [email protected] ® www.mykoios.com 1 CONTACT US
  • Page 3 - English - : Before connecting the product to the power supply. please check if the voltage marked on the product matches the mains power supply voltage. Do not use this product if the plug. power cord or the product itself is If the power cord is damaged. it must be replaced by a special repair center or by qualified personnel in order to prevent accidents. Products are not recommended for use by persons who have physical. sensory or mental deficiencies or lack experience and knowledge (including children). unless they are responsible for their safety and supervision or guidance regarding their use. Keep the product and its cables out of the reach of children. Do not allow the power cord to come into contact with hot surfaces. The product must be plugged into a grounded outlet and it must be ensured that it is properly inserted. Use of accessories not recommended by the manufacturer may cause This product cannot be operated with an external timer or a separate remote control system. Do not place the product against a wall or other products. At least 10 cm of free space should be left behind. on both sides and above the product. Never place items on top of the product. Do not place the product on or near a gas stove. electric stove or preheated oven. Do not use this product for any purpose other than as described in this user manual. During frying with hot air. high temperature steam is released from the air outlet. Keep your hands and face at a safe distance from the steam and air outlets. Also pay attention to high temperature steam and hot air when removing the frying pan from the unit. Care must be taken when moving products containing hot liquids. When the product is used. its accessible surface may become very hot. The product cannot be operated in the form of an external timer or a separate remote control system
  • Page 4 - English - : The product is for normal home use only and should not be used in staff canteens. shops. offices. farms or other work environments. It must not be used by guests in restaurants. hotels. places that provide accommodation and breakfast or other accommodations. Do not use the product outdoors. The product can only be sent to an authorized service center for inspection. Do not repair the product by yourself. otherwise the product warranty will become invalid. The product is designed for use in ambient temperatures between 41°F and 105°F. When using this product. make sure the power cord is connected to the product before plugging it into the outlet. When disconnecting. make sure the appliance is turned off and then removed from the outlet. Always unplug the product after each use. Make sure that the ingredients cooked in this product are golden yellow. not black or brown. The charred part should be discarded. To minimize acrylamide production. never fry fresh potatoes at temperatures above 360 This product comes with a power cord with three-pin plug. To reduce the risk of electric shock. the outlet must have a grounding wire. If the plug does not fit properly into the plug socket. please contact a qualified electrician. Never try to modify the plug. If the power cord is damaged. it must be replaced by the manufacturer. its service department or a similar department to avoid hazards. *To prevent food from coming into contact with the heating element. do not put food that exceeds 4/5 of the capacity of the basket. ¢ Do not cover the air inlet and outlet while operating. ¢ Do not put oil in the oil basin as this may result in a fire hazard. ¢ Do not touch the hot surface or the handle. ¢ Do not immerse the main part of this product in water or other liquids. or rinse under the tap. *Do not immerse the power cord or plug in water or other liquids to prevent damage. Electromagnetic Fields (EMF) This product complies with all standards and regulations regarding the use of electromagnetic fields. When disposing of this product. please do not put it together with general household waste; it should be handed over to an official collection point for the correct disposal of electronic waste.
  • Page 5: PARTS DESCRIPTION o 2.Oil Basin : : ae 3.Grid PARTS DESCRIPTION 4
  • Page 6 - English - : OPERATING INSTRUCTIONS Before use: 1. Open the package and take out the product. 2. Remove packaging and labels. 3. Use a sponge cloth to wipe the oil basin with hot water or wash them ina dishwasher. 4. Wipe the inside and outside of the unit with a damp towel. Do not put the unit in water to clean it. Note: This appliance uses hot air to cook food. Please do not put oil in the oil basin. 1. Place the machine on a level. firm. heat-resistant table top. 2. Place the oil basin into the machine. 3. Insert the plug into the socket. Note: Do not cover or block the exhaust port behind the air fryer. otherwise it will affect the taste of the food due to poor ventilation. Initial State: 1. Turn on the power and the buzzer sounds “bi” “bi” 2. When cooking ends. the buzzer sounds “bi”“bi”“bi’and then a long “bi”; the LED screen displays “End” 3. When the LED screen displays “End”. pull out the basket. it then displays Changing between °C and °F: : The air fryer can display both °C and °F. Hold down both the "AIR FRY" button and "DEHYDRATE" for 2 seconds to switch between °C and °F. The air fryer will remember the last temperature unit used after power is disconnected. 5 OPERATING INSTRUCTIONS
  • Page 7 - English - : OPERATING INSTRUCTIONS OE Function Button - ON/OFF: « Press the button to turn the unit on into standby mode. The LED displays “O”. time and temperature are not displayed. Press this button again to turn the unit off. or to stop the unit when it is operating. RUE START/PAUSE: * Quick Start. When the LED screen displays “0”. press the =) button to start the unit. The default temperature is 360°F and the default time is 10 minutes. * Press the button to pause the operation. Any settings can then be modified. Press again to continue. + After pressing the button. 3 blue turning blades will be displayed to indicate the unit is operating. Note: In any cooking process. if the frying basket is removed the unit will automatically cease the cooking function. When the user re-inserts it. the unit will start operating again and the countdown timer display will resume. OPERATING INSTRUCTIONS 6
  • Page 8 - English - : OPERATING INSTRUCTIONS * Press the button to start cooking. * Press and hold the (eal button to select the appropriate option. then press &) to start. * After pressing the button. the LED display will show the countdown timer and the three rotating blades. « When cooking is finished. the unit will emit three beeps and the LED display shows “End”. DEFAULT | DEFAULT RECOMME MENU OPTION TIME TEMPERA | pispLay QUANTITY (MIN) TURE("F) (3) French FRIES Thawed FROZEN French FRIES 350G Fries & 360°F & 400°F 3006 Remarks: The above mentioned times. temperatures and quantity are for reference only and can be adjusted according to your needs. ROAST} Menu: * Press and hold the button to select the appropriate option. then press the &) button to start. « After pressing the button. the LED display will show the countdown timer and the three rotating blades. * When cooking is finished. the unit will emit three beeps and the LED display shows “End”. 7 OPERATING INSTRUCTIONS
  • Page 9 - English - : OPERATING INSTRUCTIONS DEFAULT | DEFAULT RECOMME MENU OPTION TIME TURECE) DISPLAY quantry (MIN) TURE(* French FRIES Thawed FROZEN French 360°F FRIES Fries & 360°F Remarks: The above mentioned times. temperatures and quantity are for reference only and can be adjusted according to your needs. REHEAT Menu: * Press and hold the button to select the appropriate option. then press the &) button to start. « After pressing the 3) button. the LED display will show the countdown timer and the three rotating blades. * When cooking is finished. the unit will emit three beeps and the LED display shows “End”. DEFAULT | DEFAULT RECOMME MENU OPTION TIME TURECE) DISBLAY auantry (MIN) TURE(* French FRIES Thawed FROZEN French 2 4 320°F FRIES Fries & 320°F pre fos |e fw | site | pom [oe |e | me | a | pm [os |e | ome [ear prom | os |e | ow [see] OPERATING INSTRUCTIONS 8
  • Page 10 - English - : OPERATING INSTRUCTIONS Remarks: The above mentioned times. temperatures and quantity are for reference only and can be adjusted according to your needs. pRATE) DEHYDRATE: * Press the button once. the LED display shows 120°F. Press the button and the unit will operate at 120°F for 8 minutes. Temperature Adjustment: * The default temperature is 360°F * Pressing A V will display the current temperature. * Pressing A V will increase or decrease the temperature in 5 °F increments. Timer Adjustment: The default time is 10 minutes. Pressing A V will display the current default time. Pressing A ¥ will adjust the time in 1 minute increments. For quick timer adjustment. press and hold AV until it reaches the desired time. Select the appropriate cooking time according to the reference menu. The maximum cooking time is 1 hour and the minimum time is 1 minute. In any cooking process. press A Wto increase or decrease the time based on the current countdown display time. If you finish setting the cooking time and temperature. but want to add food or ingredients. pull out the fry basin. Note: Grasp the handle and place the oil basin into the air fryer. When you place the oil basin into the air fryer. do not put food that exceeds 4/5 of the capacity of the air fryer. When cooking is complete. do not immediately touch the fry basin to avoid burns. 9 OPERATING INSTRUCTIONS
  • Page 11 - English - : OPERATING INSTRUCTIONS Shake the food: Some foods need to be shaken during cooking. Hold the handle and take the oil basin out of the unit. Shake the oil basin. During shaking. ensure the food is fully turned over. Re-insert the oil basin into the unit to continue CLEANING AND MAINTENANCE * Always unplug the appliance and disconnect from power before cleaning the appliance. Before handling or cleaning the appliance after using it. it must be allowed to cool for approximately 30 minutes. Do not immerse the entire product in water for cleaning Use a sponge or a soft cloth to wipe. Wash the frying basket and oil basin with a sponge and detergent. or place it in a dishwasher. Use soft sponges and cloths only. Do not use scouring pads or abrasives. If you need additional information or support. please read the separate warranty card. * Unplug the power and make sure that the machine is fully cooled. * Make sure all parts are clean and dry before storing. OPERATING INSTRUCTIONS 10