Before using your new product, please read these instructions to prevent any damage.
USER GUIDE
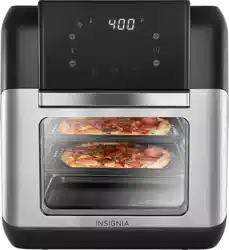
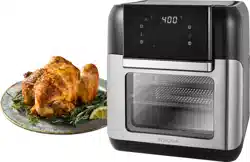
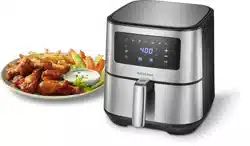
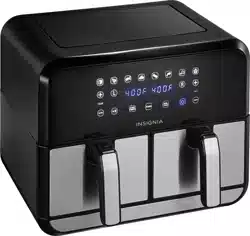
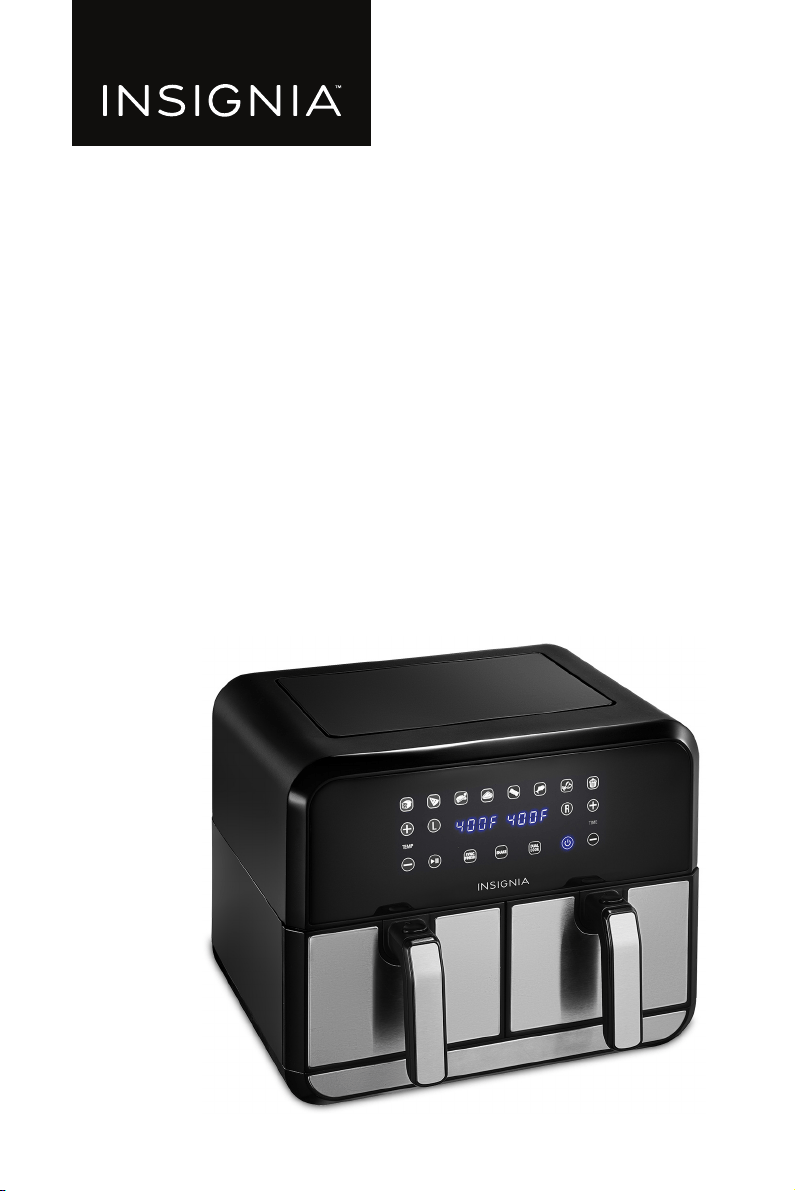
8 Qt. Dual Basket Air Fryer
NS-AF8DBD2 / NS-AF8DBD2-C

www.insigniaproducts.com
2
Contents
IMPORTANT SAFEGUARDS . . . . . . . . . . . . . . . . . . . . . . . . . . . . . . . . . . . . . . . . . . . . . . . 2
Features . . . . . . . . . . . . . . . . . . . . . . . . . . . . . . . . . . . . . . . . . . . . . . . . . . . . . . . . . . . . . . . . 5
Package contents . . . . . . . . . . . . . . . . . . . . . . . . . . . . . . . . . . . . . . . . . . . . . . . . . . . 5
Components. . . . . . . . . . . . . . . . . . . . . . . . . . . . . . . . . . . . . . . . . . . . . . . . . . . . . . . . 6
Control and display panel . . . . . . . . . . . . . . . . . . . . . . . . . . . . . . . . . . . . . . . . . . . 7
Setting up your air fryer . . . . . . . . . . . . . . . . . . . . . . . . . . . . . . . . . . . . . . . . . . . . . . . . . 8
Before using your air fryer . . . . . . . . . . . . . . . . . . . . . . . . . . . . . . . . . . . . . . . . . . . 8
Finding a suitable location . . . . . . . . . . . . . . . . . . . . . . . . . . . . . . . . . . . . . . . . . . 8
Connecting to power. . . . . . . . . . . . . . . . . . . . . . . . . . . . . . . . . . . . . . . . . . . . . . . . 8
Using your air fryer . . . . . . . . . . . . . . . . . . . . . . . . . . . . . . . . . . . . . . . . . . . . . . . . . . . . . .9
Cooking tips . . . . . . . . . . . . . . . . . . . . . . . . . . . . . . . . . . . . . . . . . . . . . . . . . . . . . . . . 9
Turning your air fryer on and off . . . . . . . . . . . . . . . . . . . . . . . . . . . . . . . . . . . . . 9
Choosing the cooking zone . . . . . . . . . . . . . . . . . . . . . . . . . . . . . . . . . . . . . . . . . 9
Preset food temperatures and times . . . . . . . . . . . . . . . . . . . . . . . . . . . . . . . .10
Setting the temperature. . . . . . . . . . . . . . . . . . . . . . . . . . . . . . . . . . . . . . . . . . . .10
Setting the cooking time . . . . . . . . . . . . . . . . . . . . . . . . . . . . . . . . . . . . . . . . . . .10
Pausing or ending cooking . . . . . . . . . . . . . . . . . . . . . . . . . . . . . . . . . . . . . . . . .10
Turning the shake food beep on or off . . . . . . . . . . . . . . . . . . . . . . . . . . . . . .11
Inserting a crisper plate . . . . . . . . . . . . . . . . . . . . . . . . . . . . . . . . . . . . . . . . . . . .11
Removing a basket. . . . . . . . . . . . . . . . . . . . . . . . . . . . . . . . . . . . . . . . . . . . . . . . .12
Understanding DualZone™ technology . . . . . . . . . . . . . . . . . . . . . . . . . . . . .12
Syncing cook finish times. . . . . . . . . . . . . . . . . . . . . . . . . . . . . . . . . . . . . . . . . . .12
Cooking in both zones with the same settings . . . . . . . . . . . . . . . . . . . . . .13
Cooking in both zones with different time settings . . . . . . . . . . . . . . . . . .14
Cooking in one zone . . . . . . . . . . . . . . . . . . . . . . . . . . . . . . . . . . . . . . . . . . . . . . .15
Cleaning your air fryer . . . . . . . . . . . . . . . . . . . . . . . . . . . . . . . . . . . . . . . . . . . . . . . . . .16
Air fryer basket. . . . . . . . . . . . . . . . . . . . . . . . . . . . . . . . . . . . . . . . . . . . . . . . . . . . .16
Crisper plate . . . . . . . . . . . . . . . . . . . . . . . . . . . . . . . . . . . . . . . . . . . . . . . . . . . . . . .16
Cooking chamber . . . . . . . . . . . . . . . . . . . . . . . . . . . . . . . . . . . . . . . . . . . . . . . . . .16
Exterior and control panel . . . . . . . . . . . . . . . . . . . . . . . . . . . . . . . . . . . . . . . . . .17
Troubleshooting . . . . . . . . . . . . . . . . . . . . . . . . . . . . . . . . . . . . . . . . . . . . . . . . . . . . . . .17
Error codes . . . . . . . . . . . . . . . . . . . . . . . . . . . . . . . . . . . . . . . . . . . . . . . . . . . . . . . .17
Specifications . . . . . . . . . . . . . . . . . . . . . . . . . . . . . . . . . . . . . . . . . . . . . . . . . . . . . . . . . .18
ONE-YEAR LIMITED WARRANTY . . . . . . . . . . . . . . . . . . . . . . . . . . . . . . . . . . . . . . . . .19
IMPORTANT SAFEGUARDS
WARNING: Read this manual carefully and completely and retain for
future reference. Failure to adhere to safety instructions may result
in serious injury or damage.

3
8 Qt. Dual Basket Air Fryer
www.insigniaproducts.com
When using electrical appliances, basic safety precautions should always be
followed:
1 This appliance can be used by persons with reduced physical, sensory or
mental capabilities or lack of experience and knowledge if they have been
given supervision or instruction concerning the use of the appliance in a safe
way and understand the hazards involved.
2 Keep the appliance and its cord out of reach of children. DO NOT allow the
appliance to be used by children. Close supervision is necessary when used
near children.
3 Children should not play with the appliance.
4 NEVER use electrical socket below counter.
5 NEVER connect this appliance to an external timer switch or separate
remote-control system.
6 When using this appliance, provide at least 6 inches (15.25 cm) of space above
and on all sides for air circulation.
7 To protect against electrical shock, DO NOT immerse cord, plugs, or main unit
housing in water or other liquid. Cook only in the basket provided.
8 Regularly inspect the appliance and power cord. DO NOT use the appliance if
there is damage to the power cord or plug. If the appliance malfunctions or
has been damaged in any way, immediately stop use and call Customer
Service.
9 DO NOT use an extension short cord. A short power-supply cord is used to
reduce the risk of children grabbing the cord or becoming entangled and to
reduce the risk of people tripping over a longer cord.
10 ALWAYS ensure the appliance is properly assembled before use.
11 DO NOT cover the air intake vent or air outlet while unit is operating. Doing so
will prevent even cooking and may damage the unit or cause it to overheat.
12 Before placing removable basket into the main unit, ensure basket and unit
are clean and dry by wiping with a soft cloth.
13 This appliance is for household use only. DO NOT use this appliance for
anything other than its intended use. DO NOT use in moving vehicles or boats.
DO NOT use outdoors. Misuse may cause injury.
14 Intended for worktop use only. Ensure the surface is level, clean and dry. DO
NOT move the appliance when in use.
15 DO NOT place the appliance near the edge of a worktop during operation.
16 DO NOT use accessory attachments not recommended or sold by the
manufacturer. DO NOT place accessories in a microwave, toaster oven,
convection oven, or conventional oven or on a ceramic cooktop, electric coil,
gas burner range or outdoor grill. The use of accessory attachments not
recommended by the manufacturer may cause fire, electric shock or injuries.
17 ALWAYS ensure basket is properly closed before operating.
18 DO NOT use the appliance without the removable basket installed.
19 DO NOT use this appliance for deep-frying.
20 DO NOT place appliance on hot surfaces or near a hot gas or electric burner or
in a heated oven.
4
www.insigniaproducts.com
21 Prevent food contact with heating elements. DO NOT overfill when cooking.
Overfilling may cause personal injury or property damage or affect the safe
use of the appliance.
22 DO NOT place items on top of unit at any time.
23 Socket voltages can vary, affecting the performance of your product. To
prevent possible illness, use a thermometer to check that your food is cooked
to the temperatures recommended.
24 Should the unit emit black smoke, unplug immediately. Wait for smoking to
stop before removing any cooking accessories.
25 DO NOT touch hot surfaces. Appliance surfaces are hot during and after
operation. To prevent burns or personal injury, ALWAYS use protective hot
pads or insulated oven mitts and use available handles.
26 Extreme caution must be used when the appliance contains hot food.
Improper use may result in personal injury.
27 This appliance has a polarized plug (one blade is wider than the other). To
reduce the risk of electric shock, this plug is intended to fit into a polarized
outlet only one way. If the plug does not fit fully into the outlet, reverse the
plug. If it still does not fit, contact a qualified electrician. DO NOT attempt to
modify the plug in any way.
28 Spilled food can cause serious burns. Keep appliance and cord away from
children. DO NOT let cord hang over edges of tables or counters or touch hot
surfaces.
29 The basket and crisper plate become extremely hot during the cooking
process. Avoid physical contact while removing the basket or plate from the
appliance. ALWAYS place basket or plate on a heat-resistant surface after
removing. DO NOT touch accessories during or immediately after cooking.
30 Cleaning and user maintenance should not be carried out by children.
31 To disconnect, press the power button to turn off the unit, then unplug from
socket when not in use and before cleaning. Allow to cool before cleaning,
disassembly, putting in or taking off parts and storage.
32 DO NOT clean with metal scouring pads. Pieces can break off the pad and
touch electrical parts, creating the risk of electric shock. Please refer to
Cleaning your air fryer on page 16 for regular maintenance of the appliance.
SAVE THESE INSTRUCTIONS
California Residents
WARNING: Cancer and reproductive harm -
www.p65warnings.ca.gov
WARNING: To avoid injury, read and understand the instructions in
this user manual before attempting to use this appliance.
5
8 Qt. Dual Basket Air Fryer
www.insigniaproducts.com
Features
• Air fryer circulates hot air, efficiently cooking your food without oil
• Two baskets operate independently to let you cook two separate items at the
same time
• 8 qt (7.6 l) capacity without crisper plate — 7.6 qt (7.2 l) capacity with crisper
plate makes enough food for the whole family
• Digital controls with an easy-to-read display makes adjusting your settings a
breeze
• 8 preset functions let you bake, roast, or fry all your favorite foods
• Temperature ranges from 175–400° F (80–204° C), giving you precise control
• Timer lets you cook your food anywhere from 1–60 minutes, while auto
shut-off grants you peace of mind
• Dishwasher-safe baskets and crisper plates make clean-up a breeze
Package contents
•Air Fryer
• Baskets (2)
• Nonstick crisper plates (2)
• User Guide
WARNING:
Electrical shock hazard. Use grounded outlet only.
• DO NOT remove ground.
• DO NOT use an adapter
• DO NOT use an extension cord.
Failure to follow these instructions may result in electric shock and/or serious
injury.
WARNING: THE FAILURE TO FOLLOW ANY OF THE IMPORTANT
SAFEGUARDS AND/OR THE INSTRUCTIONS FOR SAFE USE IS A
MISUSE OF YOUR APPLIANCE THAT CAN VOID YOUR WARRANTY
AND CREATE THE RISK OF SERIOUS INJURY.
WARNING: THE FAILURE TO FOLLOW ANY OF THE IMPORTANT
SAFEGUARDS AND/OR THE INSTRUCTIONS FOR SAFE USE IS A
MISUSE OF YOUR APPLIANCE THAT CAN VOID YOUR WARRANTY
AND CREATE THE RISK OF SERIOUS INJURY.
6
www.insigniaproducts.com
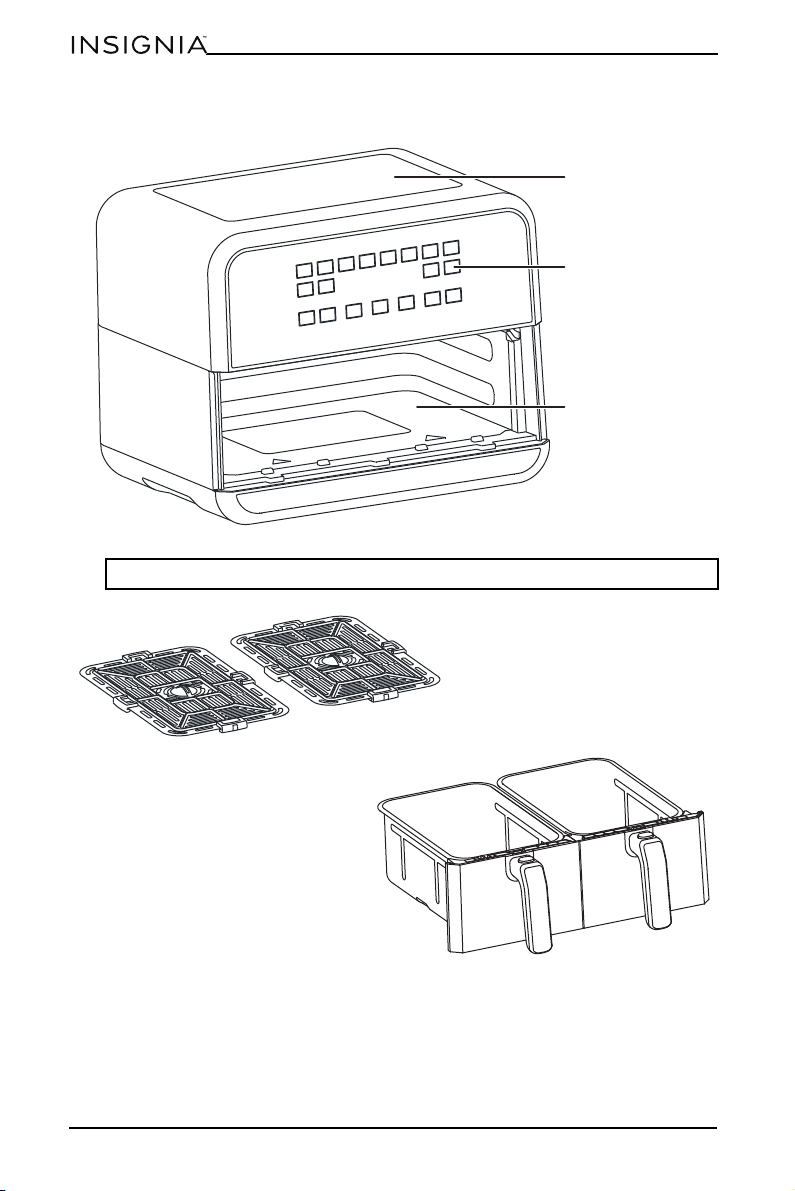
Components
Note: The air outlet is located on the back of your air fryer.
Air intake
Control panel
Cooking chamber
Nonstick baskets
Nonstick crisper plates
7
8 Qt. Dual Basket Air Fryer
www.insigniaproducts.com
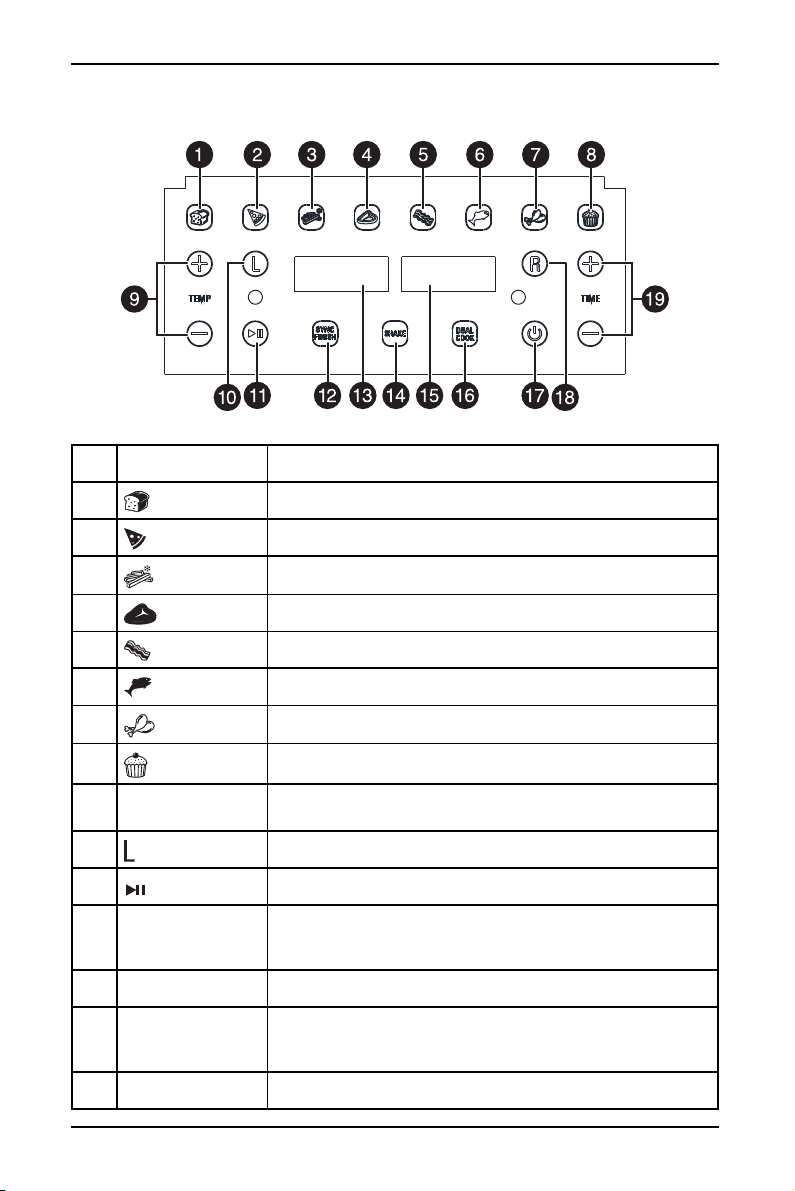
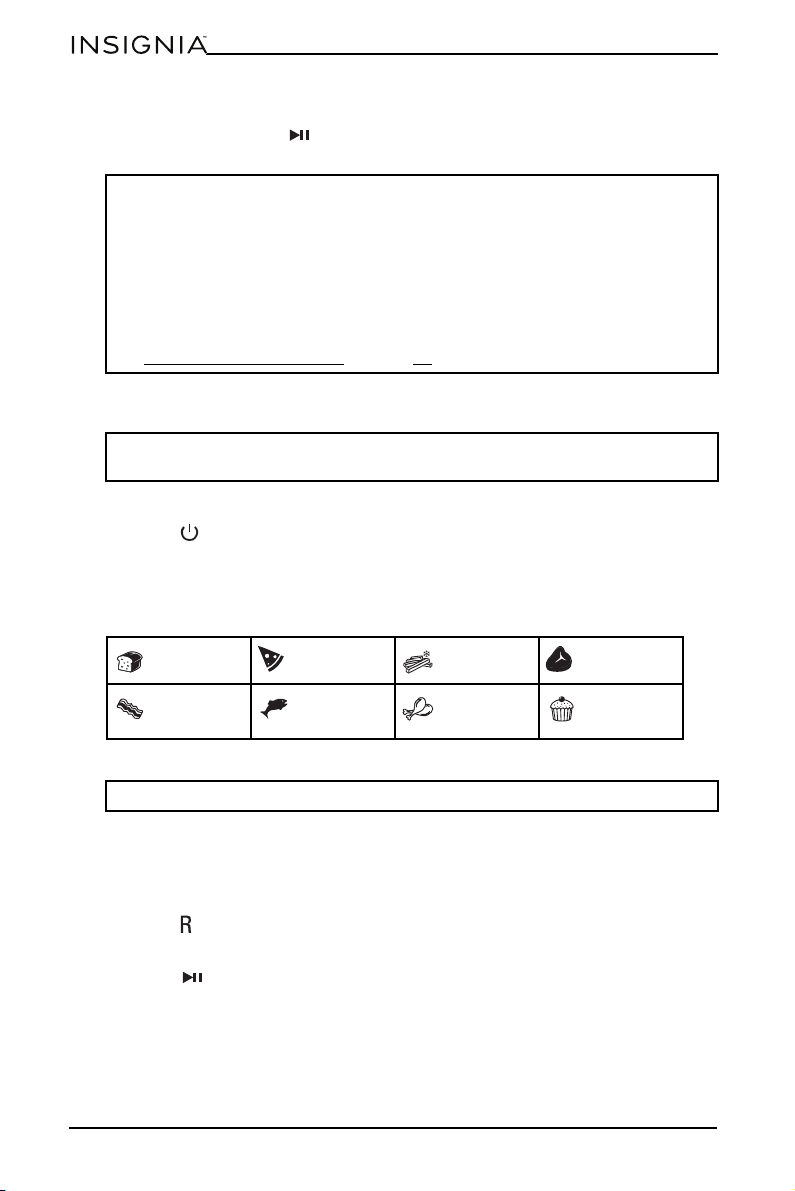
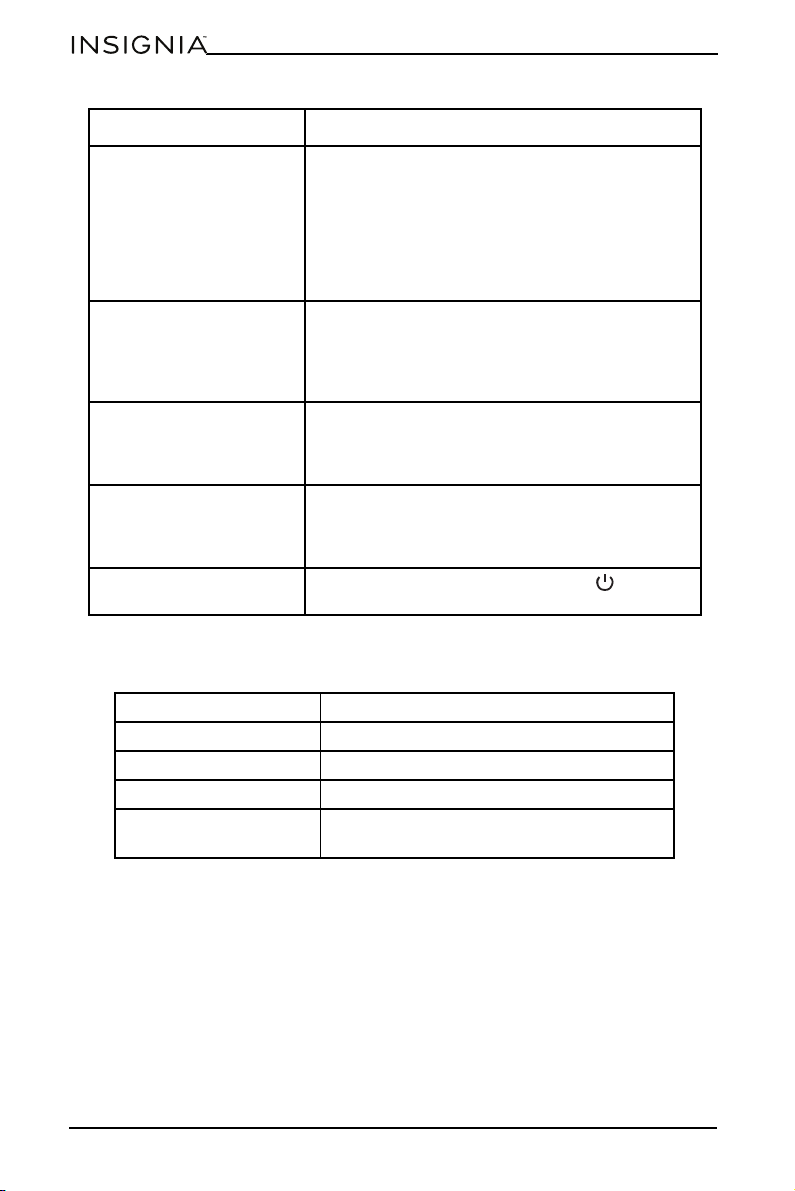
Control and display panel
#BUTTON DESCRIPTION
1
(bread) Cooks bread.
2
(pizza) Cooks pizza.
3
(French fries) Cooks French fries..
4
(steak) Cooks steak.
5
(bacon) Cooks bacon.
6
(fish) Cooks fish.
7
(chicken) Cooks chicken.
8
(pastries) Cooks pastries.
9 TEMP +/–
Increases or decreases the temperature before and during
cooking.
10 Controls the output for the basket on the left side (zone 1).
11
(start/pause)
Starts or pauses cooking.
12 SYNC FINISH
Automatically syncs the cook times so that both baskets
finish cooking at the same time, even if you are using
different cook times.
13 Left display Displays settings for the basket on the left.
14 SHAKE
Beeps when either 1/2 or 1/3 of the cook time has elapsed.
The Pizza, Bacon, Cake presets do not have the shake
reminding setting.
15 Right display Displays settings for the basket on the right.
8
www.insigniaproducts.com
Setting up your air fryer
Before using your air fryer
1 Remove and discard all packaging material, promotional labels, and tape from
your air fryer.
2 Remove all accessories from the package and read this manual carefully. Pay
particular attention to operational instructions, warnings, and important
safeguards to avoid any injury or property damage.
3 Wash the baskets and crisper plates in hot, soapy water, then rinse and dry
thoroughly. The crisper plates and baskets are the ONLY dishwasher-safe
parts. NEVER clean the main part of your air fryer in the dishwasher.
Finding a suitable location
• Do not place your air fryer on top of another appliance (such as a stove top).
• Place the air fryer on a stable, level surface, away from combustible material
and external heat sources.
• Leave at least 5 in. (13 cm) of space above and around all sides of your air fryer.
Connecting to power
• Connect the power cord to a standard 120 V wall outlet.
16 DUAL COOK
Automatically matches the zone 2 (right) settings to the
zone 1 settings (left). Use to cook large amounts of the
same food or different foods when using both baskets.
17 (power) Turns your air fryer on or off.
18 Controls the output for the basket on the right side (zone 2).
19 TIME +/–
Increases or decreases the cook time before and during
cooking.
Press and hold both + and – for several seconds to turn the
beep sound on or off.
WARNING:
• Read the IMPORTANT SAFEGUARDS
on page 2 before using your air fryer.
Failure to read and follow those instructions for safe use may result in
damage to your air fryer, property damage, or personal injury.
• To avoid property damage, do not place your air fryer on a stove top, on
another appliance, or in a heated oven. Heat from an external source may
damage your air fryer.
• To avoid the risk of fire, property damage, or personal injury, do not place
anything on top of air fryer, and do not block the air vents.
Note: Don’t remove the safety warning stickers or the rating label from the air
fryer.
#BUTTON DESCRIPTION
9
8 Qt. Dual Basket Air Fryer
www.insigniaproducts.com
Using your air fryer
Cooking tips
• For consistent browning, make sure that ingredients are arranged in an even
layer on the bottom of the basket with no overlapping. If ingredients are
overlapping, shake them halfway through cooking.
• You can adjust the cook temperature and time at any time during cooking.
Press for the left side (zone 1) or for the right side (zone 2), then press
TEMP +/– to adjust the temperature or TIME +/– to adjust the time.
• To convert recipes for a traditional oven, reduce the temperature by 25°F.
Check food frequently to avoid overcooking.
• Occasionally, the fan from your air fryer may blow lightweight foods around.
Use wooden toothpicks to secure loose, lightweight food, like the top slice of
bread on a sandwich.
• The crisper plates elevate ingredients in the baskets so air can circulate under
and around ingredients for even, crisp results.
• After selecting a cooking function, you can press (start/pause) to begin
cooking immediately. Your air fryer runs at the default temperature and time.
• To avoid overcooking or burning:
• Check progress throughout cooking and remove food as it reaches the level
of brownness you want. We recommend using an instant-read thermometer
to monitor the internal temperature of proteins.
• Remove food directly after the cook time is complete to avoid overcooking.
Turning your air fryer on and off
Plug the power cord, into a power outlet, then press (power). Your air fryer
turns on and enters standby mode. Press again to turn off your air fryer.
Choosing the cooking zone
Your air fryer uses DualZone™ technology that lets you use two cooking zones to
increase versatility. See Understanding DualZone™ technology on page 12.
When you turn on your air fryer, it automatically defaults to the left side (zone 1).
• To select the right side, (zone 2), press ).
• To switch back the left side (zone 1), press .
Note: The first few times you use the air fryer, you may notice a strong plastic
smell. This is normal, non-toxic, and goes away quickly.
You can press and hold both + and – for several seconds to turn the beep sound
on or off.
10
www.insigniaproducts.com
Preset food temperatures and times
This table shows the default temperature and times settings for items on the
preset menu. You can use the TEMP + or TEMP – or TIME + and TIME – to change
the preset temperature and time, as needed.
Setting the temperature
• Press TEMP + or TEMP – to raise or lower the temperature.
Setting the cooking time
• Press TIME + or TIME – to increase or decrease the cook time.
Pausing or ending cooking
Pausing both zones
• In Sync Finish or Dual Cook mode, press (start/pause). Press again to
resume cooking.
Pausing one zone when using both zones
• Press for the left side (zone 1) or for the right side (zone 2), then press
(start/pause). Press again to resume cooking.
Pausing when using one zone
• Press (start/pause). Press again to resume cooking.
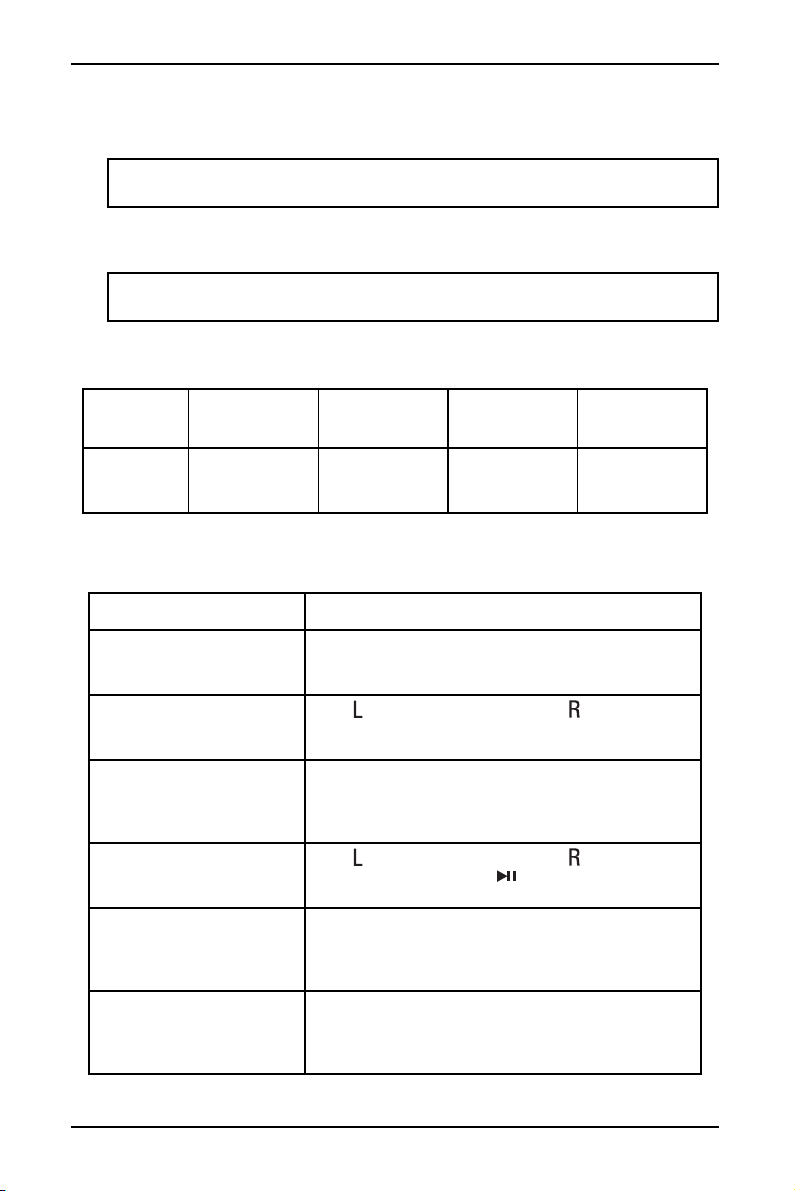
SINGLE BASKET BOTH BASKETS
DEFAULT
TIME
DEFAULT TEMP
DEFAULT
TIME
DEFAULT TEMP
French fries
20 min. 400° F (204° C) 30 min. 400° F (204° C)
Chicken
25 min. 400° F (204° C) 30 min. 400° F (204° C)
Steak
15 min. 360° F (182° C) 20 min. 360° (182° C)
Pizza
12 min. 300° F (149° C) 12 min. 300° F (149° C)
Bread
6 min. 400° F (204° C) 6 min. 400° F (204° C)
Fish
15 min. 360° F (182° C) 20 min. 360° F (182° C)
Bacon
6 min. 400° F (204° C) 8 min. 400° F (204° C)
Pastries
12 min. 300° F (149° C) 12 min. 300° F (149° C)

11
8 Qt. Dual Basket Air Fryer
www.insigniaproducts.com
Ending cooking in one zone when using both zones
• If you want to end cooking in a zone before the cook time runs out, press for
the left side (zone 1) or for the right side (zone 2), then press
(start/pause). Cooking continues in the other zone.
Ending cooking using one zone
• If you want to end cooking before the cook time runs out, press
(start/pause).
Turning the shake food beep on or off
By default, your air fryer beeps when either 1/2 or 1/3 of the cook time has elapsed
(depending on the cooking preset) to remind you to shake the food in the basket.
• To turn off the shake food beep, press SHAKE. To turn it back on press SHAKE
again.
Inserting a crisper plate
1 Hold the crisper plate by the handle, and align it with the cooking chamber
opening.
2 While gently pressing the sides of the crisper plate, lower the plate into a
basket.
Plate handle
12
www.insigniaproducts.com
Removing a basket
1 Pull your air fryer’s handle out to slide the pan out.
2 Remove the food by dumping it in a container or by using silicone-tipped
tongs or utensils. DO NOT place a basket on the top of your air fryer.
Understanding DualZone™ technology
Your air fryer is designed with DualZone™ technology that lets you use two
cooking zones to increase versatility.
The left side of the cooking chamber is zone 1. The right side is zone 2. Each zone
has its own settings and display. With DualZone™ technology, you can use both
zones with the different settings, use both zones with the same settings, and sync
cook times so that both zones end cooking at the same time.
Syncing cook finish times
1 Press (power).
2 Place a crisper plate into the bottom of each basket, then add food to the
baskets.
3 Insert the baskets into the cooking chamber. Your air fryer automatically
defaults the left side (zone 1).
4 Press a cooking function. You can select:
.
5 Press TEMP + or TEMP – to set the temperature. The temperature appears in
the left display.
6 Press TIME + or TIME – to set the cook time in increments from one minute to
one hour. The time appears in the left display.
7 Press to select the right side (zone 2).
8 Press a cooking function. You can select:
CAUTION: After cooking, the basket handle and food are hot. Use a potholder or
oven mitt to avoid injury.
Bread Pizza French fries Steak
Bacon Fish Chicken Pastries
Note: You can cancel your selection by pressing the cooking function again.
Bread Pizza French fries Steak
Bacon Fish Chicken Pastries
Note: You can cancel your selection by pressing the cooking function again.
13
8 Qt. Dual Basket Air Fryer
www.insigniaproducts.com
9 Enter the temperature and cook time for the food in the right side.
10 Press SYNC FINISH, then press (start/pause).
Your air fryer starts cooking in the zone with the longest cook time. Hold
appears in the display for the zone with the shortest cook time. When both
zones have the same remaining time, your air fryer beeps and starts cooking
in the zone that was on hold.
When cooking has finished, End appears on both displays.
11 Remove the food by dumping it in a container or by using silicone-tipped
tongs or utensils. DO NOT place a basket on the top of your air fryer.
Cooking in both zones with the same settings
If the settings for both zones are the same, you can select the settings for the left
side (zone 1), then copy the settings to right side (zone 2) using the Dual Cook
feature.
1 Press (power).
2 Place a crisper plate into the bottom of each basket, add food to the baskets,
then insert them into the cooking chamber. Your air fryer automatically selects
the left side (zone 1).
3 Press a cooking function. You can select:
4 Press TEMP + or TEMP – to set the temperature. The temperature appears in
the display.
5 Press TIME + or TIME – to set the cook time in increments from one minute to
one hour. The time appears in the display.
Note: We recommend that you shake or toss the food in both baskets to make
sure that the food is cooked evenly.
After you remove a basket:
• Replace the basket within 90 seconds to continue with the original cook
settings.
• If you replace the basket within five minutes (but after 90 seconds), the
DUAL/SYNC setting turns off and each zone works separately.
• If you replace the basket after five minutes, the zone turns off and you must
to reset the cook time and temperature.
See Pausing or ending cooking
on page 10.
CAUTION: After cooking, the basket handles and food are hot. Use a potholder
or oven mitt to avoid injury.
Bread Pizza French fries Steak
Bacon Fish Chicken Pastries
Note: You can cancel your selection by pressing the cooking function again.
14
www.insigniaproducts.com
6 Press DUAL COOK to copy the setting from left side (zone 1) to the right side
(zone 2), then press (start/pause) to start cooking in both zones.
When cooking has finished, End appears in both displays.
7 Remove the food by dumping it in a container or by using silicone-tipped
tongs or utensils. DO NOT place a basket on the top of your air fryer.
Cooking in both zones with different time settings
1 Press (power).
2 Place a crisper plate into the bottom of each basket, add food to the baskets,
then insert them into the cooking chamber. Your air fryer automatically selects
the left side (zone 1).
3 Press a cooking function. You can select:
4 Press TEMP + or TEMP – to set the temperature. The temperature appears in
the display.
5 Press TIME + or TIME – to set the cook time in increments from one minute to
one hour. The time appears in the display.
6 Press to select the right side (zone 2).
7 Set the temperature and time for the right side.
8 Press (start/pause) to start cooking in both zones.
Note: We recommend that you shake or toss the food in both baskets to make
sure that the food is cooked evenly.
After you remove a basket:
• Replace the basket within 90 seconds to continue with the original cook
settings.
• If you replace the basket within five minutes (but after 90 seconds), the
DUAL/SYNC setting turns off and each zone works separately.
• If you replace the basket after five minutes, the zone turns off and you must
to reset the cook time and temperature.
See Pausing or ending cooking
on page 10.
CAUTION: After cooking, the basket handles and food are hot. Use a potholder
or oven mitt to avoid injury.
Bread Pizza French fries Steak
Bacon Fish Chicken Pastries
Note: You can cancel your selection by pressing the cooking function again.
15
8 Qt. Dual Basket Air Fryer
www.insigniaproducts.com
9 If you want to stop or pause cooking in a zone before the cook time runs out,
press for the left side (zone 1) or for the right side (zone 2), then press
(start/pause).
When cooking has finished, End appears in both displays.
10 Remove the food by dumping it in a container or by using silicone-tipped
tongs or utensils. DO NOT place a basket on the top of your air fryer.
Cooking in one zone
1 Press (power).
2 Place a crisper plate into the bottom of a basket, add food to the basket, then
insert the basket into the cooking chamber. Your air fryer automatically selects
the left side (zone 1).
3 If you want to use the right side (zone 2), press .
4 Press a cooking function. You can select:
5 Press TEMP + or TEMP – to set the temperature. The temperature appears in
the display.
6 Press TIME + or TIME – to set the cook time in increments from one minute to
one hour. The time appears in the display.
7 Press (start/pause) to start cooking. When cooking is complete, your air
fryer beeps and End appears in the display.
8 Remove the food by dumping it in a container or by using silicone-tipped
tongs or utensils. DO NOT place a basket on the top of your air fryer.
Note: We recommend that you shake or toss the food in both baskets to make
sure that the food is cooked evenly. See Pausing or ending cooking
on page 10.
CAUTION: After cooking, the basket handles and food are hot. Use a potholder
or oven mitt to avoid injury.
Bread Pizza French fries Steak
Bacon Fish Chicken Pastries
Note: You can cancel your selection by pressing the cooking function again.
CAUTION: After cooking, the basket handle and food are hot. Use a potholder or
oven mitt to avoid injury.
16
www.insigniaproducts.com
Cleaning your air fryer
• Clean your air fryer and accessories after each use.
• Always unplug your air fryer and let it cool to room temperature before
cleaning.
• Never use harsh chemical detergents, scouring pads, or powders on any of the
parts or components.
• Let all surfaces dry thoroughly before use and before storage.
Air fryer basket
• Wash the baskets by hand or in a dish washer. If hand-washing, air-dry or
towel dry.
• If food residue is stuck on the baskets, place them in a sink filled with warm,
soapy water and let them soak.
Crisper plate
• Wash the crisper plates by hand or in a dish washer. If hand-washing, air-dry or
towel dry.
• If food residue is stuck on the crisper plates, place them in a sink filled with
warm, soapy water and let them soak.
• The crisper plate has a non-stick coating. To avoid damage to the non-stick
coating, DO NOT use metal cleaning utensils.
Cooking chamber
• Clean the cooking chamber with a sponge or soft cloth and warm water and
dish soap.
• To remove baked-on grease and food residue from the cooking chamber,
spray with a mixture of baking soda and vinegar and wipe clean with damp
cloth.
• For stubborn stains, let the mixture sit on the affected area for several minutes
before scrubbing clean.
• Check the heating coil for oil spatter and food debris. Clean the heating coil
with a damp cloth as needed. Make sure that the heating coil is completely dry
before the next use.
WARNING: To avoid risk of electrical shock and personal injury:
• Do not immerse your air fryer in water.
• Do not rinse your air fryer under a tap.
• Do not wet prongs of the power cord.
WARNING:
Without proper cleaning, food and grease splatter may build up around the
heating element, causing the risk of smoke, fire, and personal injury.
WARNING:
If you see or smell smoke, press (start/pause), unplug you air fryer, and let it
cool. Remove food splatter or grease with a soft cloth and dish detergent.
17
8 Qt. Dual Basket Air Fryer
www.insigniaproducts.com
Exterior and control panel
• Clean with a soft, damp cloth or sponge and wipe dry.
Troubleshooting
Error codes
If a fault is detected, the display shows one of the following codes:
If any of these error codes appears on the display, contact your local dealer or
service center. Do not try to repair your air fryer yourself.
Note: NEVER immerse your air fryer in water or any other liquid. NEVER clean
your air fryer in a dishwasher.
CAUTION: Use extreme caution with children. DO NOT let children play with
your air dryer.
FAULT
CODE
E1 E2 E3 E4
Description Temperature
sensor error in
the upper zone
Temperature
sensor error in
the lower zone
DC electric fan
error in the
upper zone
DC electric fan
error in the
lower zone
PROBLEM SOLUTION
How do I adjust the
temperature or time while
using one zone?
Press TEMP +/– to adjust the temperature or
TIME +/– to adjust the time.
How do I adjust the
temperature or time while
using both zones?
Press for the left side (zone 1) or for the right
side (zone 2), then press TEMP +/– to adjust the
temperature or TIME +/– to adjust the time.
Can I cook different foods in
each zone without
worrying about cross
contamination?
Yes, both zones are self-contained with separate
heating elements and fans.
How do I pause or stop one
zone when using both
zones?
Press for the left side (zone 1) or for the right
side (zone 2), then press (start/pause).
Are the baskets safe to put
on my countertop?
The baskets heat up during cooking. Use caution
when handling, and place them on heat-safe
surfaces only. DO NOT place the baskets on the top
of your air fryer.
When should I use a crisper
plate?
Use a crisper plate when you want food to come out
crispy. The plate elevates the food in the basket so
that air can flow under and around it to cook
ingredients evenly.
18
www.insigniaproducts.com
Specifications
Why didn’t my food cook
fully?
Make sure that the basket is fully inserted during
cooking. For consistent browning, make sure that
ingredients are arranged in an even layer on the
bottom of the basket with no overlapping. Shake
the basket to toss ingredients for even crispiness.
Cook temperature and time can be adjusted at any
time during cooking by pressing TEMP +/– to adjust
the temperature or TIME +/– to adjust the time.
Why is my food burned? For best results, check progress throughout cooking
and remove food when it reaches the level of
brownness you want. Remove food immediately
after the cook time is complete to avoid
overcooking.
Why do some ingredients
blow around when air
frying?
Occasionally, the fan from the air fryer can blow
lightweight foods around. Use wooden toothpicks
to secure loose, lightweight food, like the top slice of
bread on a sandwich.
Can I air fry wet, battered
ingredients?
Yes, but use the correct breading technique. Batter
foods with flour, then with egg. Press bread firmly
onto the battered food so crumbs won’t be blown of
by the fan.
Why did the display screen
go black?
Your air fryer is in standby mode. Press (power) to
turn it back on.
Dimensions (H × W × D) 12 × 15 × 14.6 in. (30.7 × 38.2 × 37.3 cm)
Weight 16.3 lbs. (7.4 kg)
Power requirements 120V~60Hz
Wattage 1,700 W
Capacity 8 qt. (7.5 L) without crisper plate
7.6 qt (7.2 l) capacity with crisper plate
PROBLEM SOLUTION

19
8 Qt. Dual Basket Air Fryer
www.insigniaproducts.com
ONE-YEAR LIMITED WARRANTY
Definitions:
The Distributor* of Insignia branded products warrants to you, the original purchaser of this
new Insignia-branded product (“Product”), that the Product shall be free of defects in the
original manufacturer of the material or workmanship for a period of one (1) year from the
date of your purchase of the Product (“Warranty Period”).
For this warranty to apply, your Product must be purchased in the United States or Canada
from a Best Buy branded retail store or online at www.bestbuy.com
or www.bestbuy.ca and
is packaged with this warranty statement.
How long does the coverage last?
The Warranty Period lasts for 1 year (365 days) from the date you purchased the Product.
Your purchase date is printed on the receipt you received with the Product.
What does this warranty cover?
During the Warranty Period, if the original manufacture of the material or workmanship of
the Product is determined to be defective by an authorized Insignia repair center or store
personnel, Insignia will (at its sole option): (1) repair the Product with new or rebuilt parts; or
(2) replace the Product at no charge with new or rebuilt comparable products or parts.
Products and parts replaced under this warranty become the property of Insignia and are
not returned to you. If service of Products or parts are required after the Warranty Period
expires, you must pay all labor and parts charges. This warranty lasts as long as you own your
Insignia Product during the Warranty Period. Warranty coverage terminates if you sell or
otherwise transfer the Product.
How to obtain warranty service?
If you purchased the Product at a Best Buy retail store location or from a Best Buy online
website (www.bestbuy.com or www.bestbuy.ca), please take your original receipt and the
Product to any Best Buy store. Make sure that you place the Product in its original packaging
or packaging that provides the same amount of protection as the original packaging.
To obtain warranty service, in the United States and Canada call 1-877-467-4289. Call agents
may diagnose and correct the issue over the phone.
Where is the warranty valid?
This warranty is valid only in the United States and Canada at Best Buy branded retail stores
or websites to the original purchaser of the product in the country where the original
purchase was made.
What does the warranty not cover?
This warranty does not cover:
• Food loss/spoilage due to failure of refrigerator or freezer
• Customer instruction/education
•Installation
•Set up adjustments
• Cosmetic damage
• Damage due to weather, lightning, and other acts of God, such as power surges
• Accidental damage
•Misuse
•Abuse
•Negligence
• Commercial purposes/use, including but not limited to use in a place of business or in
communal areas of a multiple dwelling condominium or apartment complex, or
otherwise used in a place of other than a private home.
• Modification of any part of the Product, including the antenna
• Display panel damaged by static (non-moving) images applied for lengthy periods
(burn-in).

20
www.insigniaproducts.com
• Damage due to incorrect operation or maintenance
• Connection to an incorrect voltage or power supply
• Attempted repair by any person not authorized by Insignia to service the Product
• Products sold “as is” or “with all faults”
• Consumables, including but not limited to batteries (i.e. AA, AAA, C etc.)
• Products where the factory applied serial number has been altered or removed
• Loss or Theft of this product or any part of the product
• Display panels containing up to three (3) pixel failures (dots that are dark or incorrectly
illuminated) grouped in an area smaller than one tenth (1/10) of the display size or up to
five (5) pixel failures throughout the display. (Pixel based displays may contain a limited
number of pixels that may not function normally.)
• Failures or Damage caused by any contact including but not limited to liquids, gels or
pastes.
REPAIR REPLACEMENT AS PROVIDED UNDER THIS WARRANTY IS YOUR EXCLUSIVE REMEDY
FOR BREACH OF WARRANTY. INSIGNIA SHALL NOT BE LIABLE FOR ANY INCIDENTAL OR
CONSEQUENTIAL DAMAGES FOR THE BREACH OF ANY EXPRESS OR IMPLIED WARRANTY ON
THIS PRODUCT, INCLUDING, BUT NOT LIMITED TO, LOST DATA, LOSS OF USE OF YOUR
PRODUCT, LOST BUSINESS OR LOST PROFITS. INSIGNIA PRODUCTS MAKES NO OTHER
EXPRESS WARRANTIES WITH RESPECT TO THE PRODUCT, ALL EXPRESS AND IMPLIED
WARRANTIES FOR THE PRODUCT, INCLUDING BUT NOT LIMITED TO ANY IMPLIED
WARRANTIES OF AND CONDITIONS OF MERCHANTABILITY AND FITNESS FOR A PARTICULAR
PURPOSE, ARE LIMITED IN DURATION TO THE WARRANTY PERIOD SET FORTH ABOVE AND
NO WARRANTIES, WHETHER EXPRESS OR IMPLIED, WILL APPLY AFTER THE WARRANTY
PERIOD. SOME STATES, PROVINCES AND JURISDICTIONS DO NOT ALLOW LIMITATIONS ON
HOW LONG AN IMPLIED WARRANTY LASTS, SO THE ABOVE LIMITATION MAY NOT APPLY TO
YOU. THIS WARRANTY GIVES YOU SPECIFIC LEGAL RIGHTS, AND YOU MAY ALSO HAVE OTHER
RIGHTS, WHICH VARY FR OM STATE TO STATE OR PROVINCE TO PROVINCE.
Contact Insignia:
1-877-467-4289
www.insigniaproducts.com
INSIGNIA is a trademark of Best Buy and its affiliated companies.
*Distributed by Best Buy Purchasing, LLC
7601 Penn Ave South, Richfield, MN 55423 U.S.A.
©2021 Best Buy. All rights reserved.

www.insigniaproducts.com
1-877-467-4289 (U.S. and Canada)
INSIGNIA is a trademark of Best Buy and its affiliated companies.
Distributed by Best Buy Purchasing, LLC
7601 Penn Ave South, Richfield, MN 55423 U.S.A.
©2021 Best Buy. All rights reserved.
V2 ENGLISH
21-0490