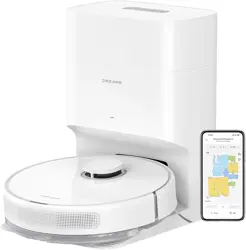
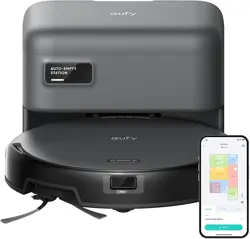
Koios I3 Robot Vacuum Cleaner
Product's Documents
Below are documents related to this product, you can read online or download:
- Owner's manual - (English) Read Online | Download pdf

User Manual Vacuum Cleaner
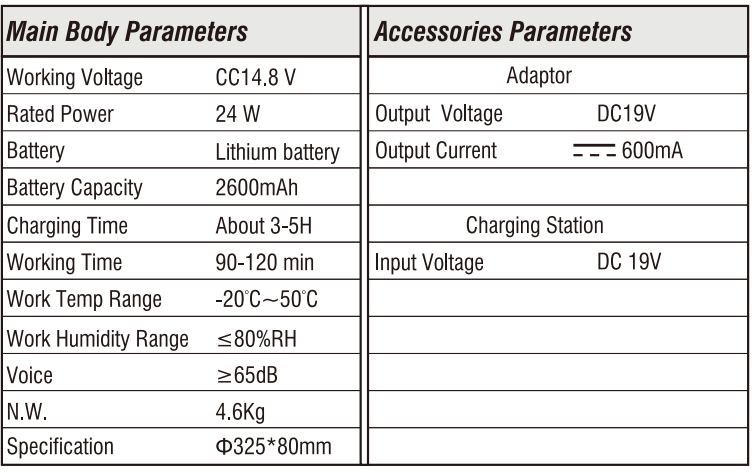
MAIN BODY AND ACCESSORIES
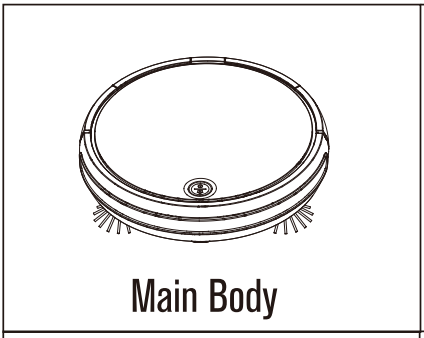


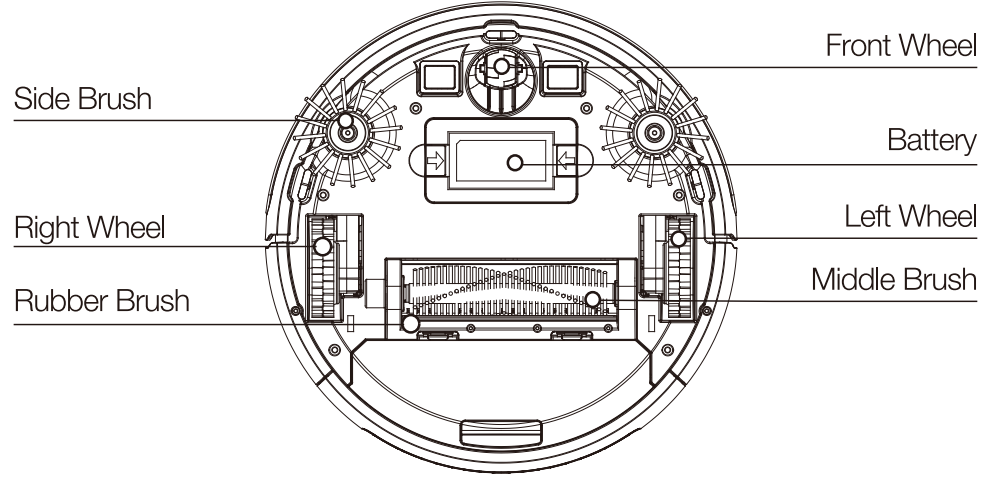
ACCESSORIES INTRODUCTION
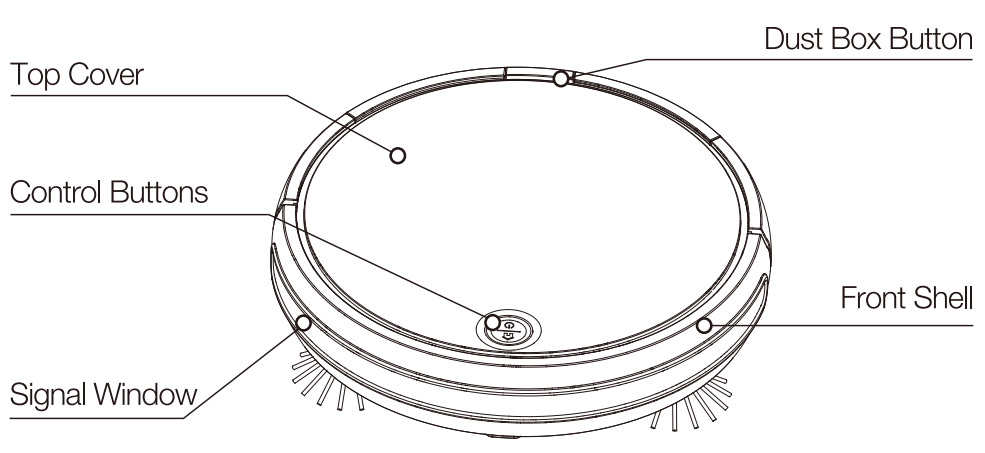
FRONT VIEW
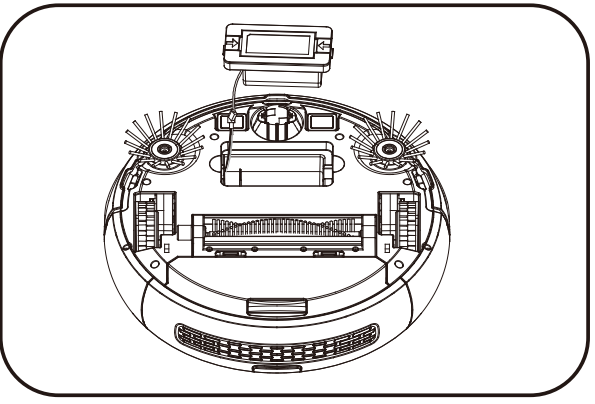
BOTTOM VIEW
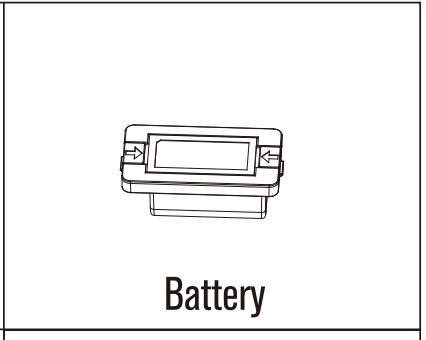
PLEASE INSTALL THE BATTERY BEFORE USING THE CLEANER
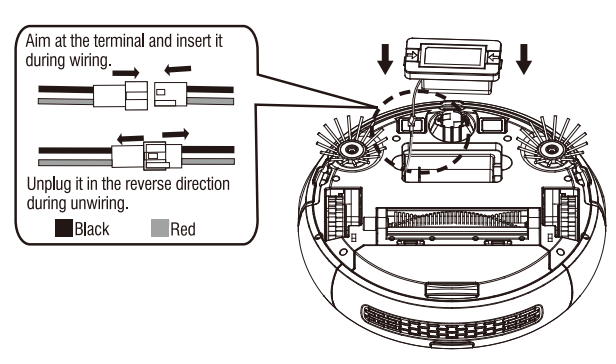
1. Connect the terminal of the battery pack with the machine; then press the battery pack downwards into the battery compartment.
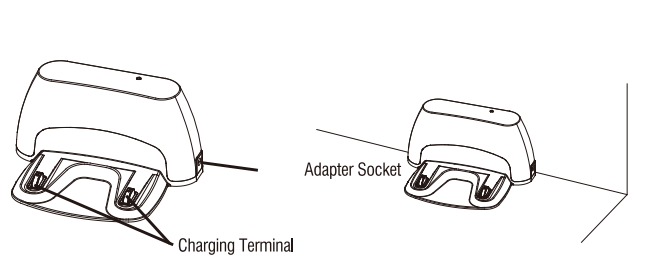
2. Please put the docking station on flat ground against a wall. Clear away dust and other debris before placing the docking station on the floor. Next, insert the adapter into.
The docking station can’t be placed on carpet. It is recommended to place it in a fixed position and do not regularly move it. Please don't move the docking station during cleaning
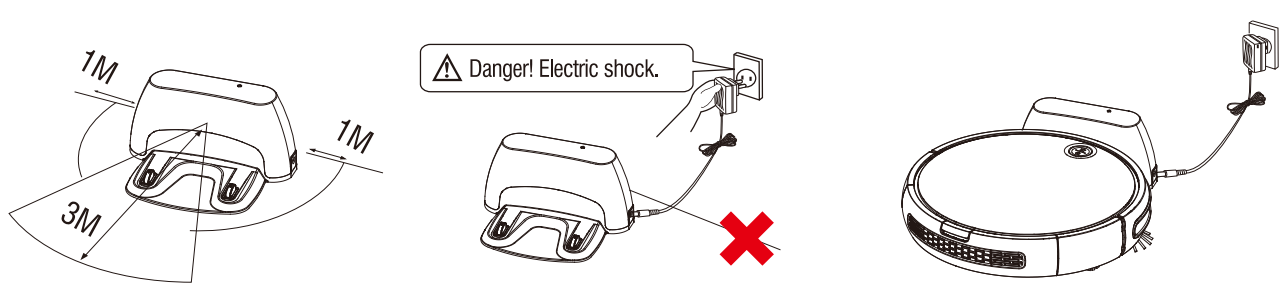
1. Place the docking station on flat ground against a wall. Make sure no obstacles are present within 3 meters of the front of the docking station or within 1 meter’s scope of it.
2. Connect the adapter and docking station.
MAIN PRODUCT USE
Introduction to Control Buttons

BUTTONS INTRODUCTION | |
 | Recharge Button |
 | Power Button |
WORK MODE
Manual Mode
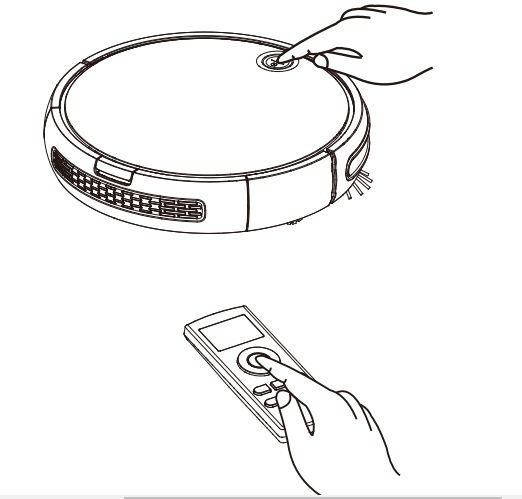
1. Short-press the Power key and the indicator will light up. The cleaner will enter standby state, and then start cleaning automatically.
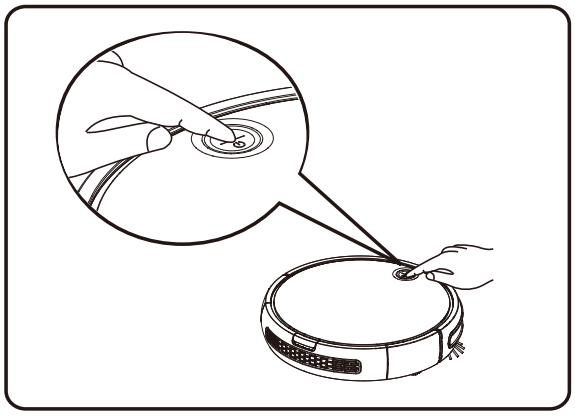
2. When the vacuum cleaner is in standby state, press the Power key and it will become active. The Recharge key will flash blue and the device will find the docking station.
Guide to operating indicators
STATE | DISPLAY | OPERATION |
Tum-off |
| Long-press |
Tum-on |  Light-on Light-on | Short-press |
| Cleaning |  Light-on Light-on | Short-press'' |
| Recharge |  Flash Blue Flash Blue | Short-press'' |
| Charging | Flash Blue | |
| Error | Flash Blue at the same time | |
| Fully Charged | Blue-light Long-Bright | |
| Pairing Mode | Flash Blue | Long-presS'' |
CHARGING METHODS
Manual Charging

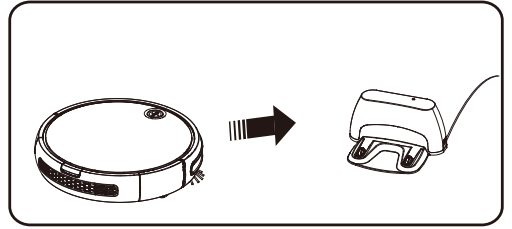
1. Charging with the docking station:
Connect the adapter to the docking station first, and then insert to the power supply; place the vacuum cleaner on the docking station for charging. 0~he blue indicator of the recharge key will flash during the recharge; the blue indicator will be on all the time after the device is fully charged).
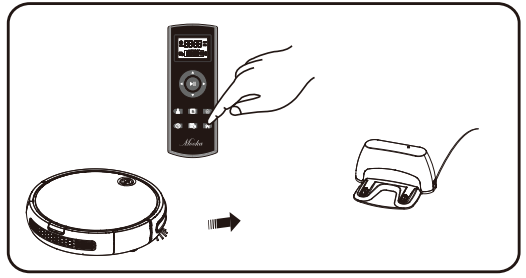
2. Charging via the remote control:
When the cleaner is at the standby state, press the "recharge" button to let the machine enter the recharge mode.
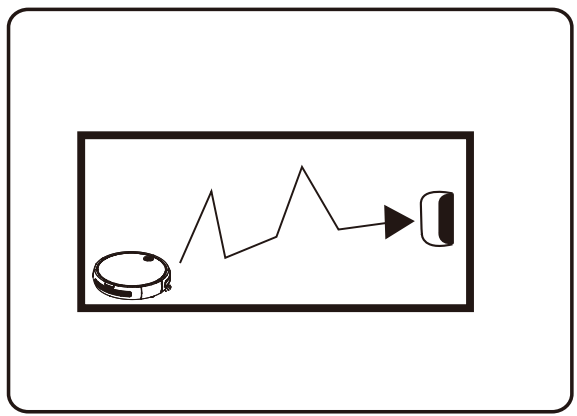
Auto Charging
Automatic Charging:
When the working voitage is below 13V, the blue indicator of the recharge key will flash and the device will enter the recharge mode.

INTRODUCTION OF REMOTE CONTROL BUTTONS | |
 | Forward button |
 | Start/Stop Auto clearing |
 | Left-tum button |
 | Right-tum button |
 | Back button |
 | Auto cleaning button |
 | Edge cleaning button |
 | Single Room Cleaning |
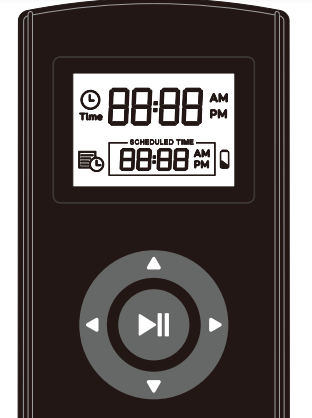
 | Set the current time |
 | Button of scheduling to clean |
 | Auto charging |
GUIDE TO REMOTE CONTROL USE
FUNCTION GUIDELINES | FUNCTION INFORMATION |
Start/Stop (button) | 1. When the cleaner is in standby mode, press the button to enter the auto-clearing mode. 2. When the cleaner Is at any cleaning mode, press the button to let It shift to standby mode. After finishing the sweeping task It automatically turns Into recharging mode. 3. When setting the time, press this button to hold settings. 4. The cleaner will respond with a sound when receiving an order from the remote control. |
Forward button | Long-press the button and the cleaner will forward; releasing, it stops moving. |
Left-turn button  | Long-press the button and the cleaner rotates clockwise; releasing, It stops. |
Right-turn button  | Long-press the button and the cleaner rotates clockwise; releasing it, It stops rotating. |
Back button | Long-press the button and the cleaner moves backward; releasing it, It stops moving. |
Auto Cleaning button | 1. Press the button to change the cleaner's cleaning state to standby. 2. When the cleaner is standby, press the button to let it shift to auto-cleaning mode. After finishing the sweeping will turns Into recharging mode. 3. The cleaner will respond with a sound when receiving an order from the remote control. |
Edge Cleaning button | 1. Press the button to change the cleaner's cleaning state to standby. 2. When the cleaner Is standby, press the button to let It shift to edge cleaning mode. After finishing the sweeping task It automatically toms Into recharging mode. 3. The cleaner will respond with a sound when receiving an order from the remote control. |
Single Room Cleaning button  | 1. Press the button to change the cleaner's cleaning state to standby. 2. When the cleaner Is standby, press the button to let It shift to edge cleaning mode. After finishing the sweeping task It automatically toms Into recharging mode. 3. The cleaner will respond with a sound when receiving an order from the remote control. |
Button of time-setting  | 1. In the standby state pressing this button, the 2. Press the lefl/right-tom key “ 3. Please save your settings by pressing the “ |
Button of scheduling to clean 
| 1. In the standby state pressing this button, the' 2. Press the leftfrtght-tum key' 3. Please save your settings by pressing the |
Button of recharging  | 1. In the clearing mode, press the button to charge the vacuum cleaner Into standby. 2. In the standby mode, press the button to let It do In recharging mode. The cleaner will respond with a sound when receiving an order from the remote control. |
TEPS TO RESET THE REMOTE CONTROL:
A. Keep the cleaner in the standby mode.
B. Press the '’Power" button of the cleaner.
C. Wait for 6 seconds and the machine will reset its code. The power indicator will flash.
D. Press the " ” button, then release the key. When you hear the “didi" sound, the pairing process is finished.
REMARKS:
If you do not hear the "didi” sound, it means the pairing operation has failed. Please repeat the above procedures.
DAILY STORAGE
If the cleaner will not be used for a long time, please fully charge the battery first and then store it in a dry place.
CLEANING OF CHARGING PLATE
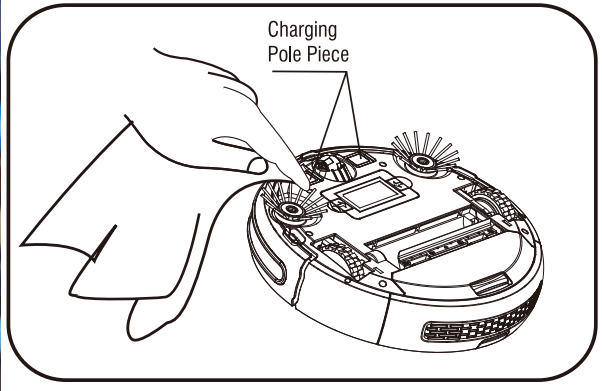
Please turn off the power switch or disconnect the power plug first.
Please clean the charging plate monthly with dry cloth.
Do not use oil for scrubbing.
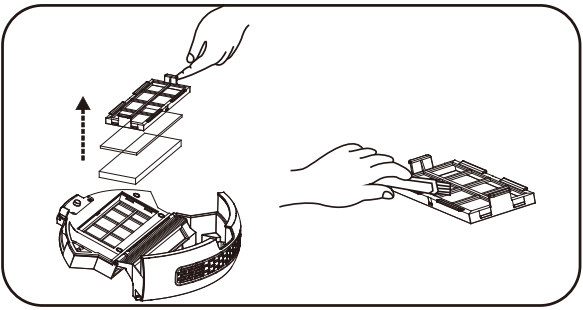
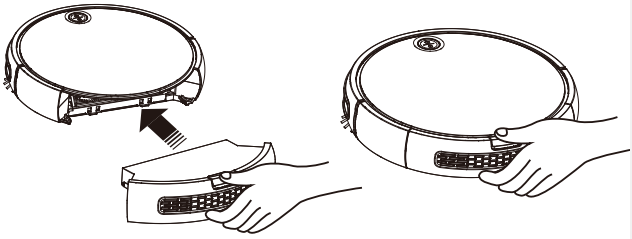
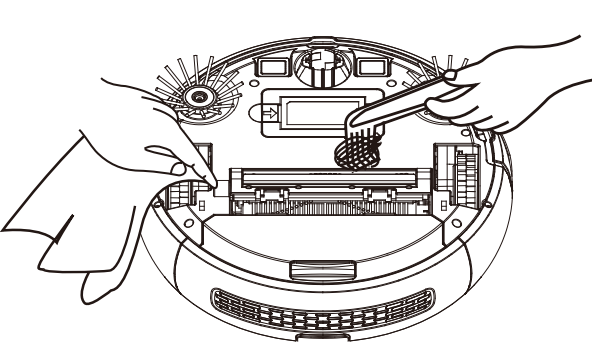
CLEAN THE DUST BOX
Assembly and Disassembly of Dust box
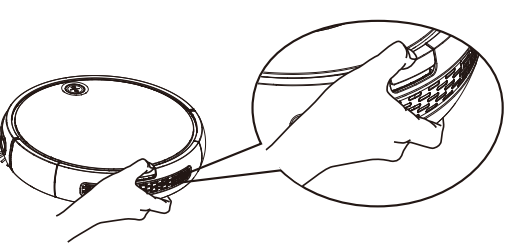
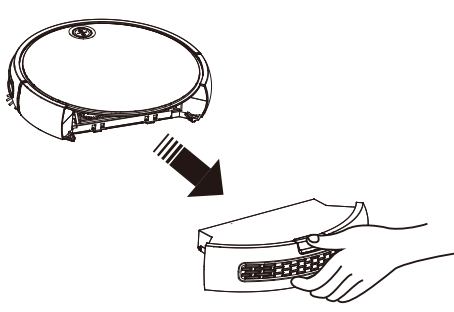
Press and hold the dust box button and then take out the dust box.
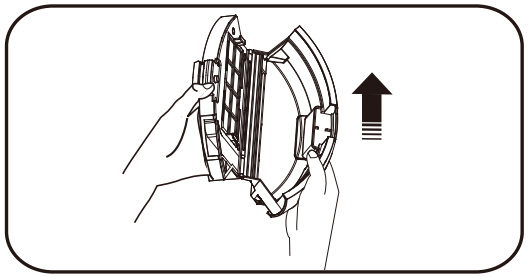
Cleaning the dust box
1. Open the baffle first, and then pour out the dust. Recommendation: the dustbin should be cleaned periodically.
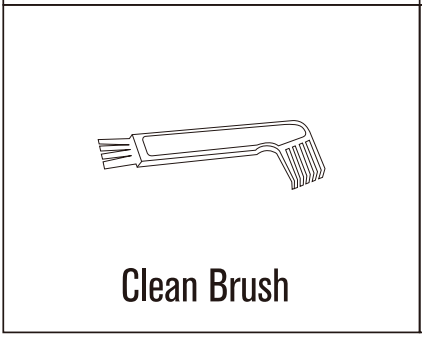
2. Please clean the dustbin with the cleaning brush.
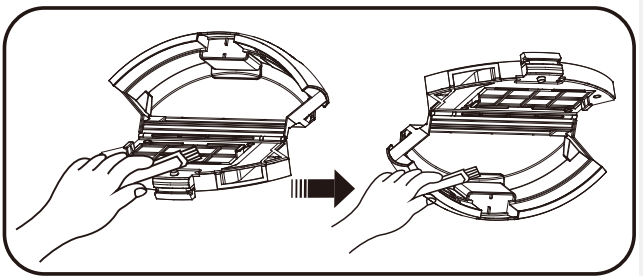
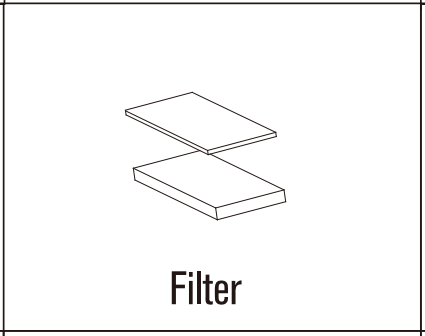
3. After taking out the filter, wipe off the dust with the cleaning brush
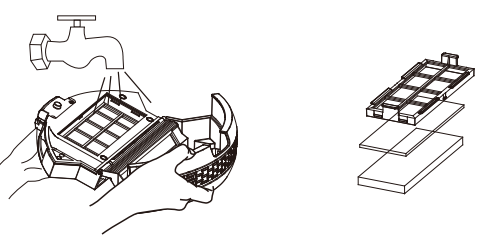
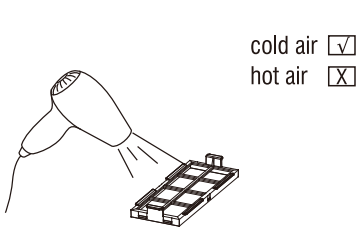
4. The dust box can be washed. (Note: the dust box should be completely air-dried before re-inserting).
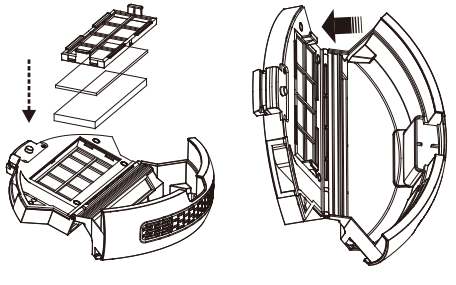
5. After cleaning, re-assemble the filter in the dustbin first, and then install the dustbin into the cleaner.
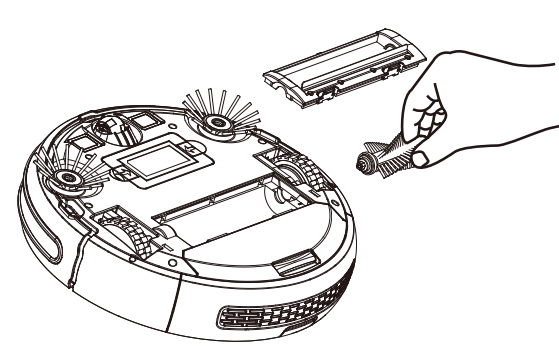
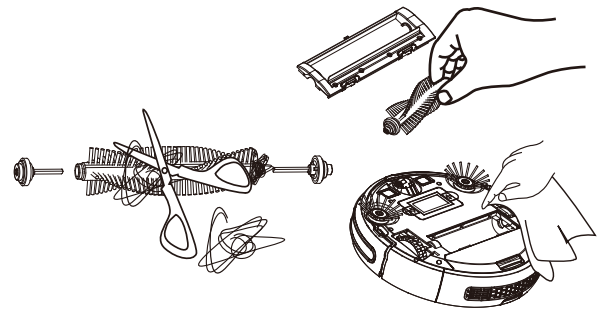
CLEANING THE MAIN BRUSH
Disassembling the Main Brush
1. Push the locking-bar buckle and lift it upward
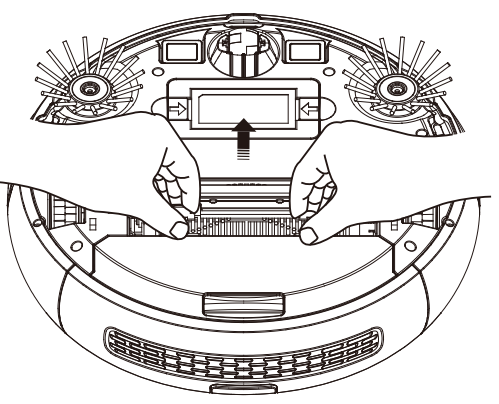
2. Clutch the main brush and lift it upward
3. Take out the middle brushes and its scraper assembly
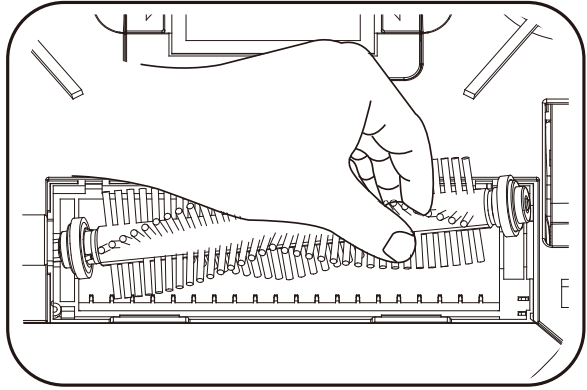
Cleaning the main brush and the rubber brush
1. Please clean the main brush and rubber brush with the cleaning brush regularly.
2. Please remove hair and other entanglements on the main brush regularly.
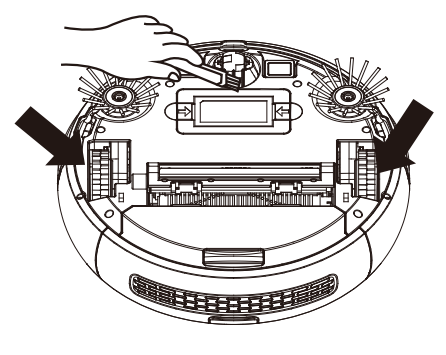
CLEANING THE SIDE BRUSH
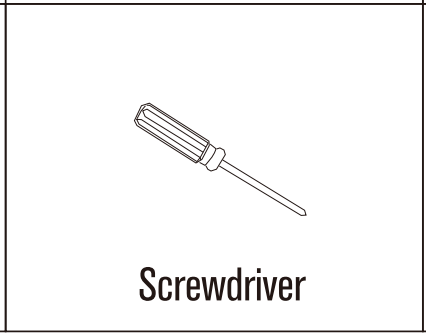
1. Unscrew the screws on the side brush with a screwdriver.
2. Remove the side brush and clear hair and debris from the inside of the cell.
CLEANING THE WHEELS
Clean the front, left and right wheels regularly with a cleaning brush.
CLEANING THE SENSORS
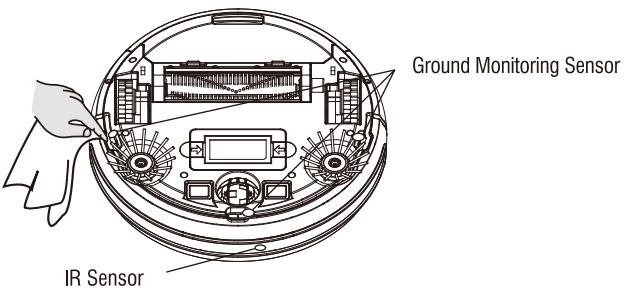
Each time after cleaning is complete, use a dry cotton cloth to dry the transparent plate to prevent dust from being accumulated on it which may affect the performance of this product
Error-flash indicator | Fault Names | Fault Forms | Solutions |
Blue light flashes twice with one sound | Failure of left wheel | The left wheel doesn't rotate and Is overloaded. | Please check if there are twisters on the left wheel of the device. |
Blue light flashes three times with one sound | Failure of right wheel | The right wheel doesn’t rotate and Is overloaded. | Please check if there are twisters on the right wheel of the device. |
Blue light flashes four times with one sound | Failure of device moving | The device moves and stops after 1 second. | Place the cleaner back on the floor. |
Blue light flashes five times with one sound | Failure of front wheel | The front wheel gets stuck and doesn't rotate. | Please check if there are twisters on the small wheels of the front wheel. |
Blue light flashes six times with one sound | Failure of (pound inspection | There Is a problem With the ground inspection. | Please check If the sensing window at the bottom of the device is abnormally shielded. |
Blue light flashes seven times with one sound | Low battery | Battery power is extremely low. (but not the critical point of recharge voltage). | Please return the device to the docking station for charging. |
Blue light flashes eight times with one sound | Failure of front bumper | The Impact switches on the left and right front shells can’t be restored. | Please check If the device Impact buffer is normal or not |
Blue light flashes nine times with one sound | Failure of main brush | The main brush wheel Is overloaded or underloaded. | Please check If there are foreign matters on the main brush hairbrush of the device. |
Blue light flashes ten times with one sound | Failure of side brush | The side-sweeper wheel is overloaded or underloaded. | Please check if there are things like hair or cloth twine the side brush. |
Blue light flashes eleven times with one sound | Failure of wall sensing | There is a problem with sensing walls inspection. | Please check if the transparent window of the wall inspection Is shielded or obstructed by har and cloth. |
Blue light flashes twelve times with one sound | Failure of fan | The fan doesn’t rotate but with large current | Please check If the blades of the fan are loose or wrapped by hair and doth |
Blue light flashes fourteen times with one sound | Failure of charging | The device can't be powered or show the charging state. | Please check If the device Is connected with the docking station |


 and
and on the display screen will flash. Then PTBSS the up/down key to adjust the hour.
 “and"
“and"  ” to change into ‘
 " to adjust the minute.
 '" or "
 ". The cleaner will respond with a sound when receiving an order from the remote control.
 ’and'
’and'  :' on the display screen will flash. Then press the up/down key to adjust the hour.