Loading ...
Loading ...
Loading ...
17
• Tilt the cutting arm to back to the right
at 90°(0°) bevel and recheck
for alignment.
• Repeat above steps if further
adjustment is needed.
• Tighten locknut (3) and bevel lock
handle (1) when alignment is achieved.
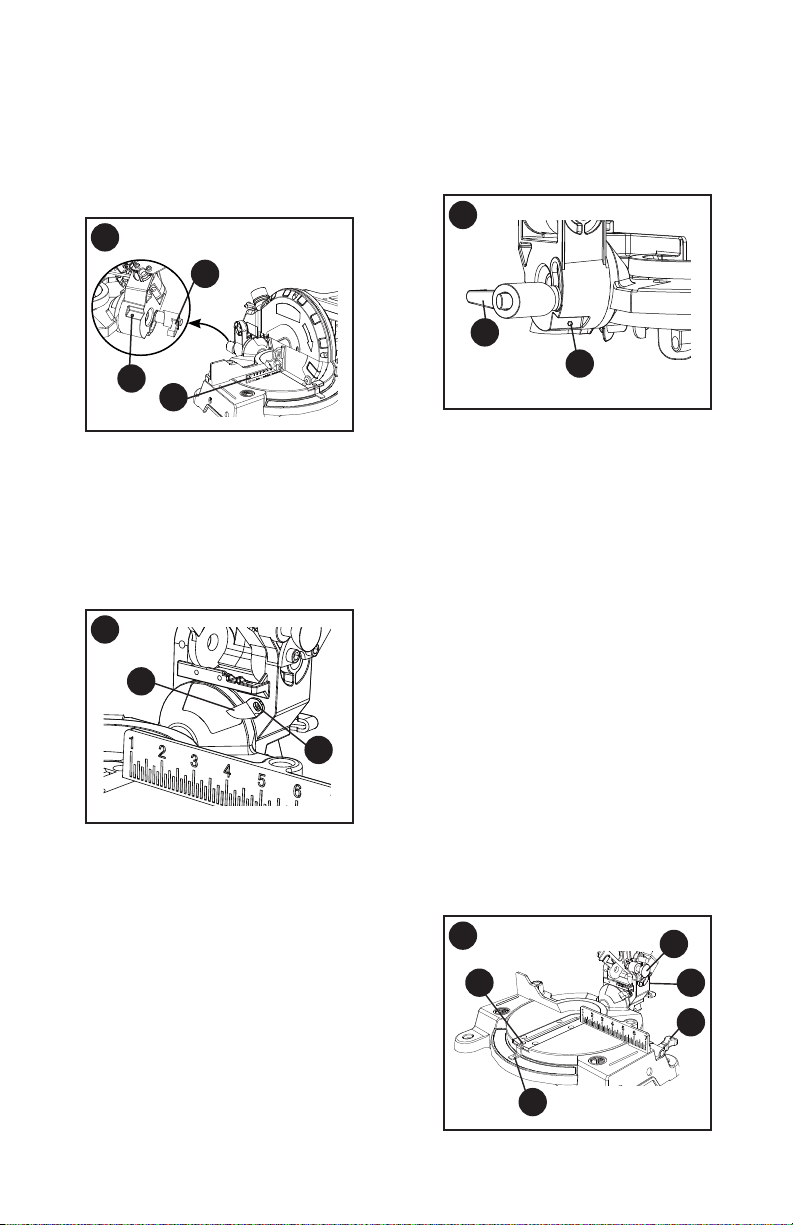
90° Bevel Pointer Adjustment (Figure N)
• When the blade is exactly 90
o
(0
o
) to
the table, loosen the bevel pointer
screw (4) using a Phillips screwdriver.
• Adjust bevel pointer (5) to the “0” mark
on the bevel scale and retighten the
screw.
45° Bevel Adjustment (Figure O)
• Set the miter angle to zero degrees.
Loosen the bevel lock handle (1) and tilt
the cutting head completely to the left.
• Lower and lock the cutting head. Using
a combination square, check to see if
the blade angle is 45° to the table.
• If the blade is not at 45° bevel to
the table, tilt the cutting arm to the
right, loosen the locknut (5) with a
10 mm wrench. Then, adjust the set
screw in the locknut (5) clockwise or
counterclockwise with a 3 mm hex key.
NOTE: The locknut is at the left rear
side of the saw base.
M
1
2
3
• Tilt the cutting arm to the left to 45°
bevel and recheck for alignment.
• Repeat above steps until the blade is at
45° to the table.
• Tighten bevel lock handle (1) and
locknut (5) when alignment is achieved.
MITER ANGLE ADJUSTMENT
(FIGURE P)
The miter scale assists the user in setting
the desired miter angles from 45° left to
45° right. The miter saw table has nine
of the most common angle settings with
positive stops at 0°, 15°, 22.5°, 31.6°,
and 45°. These positive stops position
the blade at the desired angle quickly
and accurately.
• Lock the cutting head in the down
position by pushing the hold-down
latch (1) in the locking hole.
• Raise the miter table locking lever (2)
to loosen the turn table.
• Hold the base of the saw arm (3) rmly
and use it to rotate the miter table while
holding the saw base steady.
• You can quickly locate the miter angle
by the stops or clicks.
• Once you set the miter angle you want,
tighten the miter table locking lever (2)
by pushing it down.
N
5
4
O
1
5
P
4
1
3
2
5
Loading ...
Loading ...
Loading ...