Loading ...
Loading ...
Loading ...
12
3 Initial Operation
Setting up the Device
You should position the device so that it stays flat
on a table in front of the projection surface.
In case you need to tilt the projector upwards you
can correct the projected image with the built-in
keystone correction (Options Menu).
The distance between the projector and the
screen determines the actual size of the image.
Connect Power Supply /
Charge Battery
CAUTION!
Mains Voltage at the Site of
Installation!
Check whether the mains voltage of the
power supply matches the mains
voltage available at the setup location.
1. Insert the small plug of the power supply into
the socket on the rear side of your device.
2. Plug the power supply into the mains.
3. During the charging process, the indicator
light on the side of the device will be red.
When the battery is fully charged, it will turn
green.
4. Charge the built-in battery completely before
using for the first time. This will prolong the life
of the battery.
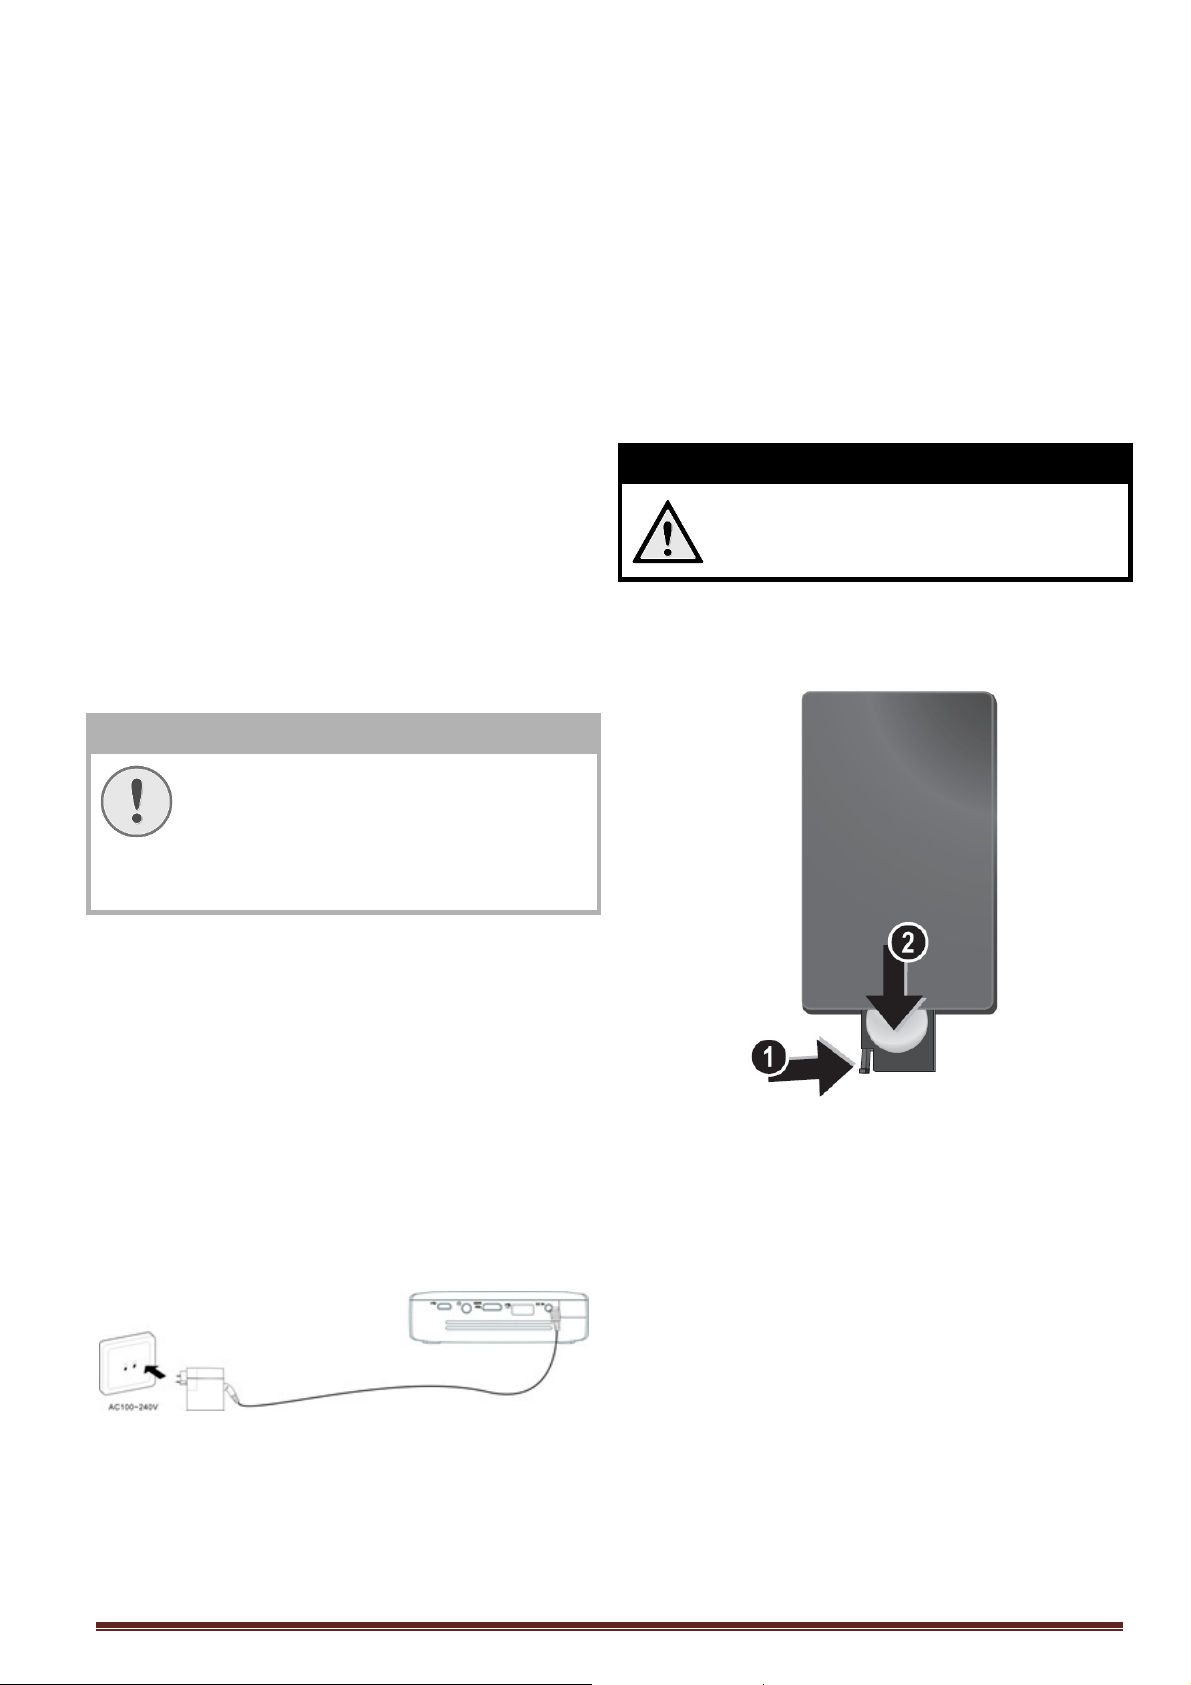
Installing or Changing the
Batteries of the Remote
Control
DANGER!
Risk of Explosion with Incorrect Type
of Batteries
Only use batteries of type CR2025.
1. To access the battery, disengage the locking
mechanism (❶) and slide out the battery
compartment (❷).
2. Insert the new battery with the positive pole as
shown on the back of the remote control.
Loading ...
Loading ...
Loading ...