Loading ...
Loading ...
Loading ...
INSTALLATION
Check the appliance is electrically safe when you have nished.
26
Electrical Connection
This appliance must be installed by a qualied electrician
to comply with the relevant regulations (AS/NZS
60335.2.6:2002) and also the local electricity supply
company requirements.
Ensure that the mains characteristics (voltage, nominal,
power, etc.) match the ratings indicated on the data plate
axed to the cooker.
The cooker is preset for a single-phase earthed electrical
connection. It is essential to install a multi-pole circuit breaker
that completely disconnects the appliance from the mains,
with a minimum contact break distance of 3mm.
Current Operated Earth Leakage Breakers
The combined use of your induction cooker and other
domestic appliances may cause nuisance tripping, so we
recommend that the cooker is protected on an individual
RCD (Residual Current Device) or RCBO (Residual Current
Breaker with Overload).
IF IN DOUBT, PLEASE CONSULT A SUITABLY QUALIFIED
ELECTRICIAN.
WARNING: THIS APPLIANCE MUST BE EARTHED
The appliance must be connected to an ecient earthing
circuit. If the electricity network is not equipped with an
earth connection, then it must be installed separately in
compliance with local regulations.
Earthing is a safety measure required by law, and must be
performed with particular care by a qualied technician,
who must also check that the electricity supply
characteristics are correct.
The total electrical load of the appliance is approximately
17kW. The cable size used should be suitable for this load and
comply with all local requirements (i.e. PVC Insulated cable
IEC 60227 – code 53 for ordinary cables).
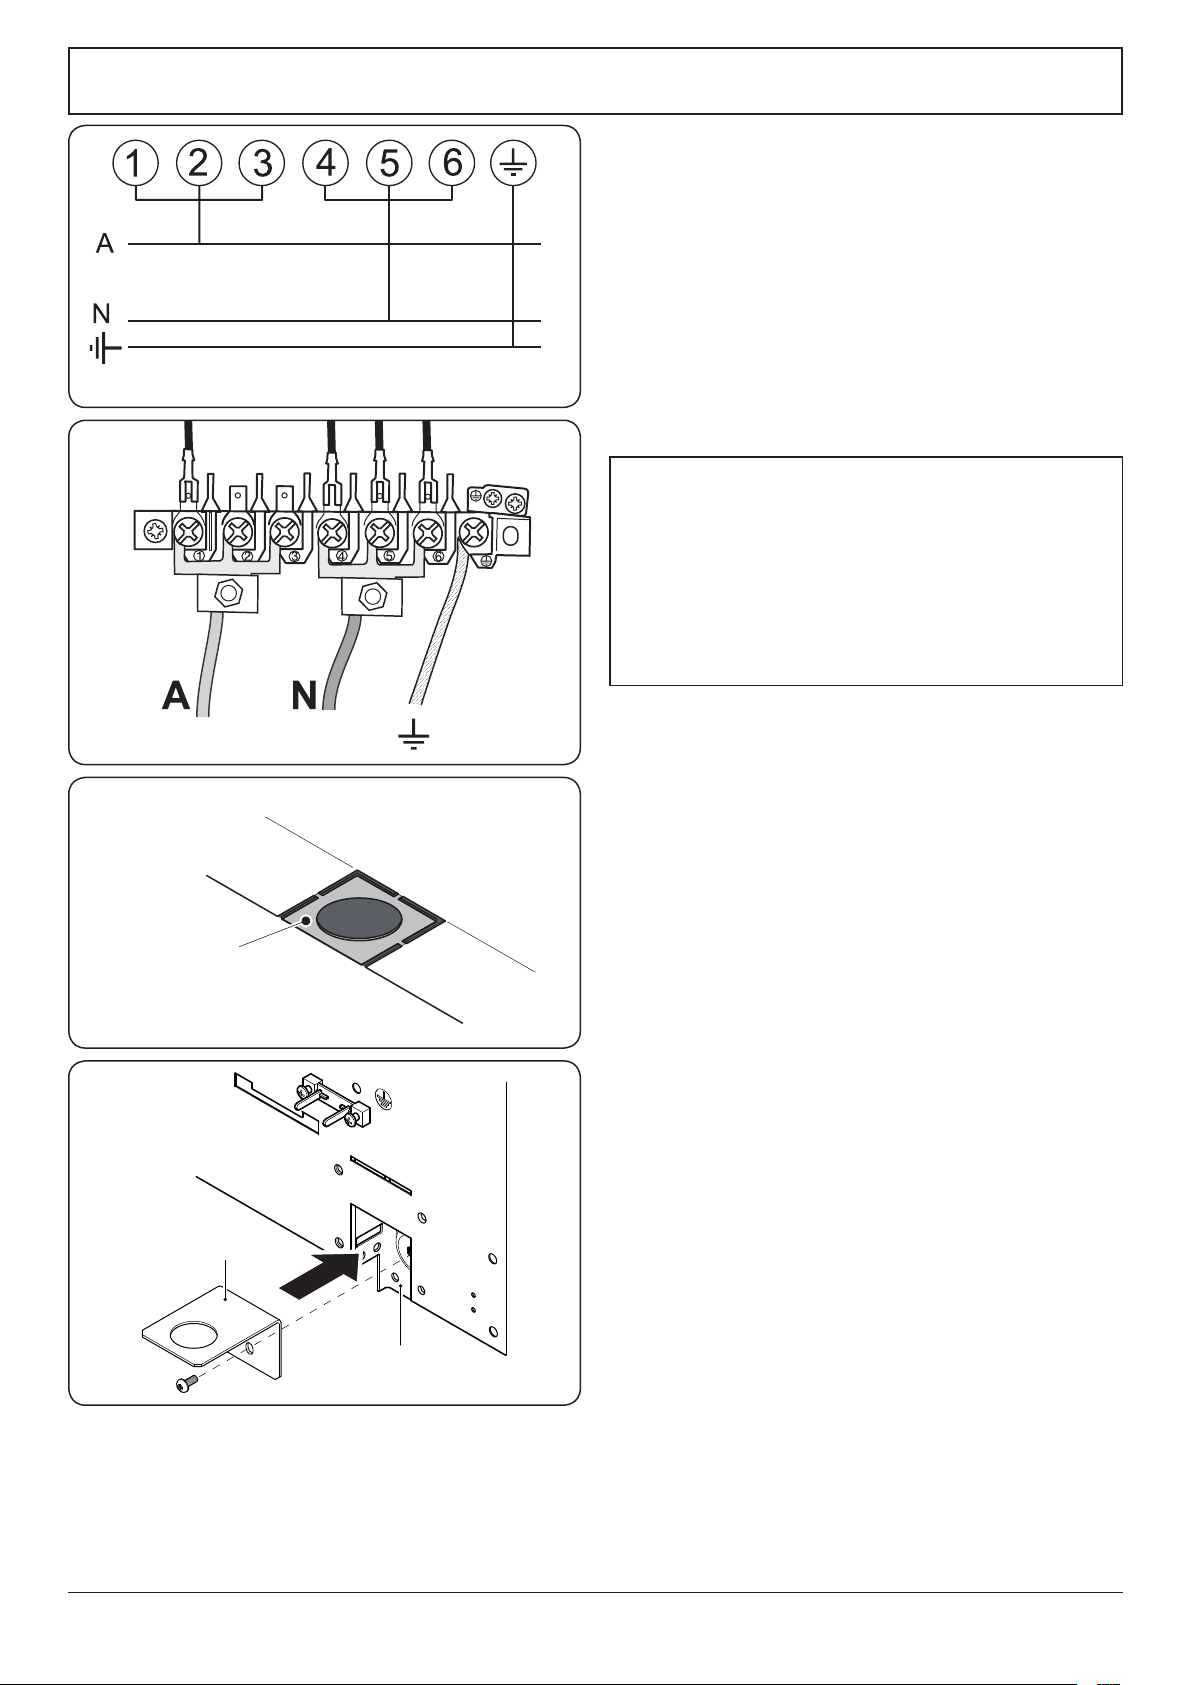
Access to the mains terminal is gained by removing the
electrical terminal cover box on the back panel. Connect the
mains cable to the correct terminals for your electrical supply
type (Fig.7-6 and Fig.7-7). Check that the links are correctly
tted and that the terminal screws are tight. Secure the mains
cable using the cable clamp.
Fixed Wiring
For connection to xed wiring, i.e. exible conduit, remove
the main rear cover.
Remove the electrical cable entry break out from the bottom
of the rear cover (Fig.7-8).
Fix the conduit bracket to the centre upright (Fig.7-9). Fit the
conduit up to the bracket and secure in place with the plastic
nut.
Connect the mains cable to the correct terminals for your
electrical supply type (Fig.7-10 and Fig.7-11). Check that the
links are correctly tted and that the terminal screws are tight.
Secure the mains cable using the cable clamp.
ArtNo.132-0001 - 1 phase 240Vac 50Hz
1-phase 240 V
AC
50 Hz
Fig.7-6
Fig.7-7
Remove this area
Rear cover
Conduit bracket
Centre upright
Fig.7-8
Fig.7-9
Loading ...
Loading ...
Loading ...