Loading ...
Loading ...
Loading ...
8
The Clock
You can use the clock to turn the left-hand oven on and o.
The clock must be set to the time of day before the oven
will work.
Note: When using the timer functions, rst set the clock as
required before setting the oven temperature and selecting
the oven function (multi-function ovens only).
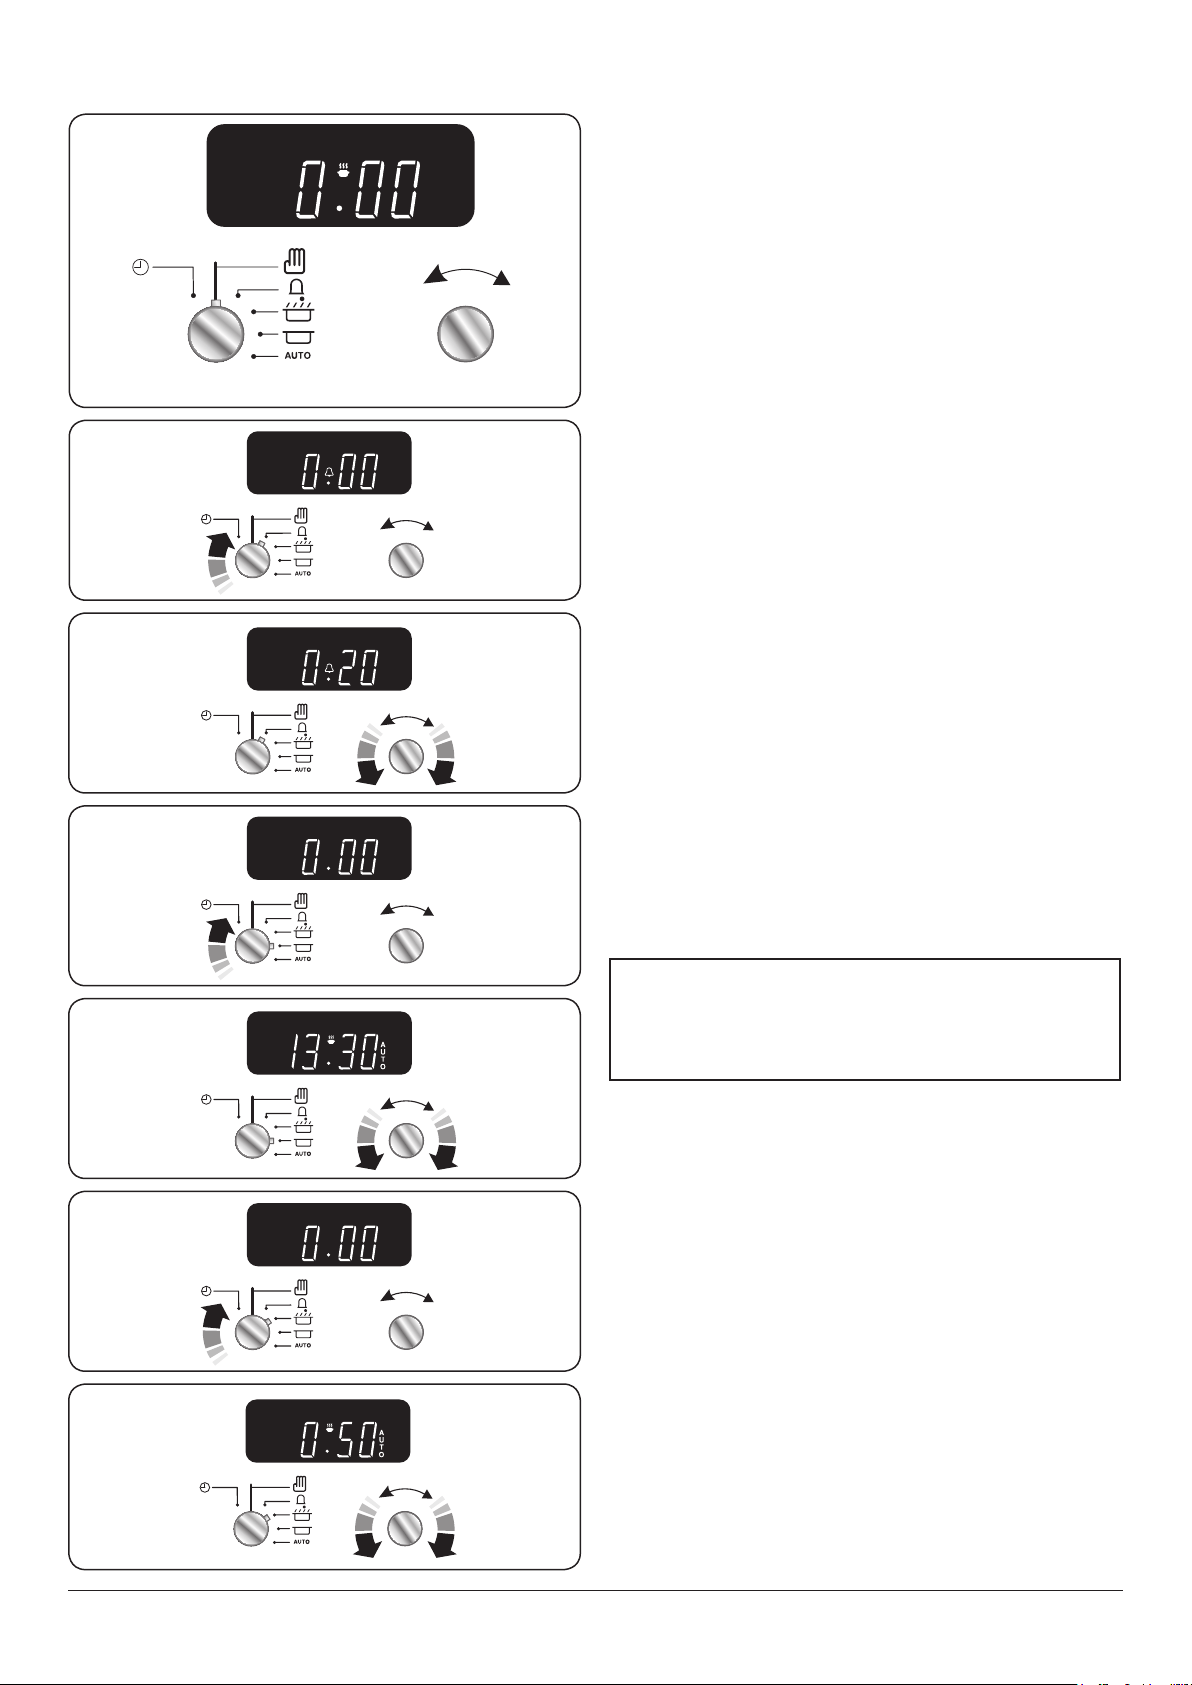
The 2-button Clock (Professional+ only)
Setting the time of day
The 2-button LCD clock is shown in (Fig.2-12). When the
clock is rst connected, the display ashes ( 0.00) and (
)
alternately.
To set the time, turn and hold the Timer knob to the clock
symbol (
) and at the same time turn the Adjusting knob left
or right until the clock shows the time of day. Remember this
is a 24-hour clock. Let go of the Timer knob and it will spring
back to the vertical, oven manual setting.
IMPORTANT: The left-hand oven will not operate unless the
clock has been set.
Setting the minute minder
To activate the minute minder turn the Timer knob to the
right to the (
) minute minder setting – it should click into
position (Fig.2-13).
Rotate the Adjusting knob to set the time required (Fig.2-14).
You can either turn the knob back to the vertical manual
setting (
) to keep an eye on the time of day, or leave it in
the (
) minute minder position as the time ticks down.
To stop the beeper when it sounds, turn the Adjusting knob
anti-clockwise.
• The ‘cook period’, which is the length of time you
want the oven to cook for.
• The ‘stop time’, which is the time of day you
want the oven to stop cooking.
To stop the oven at a specic time of day
Turn the Timer knob to the (
) position (Fig.2-15).
Use the Adjusting knob to set the ‘stop time’. You can set
the oven to turn on at any time over the following 24-hour
period. AUTO shows in the display (Fig.2-16).
Turn the Timer knob to the bottom ‘AUTO’ setting to return to
the clock display.
Once the ‘stop time’ is reached, the beeper sounds. Turn the
Timer knob to the vertical (
) to return to manual cooking.
To start and then stop the oven using the Timer
You cannot set a start time directly – this is set
automatically by a combination of the ‘cook time’ and
‘stop time’.
Turn the Timer knob to the (
) position (Fig.2-17).
Turn the Adjusting knob to set the ‘cooking time’ you need
(Fig.2-18).
ArtNo.300-0004 2-button clock annotated
A B
A – Timer knob, B – Adjusting knob
Fig.2-12
ArtNo.300-0005 2BC
minute minder setting
ArtNo.300-0006 2BC
minute minder setting 2
ArtNo.301-0007 2BC
Stopping the oven 1
ArtNo.301-0008 2BC
Stopping the oven 2
Fig.2-13
Fig.2-14
Fig.2-15
Fig.2-16
ArtNo.301-0009 2BC
Setting the cooking timer
ArtNo.301-0010 2BC
Setting the cooking time
Fig.2-17
Fig.2-18
Loading ...
Loading ...
Loading ...