Loading ...
Loading ...
Loading ...
21
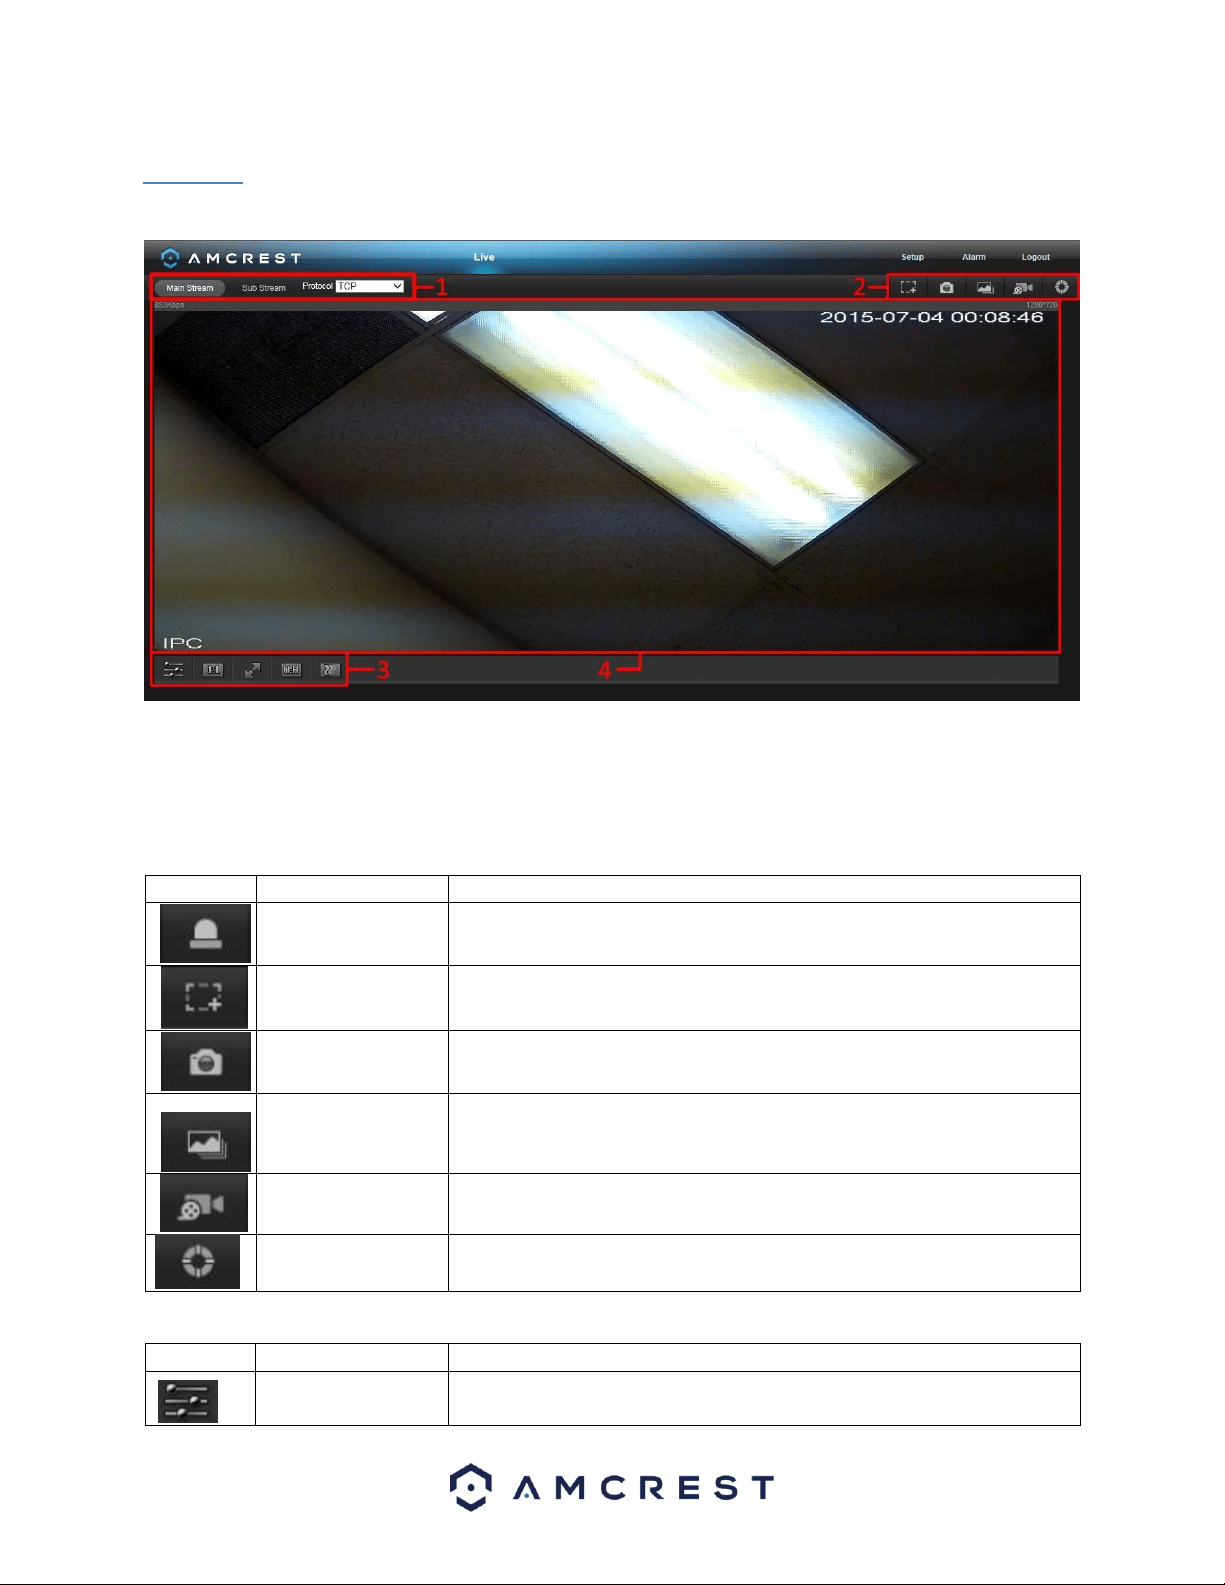
5.1 Live
The Live tab allows the user to see a live video feed from the camera. The live tab has 3 main sections:
Section 1: This bar allows the user to select which stream type and which protocol they want to choose. For more
information on stream types, see section 5.2.1.2.1. For more information on protocols, see section 5.2.2.2.1.
Section 2: The functions bar allows the user to perform different camera functions while in live mode. See the
table below for an explanation of the different functions available:
Button
Function Name
Function Description
Alarm Output
Click this button to generate an alarm output signal. This button becomes
red/grey depending on alarm output activation or cancellation.
Digital Zoom
Click this button to activate the zone selection function. This allows the
user to use the mouse to select a zone to zoom in on.
Snapshot
Click this button to take a screenshot of the live feed. The picture is saved
at the path specified in Setup -> Camera -> Video -> Path.
Triple Snapshot
Click this button to take 1 screenshot per second for 3 seconds. The
pictures are saved at the path specified in Setup -> Camera -> Video ->
Path.
Manual Record
Click this button to manually record video. The video is saved at the path
specified in Setup -> Camera -> Video -> Path.
Help
Click this button to open a window that details the buttons and functions
shown on this screen.
Section 3: This bar allows the user to change video settings for the live playback screen. See the below table for an
explanation of the video settings:
Button
Function Name
Function Description
Image Adjustment
This button opens the image adjustment toolbar, which allows the user to
adjust brightness, contrast, saturation, and hue for the live feed’s picture.
Loading ...
Loading ...
Loading ...