Loading ...
Loading ...
Loading ...
48
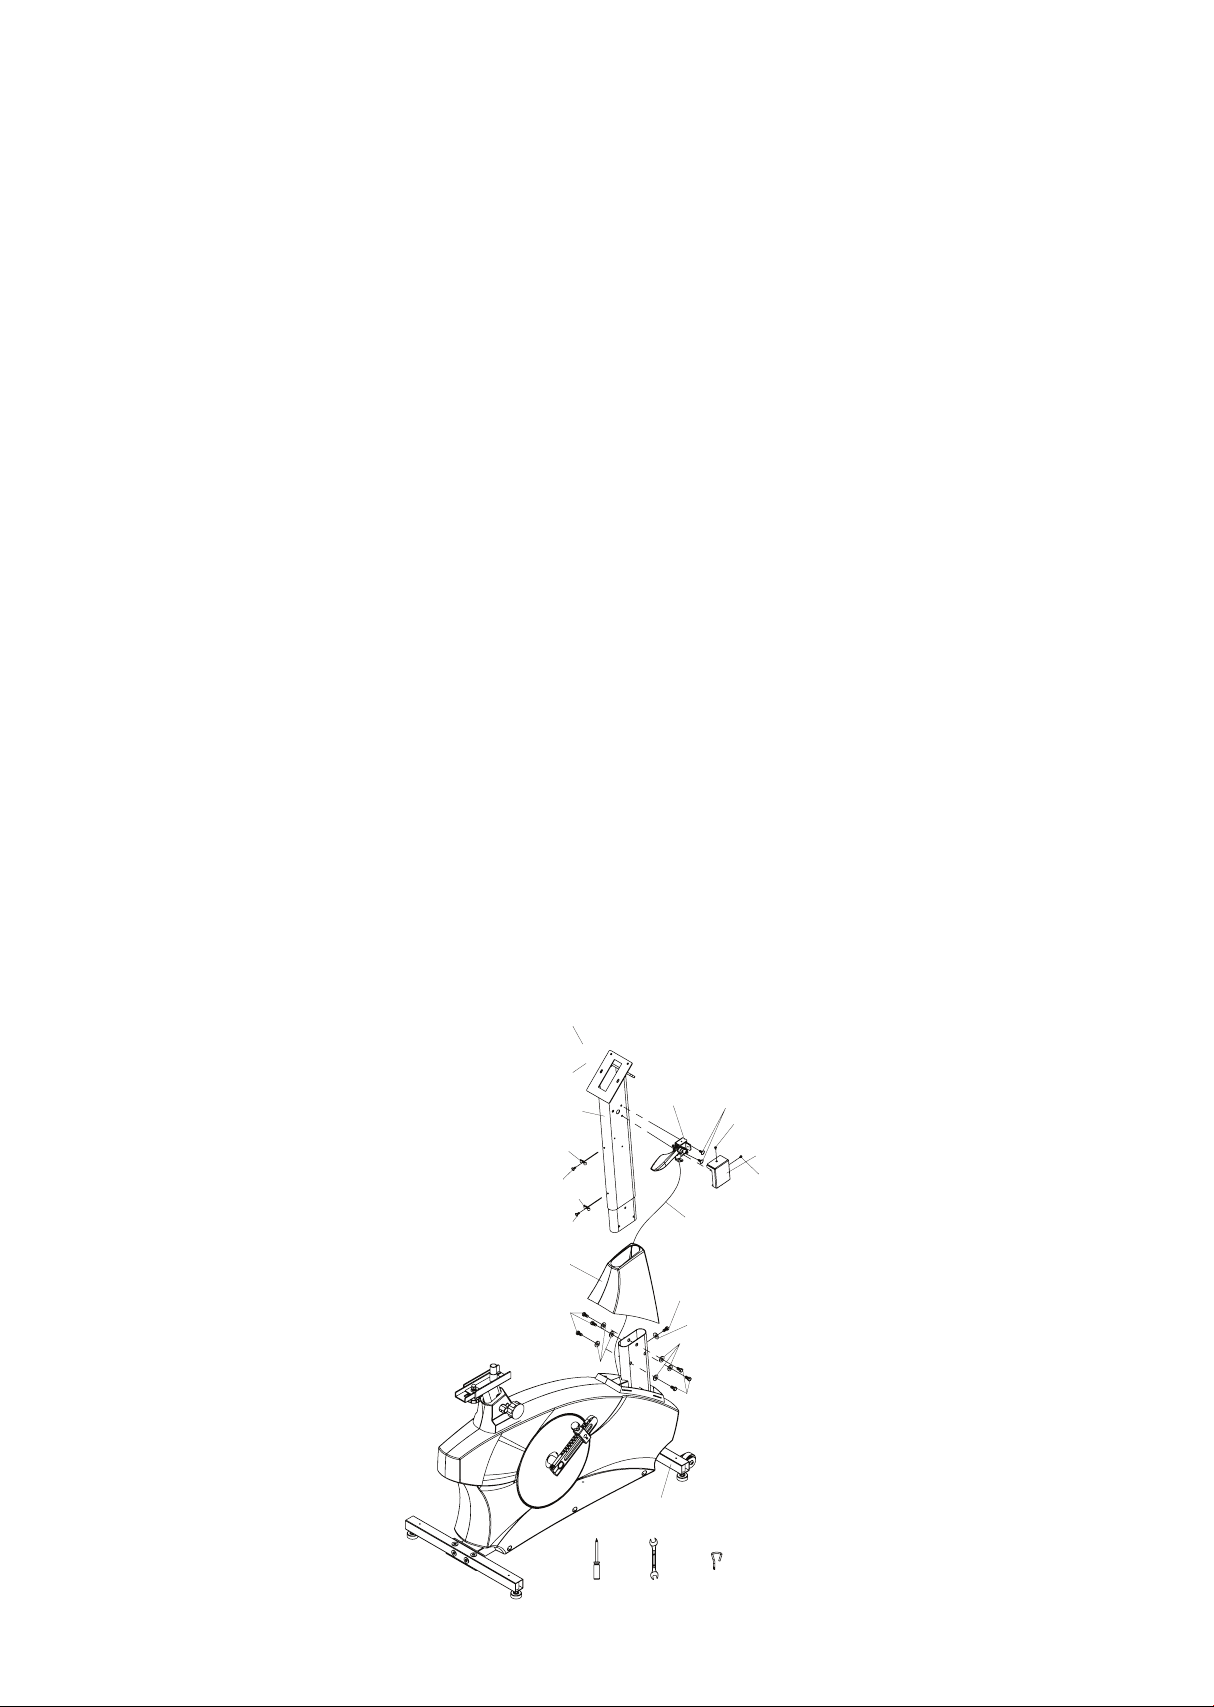
Step 2. Front console mast assembly
• Locate the console mast cover (38) and route the computer cables (155
& 157) and the brake lever & cable (133 & 149) through the cover. Tem-
porarily place the cover down on the main body of the bike. Do not
snap the cover in place yet.
• Unravel the Computer Cables (155 & 157) and snake them through the
Console Mast (2) until the cable connectors come out the top opening
of the console mast. Be sure the brake cable (149) is in the groove of
the cover when installing the mast during the next step.
• Holding the console mast in one hand and gently keeping tension on
the computer cables at the top of the mast with the other, Install the
Console Mast (2) into the Main Frame receiving tube under the cover
(38). Keeping tension on the cables will ensure the wires don’t get
caught between the mast and receiving tube. Do not bolt the mast in
place at this time
• Install the Brake Lever (133) on the mast with the two 6mm Phillips
screws (144). Install the cover (151) with the two 4mm screws (106-2).
The top screw needs to be tightened with the short screw driver.
• Slide the cover (38) up the mast and bolt the mast in place with seven
5/16” x 5/8” Hex Head bolts (51), six 5/16” Flat Washers (72) on the six
side bolts and one 5/16” Curved Washer (99) on the front bolt. Slide
the cover down and snap in place on the main body.
• Install the two brake cable tie downs (136) with the two 5mm screws
(166).
2
38
1
133
144
51
72
99
72
51
51
136
166
136
166
106-2
106-2
151
155
157
149
93 100 165
Loading ...
Loading ...
Loading ...