To avoid possible SERIOUS INJURY to fingers from moving
garage door opener:
• Be sure power is not connected to the garage door opener
BEFORE installing the 480LM mounting kit.
• ALWAYS keep hand clear of chain and sprocket while
operating opener.
• Securely attach chain cover BEFORE operating.
Figure 2
Figure 1
Models 480LM & 480LMC
Alternate Mounting Kit
1
2
3
4
5
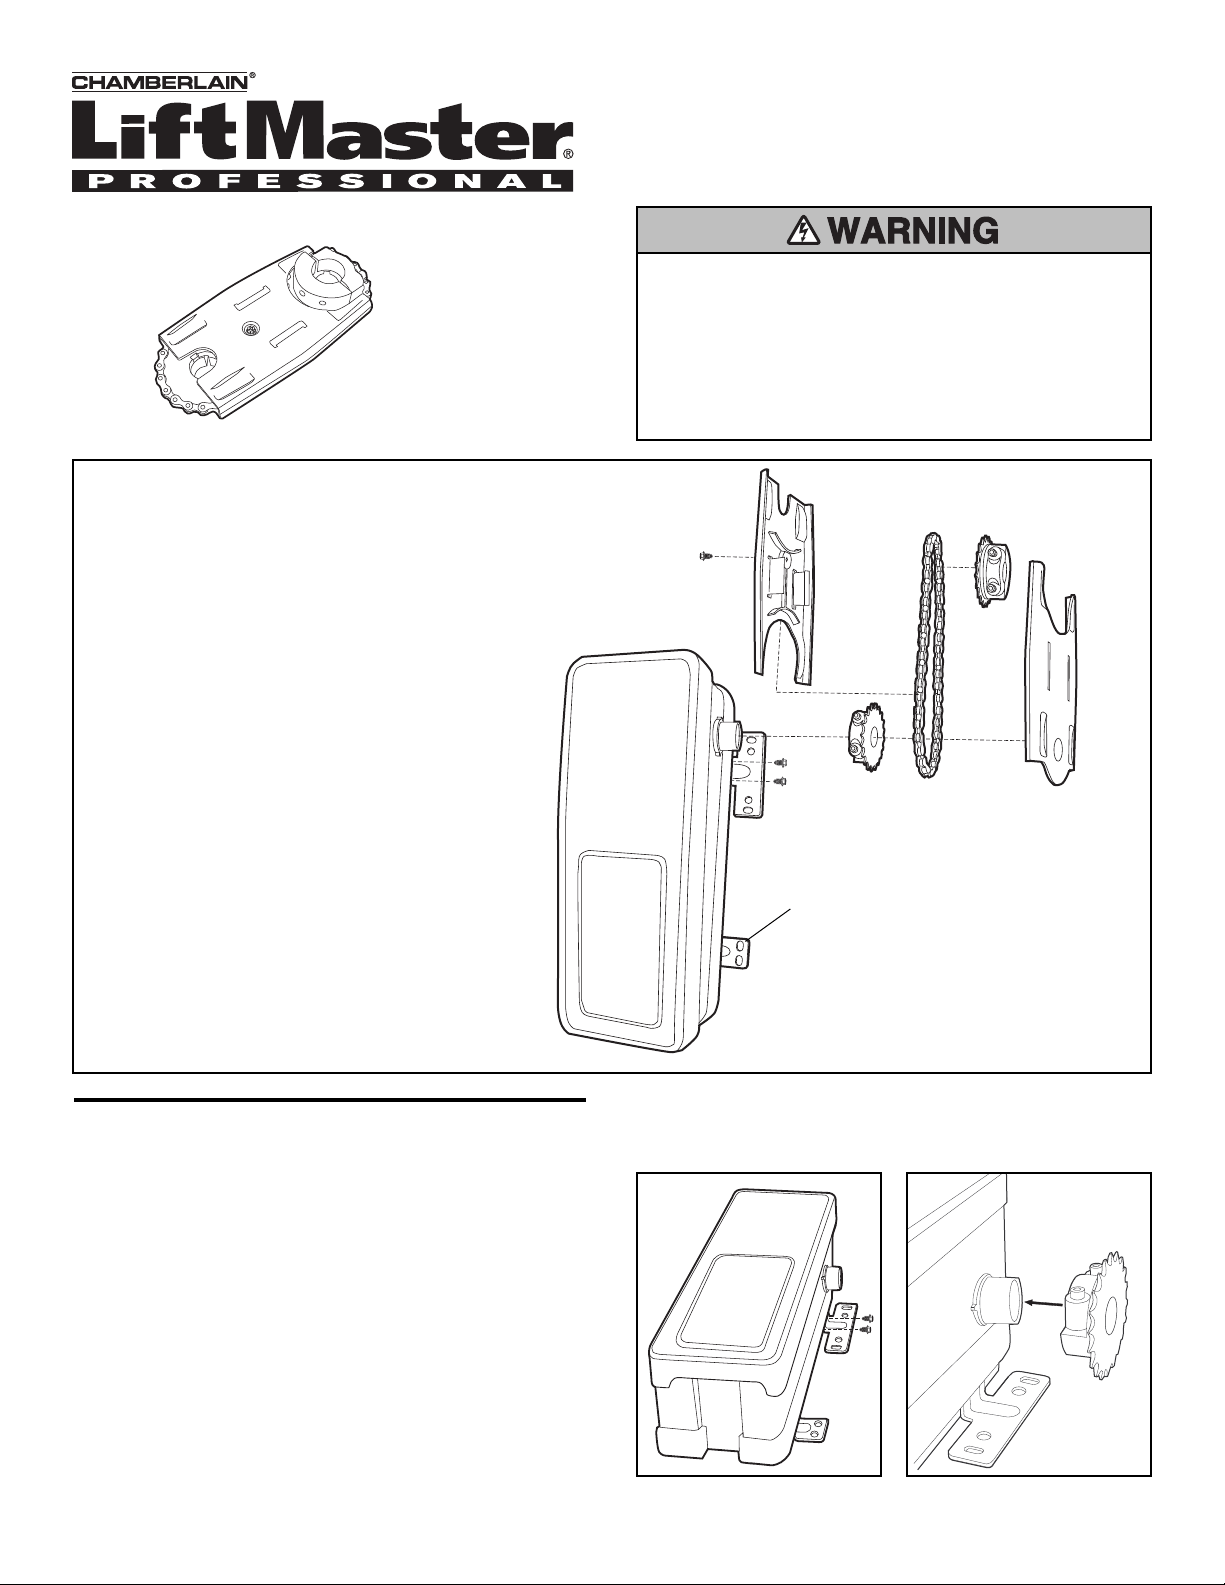
INSTALLATION
1. Disassemble kit and remove foam pad (attached to
sprocket hub). Discard foam pad.
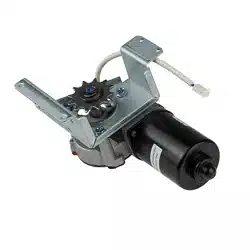
2. Attach the T-bracket to the motor unit using the
self-threading screws (Figure 1).
NOTE: The T-bracket will be above the existing mounting
bracket.
3. Attach sprocket with larger bore (1-1/4") to the motor
shaft of the opener. Position the sprocket so that the
screws are facing up and are accessible when
attached to the torsion bar (Figure 2).
4. Tighten both sides of the sprocket screws equally to
secure the sprocket to the motor unit (12-14 ft./lbs.
of torque). Securely tighten set screw.
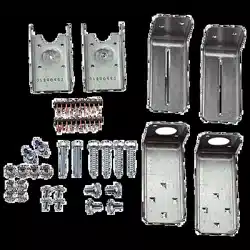
CARTON INVENTORY
1 T-bracket
2 1-1/4" Sprocket with Collar and Screws
3 1" Sprocket with Collar and Screws
4 Chain
5 Cover Assembly
NOT SHOWN
Hardware: 1/2" Screw (1),
#10 Self-Threading Screw (2),
and 1-1/2" Hex Head Screw (2)
Instructions
5
(provided with opener)

Figure 5
Figure 6
Figure 7
INSTALLATION
5. Attach sprocket with the smaller bore (1") to the
torsion bar making sure that the screws are on the
side closest to the garage door (Figure 3).
NOTE: Do not tighten sprocket at this time.
6. Place the chain on the sprocket located on the
torsion bar (Figure 4).
7. Attach the sprocket located on the motor unit shaft to
the chain. Secure the motor unit to the wall using the
hex head screws (Figure 5).
NOTE: Ensure that the chain is perpendicular to the bar
and not too tight.
8. Tighten both screws of the sprocket on the torsion
bar equally to secure the sprocket to the bar
(12-14 ft./lbs. of torque). Securely tighten set screw.
You may need to rotate the chain to make the
screws accessible.
9. One side of the chain cover will have an indentation
that will fit into the middle of the motor unit sprocket.
This side should be put on first (Figure 6).
10. Position the remaining cover over the other side so
that it encloses the chain and sprocket assembly.
The covers will snap into place. Secure them by
screwing them together using the 1/2" screw
(Figure 7).
11. Rotate chain to ensure smooth travel. Adjust, if
necessary.
12. Refer to Installation Step 2 of the owner’s manual for
further instructions.
Figure 4
Figure 3

Pour éviter les BLESSURES GRAVES potentielles au niveau des
doigts en déplaçant l’ouvre-porte de garage :
• Assurez-vous que l’alimentation n’est pas branchée à l’ouvre-
porte de garage AVANT d’installer l’ensemble de montage 480LM.
• Gardez toujours vos mains à distance de la chaîne et du barbotin
pendant le fonctionnement de l’ouvre-porte.
• Fixez solidement le garde-chaîne AVANT d’opérer.
ATTENTION
AVERTISSEMENT AVERTISSEMENTAVERTISSEMENT
AVERTISSEMENT
AVERTISSEMENT
Figure 2
Figure 1
Modèles 480LM et 480LMC
Ensemble de montage
de rechange
1
2
3
4
5
POSE
1. Désassemblez le kit et retirez la garniture de mousse
(attachée au pivot de pignon). Jetez la garniture de
mousse.
2. Fixez le support en T à l’unité motrice à l’aide des vis
autotaraudeuses (Figure 1).
REMARQUE : Le support en T se trouvera au dessus du
support existant de montage.
3. Fixez le barbotin avec le plus grand logement (1-1/4 de po.)
à l’unité motrice de l’ouvre-porte. Positionnez le barbotin
afin que les vis soient tournées vers le haut et accessibles
lorsqu’elles seront fixées à la barre de torsion (Figure 2).
4. Resserrez de façon égale les deux côtés des vis du
barbotin pour fixer solidement le barbotin à l’unité motrice
(12-14 pieds/lbs. du couple). Serrez solidement la vis de
réglage.
INVENTAIRE DE LA BOÎTE
1 Support en T
2 1-1/4 de po. pignon avec de collier et de vis
3 1 po. pignon avec de collier et de vis
4 Chaîne
5 l’Assemblée de couverture
NON ILLUSTRÉ
Fixations : vis 1/2 de po. (1),
vis autotaraudeuse de #10 (2),
et 1-1/2 de po. vis à tête hex (2)
Instructions
5
(fourni en ouvreur)
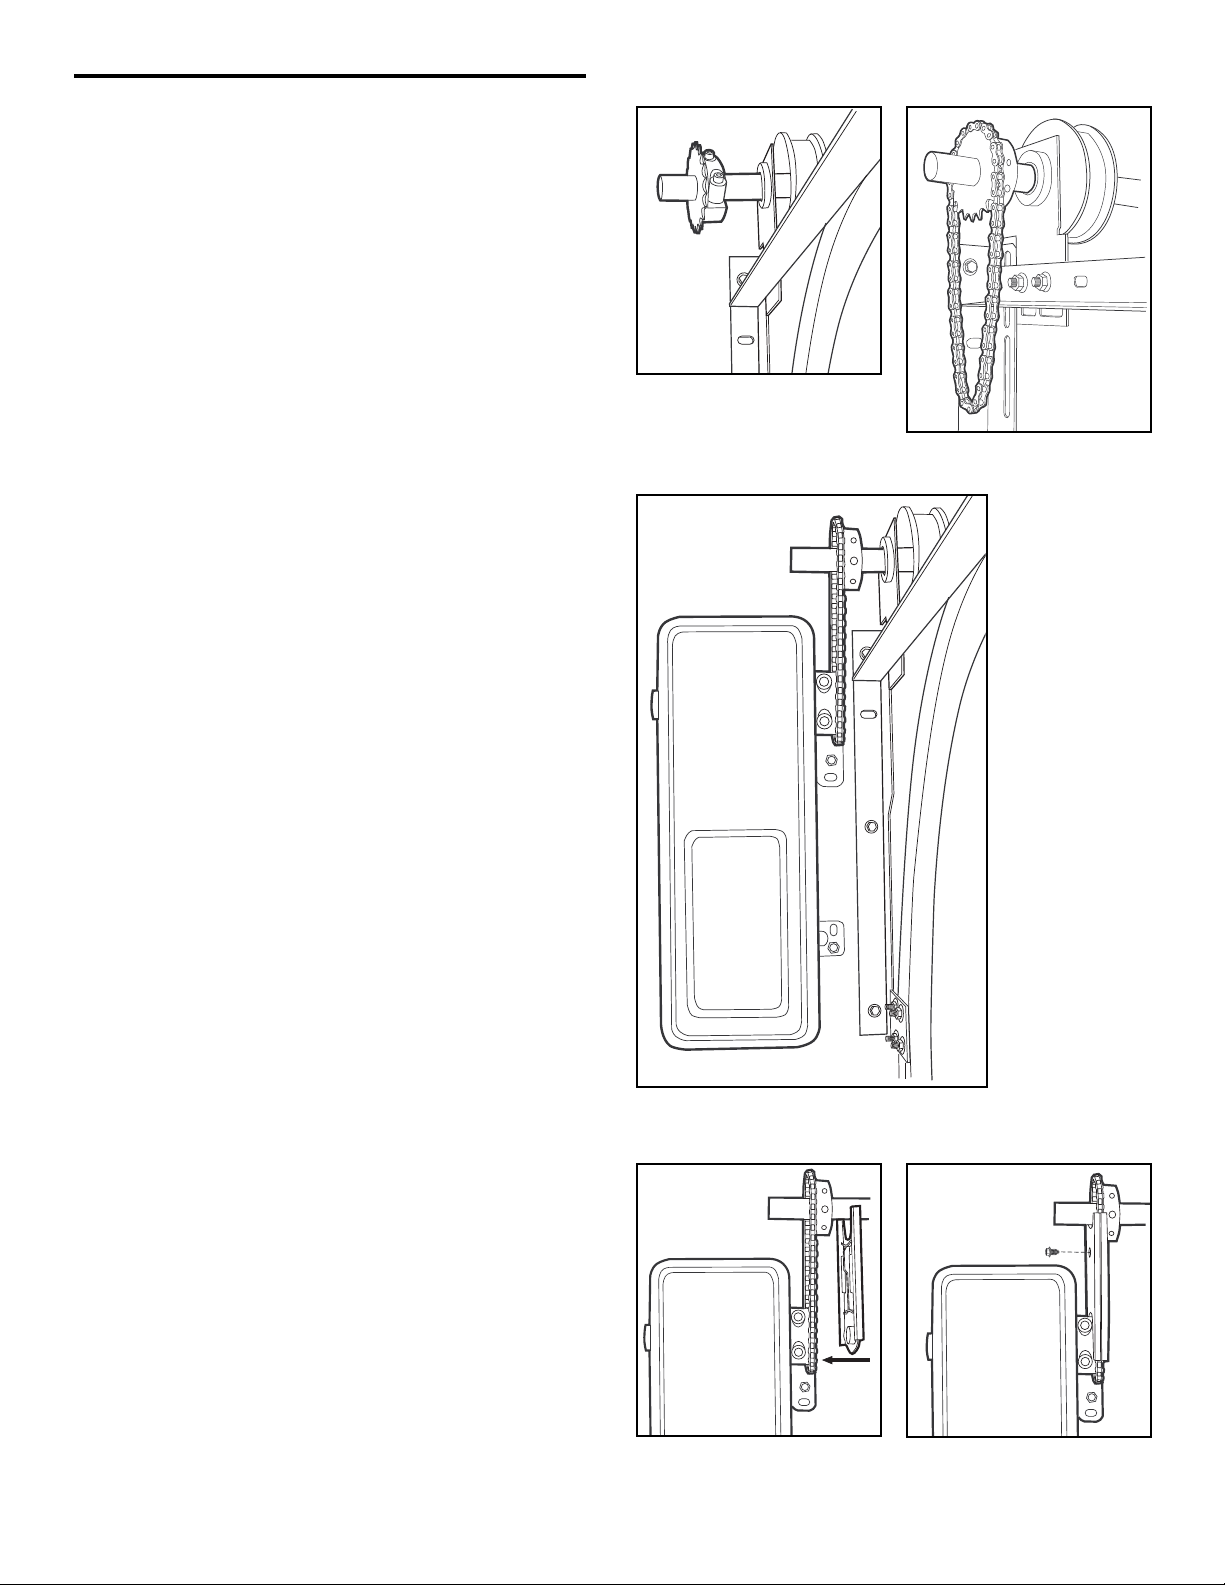
Figure 5
Figure 6
Figure 7
POSE
5. Fixez le barbotin avec le plus petit logement (1 po.) à la
barre de torsion pour vous assurer que les vis sont sur le
côté le plus proche de la porte du garage (Figure 3).
REMARQUE : Ne pas serrer le barbotin à cette étape.
6. Placez la chaîne sur le barbotin situé sur la barre de
torsion (Figure 4).
7. Fixez le barbotin situé sur l’arbre de l’unité motrice à la
chaîne. Fixez l’unité de moteur au mur à l’aide des vis à
tête hex (Figure 5).
REMARQUE : Assurez-vous que la chaîne est perpendiculaire
à la barre et qu’elle n’est pas trop serrée.
8. Resserrez de façon égale les deux vis du barbotin sur la
barre de torsion pour fixer solidement le barbotin à la barre
(12-14 pieds/lbs du couple). Serrez solidement la vis de
réglage. Vous devrez peut-être faire pivoter la chaîne pour
rendre les vis accessibles.
9. L’un des côtés du garde-chaîne aura une dentelure qui
s’insèrera dans la partie centrale du barbotin de l’unité
motrice. Ce côté doit être mis en place en premier (Figure 6).
10. Positionnez la protection restante sur l’autre côté afin
qu’elle comprenne la chaîne et l’ensemble du barbotin. Les
protections se mettront en place par encliquetage.
Fixez-les en les vissant à l’aide ensemble de la vis 1/2 de
po. (Figure 7).
11. Faites pivoter la chaîne pour vous assurer qu’elle se
déplace de façon régulière. Réglez si nécessaire.
12. Référez-vous à l’étape 2 d’installation du manuel
d’utilisation pour obtenir des instructions complémentaires.
Figure 4
Figure 3
© 2007, The Chamberlain Group Inc.
114A3394B All Rights Reserved