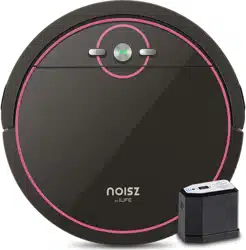
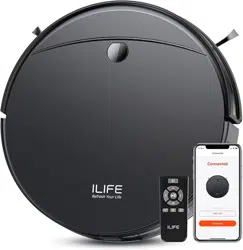
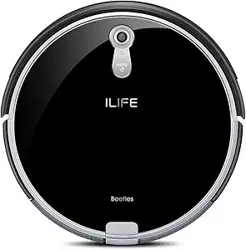
Product Parts
Main body and accessories
- Main Body
- Charging Dock
- Remote Control (battery included)
- Electrowall (battery included)
- Power Adapter
- Cleaning Tool
- User Manual
- Extra Side Brushes
- High Performance Filters

Robot anatomy


Dustbin

Charging dock

Remote control

Remote control operation
1 Start/Pause 
- To start cleaning in selected mode.
- To stop current cleaning cycle.
- To change from sleep mode to selected mode.
2 Direction Buttons
A." " Button
- To increase minute and hour setting in schedule or clock mode.
- To move the robot forward in selected mode.
- To stop the robot when it hits against objects.
B. “MAX” Button
- To decrease minute and hour setting in schedule or clock mode.
- To move robot backward in selected mode.
- Press "MAX". the vacuum power will be the strongest.
C.“  " Button
- To change from minute to hour in schedule or clock mode.
- To turn the robot left.
D.“ ” Button
- To change from minute to hour in schedule or clock mode.
- To turn the robot right.
3 “Plan” Button
- To enter schedule mode when robot is in selected mode.
- To confirm scheduled cleaning.
4 “Clock” Button 
- To enter clock mode when robot is in selected mode.
- To confirm time setting.
5 “HOME” Button 
To return robot to charging dock.
6 “Edge ” Button 
To clean along the edge of the walls.
7 “Spot” Button 
To start cleaning specific areas.
8 00:00 
To display scheduled time.
9 00:00 
To display clock.
NOTE
1. Place two AAA batteries into the remote control.
2. Remove batteries if the remote control will not be used for a long time.
CLEAN button signals
Charging --- Middle light in orange flash steadily
Charging finished --- All lights off
In selected mode --- Three lights flash in green
Malfunctioning --- Middle light flash slowly in red
Low battery --- Middle light in orange turns solid
In home mode --- Home button turns solid
In cleaning mode --- Middle light in green turns solid
In edge mode --- Middle light in green turns solid
In spot mode --- Spot button turns solid
Product Operation
1. Getting started
1. Place the charging dock on the floor and plug in the adapter. Signal light on charging dock will turn solid.
Note: Put charging dock against a wall and remove obstacles about 1 meter on both sides and about 2 meters in front.

2. Display panel will flash after power switch (near power socket) is turned on.
(If no command is received. the robot will switch to sleep mode after 45 seconds.)
Note:
A. Always keep the power switch on. otherwise the robot will not work.
B. If power switch is turned off. all scheduled cleaning will be lost.
Caution: Before charging the robot. make sure the power switch is turned on. or the robot will not be charged.
3. Robot can be recharged by:
A. plugging into an outlet;
B. pressing [  ] button on remote control — the robot will return to charging dock for auto recharge.


Extending battery life:
A. Before first use, charge the robot overnight. When charging is finished, light at main button will turn off.
B. Always place the robot on charging dock that is connected to power.
C. If the robot will not be used for a long time, fully recharge the robot and turn the power switch off before storing it in a cool, dry place.
4. Auto charging
The robot will automatically return to the charging dock when its battery runs low.
2. Start/Pause/Sleep
- Sleep mode: robot is not working. light at
 button is off and power switch is on.
- Selected mode: robot is not working. green light at button flashes.
- Cleaning mode: robot is working. green light at button turns solid.
1. Start
A. Make sure the power switch is turned on.
B. Press button on robot or remote control to start cleaning.
Note: If robot is in sleep mode. press button to reactivate it.
Press button again to start the operation.
2. Pause
Press button on robot or remote control to change robot from Clean mode to selected mode.
Note: When robot is paused. press button to resume the operation.
3. Sleep
To switch the robot from selected mode to sleep mode:
A. Press and hold button on robot for 3 seconds.
B. Robot automatically enters sleep mode if no command is received after 15 seconds.
3. Schedule
You can preset a cleaning routine for your robot.
Note: Reset the clock and reschedule a cleaning cycle after replacing battery. Robot will only start cleaning automatically after the clock and schedule are set.
Set the clock
1. Point the remote control at robot (make sure the power switch is on).
2. Press [ ]button and adjust to your local time with direction buttons.
3. Press [ ] button again to save the setting.
Set a schedule
Robot starts a cleaning schedule only when its power switch is on.
1. Point the remote control at robot.
2. Press [ ] button and adjust time with direction buttons.
3. Press [ ] button to save the setting.
Note:
1. Successful clock and schedule settings will be confirmed by a “beep” sound. Reset the schedule if there is no sound confirmation.
2. Turn off the robot to cancel the schedule.
4. Cleaning modes
1. Auto cleaning

In Auto Cleaning mode. robot automatically cleans the areas it can reach.
Note: Press () button on robot or remote control to start Auto Cleaning.
2. Spot cleaning

- Point remote control at robot and press (
 ) button while it is cleaning. Robot will clean around a circular route and return to Auto Clean mode after Spot cleaning is finished.
- Point remote control at robot and press () button when robot is in selected mode. Robot will clean around a circular route and return to selected mode after Spot cleaning is finished.
3. Edge cleaning

To start edge cleaning. put the robot near the edge of a wall and press [] button on remote control.
Note: Edge cleaning will automatically stop if the robot cannot detect any edges. To stop edge cleaning manually. press () button.
4. MAX cleaning

High suction power for areas with concentrated dust. Press MAX button on remote control to increase suction level. Press MAX again to return to normal level.
5. Electrowall

Electrowall creates an invisible barrier that S5 will not cross. This invisible barrier can be used to confine S5 to a particular room or area.
- Install battery first. then turn it on.
- Put the Electrowall on the outside of the doorway you wish to block.
- Ensure the signal logo is facing forward and toward the opening you would like to block.
- Turn off the Electrowall after each use.


TIPS:
- Make sure which side is working area according to the stickers on the Electrowall.
- Place the robot in the "working area" to do cleaning.
- We suggest putting the Electrowall behind the door or against the wall.
Maintenance
1. Side brushes
Clean the side brushes when they get dirty. Replace them if they are damaged.
Note: When replacing the side brushes, make sure they are installed according to the "L" and "R" marks on both sides of the brush and the base of the robot.
2. Dustbin and filter
Follow the below steps to empty and clean the dustbin after each use.
- Take out the dustbin and clean dust or debris in the suction opening.
- Clean the high performance filter after 15-30 days of use. Replace it no more than 6 months of use.
- Do not reinstall the high performance filter and primary filters when they are still wet.
- Replace the high performance filter and primary filter if needed.

3. Cliff sensors and auto charging pins
Gently clean the sensor lens and auto charging pins with a soft dry cloth.
Note: Charging pins need to be cleaned if they become dirty.


4. Nose wheel
Make sure the nose wheel is clean to avoid lowered cleaning performance:
(1) Pull the wheel up and out vertically and clean it. Also check if the gasket is worn.
(2) Ensure that the gasket is properly installed after cleaning the nose wheel.


Troubleshooting
Error codes
The robot will remind you by beeping when it is malfunctioning.
 One tone
Wheels or side brushes problems
- Check wheels and side brushes
 Two tones
Cliff sensor or bumper sensor failure
- Clean cliff sensor
- Gently shake the bumper to check if there's anything stuck in it
 Three tones
Robot gets stuck
- Pick up robot and restart
Note: If none of the above solutions works. try the following:
1. Turn power switch off and on to reset the robot.
2. If resetting doesn't help. contact the seller for repair service.
Error symptoms
Circle around a small area
Side wheels are jammed
- Remove hair and debris from side wheels
- While reinstalling. push the wheels in and out to make sure they can rotate freely
- Restart robot in another spot
Keep moving backward
A Cliff sensor is dirty or broken
- Check cliff sensor lens
- Clean or replace it if needed
Bump into obstacles repeatedly
The bumper is stucked
- Tap the bumper 10-20 times to remove debris lodged in it
- Loosen the screw of the bumper
Working time shortened
Battery capacity dropped
Robot is not fully charged
CLEAN button light is off while charging
Hair or small debris stuck in charging pins
Robot is not properly connected to charging pins
- Check if robot is connected to charging pins
Pick up less dirt and debris
Filter is dirty or wet
Spit out litter
Dustbin is full
Robot doesn't start at scheduled time
Schedule was not saved successfully
- Reset schedule. Wait for a beep to confirm completion of scheduling
Schedule was canceled after you restarted robot
- Turn on the power switch on robot
Power Switch is off
- Keep robot's power switch on and put it on charging dock to make sure robot is fully charged for the next job
Battery is low
- Turn off the power switch on robot and empty the dustbin
Debris jammed in components
- Clean side brushes and main brushes