When using an electrical appliance, basic precautions should always be followed, including the following:
READ ALL INSTRUCTIONS BEFORE USING THIS VACUUM CLEANER
WARNING: To reduce the risk of fire, electric shock, or injury:
Do not use outdoors.
Do not leave vacuum cleaner when plugged in.
Turn off the switch and unplug the electrical cord when not in use and before servicing.
Do not allow to be used as a toy. Close attention is necessary when used by or near children.
Use only as described in this manual. Use only manufacturer's recommended attachments.
Do not use with damaged cord or plug.
If vacuum cleaner is not working as it should, has been dropped, damaged, left outdoors, or dropped into water, call the Eureka Customer Service HELPLINE at 1-800-282-2886.
Do not pull or carry by cord. Do not use cord as a handle. Do not close a door on cord or pull cord around sharp edges or corners. Do not run vacuum cleaner over cord. Keep cord away from heated surfaces.
Do not use extension cords or outlets with inadequate current carrying capacity.
Turn off all controls before unplugging.
Do not unplug by pulling on cord. To unplug, grasp the plug, not the cord.
Do not handle plug or vacuum cleaner with wet hands.
Do not put any object into openings. Do not use with any openings blocked; keep free of dust, lint, hair, and anything that may reduce airflow.
This vacuum cleaner creates suction and contains a revolving brush roll. Keep hair, loose clothing, fingers, and all parts of body away from openings and moving parts.
Do not place vacuum cleaner on furniture or stairs as the brush roll may cause damage. Use extra care when cleaning stairs.
Do not pick up anything that is burning or smoking, such as cigarettes, matches, or hot ashes.
Do not use without tanks, filters, lids, float, brushroll and brushroll cover in place.
Belt pulleys can become hot during normal use. To prevent burns, avoid touching the belt pulley when servicing the drive belt.
Do not use to pick up flammable or combustible liquids such as gasoline, or use in areas where they may be present.
Store your vacuum cleaner indoors in a cool, dry area.
Keep your work area well lit.
Unplug electrical appliances before vacuuming them.
Always use Eureka cleaning solution in your machine, other cleaning solutions may damage the machine and void the warranty.
Do not use an excessive amount of cleaning solution or it may cause internal damage to the machine.
Do not immerse in liquid. Use only on surfaces moistened by the cleaning process.
Use only on level surfaces for optimal cleaning results.
Do not use to pick up toxic substances (solvents, ammonia, gasoline, chlorine bleach, acidic substances, drain cleaner, etc.).
Do not lift, carry or shake appliance while in use.
When in use do not lay the machine down flat or on its side to prevent the dirty water from flowing into the motor.
WARNING: This product can expose you to chemicals including Styrene, which is known to the State of California to cause cancer, and Bisphenol-A, which is known to the State of California to cause birth defects or other reproductive harm. For more information go to www.P65Warnings.ca.gov.
SAVE THESE INSTRUCTIONS
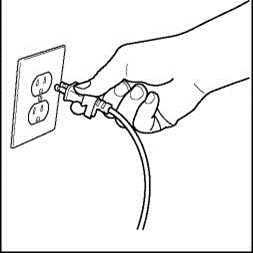
To reduce the risk of electric shock, this appliance has a polarized plug (one blade is wider than the other). This plug will fit in a polarized outlet only one way. If the plug does not fit fully into the outlet, reverse the plug.
If it still does not fit, contact a qualified electrician to install the proper outlet. Do not change the plug in any way.
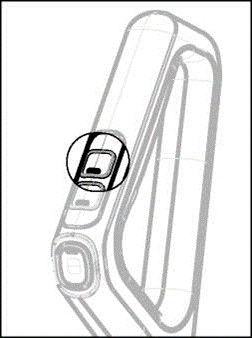
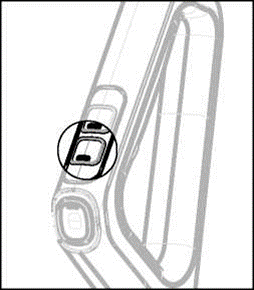
Motor
Do Not Oil the motor or the brush roll at any time. The bearings are permanently lubricated and sealed.
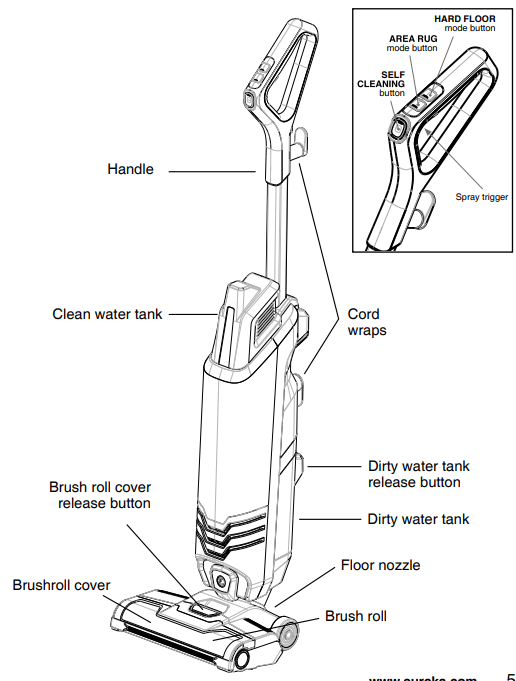
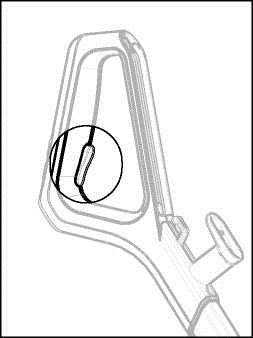
How to Identify Parts of Your Vacuum Cleaner
How to Assemble Your Vacuum Cleaner
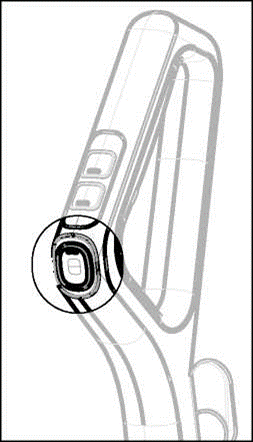
Insert handle into opening at top of vacuum until you hear a click.
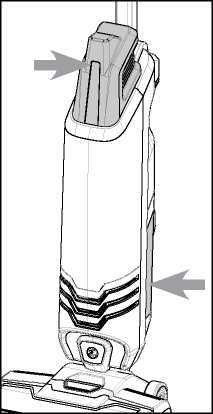
To remove handle, press button under the covering on back of vacuum and pull the handle up at the same time.
The clean water tank is located on the upper front of the vacuum and the dirty water tank is located on the lower back of the vacuum
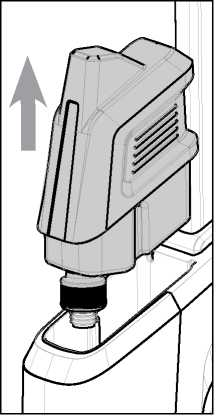
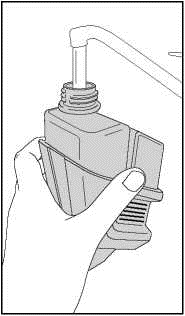
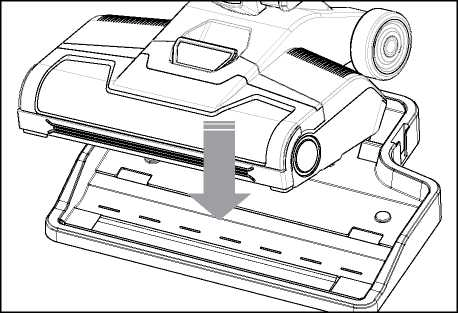
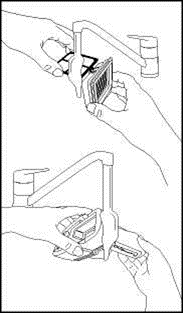
Remove the clean water tank by lifting it straight up off the vacuum.
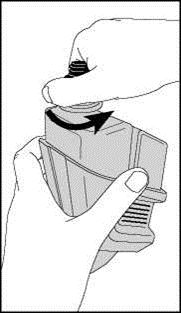
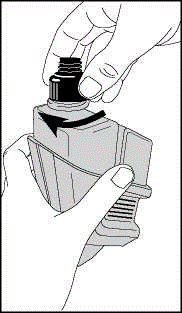
Twist to unscrew the cap on the clean water tank.
Fill the clean water tank have to the Max fill line with warm water and add ONE capful of cleaning solution.
Screw the cap firmly back on the water tank
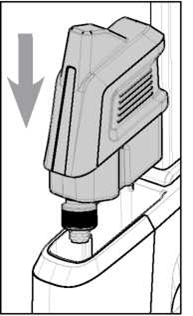
Align the water tank with the holder and slide down until it clicks into place.
Use warm water and Eureka cleaning solution. Always use Eureka cleaning solution in your machine, other cleaning solutions may damage the machine and void the warranty.
Caution: Do not use water warmer than 140 degrees Fahrenheit. Do not use boiling water or heat water or tank in microwave
How to Clean Hard Floors
Never operate vacuum cleaner without tanks, filter, brushroll and brushroll cover in place
Plug power cord into outlet.
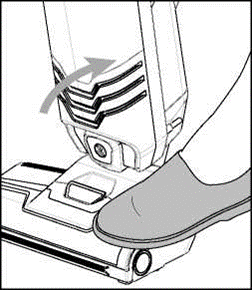
To start cleaning your hard floors turned the vacuum on pressing the HARD FLOOR button once.
Step on the floor nozzle and pull
handle to lower into position for vacuuming. Brushroll will only spin only when handle is lowered into reclined position.
Please note: When vacuum is upright the brushroll will not spin.
Locate spray trigger on underside of the handle. Before each use hold the solution spray trigger for 10 seconds to get cleaning solution flowing to the brushroll
To clean hold the solution spray trigger to apply solution on both forward and backward strokes. To dry hard floors faster do not hold down the spray trigger on the second pass.
To turn off press HARD FLOOR button a second time.
Suggestion: For challenging and stuck on messes on your hard floors use the AREA RUG mode and hold the vacuum over the mess. Use short strokes while holding the spray trigger to allow for a concentrated clean.
How to Clean Area Rugs
Never operate vacuum cleaner without tanks, filter, brushroll and brushroll cover in place.
Note: Before cleaning area rugs test a small area of the rug for color fastness. Also please check manufacturers cleaning instructions before cleaning area rugs. Do not use for on silk or delicate rugs or wall to wall carpeting.
Plug power cord into outlet.
To start cleaning your hard floors turned the vacuum on pressing the AREA RUG button once.
Step on the floor nozzle and pull handle to lower into position for vacuuming. Brushroll will only spin only when handle is lowered into reclined position.
Please note: When vacuum is upright the brushroll will not spin
Locate spray trigger on underside of the handle. Before each use hold the solution spray trigger for 10 seconds to get cleaning solution flowing to the brushroll.
To clean hold the solution spray trigger to apply solution on both forward and backward strokes. For an optimal clean, make a few wet passes followed by a few dry passes over each area of you clean on your rugs
To turn off press AREA RUG button a second time. The mode dispenses twice the solution of the HARD FLOOR mode for optimized cleaning on area rugs
CAUTION: Do not over wet the carpet. Be careful not to run the vacuum over large solid debris or edges of area rugs as this may stall the brushroll and result in premature belt failure.
Using Self-Cleaning Function
Never operate vacuum cleaner without tanks, filter, brushroll and brushroll cover in place.
Do not remove the dirty water tank until after using the self-cleaning function empty as this will allow remaining debris under the brushroll and suction tube to be sucked into the dirty water tank.
After use, keep machine plugged into a power source and place the machine back onto the base and press the SELF button on the front of the handle to start the self-cleaning function.
Note: SELF CLEANING function runs for 40 seconds and stops on its own.
After running the SELF CLEANING function disconnect the power cord from the wall and wrap the cord around the cord hooks on the back of the machine.
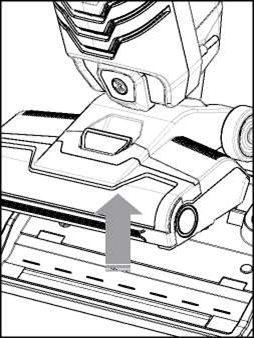
Remove machine from base to access brushroll and when reinstalling the brushroll cover
Before putting machine back onto the base, be sure to wipe the base to remove any remaining water or debris.
Maintenance: Emptying Dirty Water Tank
Never operate vacuum cleaner without tanks, filter, brushroll and brushroll cover in place
Empty and clean The Dirty water tank after every use.
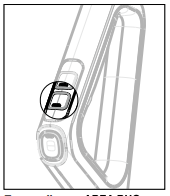
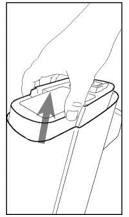
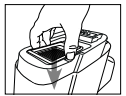
To remove The Dirty water tank press down on the release button on the top of the tank.
Grasp the front handle while pressing down on button an pull the dirty water tank straight out of machine.
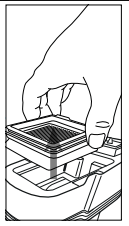
Remove the filter from the top of The Dirty water tank by pulling it straight up.
Fully remove the dirty water tank from the machine and grasp the recessed areas on top of the lid and pull straight up to remove the lid.
Pour dirty water and debris out. Rinse the inside of the dirty water tank ensuring no debris remains in the tank.
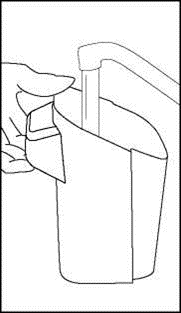
Rinse the vacuum filter and screen with warm water.
Rinse the whole lid and float with warm water ensuring no debris remains.
Wipe the area where the dirty water tank sits clean with a towel.
Leave parts out to dry thoroughly before reinstalling.
Once parts are dry, place filter back into top of tank lid and place the lid back on top of the tank ensuring it is fully installed
Align the water tank with the holder and slide down until it clicks into place.
Note: Empty and rinse out the clean water tank and allowed to dry before reinstalling. Do not store machine with water and or cleaning solution in the tanks.
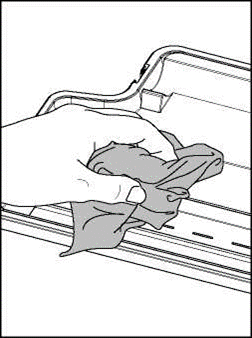
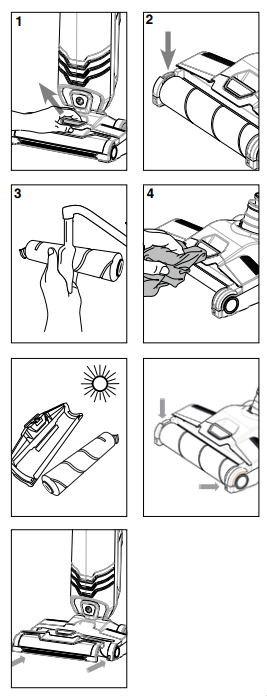
How to Clean the Brushroll and Cover
Never operate vacuum cleaner without tanks, filter, brushroll and brushroll cover in place
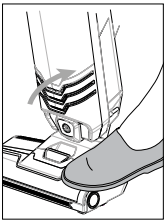
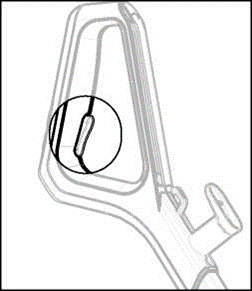
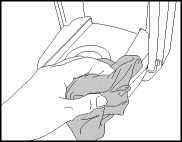
1. To remove the brushroll cover grasp the release button and pull up and forward.
2. Remove brushroll by pulling up on the tab located on the left side.
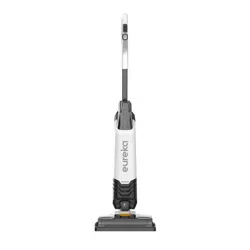
3. Rinse brushroll and brushroll cover. Use brushroll cleaning tool to help remove debris and her on the roller.
4. Wipe the brushroll chamber thoroughly to remove any debris.
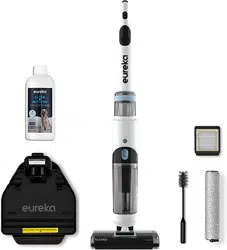
5. Put the brush roll upright in the drying stand let your brush roll and cover dry thoroughly for 24 hours before reassembling.
Note: The brushroll, brushroll cover, dirty water tank, clean water tank, lids and filters are not dishwasher safe. Please follow cleaning instructions in this manual.
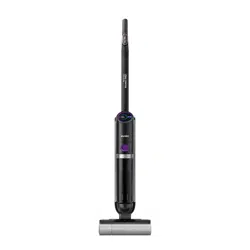
6. Install brushroll by inserting the right end of the roller into the right side of the floor nozzle. Then insert by aligning the tab on the left side with the slot and pressing into place.
7. To reinstall the brushroll cover, tilt the window back and align both tabs on the lower edges of the cover with the slots on the floor nozzle then push in and downwards until it clicks into place.
Machine Storage
Store the machine on its base in a dry, protected area. Ensure machine is not exposed to freezing temperatures or internal components could be damaged and warranty will be void.
Problem solving
This vacuum cleaner has a special thermostat that protects the vacuum in case of motor overheating.
If the vacuum suddenly shuts off, proceed as follows: 1) Push the power switch to off and unplug the vacuum. 2) Check the vacuum for a possible source of overheating such as a full dirty water tank, blocked intake passage or or clogged filter. If these conditions are found, fix them and wait at least 30 minutes before attempting to use the vacuum. 3) After the 30 minute period, plug the vacuum back in and turn on the switch. If the vacuum still does not work, call the Eureka Customer Service HELPLINE at 1-800-282-2886.
Problem
Possible Reasons
Solutions
Brushroll not spinning
The brushroll is entangled with debris, brushroll is not properly installed or vacuum is locked in the upright position.
Check brushroll chamber for debris
Recline machine to make sure brushroll is activated
Loss of suction power
The dirty water tank has reached its capacity
Empty dirty water tank
Brushroll, brushroll cover and/or dirty water tank are not properly installed
Turn machine off and reinstall making sure all parts fit properly and securely in place
The roller brush is entangled with debris
Check brushroll chamber for debris
The suction nozzle or pipe is blocked
Clean the debris in the suction nozzle or pipe
Strainer above the dirty water tank float is dirty
Empty dirty water tank and clean lid/float, filter and filter screen
Filter is clogged
Remove debris from filter, rinse clean and dry thoroughly before reinstalling
Abnormal sound
The suction nozzle is blocked
Remove clogs/debris from pipe and/or brushroll chamber
The dirty water tank has reached its capacity
Empty dirty water tank
Limited or no spray
Clean water tank is empty
Refill clean water tank
The clean water tank is not properly installed
Turn machine off and reinstall making sure all parts fit properly and securely in place
Air is leaking out
The float in the dirty water tank is not properly installed
Turn machine off and reinstall making sure all parts fit properly and securely in place
The dirty water tank filter is not completely dry
After cleaning filter let dry for at least 24 hours
Yes! I have short carpet but multiple shaggy rugs and this vacuum gives you the option between short/shaggy so you can alter the power of suction. Works very good on both!
 Motor
Motor