Loading ...
Loading ...
Loading ...
-14- -15-
HOW TO USE THE TIME DELAY (CONT.)
4. Press START/STOP button to begin the delay feature.
The timer and DELAY TIMER button will stop flashing,
while the START/STOP button will continue flashing.
This will indicate that the Multi-Cooker has been set
on the DELAY TIMER setting. The Display Screen will
countdown the delay time until 0:00 is reached. When
0:00 is reached, the DELAY TIMER light will turn off
and the START/STOP light will stop flashing to show
that time delay has finished. The word “HEAt” will
appear on the display screen until the Multi-Cooker is
fully pressurized. When the selected pressure has been
reached, the timer will start counting down.
Example:
It’s 4pm and you want to have a soup cooked and ready in 2
hours’ time for dinner at 6pm. You want to set the machine
now so you are free to do other things.
The pre-set function (if unchanged) will cook for 30 minutes
at HIGH pressure. Time to gain pressure varies according to
humidity and water temperature, but let’s assume it takes 15
minutes to gain pressure. Therefore total time is 45 minutes.
To have the stew ready by 6pm, you will need to delay
the start of your cooking by approximately 1 hour and 15
minutes.
1. Press SOUP
2. The Display Screen will flash “0:30”
3. Press the DELAY TIMER button and set for “1:15”
4. Press START/STOP
2
3
2
1
1
3
MAX
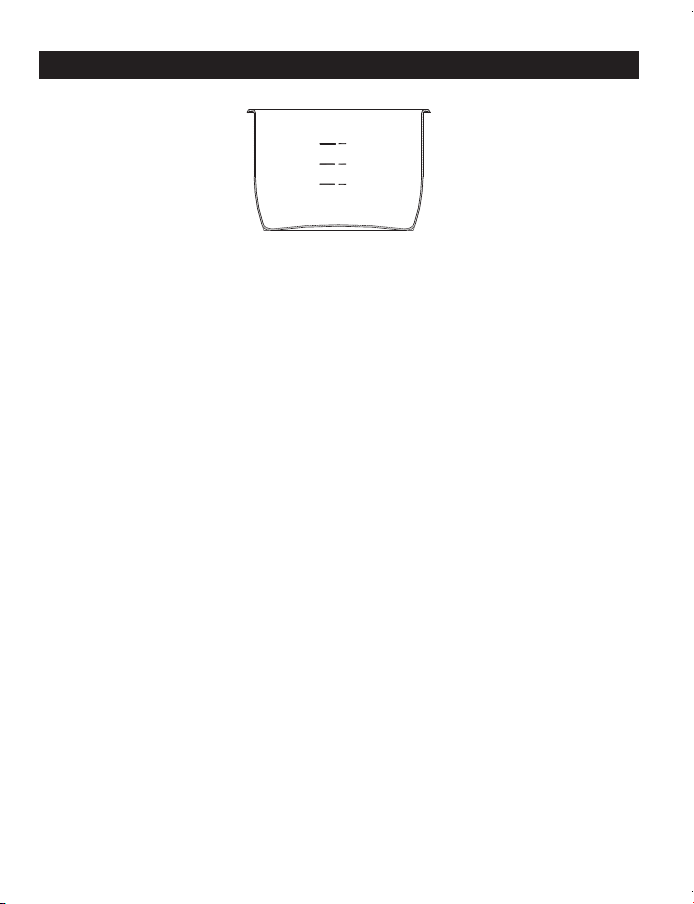
Figure 3
Inside the removable Cooking Pot are markings to guide the
fill level of the Cooking Pot. The word MAX indicates the
maximum fill line.
The 1/3, 1/2, and 2/3 markings are handy guides to use in your
recipes.
CAUTION: Never load the Cooking Pot above the maximum
ingredient level line marked MAX on the inside of the Cooking
Pot.
Foods that expand during cooking (e.g. rice) should never go
above the 1/2 mark.
Note: The Multi-Cooker cannot pressure cook without liquid.
Ensure a minimum of 8oz of liquid is used inside the removable
Cooking Pot.
COOKING POT MARKINGS
Loading ...
Loading ...
Loading ...