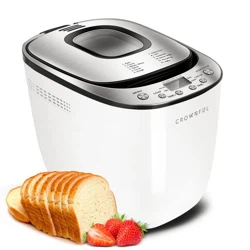
User Manual Bread Machine
IMPORTANT SAFETY PRECAUTIONS
Before using the electrical appliance, the following basic precautions should always be followed:
1. Please read the instruction carefully before use.
2. Confirm whether the voltage range used is consistent with that on the nameplate,and ensure that the socket is well grounded.
3. When not in use or before cleaning, you must turn off the toaster, and then unplug the power plug.
4. Do not touch hot surfaces. Use handles or knobs.
5. To protect against electric shock do not immerse cord, plugs, or housing in water or other liquid.
6. Unplug from outlet when not in use, before putting on or taking off parts, and before cleaning.
7. Do not let the cord hang over the edge of table or hot surfaces.
8. Using other accessory attachments that are not recommended by the appliance manufacturer may cause injuries.
9. Children should be supervised to ensure that they do not play with the appliance.
10. Do not place on or near a hot gas or electric burner, or in a heated oven.
11. Do not touch any moving or spinning parts of the machine when baking.
12. Never switch on the appliance without properly placing the bread panfilled with ingredients.
13. Do not knock the surface or edge off of the bread bucket to avoid damage.
14. Sheets of metal or other conductive material are not allowed to be inserted into the toaster to prevent fire or short circuit.
15. The heat and steam generated during the baking process need to be continuously expelled. Towels or other objects should never be used to cover the chartered aircraft to avoid fire.
16. Do not operate the appliance for other than its intended use.
17. Do not use outdoors.
18. Please keep the instruction manual.
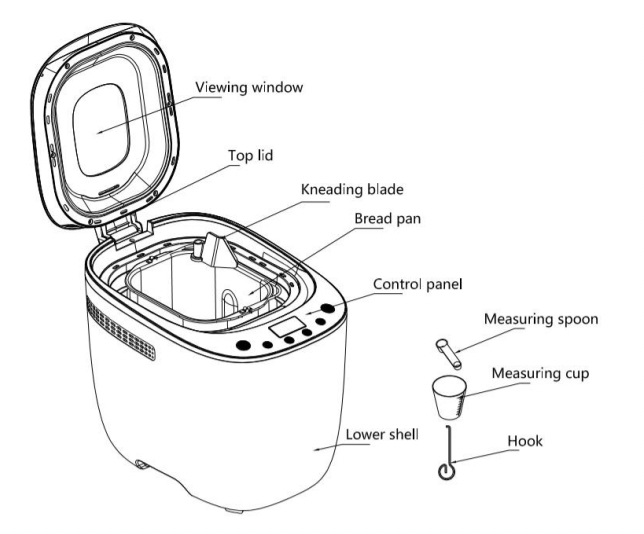
Know your bread maker
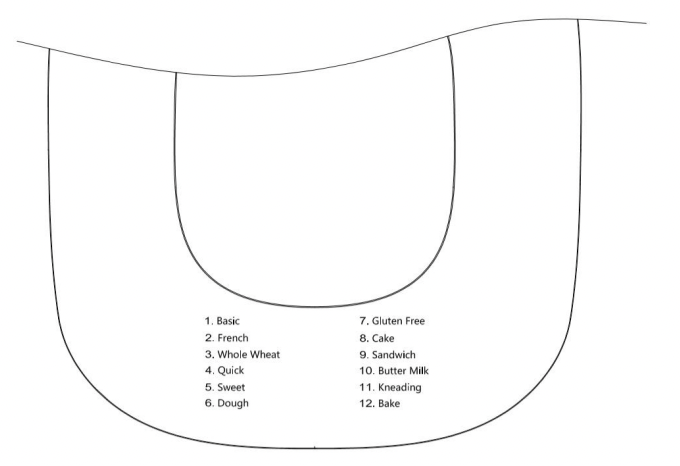
Function Introduction
1. Basic
2. French
3. Whole Wheat
4. Quick
5. Sweet
6. Dough
7. Gluten Free
8. Cake
9. Sandwich
10. Butter Milk
11. Kneading
12. Bake
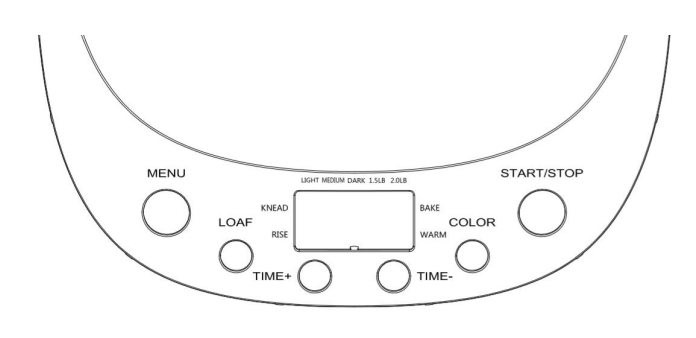
AFTER POWER-UP
As soon as the bread maker is plugged in the power supply a beep will be heard and “3:00” will appear in the display after a short time. But the two dots between the “3” and“00” don’t flash constantly. The arrow points to 2.0LB and MEDIUM. This is the default setting
 : START / STOP
For starting and stopping the selected baking program. To start a program, press the “START/STOP” button once. A short beep will beheardandthe two dots in the time display begins to flash, that means the program starts. Any other button is deactivated except the “START/STOP” button after a program has begun. To stop the program, press the “START/STOP” button for approx. 3 seconds until a beep confirms that the program has been switched off. This feature will help to prevent any unintentional disruption to the operation of the program.
 : MENU
It is used to set different programs. Each time it is pressed (accompanied by a short beep)it will show the different programs. Press the button continuously to showthe12menusonthe LCD display. Select your desired program. The functions of 12 menus will be explained below.
- 1. Basic: kneading, rise and baking normal bread. You may also add ingredients to add flavor.
- 2. French: kneading, rise and baking with a longer rise time. The breadbakedinthismenu usually will have a crispier crust and light texture.
- 3. Whole wheat: kneading, rise and baking of whole wheat bread. This settinghaslongerpreheat time to allow the grain to absorb the water and expand. It is not advisable to use the delay function as this can produce poor results.
- 4. Quick: kneading, rise and baking loaf with baking soda or baking powder. Breadbakedon this setting is usually smaller with a dense texture.
- 5. Sweet: kneading, rise and baking the sweet bread. For baking crispy and sweet bread.
- 6. Dough: kneading and rise, but without baking. Remove the dough and shape it to make bread rolls, pizza, steamed bread, and more.
- 7. Gluten Free: kneading, rise and baking of Gluten Free bread. This settinghaslongerpreheat time to allow the grain to absorb the water and expand. It is not advisable to Sethe delay function as this can produce poor results.
- 8. Cake: kneading, rise and baking, rise with soda or baking powder.
- 9. Sandwich: kneading, rise and baking sandwich. For baking light texture bread with a thinner crust. (This menu is just baking loaf bread which the texture sandwich.After finished the bread, you can cut it into sliced bread. And then you can put sauce, vegetables, deli meat, sausage patties or anything what you like betweenthebreadlayers)
- 10.Butter Milk: kneading, rise and baking butter milk bread. You can add butter and milk.
- 11. Bake: only baking, no kneading and rise. Also used to increase the baking time on selected settings
 : COLOR
With the button you can select a LIGHT, MEDIUM or DARK color for the crust. Press this button to select your desired color.
 : LOAF SIZE
Press this button to select the Loaf size of the bread. Please note the total operation time may vary with different loaf sizes.
Note: For Preset "Cake” with default size, and can't select the size with Loaf button.
 : DELAY (TIME + or TIME -)
If you don’t want the appliance to start working immediately you can use this buttontosetthe delay time.
You must decide how long it will be before your bread is ready by pressing the “TIME+” or “TIME -”. Please note the delay time should include the baking time of program. That is, at the completion of the delay time, a hot bread can be served. At first the program and degree of browning must be selected, then press “TIME+” or “TIME-” to increase or decrease the delay time at the increment of 10 minutes. The maximum delay time is 13 hours
Example: The current time is 8:30 p.m. You would like your bread to be ready the next morning at 7 o’clock, i.e. in 10 hours and 30 minutes. What you need to do is, select your menu, color, loaf size then press the TIME+ or TIME - to add the time until 10:30 appears on the LCD. Then press the STOP/START button to activate this delay program. You will see the dot flashes and LCD display will count down to show the remaining time.You will get fresh bread at 7:00 in the morning and if you don’t want to take out the bread immediately, the keeping warm time of 1 hour starts.
Note: For time delayed baking, do not use any easily perishable ingredients such as eggs,fresh milk, fruits, onions, etc.
KEEP WARM
Bread can be automatically kept warm for 60 minutes after baking. If you would like to take the bread out, switch the program off with the START/STOP button.
MEMORY
If the power supply has been interrupted during the course of bread making, the process of bread making will continue automatically within 10 minutes, even without pressing start/stop button. If the break time exceeds 10 minutes the memory may or may not save, so the bread maker may continue the process or shall be restarted. But if the dough does not exceed the kneading phase when the power supply breaks off, you can press the“START/STOP” immediately to continue the program from the beginning. How to operate depends on what happens.
ENVIRONMENT
The machine may work well in a wide range of temperatures, but there could be a difference in loaf sizes between a very warm room and a very cold room. We suggest the room temperature should be between 59 and 93.
WARNING DISPLAY:
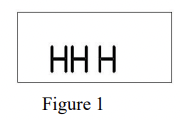
If the display shows “HHH” after the program has been started, (see below figure 1) the temperature inside is still too high. Then the program has to be stopped. Open the lid and let the machine cool down for 10 to 20 minutes
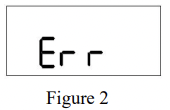
If the display shows “Err” after you have pressed START/STOP, (see belowfigure2)the temperature sensor may have been disconnected. Please have the sensor carefully checked by an Authorized expert.
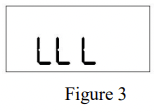
If the display shows “LLL” after pressing the Start/Stop button (except theprogramsBAKE), it means the temperature inside is too low(accompanied by 5 beeping sounds),stop the sound by pressing the Start/Stop button, open the lid and let themachinerestfor 10 to 20 minutes to return to room temperature or select the BAKE program and make the temperature inside the chamber increase rapidly”
NOTE: The bread maker’s temperature is lower than the room temperature if you place the bread maker in a cooler place (such as air conditioned room, cold storage) after a period of time. You can then move it to a room with normal temperature immediately to make bread.
For the first use
- 1. Please check if all parts and accessories are complete and undamaged.
- 2. Clean all the parts according to the latter section“Cleaning and Maintenance”
- 3. Set the bread maker in baking mode and bake empty for about 10 minutes. After cooling it down clean once more.
- 4. Dry all parts thoroughly and assemble them. Then, the appliance is ready for using
How to make bread
- 1. Place the pan in position, then turn it clockwise until they click in correct position.Fix the kneading blade onto the drive shafts. Turn the kneaders clockwise until theyclickintoplace. It is recommended to fill holes with heat-resisting margarine prior to placing the kneaders, this avoids the dough to stick below the kneaders and the kneaders could be removed from bread easily.
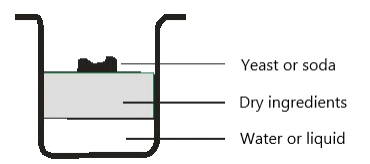
- 2. Place the ingredients into the bread pan. Please keep to the order mentionedintherecipe. Usually, the water or liquid substance should be put first, then add sugar, salt and flour, always add yeast or baking powder as the last ingredient. In case of heavy dough with high Rye or wholemeal portion we advise to reverse the order of ingredients. i.e.so fill it in first with the dry yeast and flour, and finally the liquid to get a better kneading result.
Note: To know the maximum quantity of the flour and yeast that can be used, please refer to the recipe.
- 3. Using your finger make a small indentation on one side of the flour. Addyeasttoindentation. Make sure it does not come into contact with the liquid ingredients or salt.
- 4. Close the lid gently and plug the power cord into a wall outlet.
- 5. Press the Menu button until your desired program is selected.
- 6. Press the COLOR button to select the desired crust color.
- 7. Press the LOAF SIZE button to select the desired size (1.5LB or 2.0LB).
- 8. Set the delay time by pressing Time+ or Time- button. You can skip this part if you want the bread maker to start working immediately.
- 9. Press the START/STOP button to start working.
- 10. For the program of BASIC, FRENCH, WHOLE WHEAT, SWEET, GLUTENFREE, a long beep sound will be heard during operation. This is to prompt youtoaddingredients. Open the Lid and put in the ingredients. It is possible that a steam will escape through the vent slits in the lid during baking. This is normal.
- 11. Once the process has been completed 10 beeping sound will be heard. You can press START/STOP button for approx. 3-5 seconds to stop the process and take out the bread. Open the Lid and while using oven mitts, firmly grasp the bread pan handle. Turn the pan counter-clockwise and gently pull the pan straight up and out of the machine.
- 12. Use non-stick spatula to gently loosen the sides of the bread from the pan. Caution: The Bread pan and bread may be very hot! Always handle withcareanduseoven mitts.
- 13. Turn bread pan upside down onto a clean cooking surface and gently shake until bread falls out from the rack.
- 14. Remove the bread carefully from the pan and let it cool for about 20 minutes before slicing.
- 15. If you are outside of the room or have not pressed START/STOP button at the end the operation, the bread will be kept warm automatically for 1 hour and then the “keeping warm” function will stop.
- 16. When not in use or the operation is complete, unplug the power cord. Note: Before slicing the loaf, use the hook to remove the kneading blade hiddenonthebottom of loaf. The loaf is hot, never use the hand to remove the kneading blade.
Special introduction
1. For Quick breads
Quick breads are made with baking powder and baking soda that are activated by moisture and heat. For perfect quick breads, it is suggested that all liquids be placed in the bottom of the bread pan, dry ingredients on top. During the initial mixing of quick bread batters and dry ingredients may collect in the corners of the pan, it may be necessary to hep machine mix to avoid flour clumps. If so, use a rubber spatula.
Cleaning and Maintenance
Disconnect the machine from the power and let it cool down prior to cleaning.
- 1. Bread pan: Rub the bread pan inside and outside with a damp cloth. Do not use any sharp or abrasive agents for the consideration of protecting the non-stick coating. The pan must be dried completely prior to installing.
- 2. Kneading blade: If the kneading bar is difficult to remove from the axle, fill the container with warm water and allow it to soak for approx. 30 minutes. Thekneadercanthen be easily removed for cleaning. Also wipe the blade carefully with a cotton damp cloth. Please note that both the bread pan and kneading blade are dishwasher-safe components.
- 3. Lid and Window: Clean the lid inside and outside with a slightly damp cloth.
- 4. Housing: Gently wipe the outer surface of housing with a wet cloth. Do not use any abrasive cleaner to clean as this would degrade the high polish of the surface. Never immerse the housing into water for cleaning.
- 5. Before the bread maker is packed away for storage, ensure that it has completely cooled down, is clean and dry, and put the spoon and the kneading blade in the drawer, and the lid is closed.
Introduction of bread ingredients
1. Bread flour
Bread flour has high content of high gluten (so it can be also called high-gluten flour which contains high protein), it has good elastic and can keep the size of the bread from sunken after rising. As the gluten content is higher than the common flour soit can be used for making bread with large size and better inner fiber. Bread flour is the most important ingredient of making bread.
2. Plain flour
Plain flour is made by mixing well-chosen soft and hard wheat and applicable for making express bread or cakes.
3. Whole wheat flour
Whole wheat flour is made by grinding whole wheat, it contains wheat skinandglutenwhole wheat flour is heavier and has more nutrient than common flour. The bread made by whole wheat flour is usually small in size. So many recipes usuallycombinethewhole wheat flour and bread flour to achieve best results.
4. Black wheat flour
Black wheat flour, also named as“rough flour”, is a kind of high fiber flour that is similar to the whole wheat flour. To obtain the large size after rising it must be used in combination with high proportion of bread flour.
5. Cake powder
Cake powder is made by grinding soft wheat or low protein wheat, which is specially used for making cakes. Different flour seems to be alike, actually yeast performanceorabsorbability of various flour differs largely for growing areas, growth reasons, grinding process and storage life. You may choose flour with different trademark totest, taste and compare in local market, and select the one which could produce the best result according to your own experiences and taste.
6. Corn flour and oatmeal flour
Corn flour and oat flour are made by grinding corn and oatmeal respectively, they both are the additive ingredients of making rough bread, which are used for enhancing flavor and texture.
7. Sugar
Sugar is very important ingredient to add sweet taste and color of bread. While it helps to yeast bread as nourishment, white sugar is largely used. Brown sugar, powder sugar or cotton sugar may be called by special requirements.
8. Yeast
Yeast passes doughy yeasting process, then produces carbon dioxide, making bread expand and inner fibre soft. However, yeast fast breeding needs carbohydrateinsugarand flour as nourishment.
- 1tsp. active dry yeast =3/4 tsp. instant yeast
- 1.5tsp. active dry yeast =1 tsp. instant yeast
- 2tsp. active dry yeast =1.5 tsp. instant yeast
Yeast must be stored in refrigerator as it will be killed at high temperature. Before using,check the date and storage life of your yeast. Store it back to the refrigerator as soon aspossible after each use. Usually the failure of bread rising is caused by the dead yeast.The ways described below will check whether your yeast is fresh and active or not.
(1)pour 1/2 cup warm water 113-122 into a measuring cup
(2)Put 1 tsp. white sugar into the cup and stir, then sprinkle 2tsp. yeast over the water.
(3)Place the measuring cup in a warm place for about 10min. Do not stir the water.
(4)The froth will be up to 1 cup. Otherwise the yeast is dead or inactive.
9. Salt
Salt is necessary to improve bread flavor and crust color. But salt can also restrain yeast from rising. Never use too much salt in a recipe. If you don't want to use salt, omit it.And bread would be larger if without salt.
10. Egg
Eggs can improve bread texture, make the bread more nourish and larger insize. Add special egg flavor to bread. When using it must be peeled and stirred evenly.
11. Grease, butter and vegetable oil
Grease can make bread be soft and delay storage life. Butter should be melted or chopped to small pieces before using, so it can be stirred evenly when you take it out from refrigerator.
12. Baking powder
Baking powder is mainly used for rising the Quick bread and cake as it doesnotneedrise time and produce gas which will form bubble or soften the textureofbreadutilizing chemical principle.
13. Soda
The same principle as above. It can also be used in combination with baking powder
14. Water and other liquid
Water is essential ingredient for making bread. Generally speaking, water temperature between 68 and 77 is the most proper. But the water temperature should be within 113-122 for achieving rising speed for making Quick bread.
The water may be replaced with fresh milk or water mixed with 2% milk powder, which may enhance bread flavor and improve crust color. Some recipes may call for juice for the purpose of enhancing bread flavor, e.g.: apple juice, orange juice, lemon juice and so on.
Ingredients weight
One of the important steps for making good bread is using proper amount of ingredients.It is strongly suggest to use measuring cup or measuring spoon to obtain accurate amount, as it can largely affect the baking process and result.
1. Weighing liquid ingredients
Water, fresh milk or milk powder solution should be measured with measuring cups. Observe the level of the measuring cup with your eyes horizontally. When you measure cooking oil or other ingredients, clean the measuring cup thoroughly without any other ingredients.
2. Measure dry powder
Dry powder should be kept in natural and loose conditions, level the cup mouth gently by blade to ensure accurate measure.
3. Ingredient sequence
The sequence of placing ingredients should be observed, generally speaking, the sequence is: liquid ingredients, eggs, salt and milk powder, etc. When placing the ingredients, the flour can't be wet by liquid completely. The yeast can onlybeplacedonthe dry flour. Exclusively, yeast can't touch with salt. After the flour has been kneaded for some time, a beep will remind you to put Fruit ingredients into the mixture. If the fruit ingredients are added too early the flavor will be diminished after longtime mixing. When you use the delaying function for a long time, never add the perishable ingredients such as eggs, fruit ingredient, etc.
Trouble shooting guide
Smoke from ventilation hole when baking
- Some ingredients adhere to the heat element or nearby, for the first use, oil remained on the surface of heat element
- Unplug the bread maker and clean the heating element, but be careful to not burn yourself, during the first use, dryoperatingand open the lid.
Bread bottom crust is too thick
- Keeping the bread warm and leaving it in the bread pan for a long time so that water is losing too much
- Take the bread out immediately without keeping it warm
It is very difficult to take the bread out
- Kneader adheres tightly to the shaft in bread pan
- After taking the bread out, put a hot water into the bread pan and immerse kneader for 10 minutes, then take it out and clean.
Stirred ingredients not even and bake badly selected program menu is improper
- Select the proper program menu .after operating, opening the cover several times and bread is dry, no brown crust color
- Don’t open cover at the last rise
- Stir resistance is too large so the kneader can’t almost rotate and stir adequately
- Check kneader hole, then take the bread pan out and operate without load, if not normal, contact with the authorized service facility.
Display “H:HH” after pressing “start/stop” button
- The temperature in the bread maker is too high to make bread.
- Press “start/stop” button andunplugthebread maker, then take the bread pan out and open the cover until the breadmaker cools down
Hear the motor noises but dough isn’t stirred
- Bread pan is fixed improperly or dough is too large to be stirred
- Check whether bread pan is fixed properly and dough is made according torecipeandthe ingredients are weighed accurately
Bread size is so large it pushes the cover
- Yeast is too much or flour is excessive or water is too much or environment temperature is too high
- Check the above factors, reduce properly the amount according to the true reasons
Bread size is too small or bread has not risen
- No yeast or the amount of yeast is not enough, moreover, yeast may have a poor activity as water temperature is too high or yeast is mixed together with salt, or the environment temperature is lower.
- Check the amount and performance of the yeast, increase the environment temperature properly.
Dough is so large it overflows in the bread pan
- The amount of liquids is too much as to make dough soft and yeast is also too much
- Reduce the amount of liquids and improve dough rigidity
Bread collapses in the middle parts when baking dough
- 1 used flour is not strong powder and can’t make dough rise
- Use bread flour or strong powder.
- 2.yeast rate is too fast or yeast temperature is too high
- Yeast is used under room temperature
- 2. Excessive water makes dough too wet and soft.
- According to the ability of absorbing water,adjust water on recipe
Bread weight is very large and organization construct is too dense
- too much flour or short of water
- Reduce flour or increase water
- too many fruit ingredients or too much whole wheat flour
- Reduce the amount of corresponding ingredients and increase yeast
Middle parts are hollow after cutting bread
- Excessive water or yeast or no salt
- Reduce properly water or yeast and check salt
- water temperature is too high
Bread surface is adhered to dry powder
- there is strong glutinous ingredients in bread such as butter and bananas etc.
- Do not add strong glutinous ingredients into the bread.
- not stirring adequately or short of water
- Check water and mechanical construction of the bread maker
Crust is too thick and baking color is too dark when making cakes or food with excessive sugar
- Different recipes or ingredients have great effect on making bread, baking color will become very dark because of too much sugar
- If baking color is too dark for the recipe with excessive sugar, press start/stop to interrupt the program ahead 5-10min of intended finishing time. Before removing out the bread you should keep the bread or cake in bread pan for about 20 minutes with cover closed