User Guide for Air Fryer
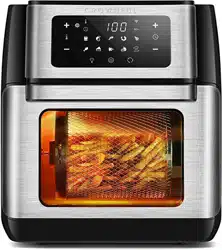
Product Diagram
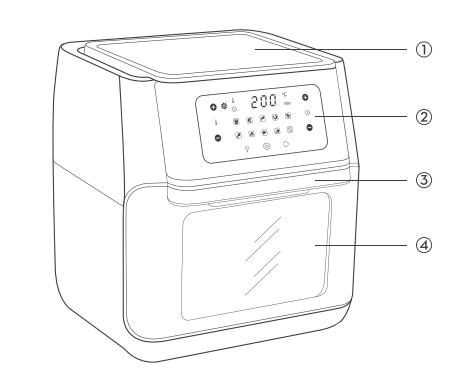
1 Top Lid
2 Control Panel
3 Handle
4 Window
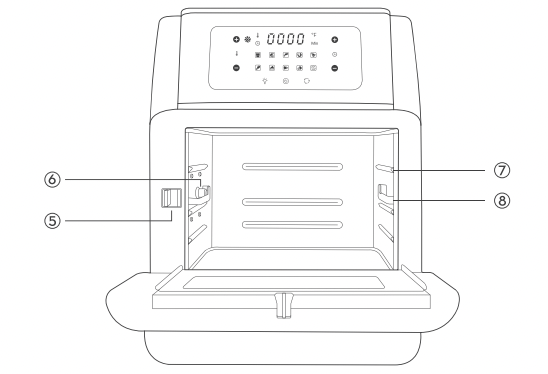
5 Switch
6 Lock
7 Rails
8 Sliding Chute
Control Panel
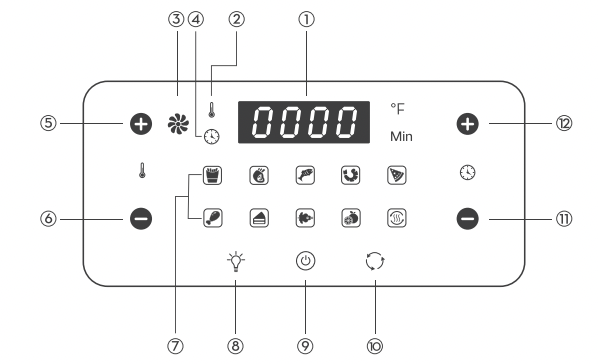
- LCD Display
- Temperature Indicator
- Working Indicator
- Time Indicator
- Temperature +
- Temperature -
- Mode Indicators: French Fry, roast, fish, shrimp, pizza, chicken, bake, rotisserie, dehydrate, reheat
- Light Button
- Power on/Pause Button (Long-press to turn off the machine)
- Rotating Button
- Time -
- Time +
Before First Use
1. Remove all packaging.
2. Check the quality of the appliance and completeness of the accessories.
3. Remove any stickers or labels from the appliance.
4. Thoroughly clean the accessories with hot water: use some mild detergent and a non-abrasive sponge.
5. Wipe the inside and outside of the appliance with a damp cloth.
6. lnitial start-up operation may produce a smell and smoke (For about 15 mins.). This is normal.
It is due to the protective substance on heating elements which protects them while they are stored. Cook slices of lemon at 300*F for 10 minutes to minimize the smell.
Note: Never wash or submerge the main unit in water.
How to Use
Connect the appliance to a power source, it enters standby mode with a beep. All the indicators on the control panel will flash once.
Power On / Off
Tap the Power Button to turn on the appliance and it will beep. All the indicators on the control panel will light up.
Tap it again to turn off the appliance. When it is off, the fan will continue working for 20 seconds more until it stops.
Light Control
When the appliance is on, press the Light Button to turn on / off the light.
Preheat the Oven
Preheat the Air Fryer Oven for 1-3 minutes. It is necessary for the Air Fryer to reach the desired temperature.
Choose the Cooking Mode
1. When the unit is on, tap the Mode Button to choose the cooking mode as desired. The corresponding mode indicator will light up. The LCD display will show the cooking temperature and cooking time alternatively with the latter counting down by the minute.
2. When the mode is selected, press the Power Button again to start the cooking process.
The Working (Fan) Indicator will keep flashing, it means the blower starts running and cooking process has started.
3. When you open the oven's door during a cooking process, the oven will pause working. This is the best time to check or turn the food over. Close it again, the appliance will resume working under the previous remaining time and temperature.
Note: Tap the Rotating Button to start rotating if the rotisserie shaft or basket is used for more even result.
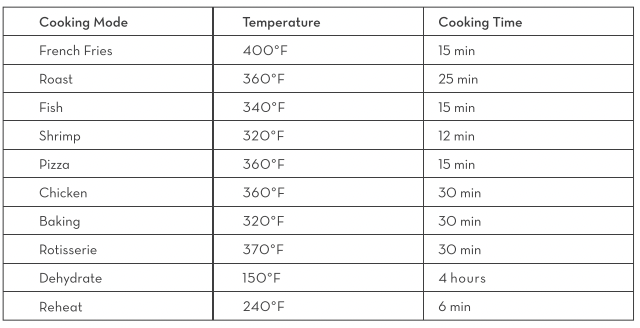
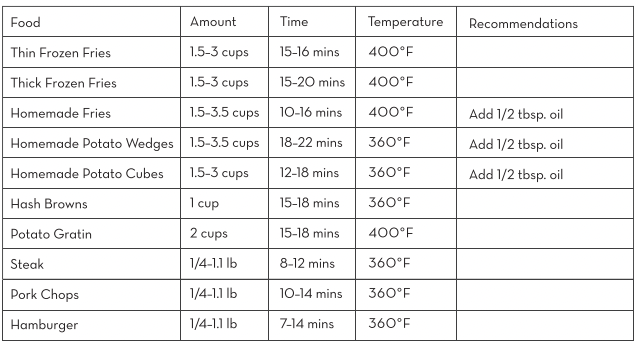
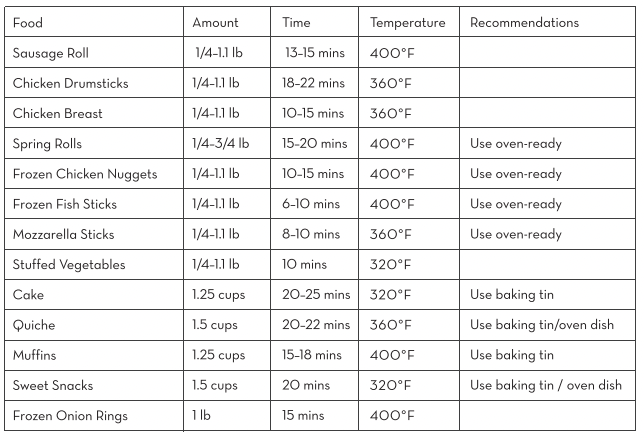
Default Cooking Time and Temperature
Set the Cooking Time
Tap the Time + / - Buttons to increase / decrease the cooking time with a difference of 1 minute in each tap.
Set the Cooking Temperature
Tap the Temperature + / - Buttons to change the cooking temperature.
Recommended Cooking Time and Temperature
Useful Tips:
1. Toast: Add your sliced bread to the air fryer Oven. Set the temperature to 400°F | 204°C, and air fry for 4 minutes. If you have very thin sliced bread, your toast will probably be done in 3 minutes. You can adjust according to your preferred texture and taste.
2. Air fryers are popular for making healthy fried foods. People would assume that no oil is needed and so ended up with dry food. However, you still need to add 1 teaspoon to 1 tablespoon of oil each time you use your air fryer to help bring that flavor and moisture to your food.
3. Turn your air fryer at 350-400 degrees F for just 3-4 minutes to reheat. Then your reheated leftovers will taste just as crispy as it was the night before. Just think - crispy, hot, and fresh reheated pizza in an air fryer (or any other food you want!). Adjustable time range is lmin-2 hours. Adjustable temperature range is 180-400°F.
4. You can roast up to 3-pound whole chicken inside the oven using the roasting fork.
Get Started
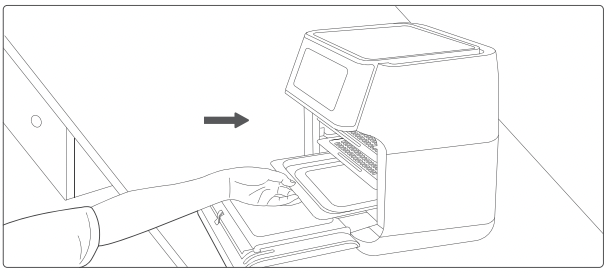
Use the Accessories
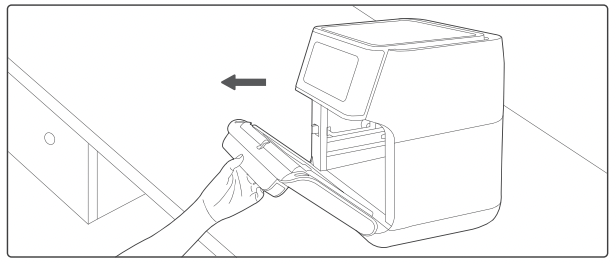
Please choose the proper accessories as per the ingredients to be cooked. Pull the Handle to open the window and install the accessories as instructed below.
Mesh Racks
Slide the mesh racks into the upper two sliding chutes for dehydration or to cook crispy snacks / reheat items like pizza.
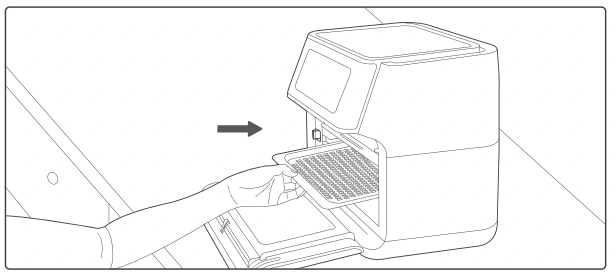
Drip Tray
Slide the drip tray into the lowest sliding chute to collect the dripping oil and residue for easier cleaning of the oven.
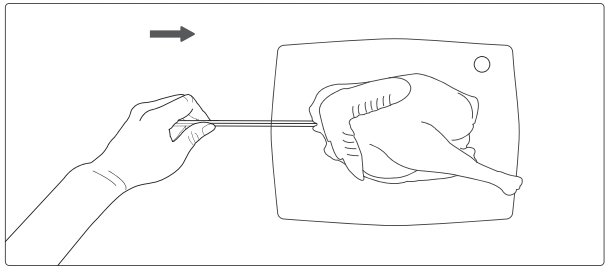
Rotisserie Shaft
It is used to roast whole chicken and relatively large pieces of meat.
1. Pass the shaft through the length of the whole chicken.
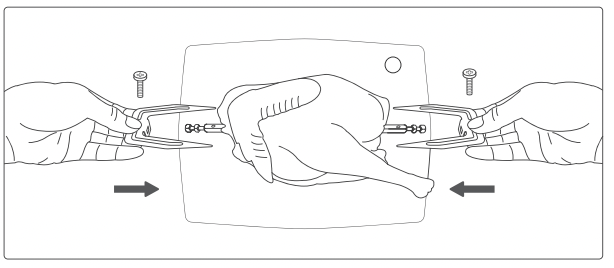
2. Mount the meat forks onto the shaft and insert it into the meat. Fix the forks with the screws.
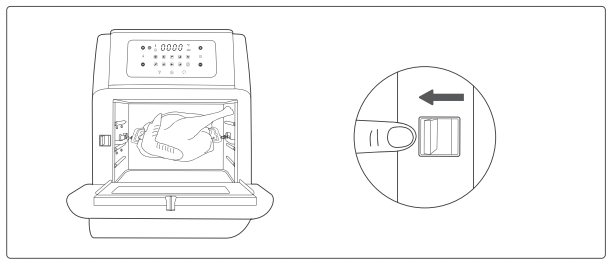
3. Toggle the Switch to the right. Place the rotisserie shaft onto the rails push it into the Lock position.

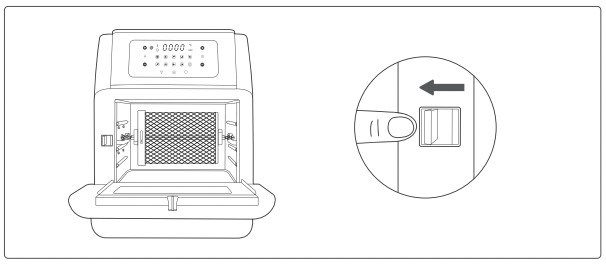
4. Release the Switch and lock the shaft into place.
Rotisserie Basket
1. Toggle the Switch to the right. Place the rotisserie shaft onto the rails push it into the Lock position.
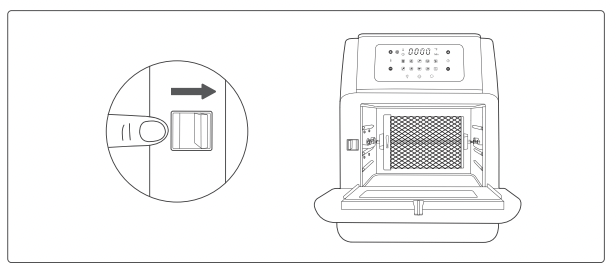
2. Release the Switch and lock the basket into place.
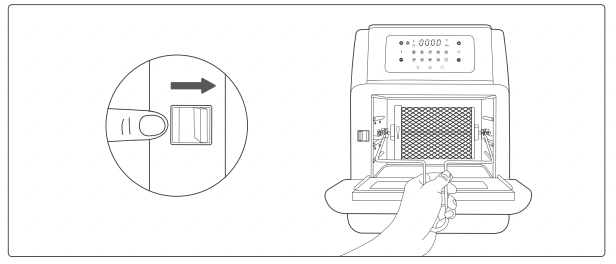
3. Use the removal tool to remove the basket to avoid scalding.
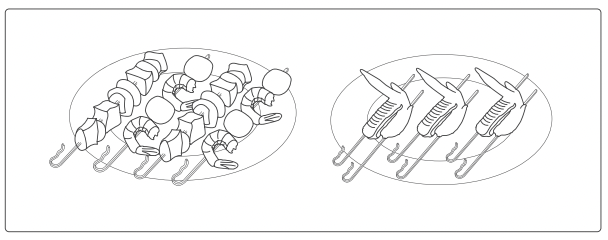
Skewers
It is used to wear meat, fish, vegetables and other ingredient.
Warning
Skewers and other accessories are relatively sharp due to functional requirements. Please pay special attention during use, and take appropriate protection when necessary. When cooking is done, the temperature of the accessories is very high. Do not touch directly to prevent scalding. Please keep the accessories properly to prevent children from coming into contact with them.
Cleaning and Storage
Cleaning
Clean the air fryer oven after each use. Unplug the power cord from the wall socket and be certain the appliance is thoroughly cooled before cleaning.
1. The accessories are dishwasher safe but never use abrasive cleaning materials or utensils on their surfaces to avoid scratches.
2. Soak the caked-on food in warm, soapy water for easy removal.
3. Wipe the outside of the appliance with a warm cloth damped with mild detergent.
4. Clean the inside of the appliance with a warm nonabrasive sponge damped with mild detergent.
If necessary, remove unwanted food residue from the control panel with a cleaning brush.
Storage
1. Unplug the appliance and let it cool thoroughly.
2. Make sure all components are clean and dry.
3. Place the appliance in the clean, dry place.
Troubleshooting
|
Problem
|
Possible Cause
|
Solution
|
|
The oven does not work
|
The appliance is not plugged in
|
Plug power cord into wall socket
|
|
You have not turned on the Unit by setting the cooking time and temperature
|
Set the temperature and time as instructed
|
|
The product window is not closed properly
|
Check that window is closed
|
|
The ingredients fried with the air oven are not done
|
Too much amount of food
|
Reduce the amount of food for single cooking
|
|
Setting temperature too low
|
Set the temperature higher
|
|
The ingredients are fried unevenly
|
When tray is used to make food, the tray position is not adjusted
|
During cooking, adjust the tray position appropriately
|
|
White smoke comes out of the appliance
|
You are preparing greasy ingredients
|
When you fry greasy ingredients in the air fryer, a large amount of oil will leak into the pan. The oil produces white smoke and the pan may heat up more than usual. This does not affect the appliance or the end result
|
|
The pan still contains grease residues from previous use
|
White smoke is caused by grease heating up in the pan. Make sure you clean the pan properly after each use
|
| Fresh fries are not crispy |
The crispiness of the fries depends on the amount of oil and water in the fries. |
Make sure you dry the potato sticks properly before you add the oil, Cut the potato sticks smaller for a crispier result. Add slightly more oil for a crispier result |
E1: Malfunction or short circuit for the internal wire, please take a picture and contact us.
E2: Malfunction or short circuit for the internal wire, please take a picture and contact us.