Loading ...
Loading ...
Loading ...
10
Installation instruction
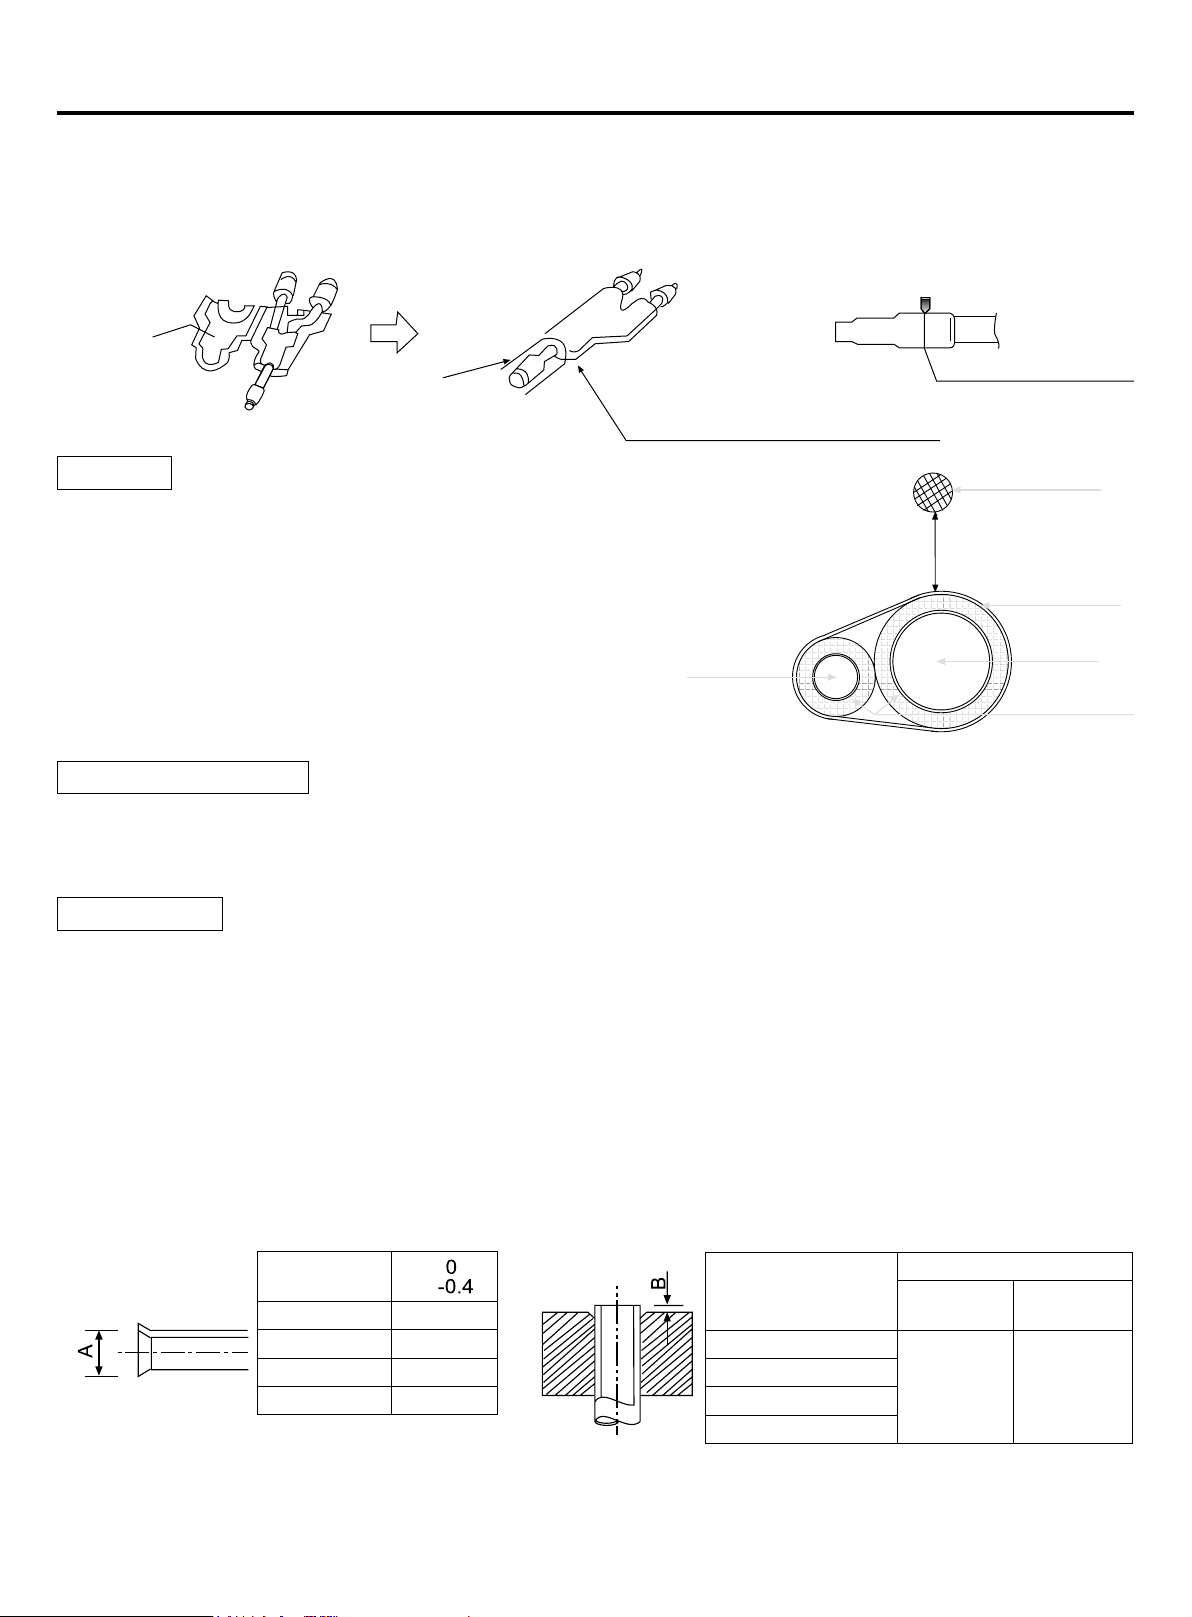
Note:
1. When connecting the pipe to the outdoor unit, please pay attention to the outdoor pipe dimension.
2. When changing the diameter between pipes and between the units, please change on the branch pipe side.
3. Be sure to blow nitrogen when welding. If not, oxides will be produced and cause heavy damage. Take precautions to
prevent water and dust from getting into the pipe.
Adhesive side
Prepare on eld
Seal the connection and wrap the
heat insulator with adhesive tape
Cut off pipe with the cutter
Cut off at the middle
• Gas pipe and liquid pipe should be insulated separately.
• The insulation material for gas pipe should be rated for temperatures over
248°F (120°C). The liquid pipe should be for over 158°F (70°C).
• The insulation should be over 0.39in.(10mm) thick, when the ambient
temp. is 86°F (30°C)When the relative humidity is over Liquid pipe 80%,
the insulation thickness should be over 0.59in. (15mm).
• The material should be snug against the pipe without a gap,
then be wrapped with adhesive tape. The connection wire can
not be wrapped with the insulation material and should be at
least 7.87in.(20cm) from the insulation.
Insulation:
• During operation, the pipe will vibrate, expand or shrink. If not being secured, the refrigerant will focus on one part and
cause the pipe to break.
• To prevent stressing the pipe, secure the pipe every 6.56-9.84ft.(2-3m).
Secure refrigerant piping
Connection wire
over 7.87in.(20cm)
Adhesive tape
Gas pipe
Heat insulator
Liquid pipe
Pipe installation
When doing the piping connection, please do the following:
• Be careful not to damage any parts or pipes while connecting to the unit.
• Close the valves fully when connecting the pipes
• Protect the pipe from getting water or other impurities in them (welding after being laid down, or being sealed with
adhesive tape).
• Use large diameter bends when possible(over 4 times of the pipe diameter).
• The connection between outdoor liquid pipe and the distributing pipe is ared type. Please are the pipe with a tool used
with R410A after installing the are nut. If the pipe length has been adjusted with the copper pipe gauge, you can use
the original tool to are the pipe.
• The oil is ester oil, not the mineral oil, since the unit uses R410A.
• When connecting the pipe, fasten the pipes using a spanner. The torque refers to the former info.
• The outdoor gas pipe and the refrigerant distributing pipe, as well the refrigerant distributing pipe and the branch pipe
should be welded with hard solder.
Pipe outer
diameter
A
Ø1/4(6.35) 0.36(9.1)
Ø3/8"(9.52) 0.52(13.2)
Ø1/2"(12.7) 0.65(16.6)
Ø5/8"(15.88) 0.78(19.7)
Expanding pipe: A(in.(mm))
Pipe outer diameter
When it is hard pipe
Special tool
for R410A
The former
tool
Ø1/4(6.35)
0-1/51"
(0-0.5)
1/25"-1/17"
(1.0-1.5)
Ø3/8"(9.52)
Ø1/2"(12.7)
Ø5/8"(15.88)
Projecting length of pipe to be expanded: B(mm)
Loading ...
Loading ...
Loading ...