
Loading ...
Loading ...
Loading ...
©2017 Pinnacle Climate Technologies 12 Vented Gas Log Appliance User’s Manual
Log Assembly
Positioning the parts not in accordance with these illustrations or using unapproved
parts may result in property damage or personal injury.
WARNING
Check to ensure that no yellow ame comes in contact with any log, both after installation
and periodically afterwards. Set the appliance to HIGH and check if yellow ames come
into contact with any log. If so, reposition the logs as indicated in the below illustrations. Yellow ames coming
into contact with logs creates soot.
CAUTION
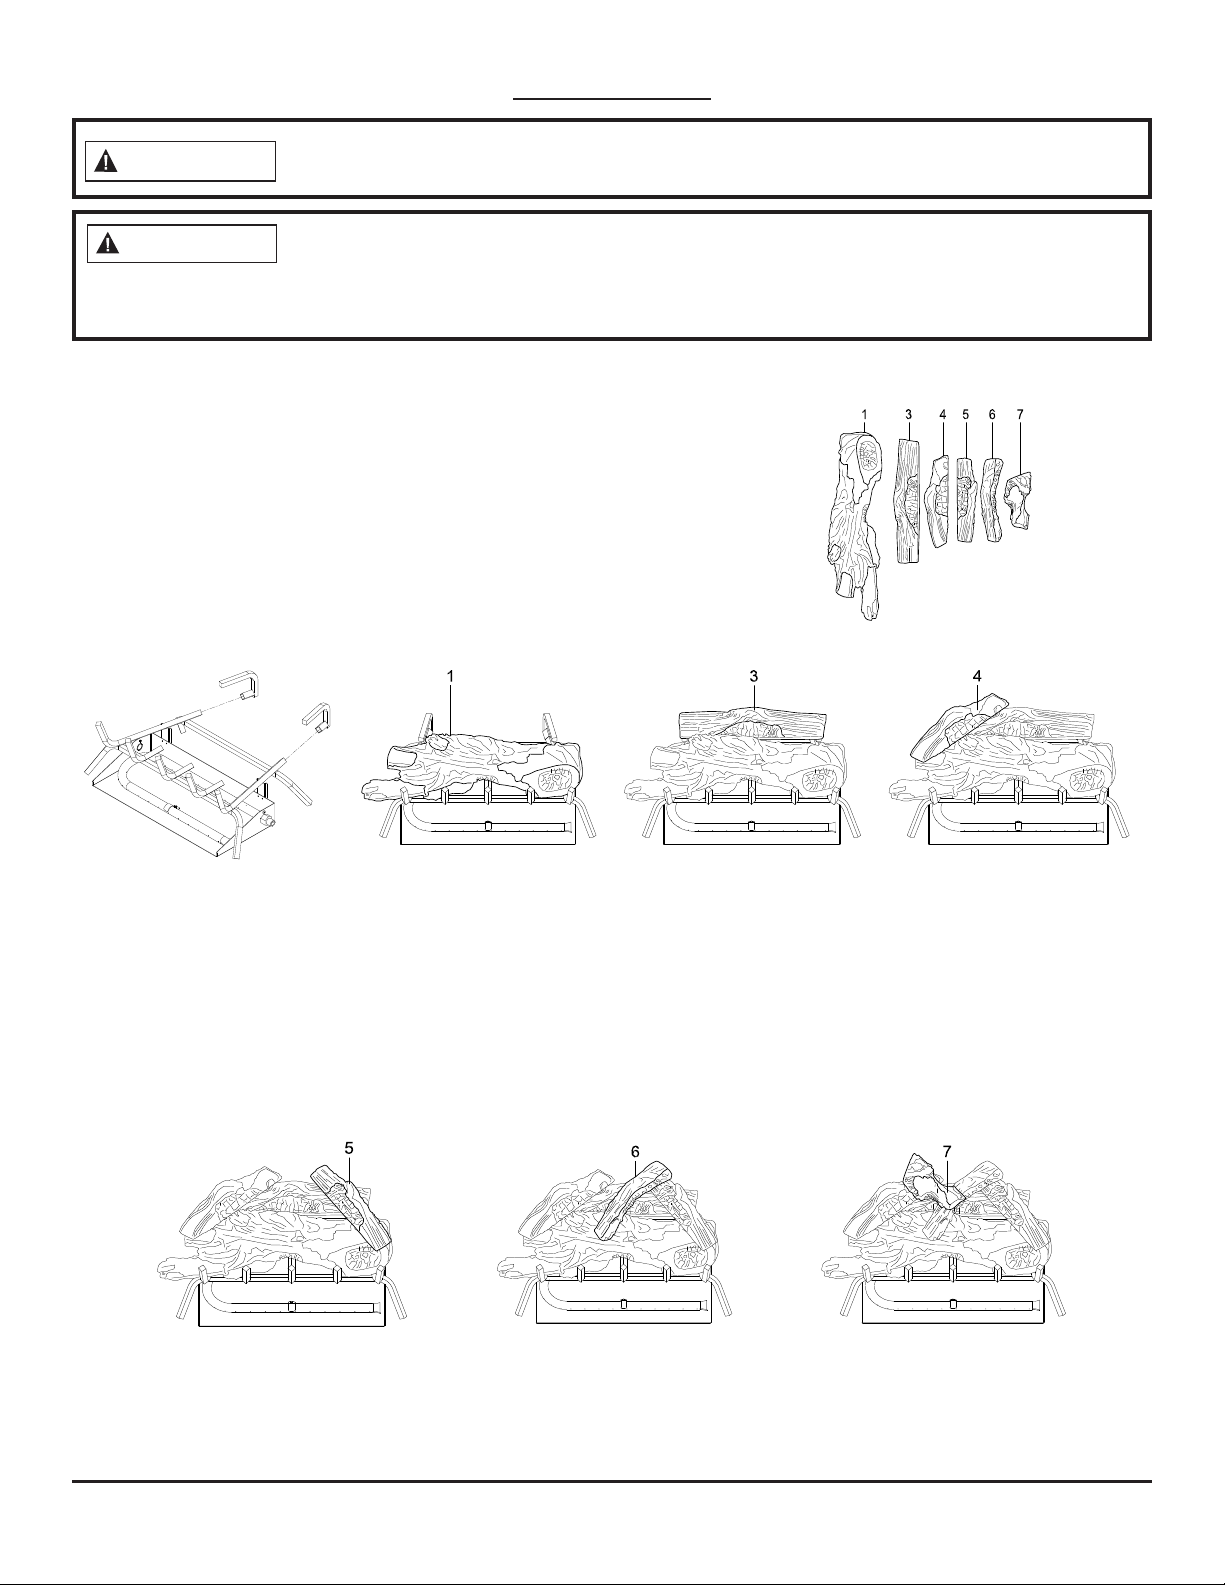
Install the logs exactly as indicated (see Fig. 10–16). Do
not modify the logs, and use only logs supplied with the
appliance. The logs are numbered and correspond to the
numbers listed below.
NOTE: The instructions below are designed to reduce the
amount of sooting created by the appliance.
NOTE: This log set does not contain a log #2.
Number of Logs: 6
Fig. 10 Fig. 11 Fig. 12 Fig. 13
Fig. 14 Fig. 15 Fig. 16
1. After adding pan
material (see page 11),
slide both risers onto the
back of the grate. Ensure
the back of the grate is
ush with the back of
the riser.
2. Place log #1 on
the top of the front
grate and ensure
the log is centered.
3. Place log #3
on the top of the
risers. Ensure the
log is centered.
4. Place log #4 so it
rests on the top left
of logs #1 and #3.
5. Place log #5 so it
rests on the top right
of logs #1 and #3.
6. Place log #6 so
it rests on the top
of logs #1 and #5.
6. Place log #7 so it
rests on the top of
logs #4 and #6.
Loading ...
Loading ...
Loading ...