Loading ...
Loading ...
Loading ...
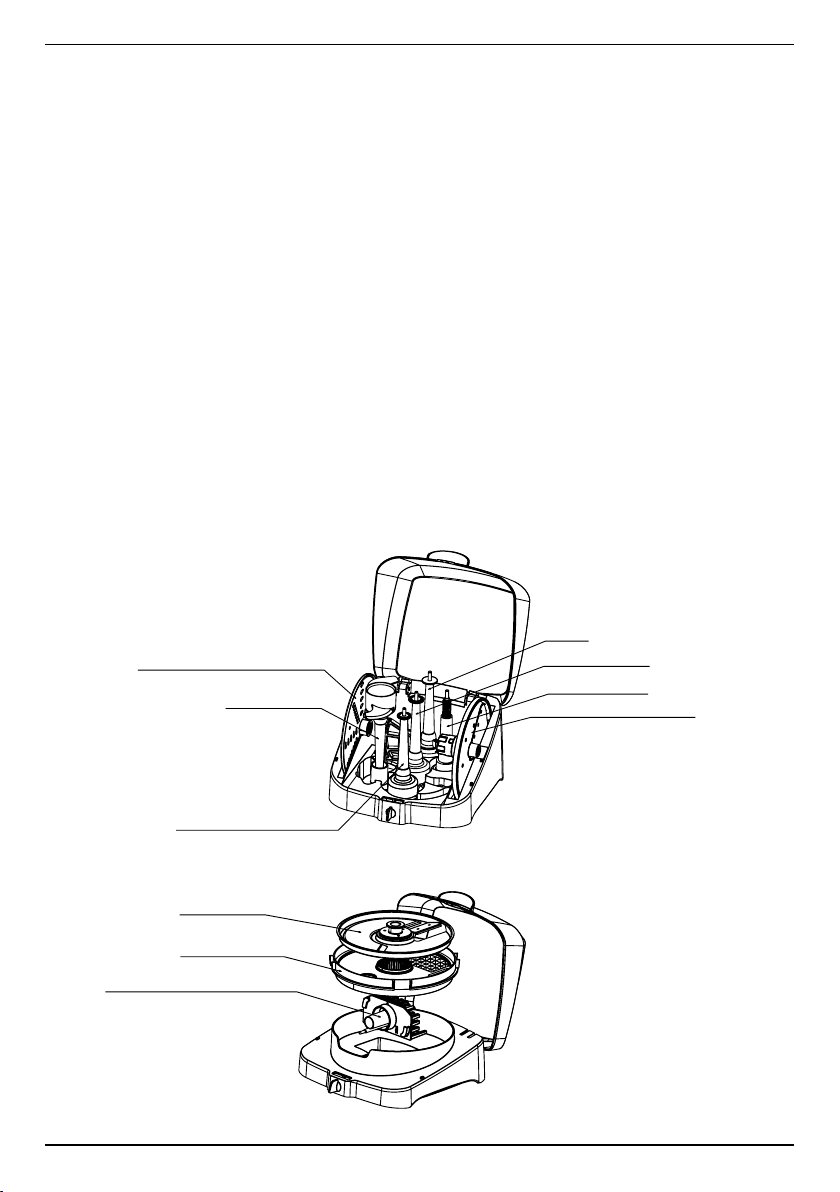
Reversible Shredding Disc
Adjustable Slicing Disc
Dough Blade
Whisk
Stirring Paddle
Stem Adapter
Metal Chopping Blade
Dicing Grid
Dicing Grid Cleaning Tool
Dicing Disc
10
ACCESSORY
STORAGE CASE
Operating the Lock
To unlock, turn counterclockwise. Gently lift up
the transparent cover. Do not force the cover
open when the knob is in the locked position.
To lock, gently close the cover and turn the
knob clockwise.
Inserting Accessories
The Accessory Storage Case holds the
Whisk on the peg in the back of the case,
the Stirring Paddle, Stem Adapter, Dough
Blade (upside down) on the middle peg, and
the Metal Chopping Blade on the front peg.
The Adjustable Slicing Disc goes in the slot
on the right; the reversible shredding disc
goes in the left slot.
Carefully hold discs by center hub when inserting
into and removing from the storage case.
NOTE: DO NOT TOUCH METAL BLADES
OR CUTTING EDGES OF DISCS. ALL ARE
EXTREMELY SHARP AND CONTACT COULD
CAUSE INJURY.
DICING KIT
STORAGE CASE
Removing Parts
1. To unlock, turn counterclockwise. Gently lift
up the transparent cover. Do not force the
cover open when the knob is in the locked
position. To lock, gently close the cover
and turn the knob clockwise.
2. Grasp center knob on Dicing Disc and set
aside on a flat surface.
3. Using the openings in the top of Dicing
Grid, grip and lift out to remove. See page
14 for dicing assembly instructions.
4. The Cleaning Tool sits in the dedicated
space in the base of the storage case.
NOTE: When finished dicing, wash,
thoroughly dry and following above
directions in reverse, return parts to
storage case.
INTRODUCTION
Loading ...
Loading ...
Loading ...