Loading ...
Loading ...
Loading ...
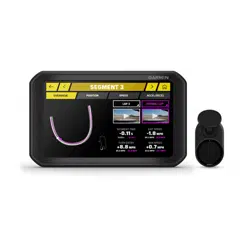
Connecting the Mount to Vehicle Power
1 Plug the mini-USB end of the power cable into the mini-USB port on the powered mount.
2 Plug the power cable into the included vehicle power adapter .
3 Plug the vehicle power adapter into the power outlet in your vehicle.
4 If necessary, turn on the vehicle ignition switch to provide power to the power outlet in your vehicle.
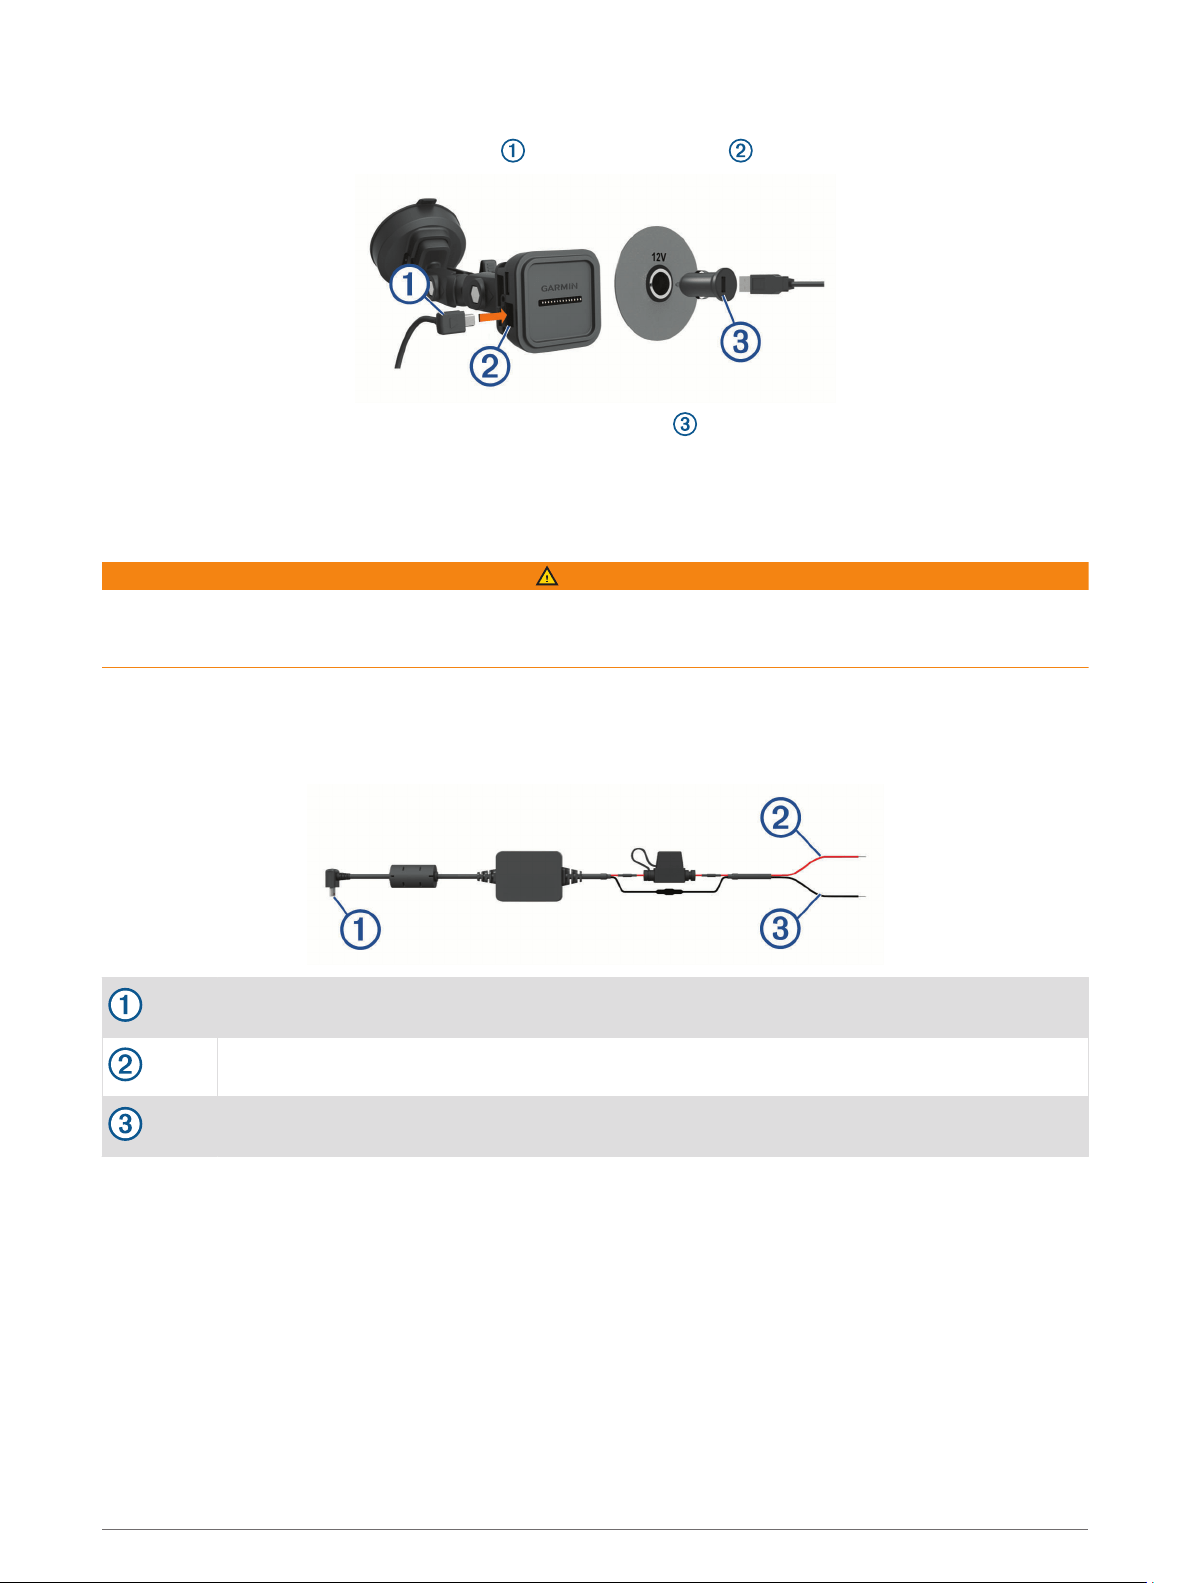
Bare Wire USB Cable
WARNING
Garmin strongly recommends having an experienced installer with the proper knowledge of electrical systems
install the device. Incorrectly wiring the power cable can result in damage to the vehicle or the battery and can
cause bodily injury.
The device includes a bare wire power adapter for use in vehicles that are not equipped with a CLA power
outlet. You can also use this cable in applications where a hardwired permanent power source is preferred. The
device must be mounted in a suitable and secure location in your vehicle, based on available power sources
and safe cable routing.
Device mini-USB connector
10 to 30 Vdc system input power (red)
System ground (black)
Camera Mounting Considerations
The first time you turn on your device, it provides information to help you mount the camera. The camera
affixes to the windshield using the included adhesive mount. The adhesive mount is difficult to remove after it
is installed. You should carefully consider the mounting location before you install the mount.
• Do not mount the camera in a location that interferes with the driver's view of the road.
• You should choose a mounting location that provides the camera a clear view of the road ahead.
• You should choose a mounting location that is as high as possible on the center of the windshield.
• You should verify the area of the windshield in front of the camera is cleared by the windshield wipers.
• You should avoid placing the camera behind a tinted area of the windshield.
2 Installation
Loading ...
Loading ...
Loading ...