
Loading ...
Loading ...
Loading ...
EN
©2019 Hestan Commercial Corporation
21
CLEANING AND MAINTENANCE
(continued)
BURNER CLEANING
Cleaning of the burner assembly itself should only be necessary in the event of a large spillover which
may have clogged the burner ports, etc. When the burners are completely cooled down, remove
the burner cap and clean up whatever debris, food, grease etc. you find using a warm, soapy water
solution. A toothbrush can be used to scrub difficult areas. Wipe with a clean cloth and reassemble.
The octagonal burner is made out of a high-grade, 300-series stainless steel which can be cleaned
with a brass-bristle brush and warm, soapy water.
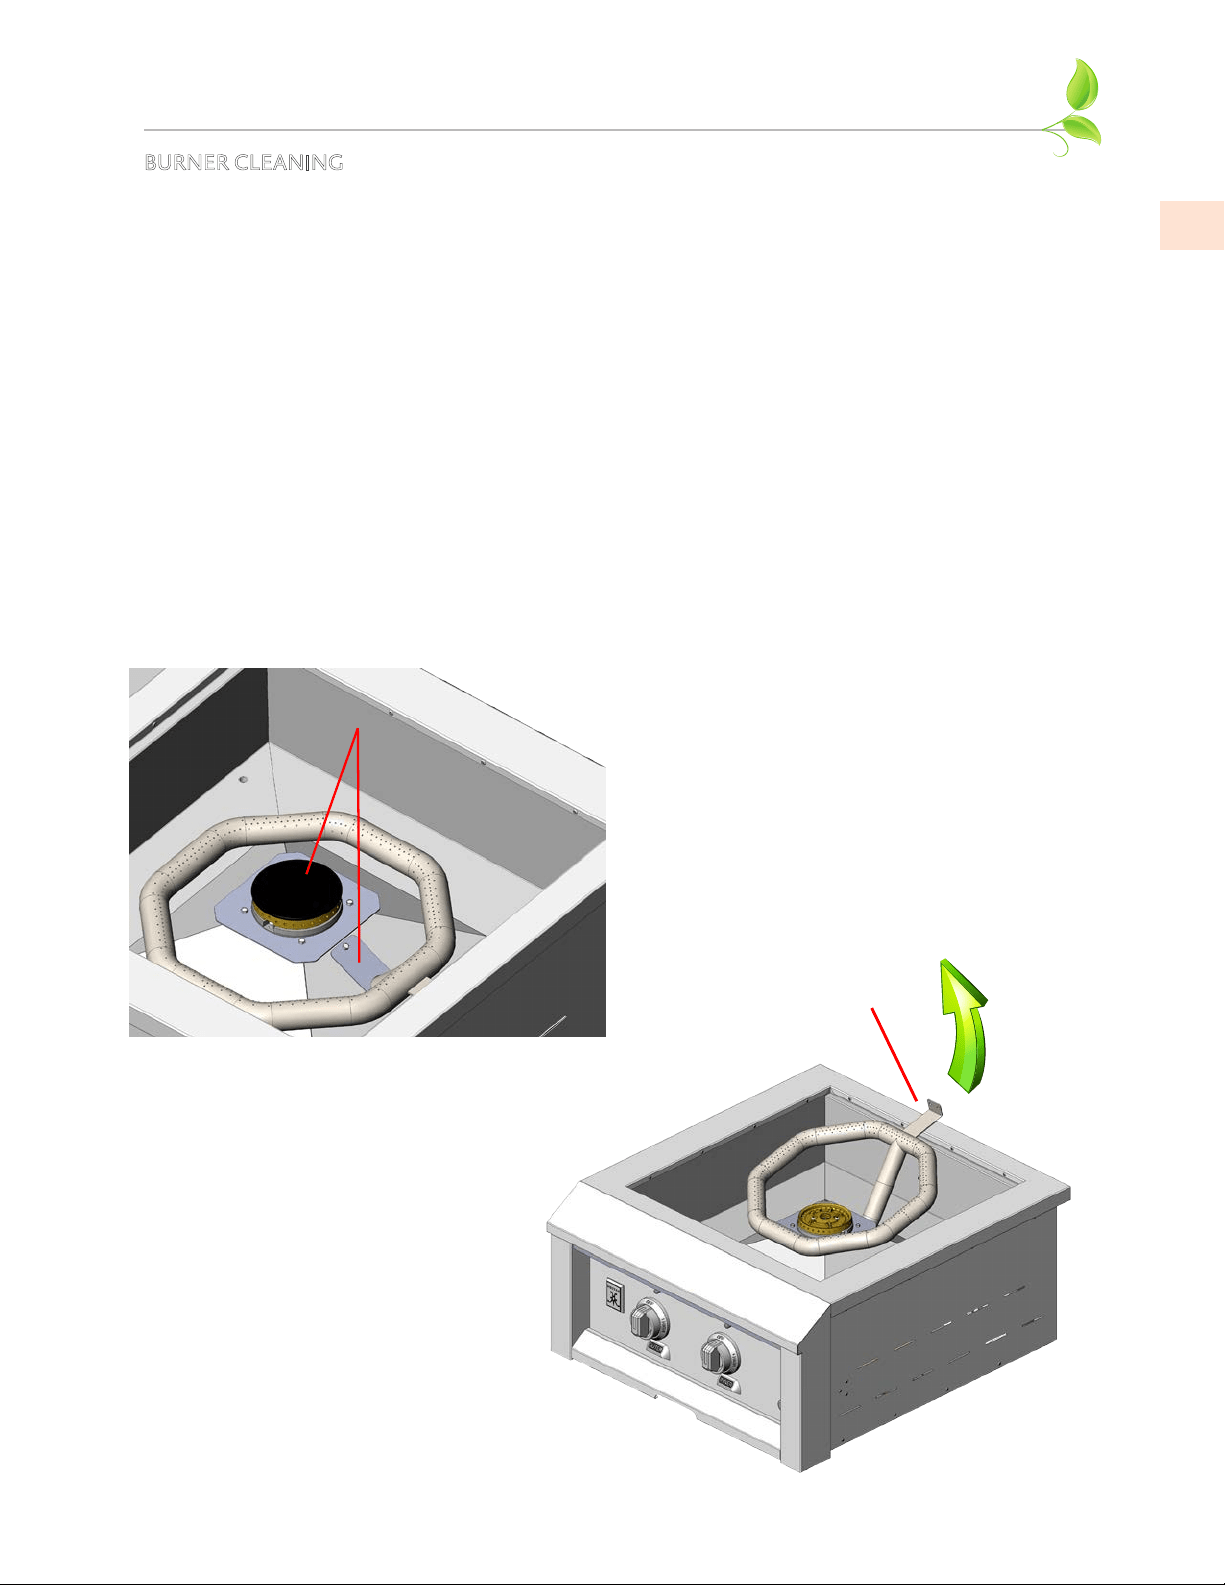
The octagonal burner requires a little more effort to clean. If removal is required, first remove the
burner cap from the center burner, and then the small cover at the rear of the burner. Also remove
the 2 screws securing the burner to the rear wall of the unit. Tilt the burner up and out of the unit.
Take care not to damage the spark igniter next to the burner.
Do not clean the burner ports with a toothpick or other item which may break off inside the
port. Use a paperclip or needle to do this. Stubborn scale can be removed with a metal scraper. If
removed, be sure to rinse everything well and shake out any water and debris trapped inside the
burner tube. Do not disturb the air-shutter.
Great care should be used when re-installing the burner. It must be correctly centered and secured
on the orifice before any attempt is made to relight the burner. Once re-installed on the orifice and
the rear bracket is secured again with the 2 screws, the burner should rest flat and have no side-to-
side movement. Take care not to damage the spark igniter next to the burner.
TILT UP BURNER
AT REAR AND REMOVE
REMOVE BURNER CAP
AND THIS SMALL COVER
Loading ...
Loading ...
Loading ...