Loading ...
Loading ...
Loading ...
10
ENG
English
ASSEMBLING AND PREPARING
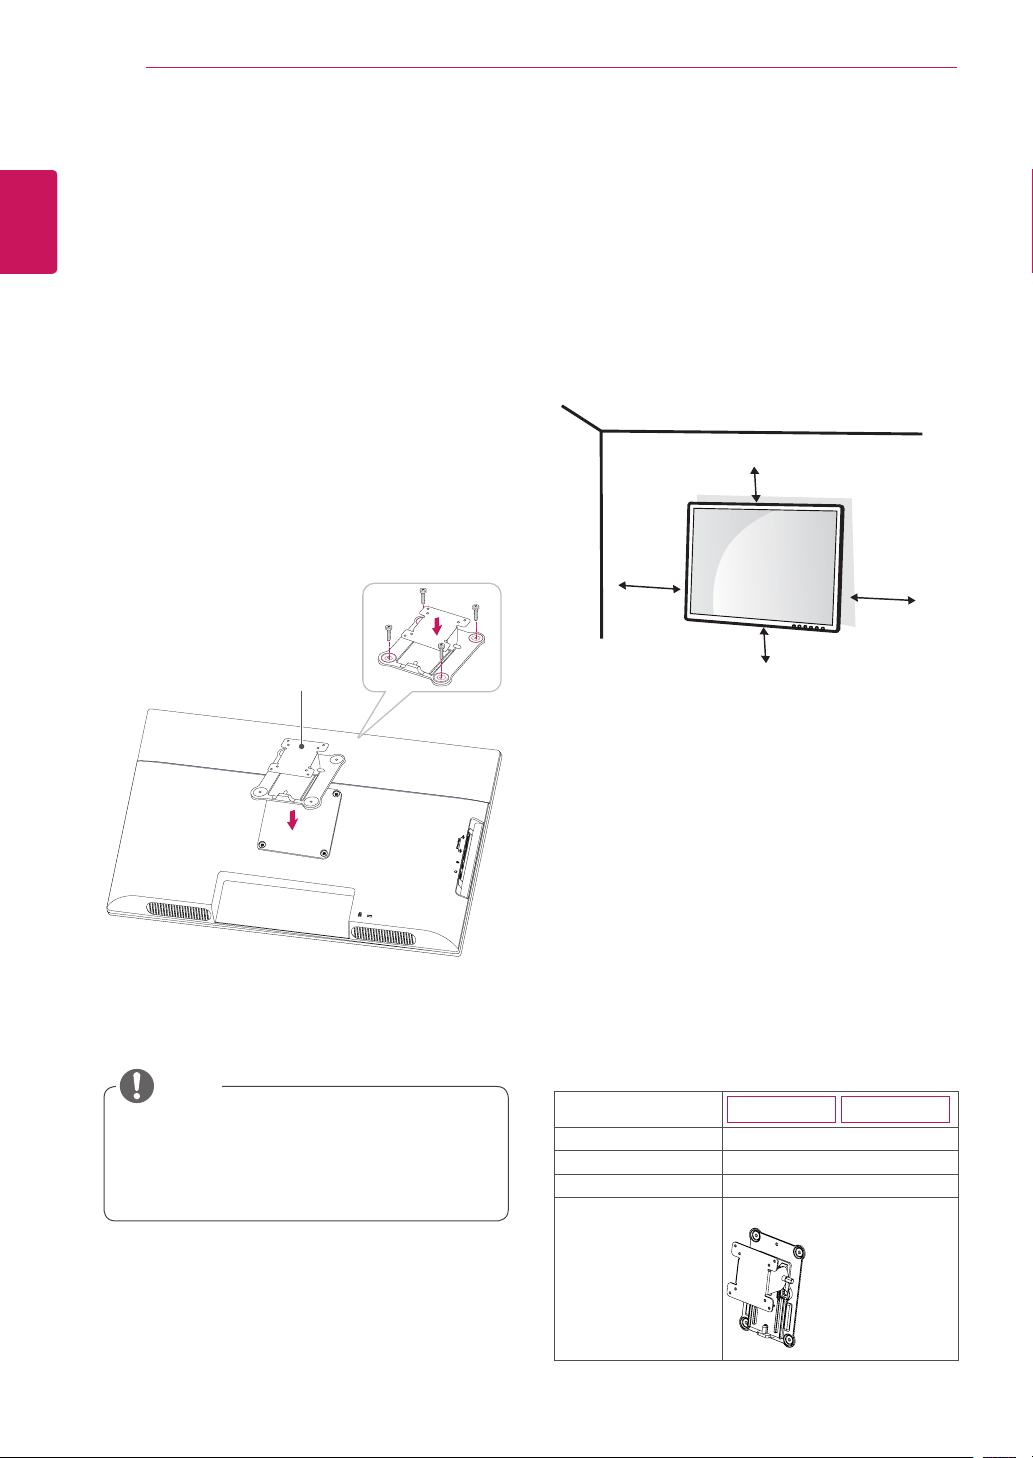
10 cm
10 cm
10 cm
10 cm
IfyouintendtomounttheMonitorsettoawall,
attachWallmountinginterface(optionalparts)to
thebackoftheset.
WhenyouinstalltheMonitorsetusingawall
mountinginterface(optionalparts),attachit
carefullysoitwillnotdrop.
1Ifyouusescrewlongerthanstandard,themoni-
tormightbedamagedinternally.
2Ifyouuseimproperscrew,theproductmightbe
damagedanddropfrommountedposition.
Inthiscase,LGElectronicsisnotresponsible
forit.
Mounting on a wall
Installthemonitoratleast10cmawayfromthe
wallandleaveabout10cmofspaceateachside
ofthemonitortoensuresufficientventilation.De-
tailedinstallationinstructionscanbeobtainedfrom
yourlocalretailstore.Pleaserefertothemanual
toinstallandsetupatiltingwallmountingbracket.
Installing the wall mount plate
ThismonitorhasaVESAcompatiblemountonthe
back.MostmountswillrequireanLGmounting
plate.
1
Placethemonitor'sscreenfacedown.To
protectthescreenfromscratches,coverthe
surfacewithasoftcloth.
2
Placethewallmountplateonthemonitorand
alignitwiththescrewholesonthemonitor.
3
Usingascrewdriver,tightenthefourscrewsto
fixtheplateontothemonitor.
Thewallmountplateissoldseparately.
Formoreinformationontheinstallation,refer
tothewallmountplate'sinstallationguide.
NOTE
Wall Mount Plate
Model
20CAV37K
24CAV37K
Wall Mount (A x B)
100x100
Stand Screw
M4
Number of screws
4
Wall Mount Plate
(Optional)
RW120
Loading ...
Loading ...
Loading ...